
Set up MCP
Set up Coolify MCP by enabling the instance endpoint, confirming team access, creating a token, and adding the endpoint to your AI client.
Before you begin
- Use Coolify Cloud or a self-hosted Coolify instance with a public HTTPS URL.
- On self-hosted Coolify, allow the client's source address in Settings > Advanced > Allowed IPs, if an allowlist is configured. MCP has its own enable switch and works while REST API access is disabled.
- Choose the team whose resources the client must access.
- Create an API token with the smallest required permissions. See API tokens.
On a self-hosted instance, you must turn on MCP for the instance before a client can connect. Open Settings > Advanced, find the API and MCP section, and set MCP server to Enabled. Until you do this, /mcp returns 404.
On Coolify Cloud, MCP is already enabled. You do not have to change this setting.
An MCP client can use every operation allowed by its token. Store the token in the client's secret configuration, never commit it, and revoke it if exposed.
Example values
This guide uses Coolify Cloud in its examples. If you use a self-hosted Coolify instance, replace app.coolify.io with your instance's domain in every URL, and use your own token:
- Coolify URL:
https://app.coolify.io - MCP endpoint:
https://app.coolify.io/mcp - API token:
67|abcthisisa123dummytoken
Enable MCP
Coolify Cloud already has instance MCP enabled. Skip the Dashboard and API tabs, then continue to Create an MCP token. Team access remains enabled by default, but check team settings if a client receives 403.
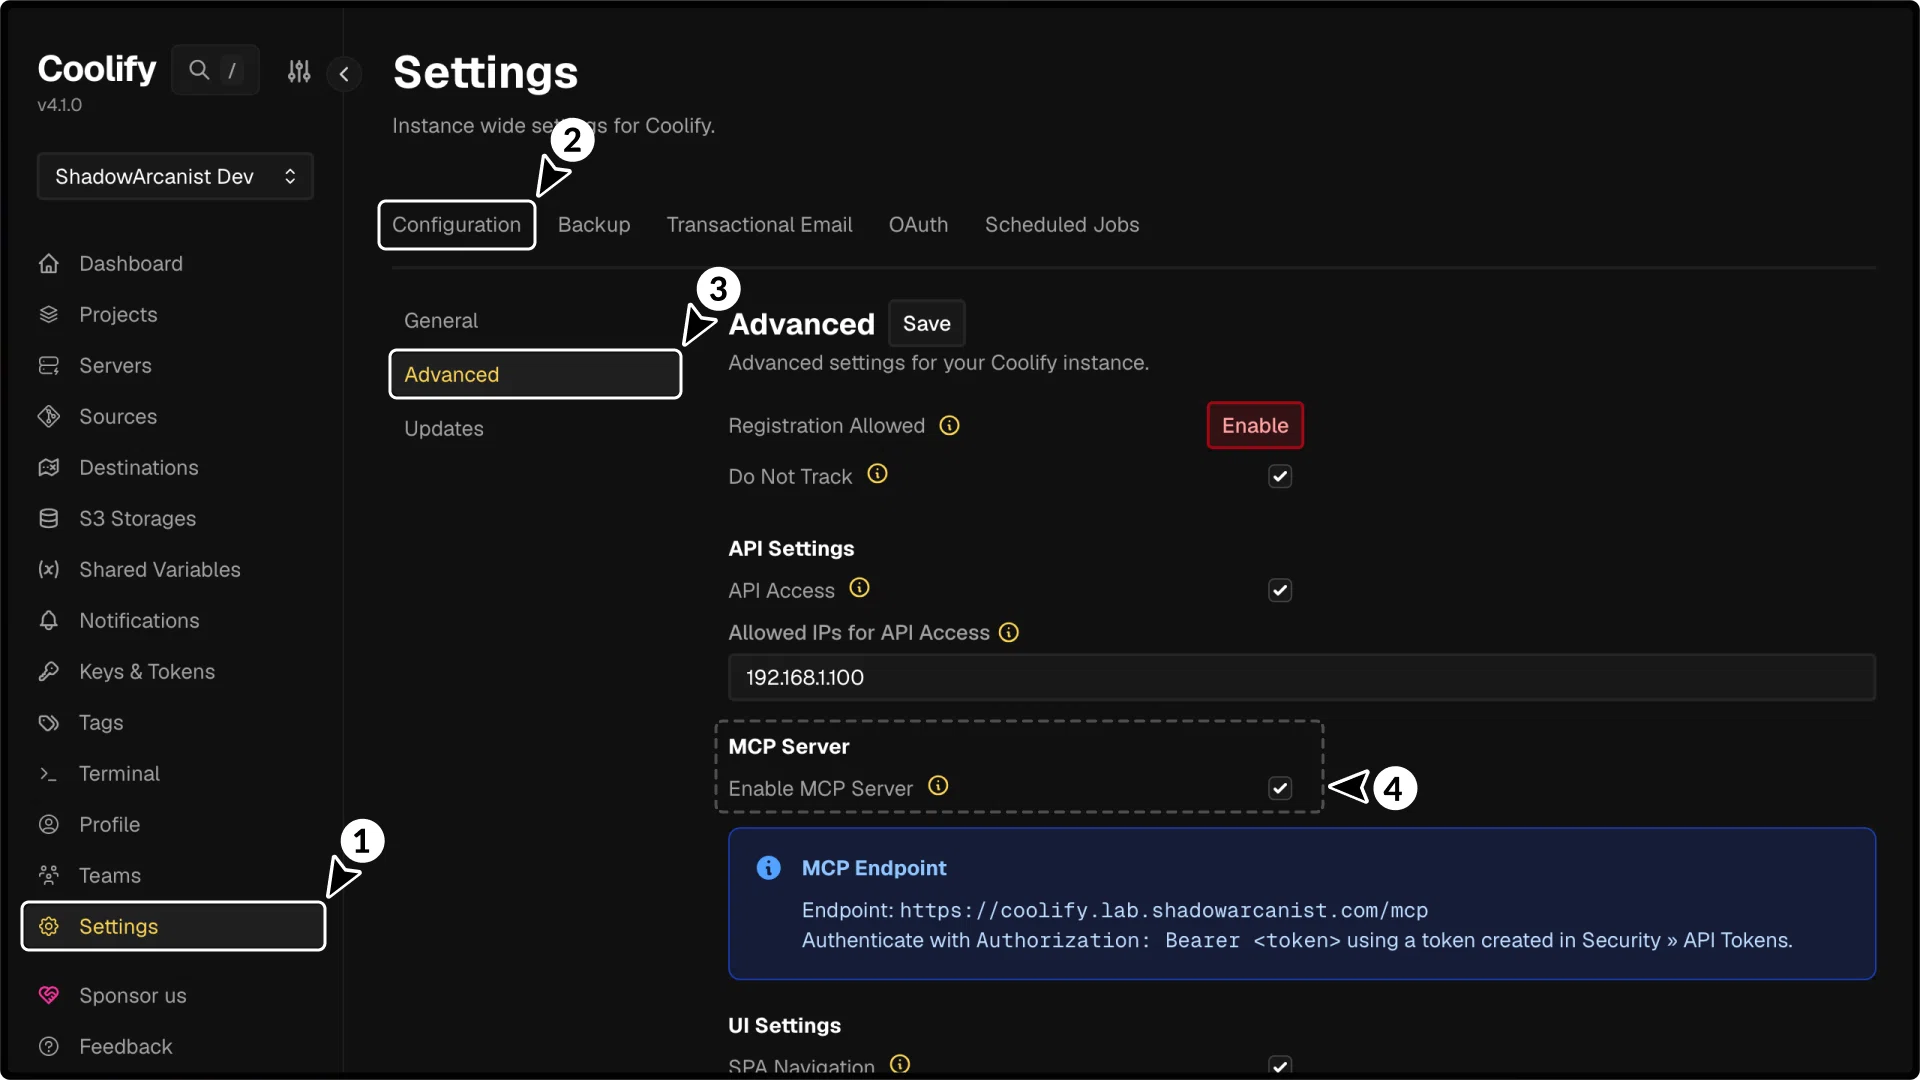
This step is required on self-hosted instances. Only an instance admin (a member of the root team) can change it.
- Open Settings in the sidebar.
- Open Advanced.
- In the API and MCP section, set MCP server to Enabled. Coolify saves the change immediately.
The API access setting does not control MCP. MCP works when the REST API is disabled.
MCP must also be enabled for the team of the token. It is enabled by default. To check it, open Team > General, make sure MCP server is Enabled for this team, then select Save changes. Team admins and owners can change this setting.
If you use Allowed IPs in Settings > Advanced, the list also applies to /mcp. Add the IP address of the machine that runs the MCP client.
Create an MCP token
Create a token from Keys & Tokens > API Tokens while the required team is active.
Coolify displays the complete token only once. Copy it into the client's secret configuration before leaving the API Tokens page.
- Use
readfor inventory and inspection. - Add
read:sensitiveonly for supported sensitive data or log summaries. - Add
deployfor deploy, start, stop, restart, cancel, and rollback operations. - Add
writeto create, update, or delete resources with thecreate_*andmanage_*tools. - Do not use
rootfor normal MCP clients.
Only team admins and owners can use tokens with read:sensitive, write, deploy, or root. A team member can use only read tokens. MCP shows only the tools that the token's permissions allow.
MCP endpoint URL:
https://app.coolify.io/mcpConnect a client
Configure the client with:
- URL:
https://app.coolify.io/mcp - Transport: Streamable HTTP
- Authorization:
Bearer 67|abcthisisa123dummytoken
Follow a client guide:
Verify access
Ask the client to call get_current_team or get_infrastructure_overview. The response should contain the team and resources associated with the token.