GitHub App
Github app allows you to grant access to a single or multiple private repositories from your either personal github account or your organization on github.
Why use github app with Coolify?
Scoped Access: The GitHub app lets you grant Coolify access to a specific repository, a selected group of repositories, or even all of your repositories. This gives you flexibility and better control over what Coolify can access.
When Not to Use github app with Coolify?
Lack of Permission: If you don't have the necessary permissions to install the GitHub app, or if you prefer not to install it, then it’s best not to use it with Coolify.
Installation Methods
There are two ways to install Github App on Coolify:
- Automated Installation (Recommended)
- Manual Installation We highly recommend the Automated Installation method as it automates the process and reduces the chance of errors.
Example Data
The following data is used as an example in this guide. Please replace it with your actual data when following the steps:
- GitHub App Name on Coolify:
Github App Tutorial - GitHub App Name on Github:
coolify-github-app-tutorial - Webhook Endpoint:
https://coolboxy.shadowarcanist.internal
Automated Installation
1. Create a Github App on Coolify

- In your Coolify dashboard, click on Sources from the sidebar.
- Click the + Add button to create a new github app.
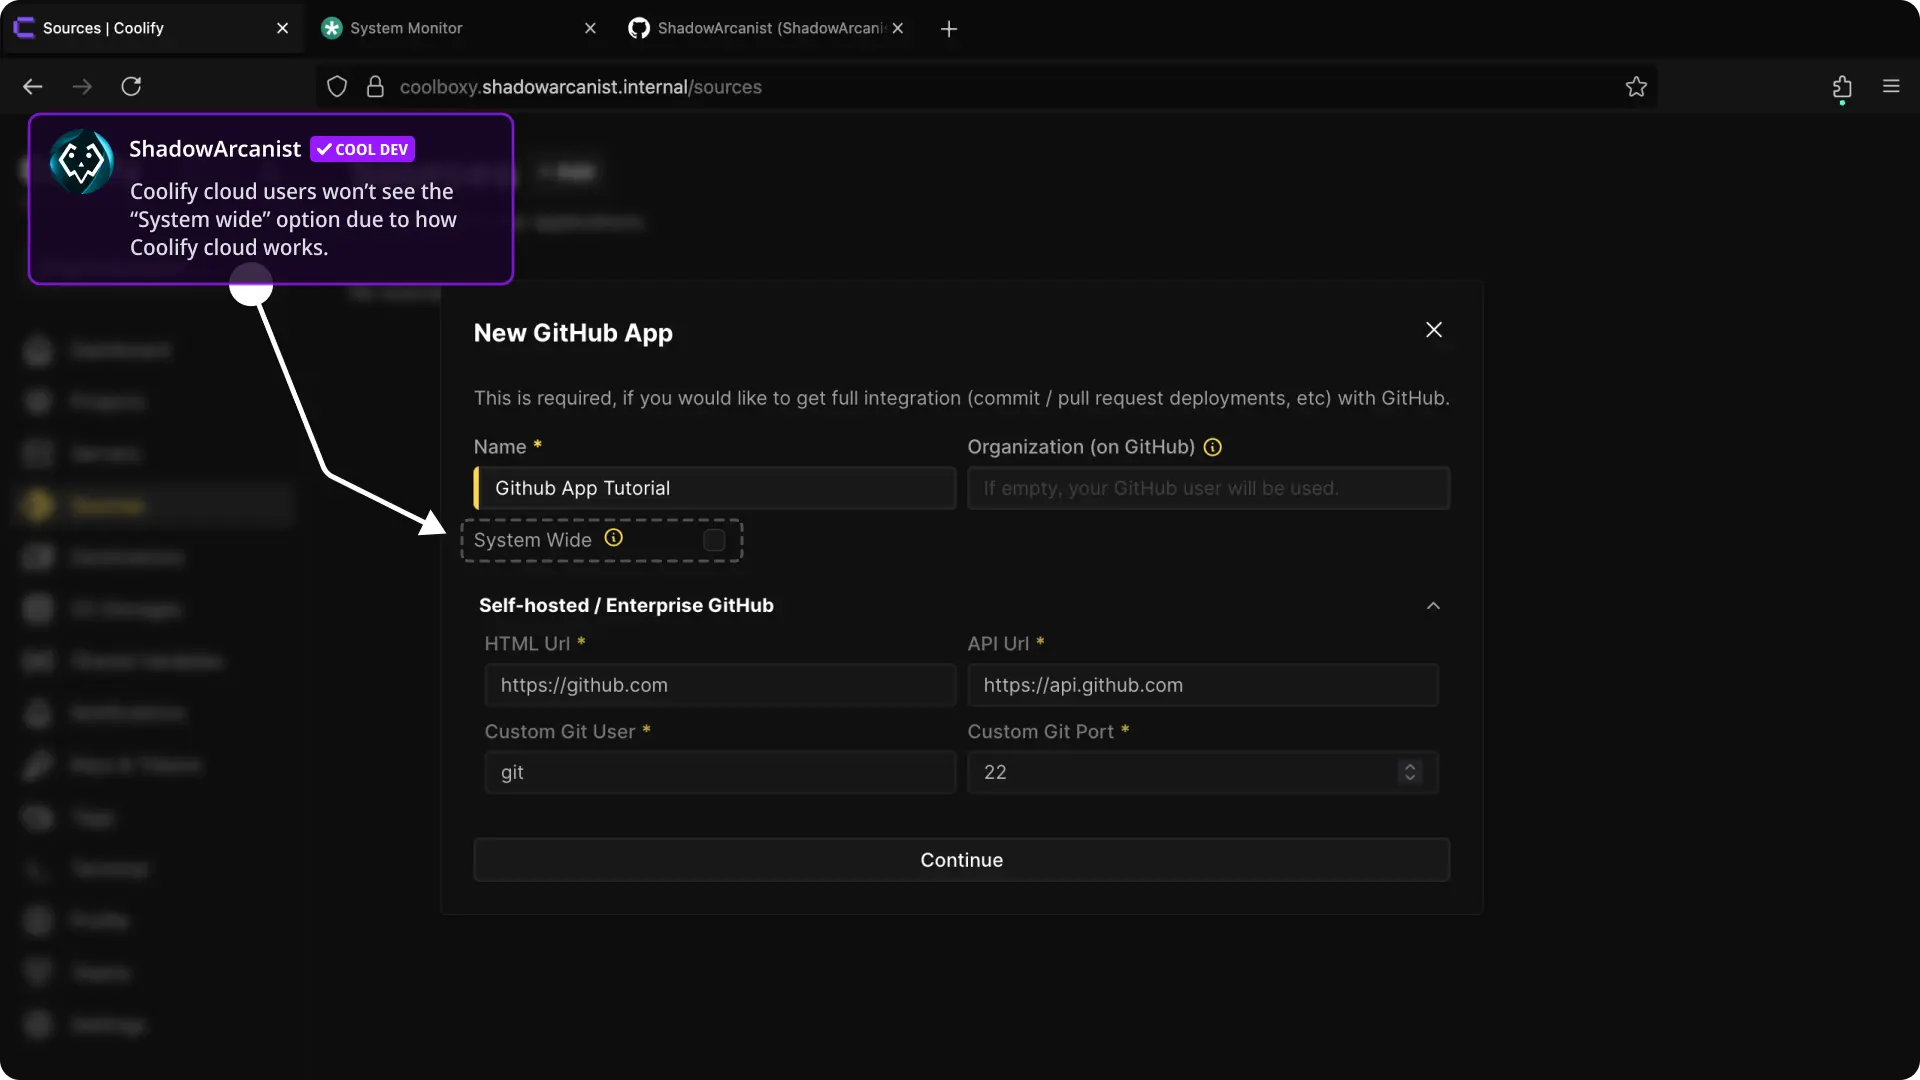
- Enter a Name for your App
- Enter your github organization name (if you are adding the github app to your github account then leave this field empty) and click continue
- If you are using Selfhost or Enterprise version of Github then you can enter your github details on the Selhost/Enterprise github section.
- The "System wide" option allows all teams you have on your coolify instance to use this specific github app, if you only want the current team to use the github app then leave this option unchecked.
Coolify cloud users won't see the option "System wide" because this option will enable your github app to all Cloud users so this option is disabled on Coolify Cloud
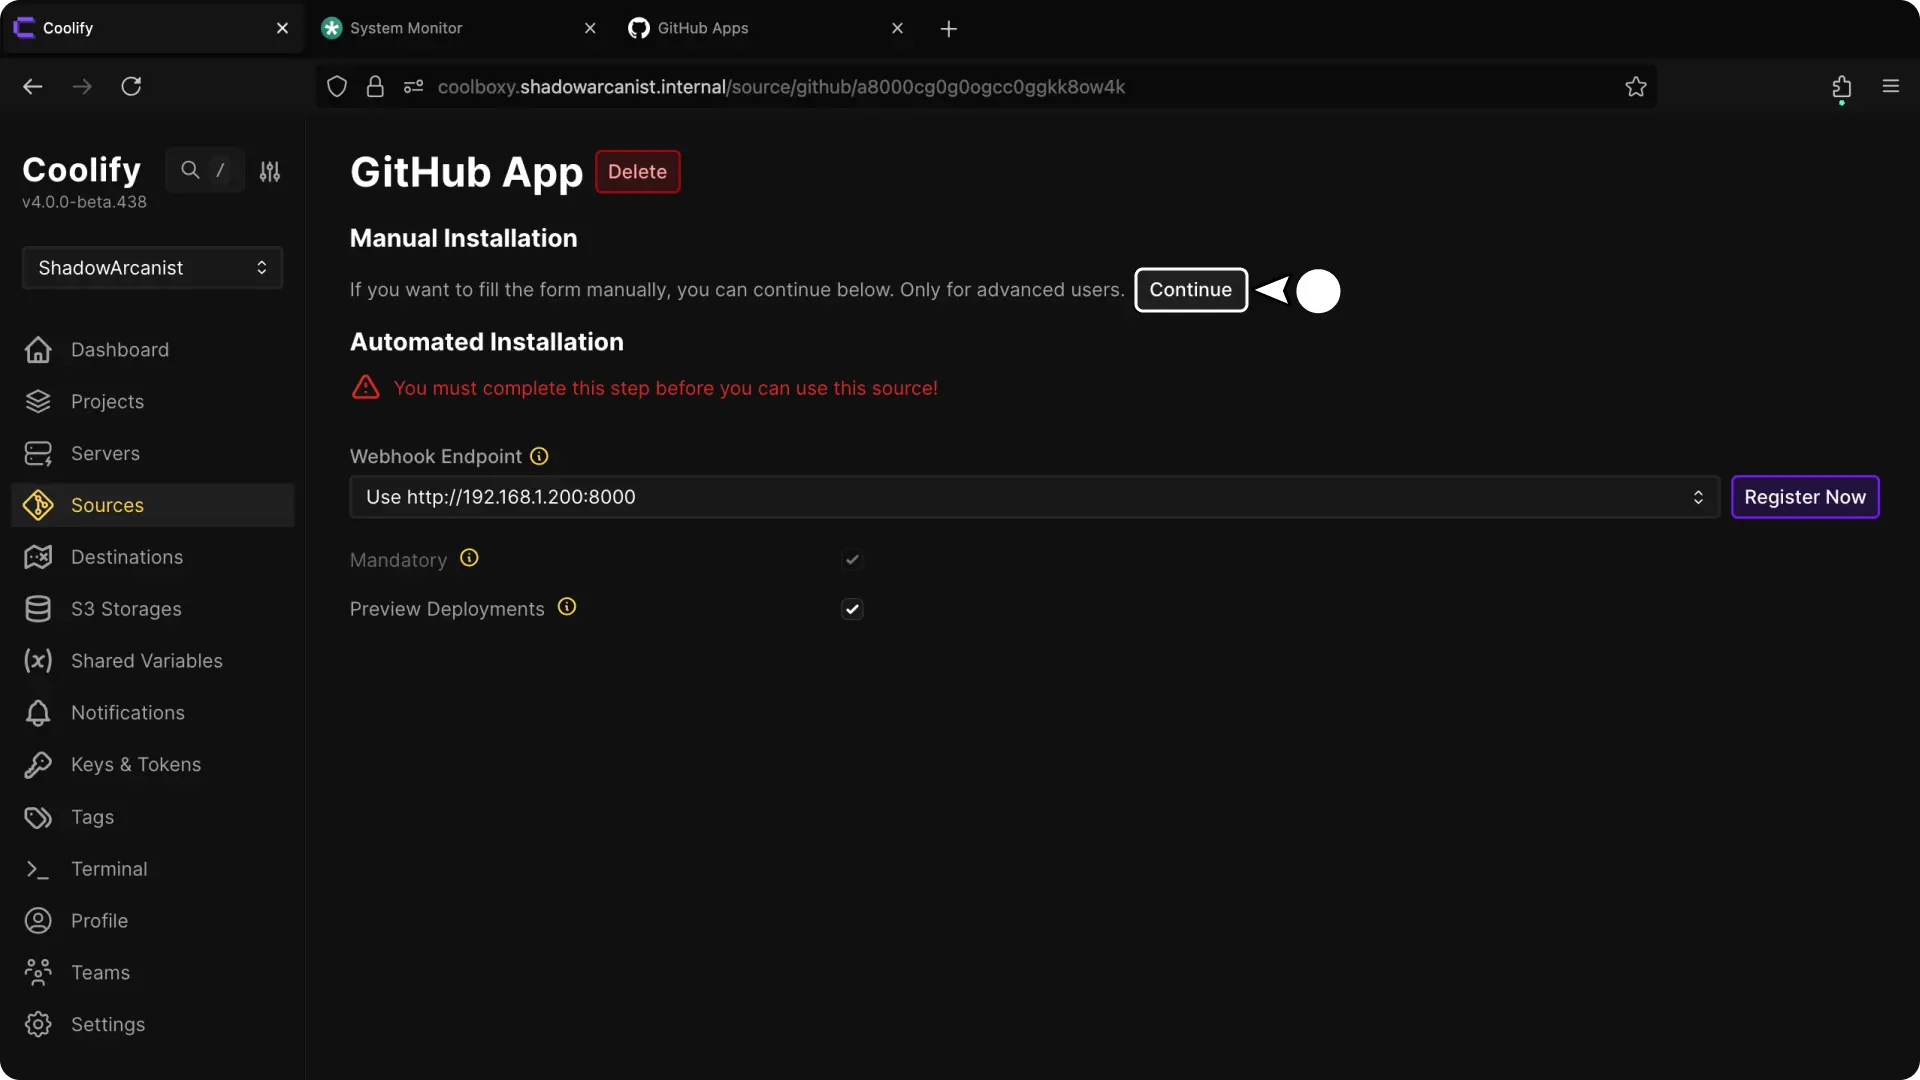
2. Set Webhook Endpoint
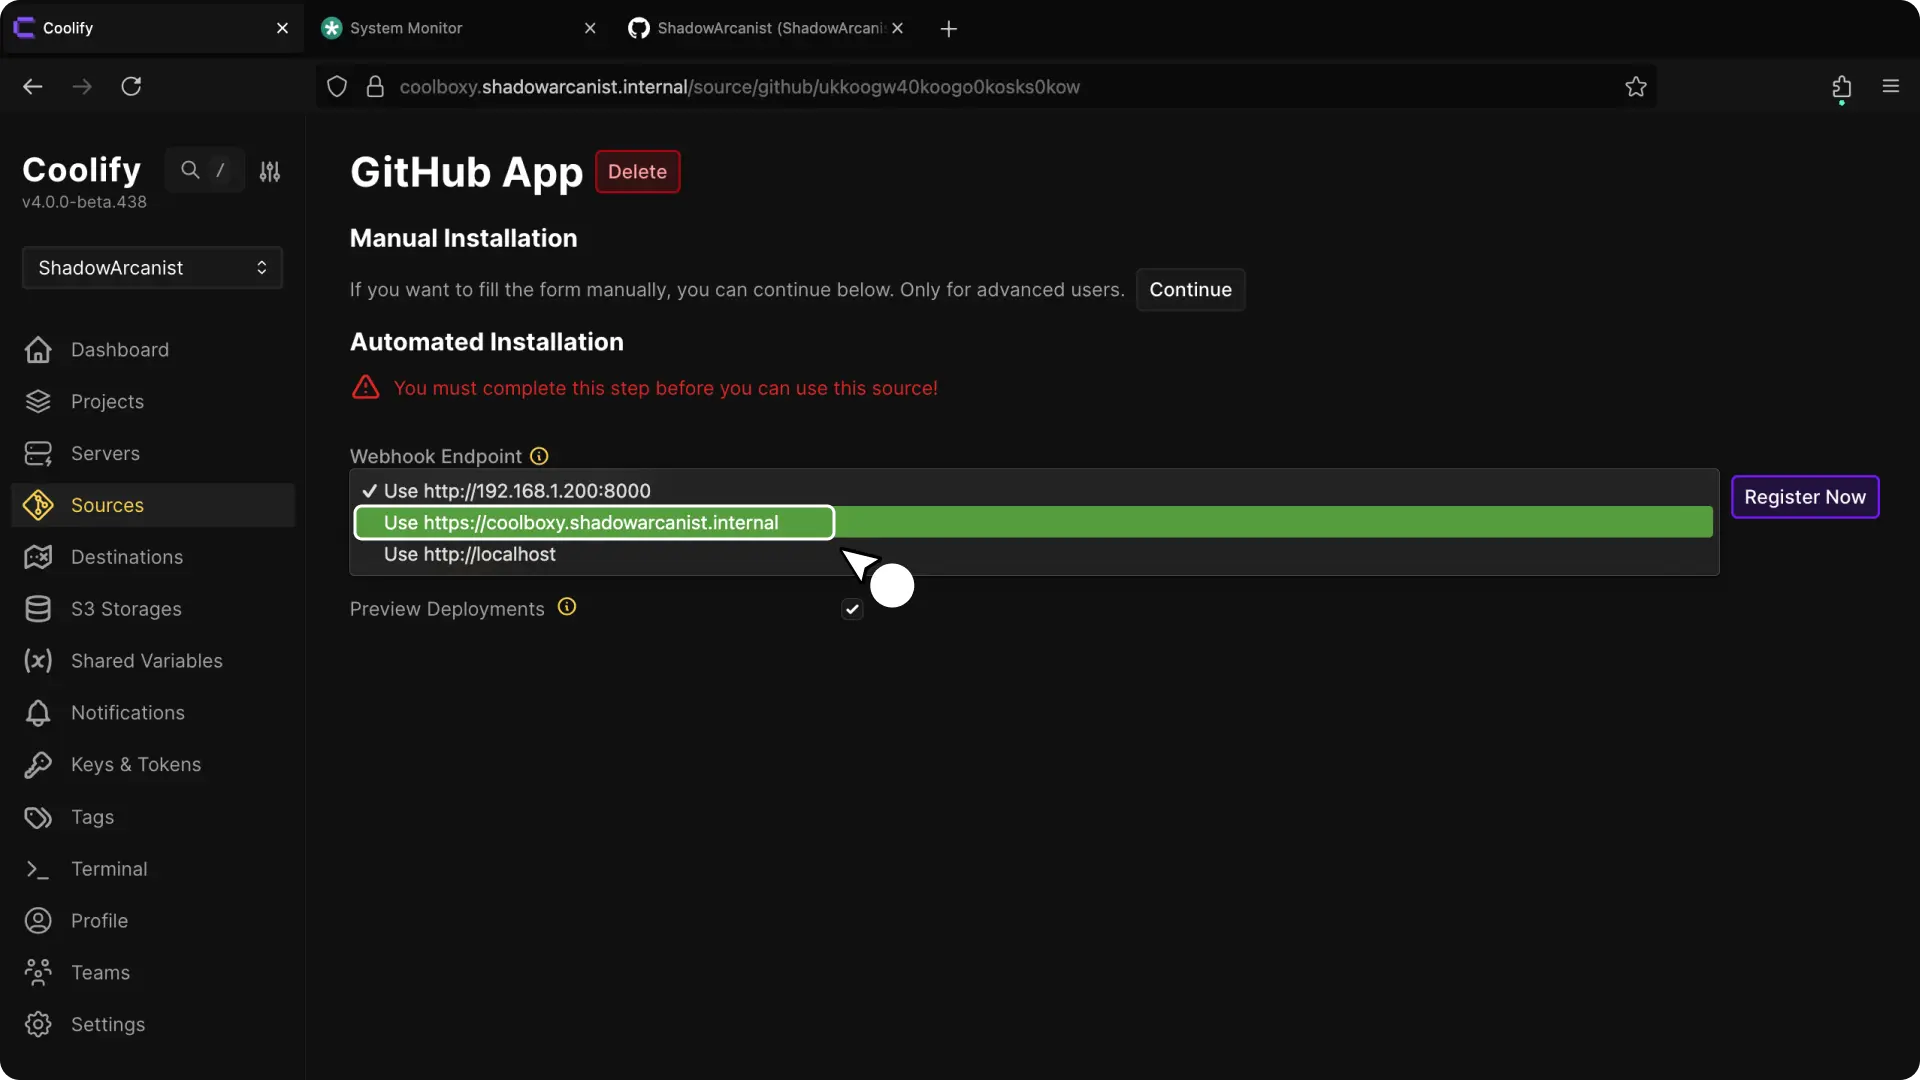
- Select the endpoint for github to send Webhook when a event (commit, pr) happens on github. If this endpoint is not reachable then automatic deployments won't work so if you decide to close port 8000 on your server you have to set the webhook endpoint as your Coolify dashboard domain
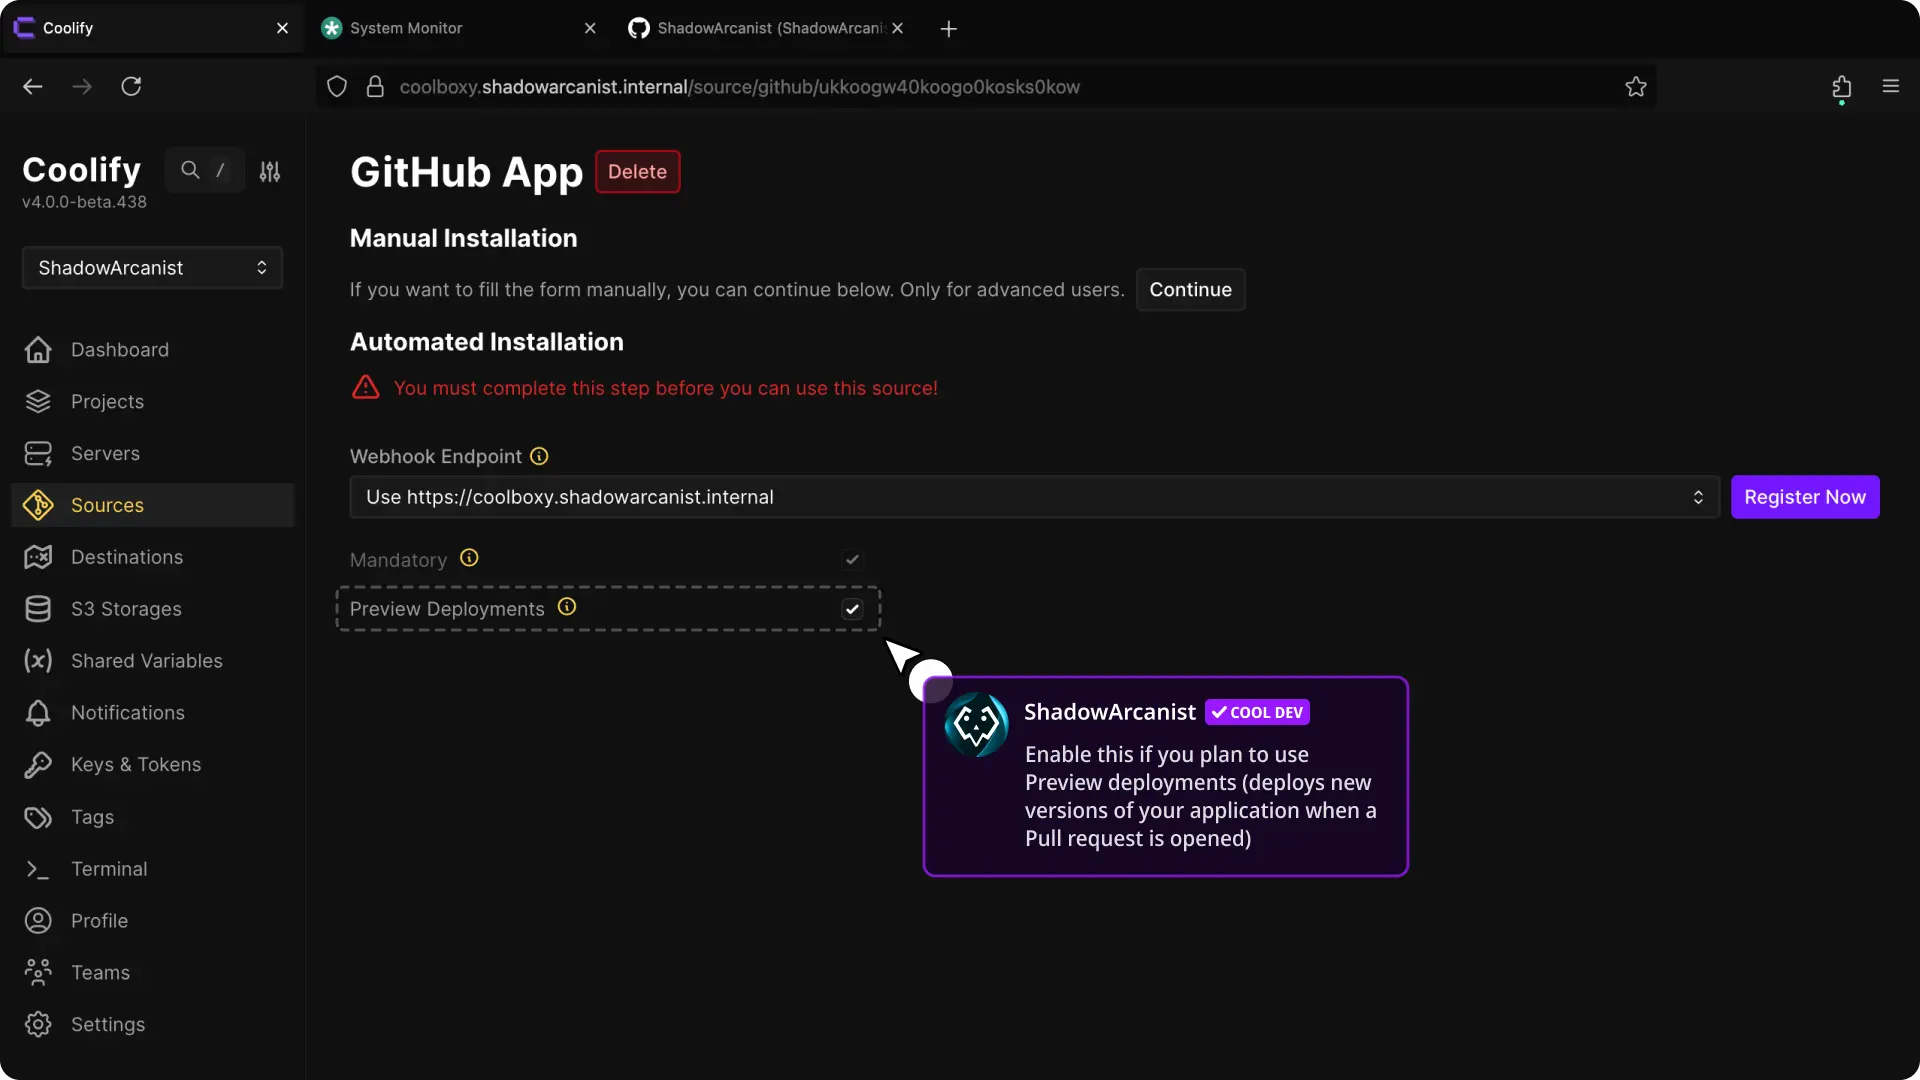
- Preview deployments are enabled by default and you can disable them if you dont want them
- Click on Register now button (this will take you to github)
3. Create Github App on Github
- Give your github app a name (this will be shown on your github app list and you can always change it later)
- Click on Create app button (this will take you back to your coolify dashboard)
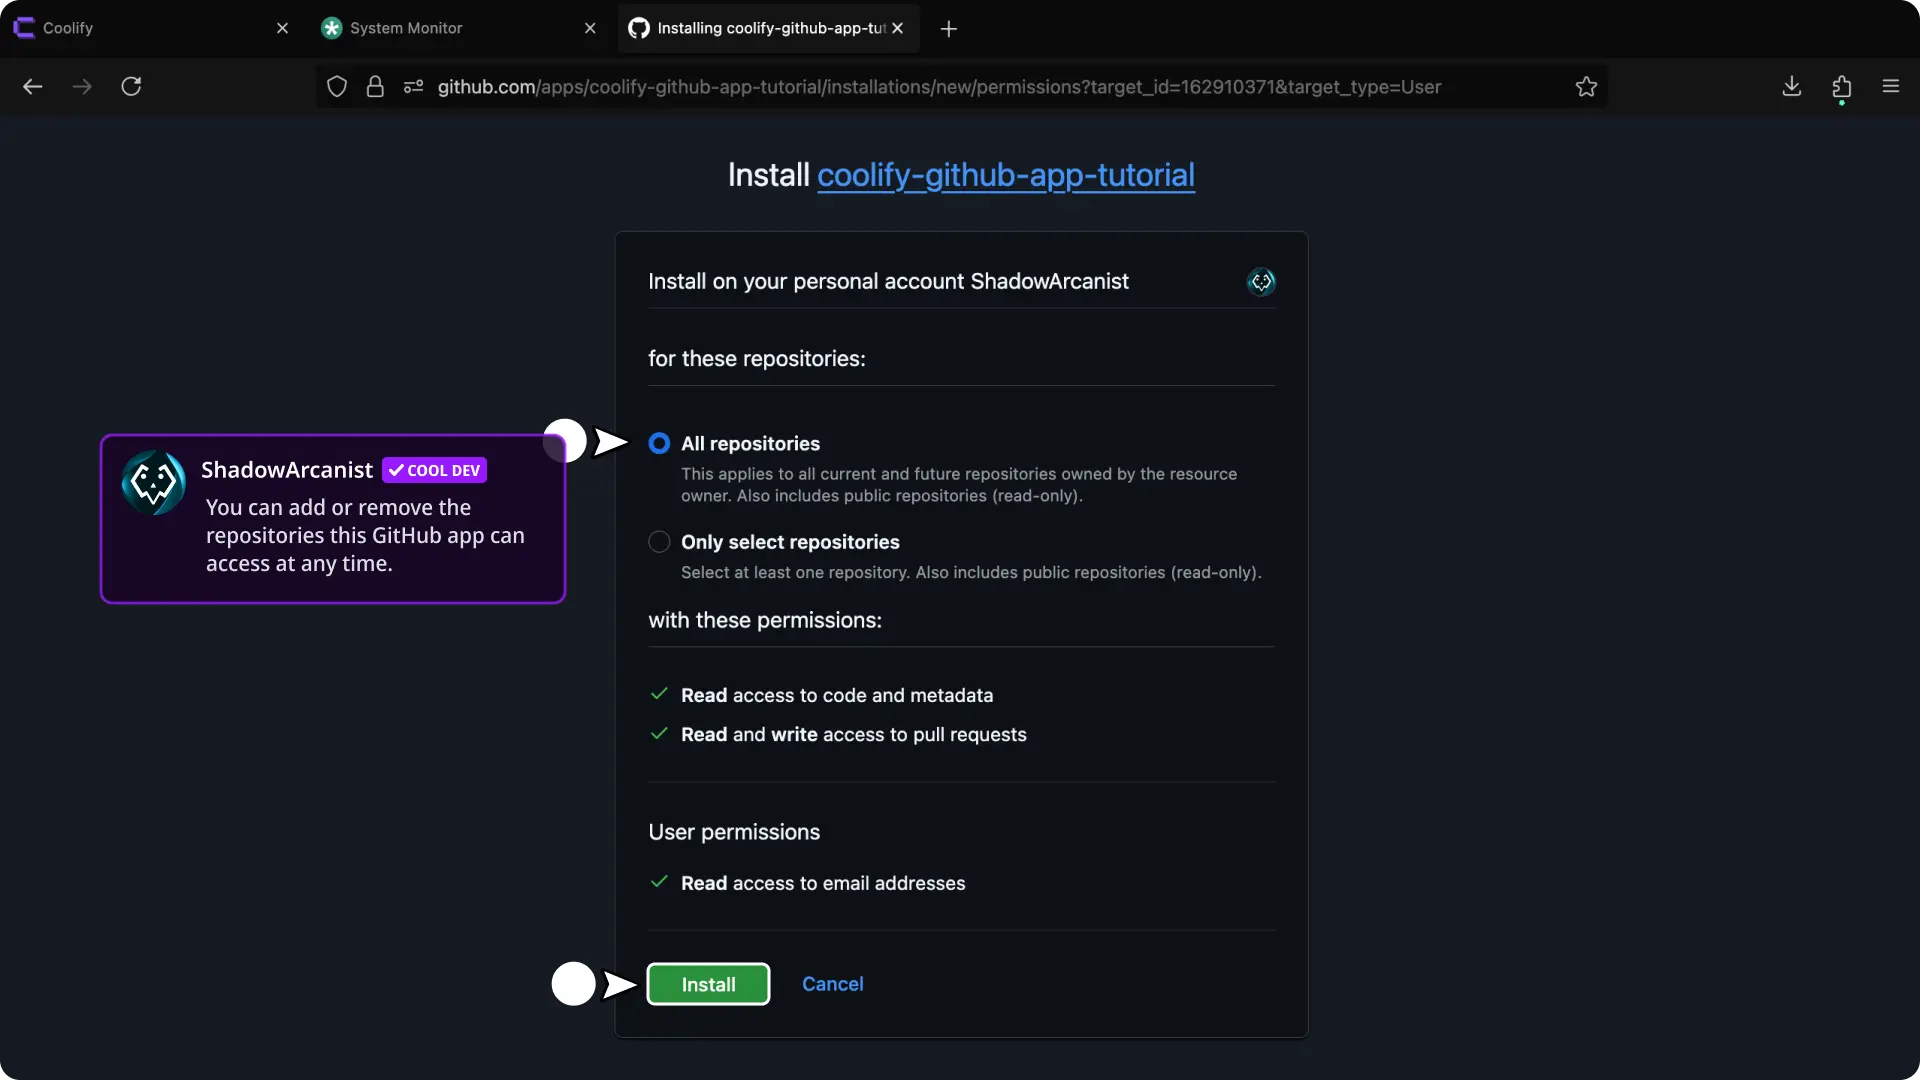
4. Allow Github app access to repositories
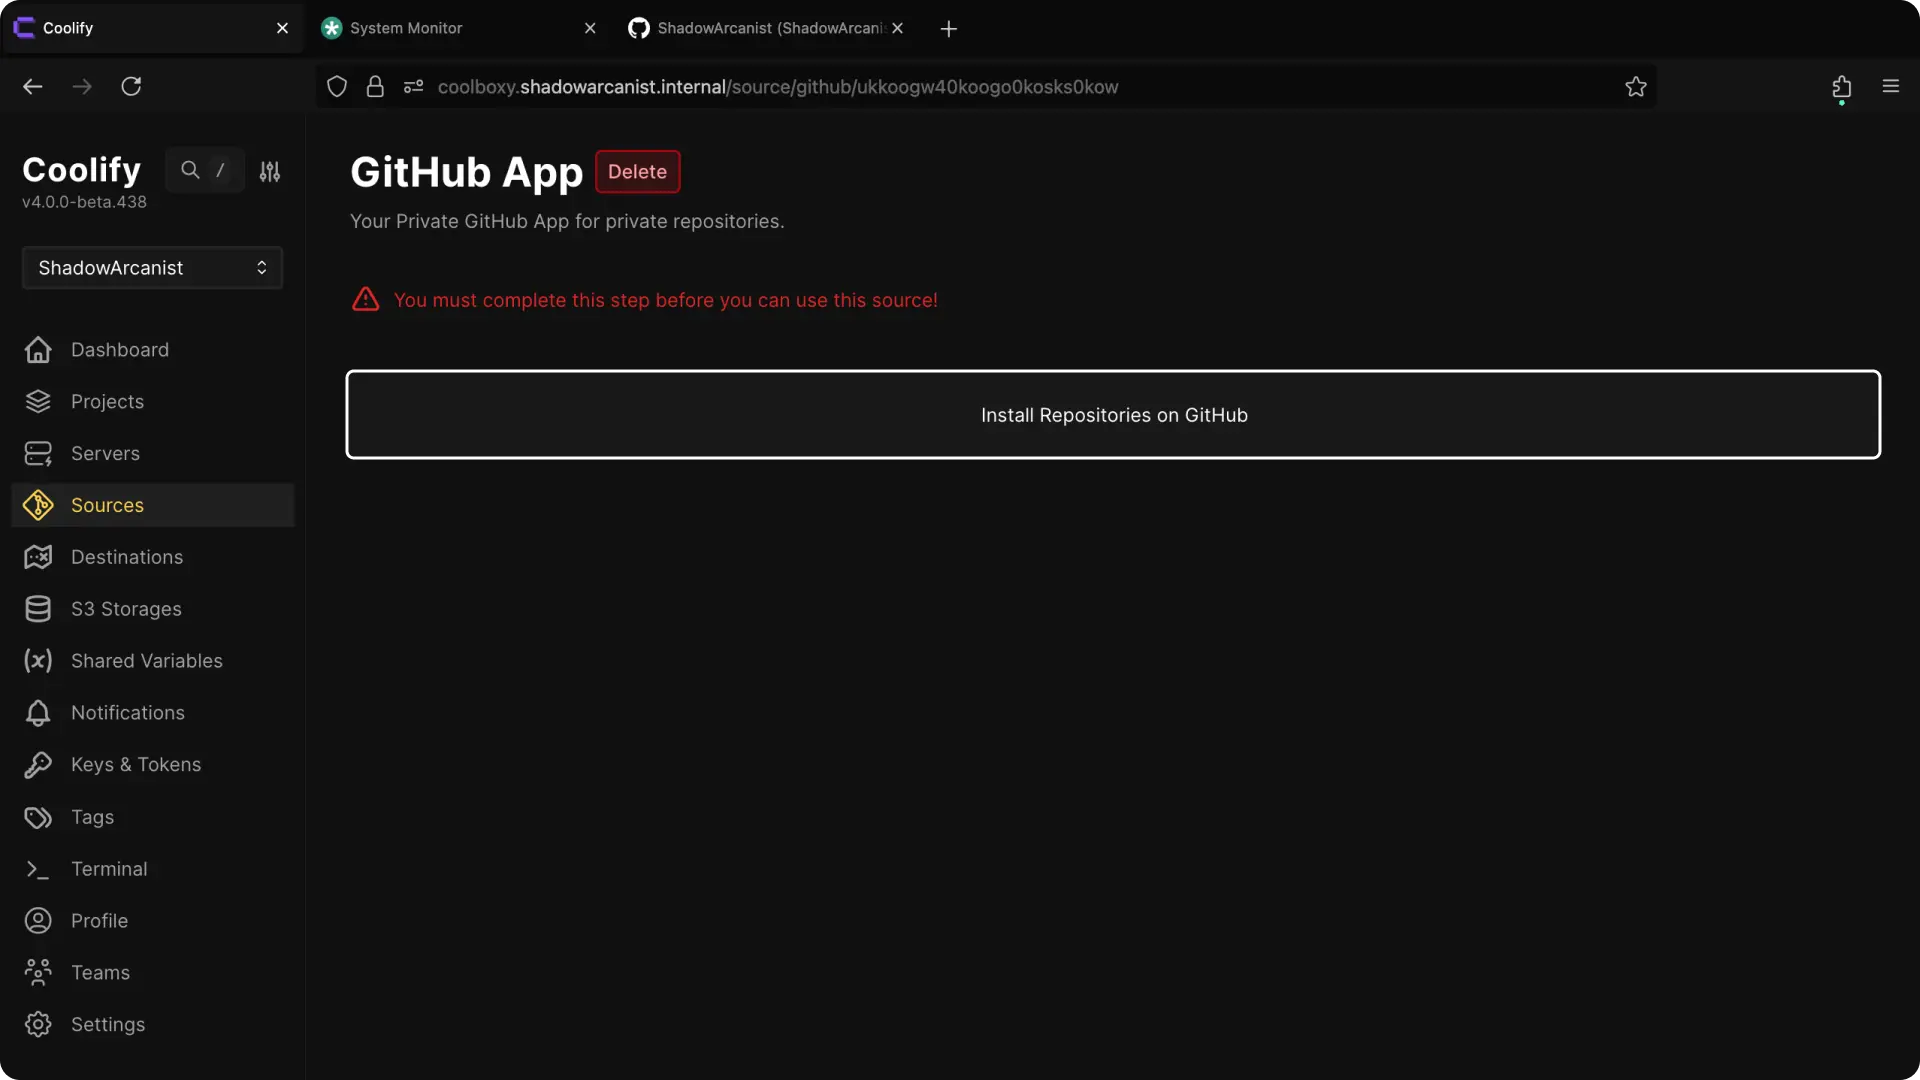
- Click on "Install repositories on Github" button
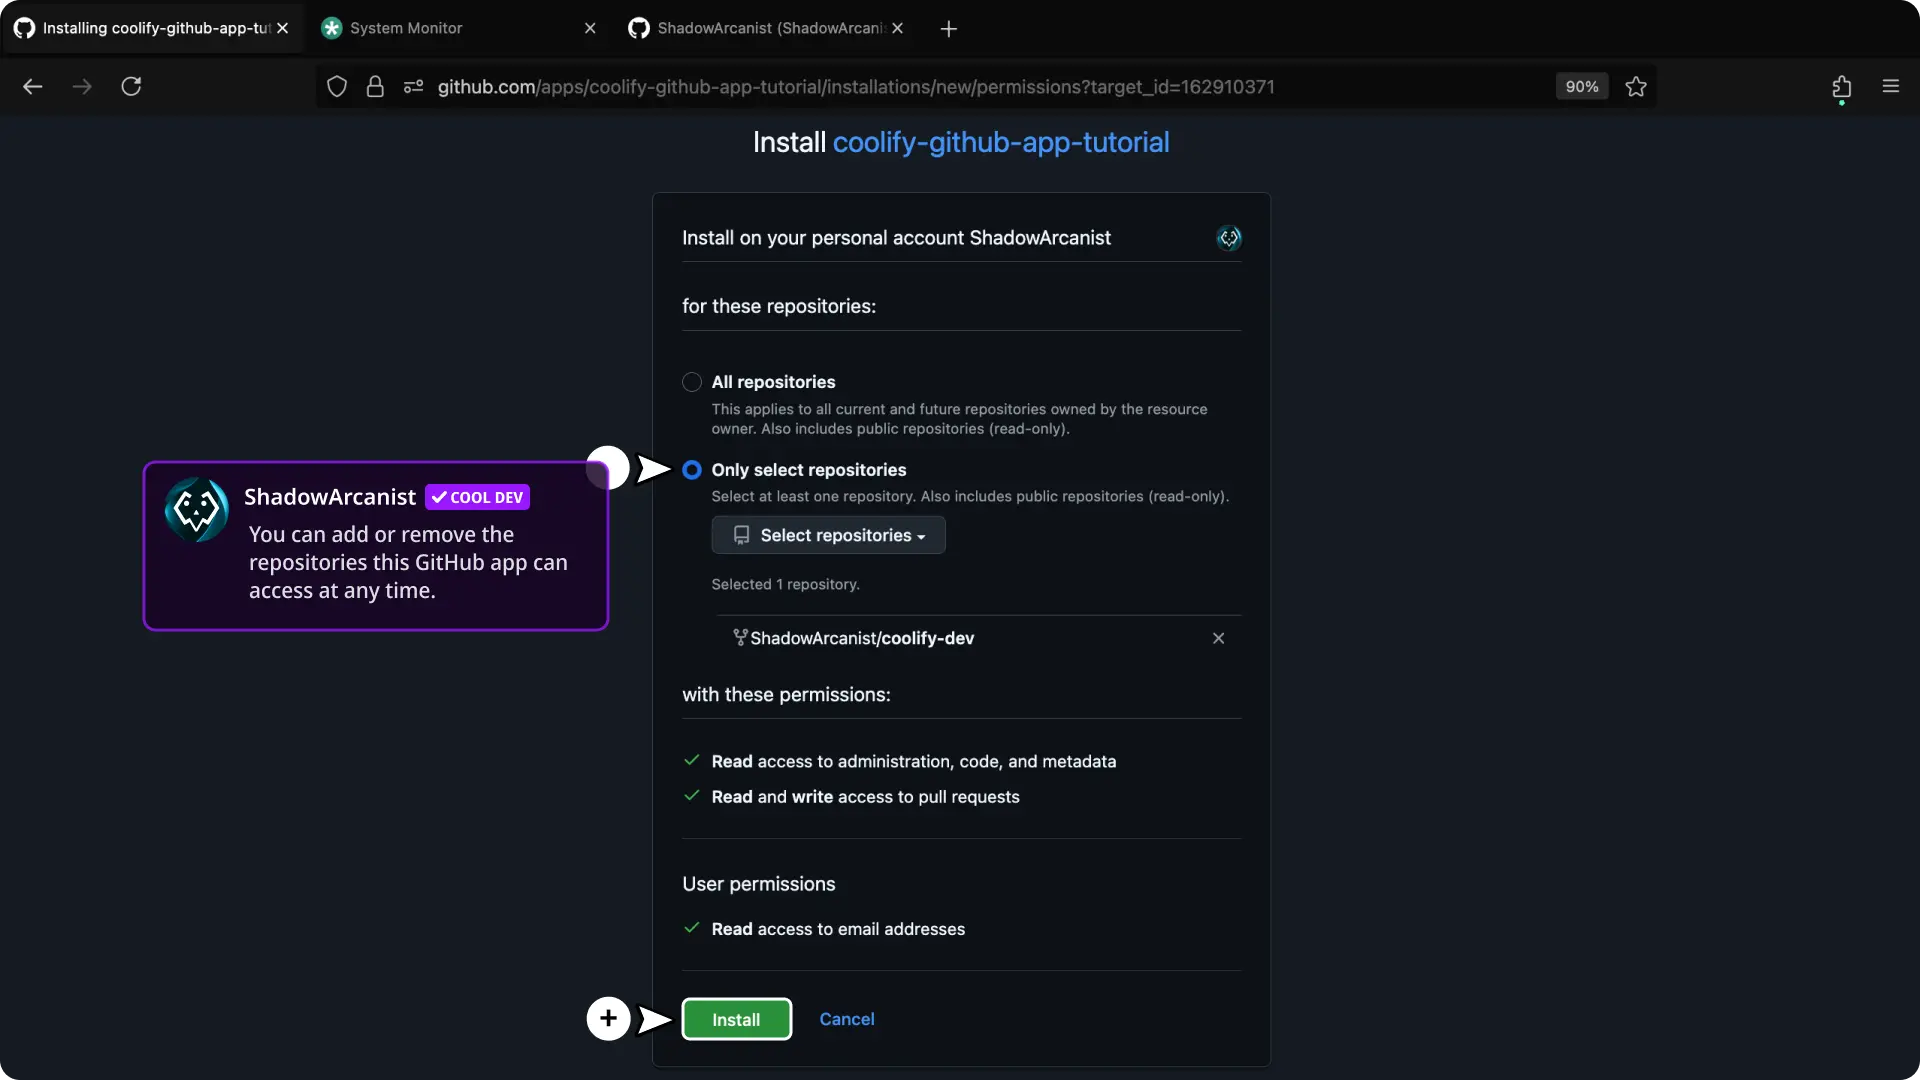
- Select the repositories that you want this app to have access to (you can give access to all repositories or specific repositories)
- Click on "Install" button (this will take you back to your Coolify dashboard)
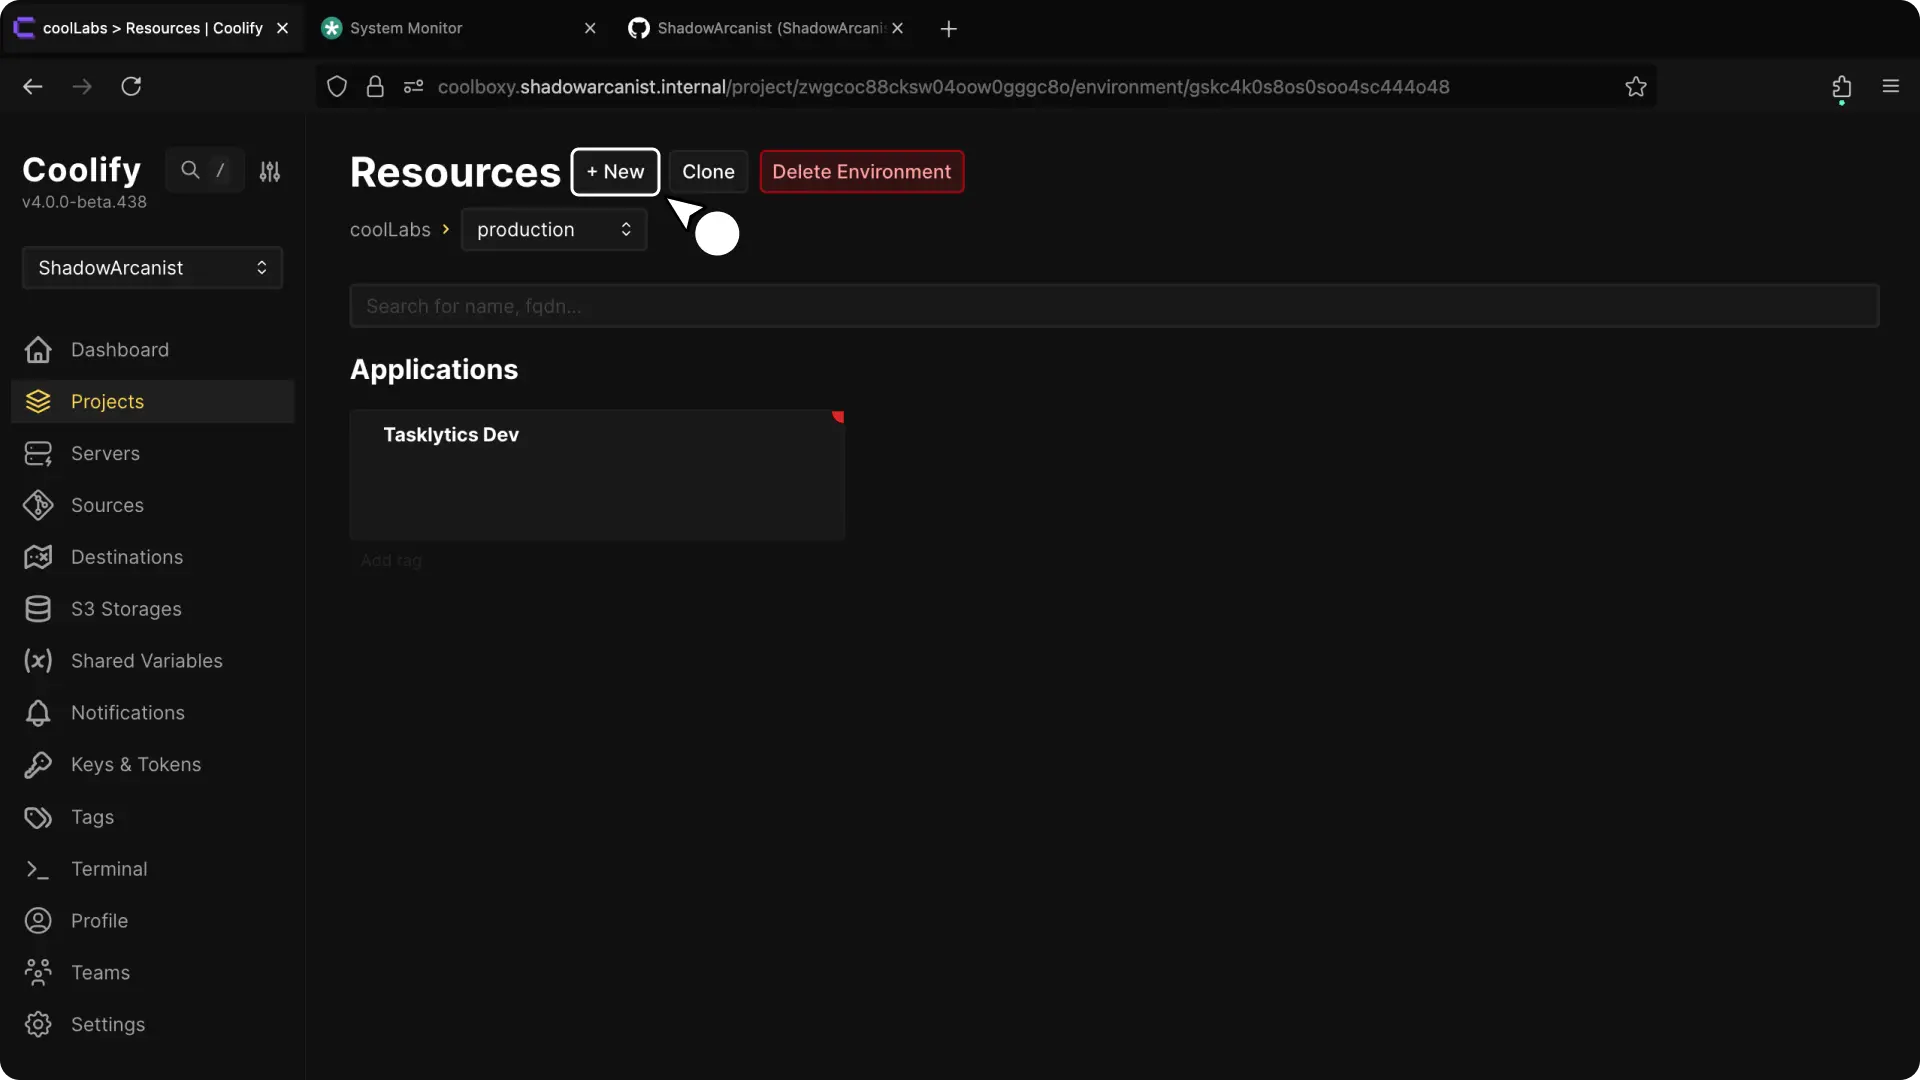
5. Create a New Resource on Coolify

- Select your project from the Coolify dashboard.
- Click the + New button to create a new resource.
6. Select Private Repository (with Github App) as Resource Type

Select Private Repository (with Github App) from the available resource types.
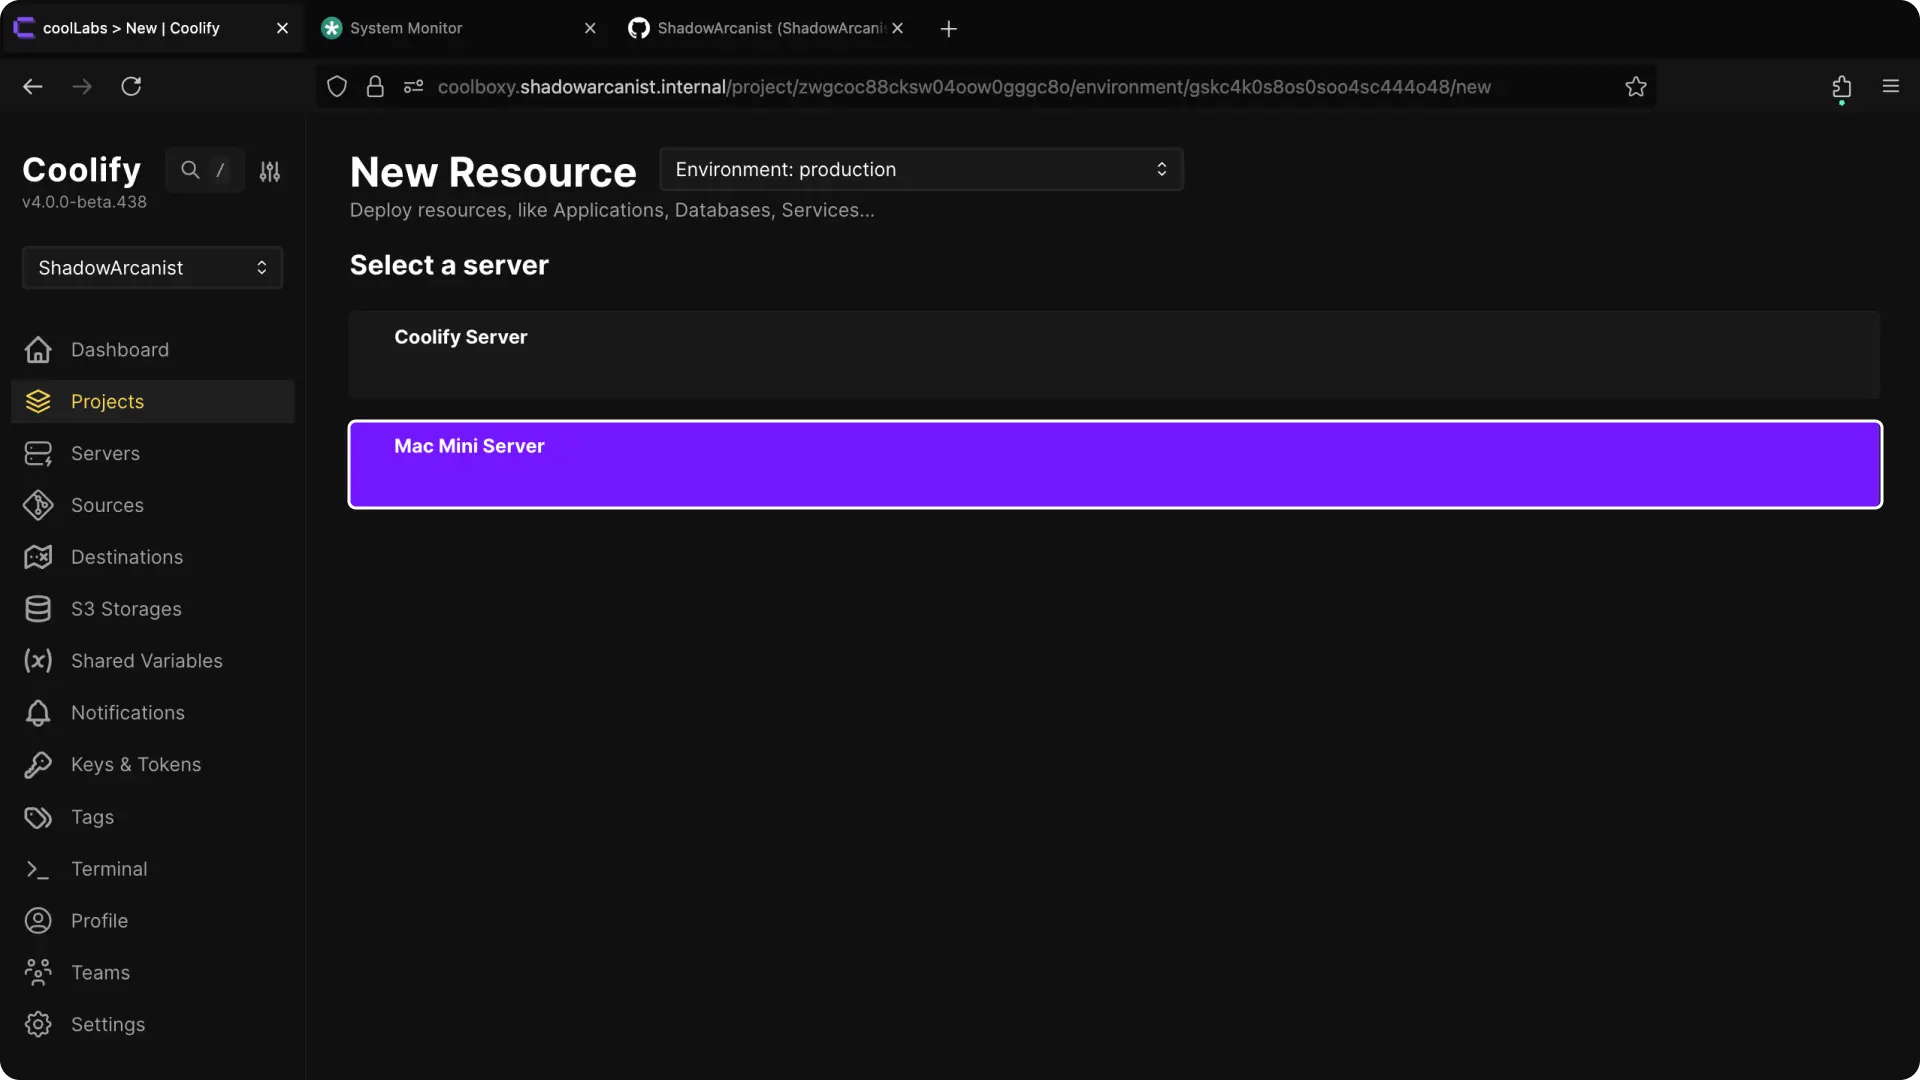
6. Choose Your Server
HEADS UP!
Coolify automatically selects the localhost server if you don't have any remote servers connected. In such cases, skip to the next step.

Choose the server where you want to deploy the application.
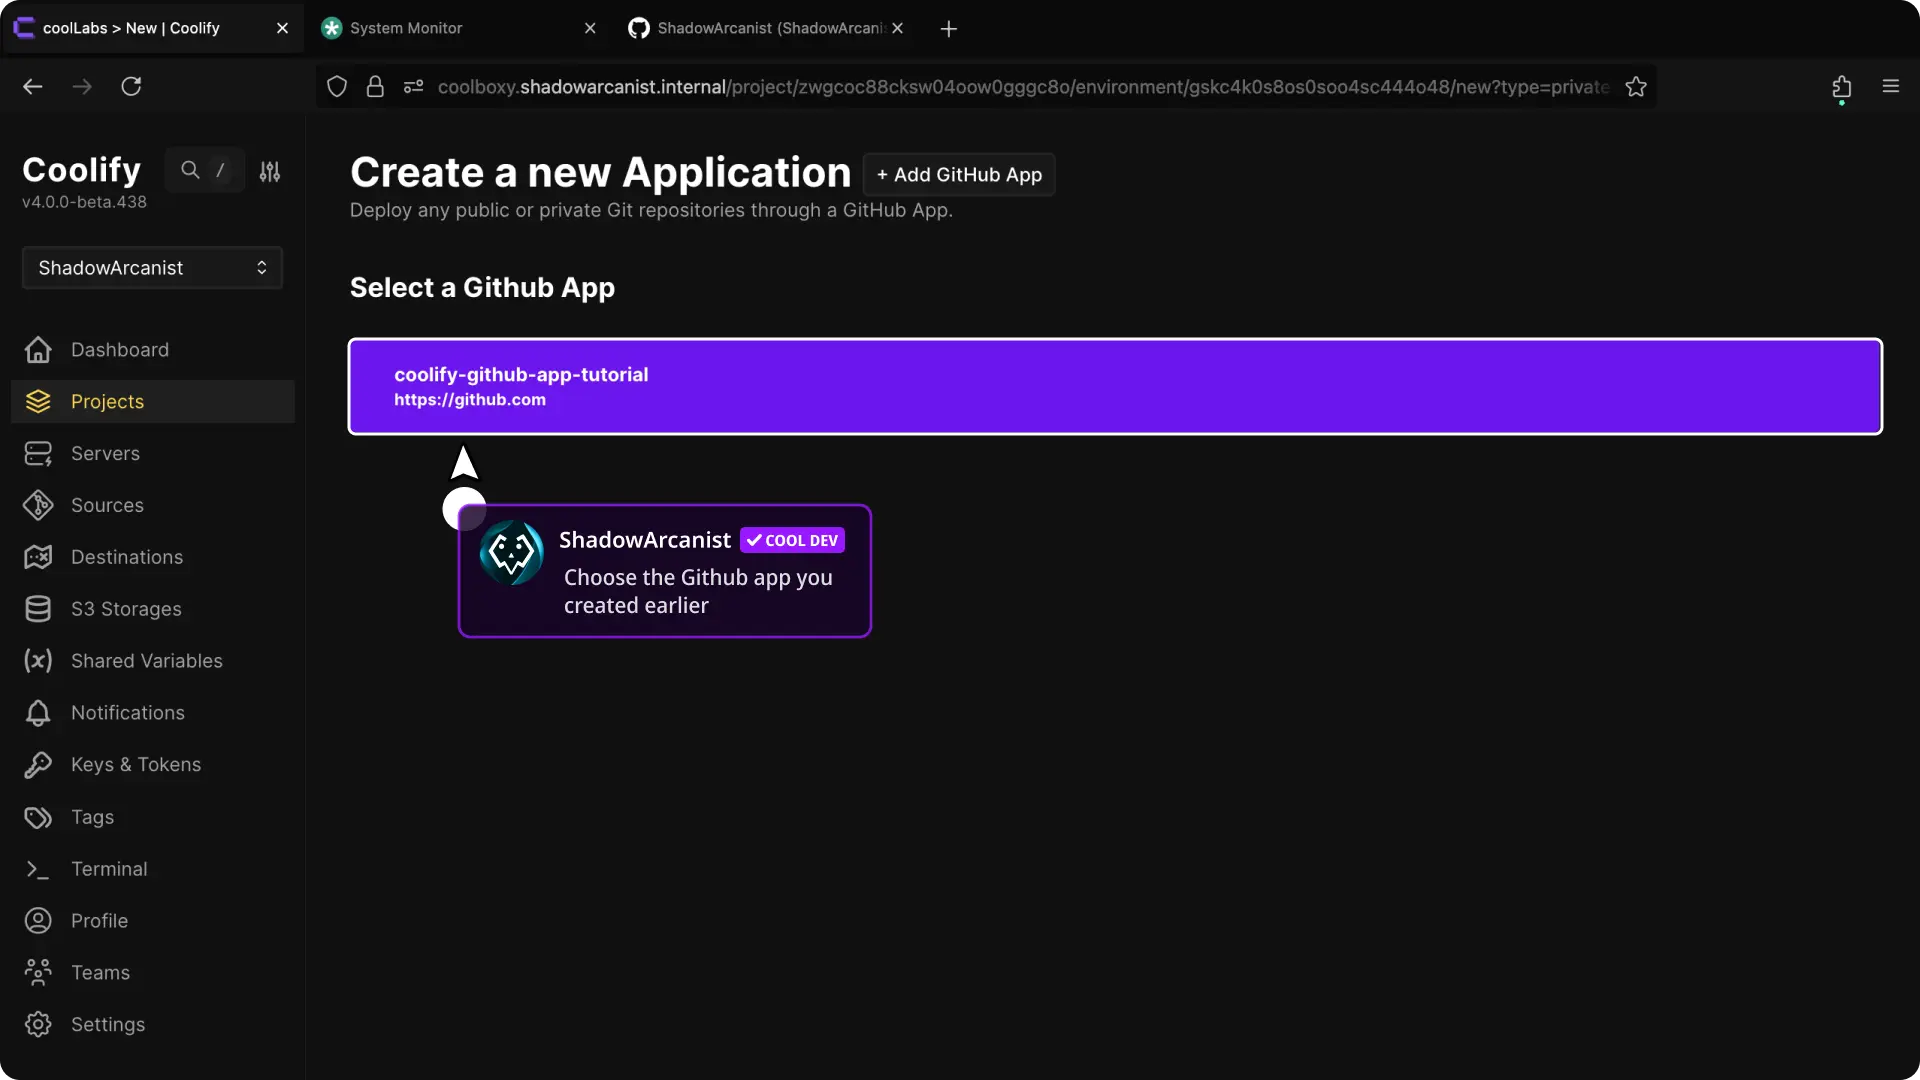
7. Choose Your Github App

Select the Github App you created in Coolify from the list of available Apps.
8. Configure the Application and Deploy
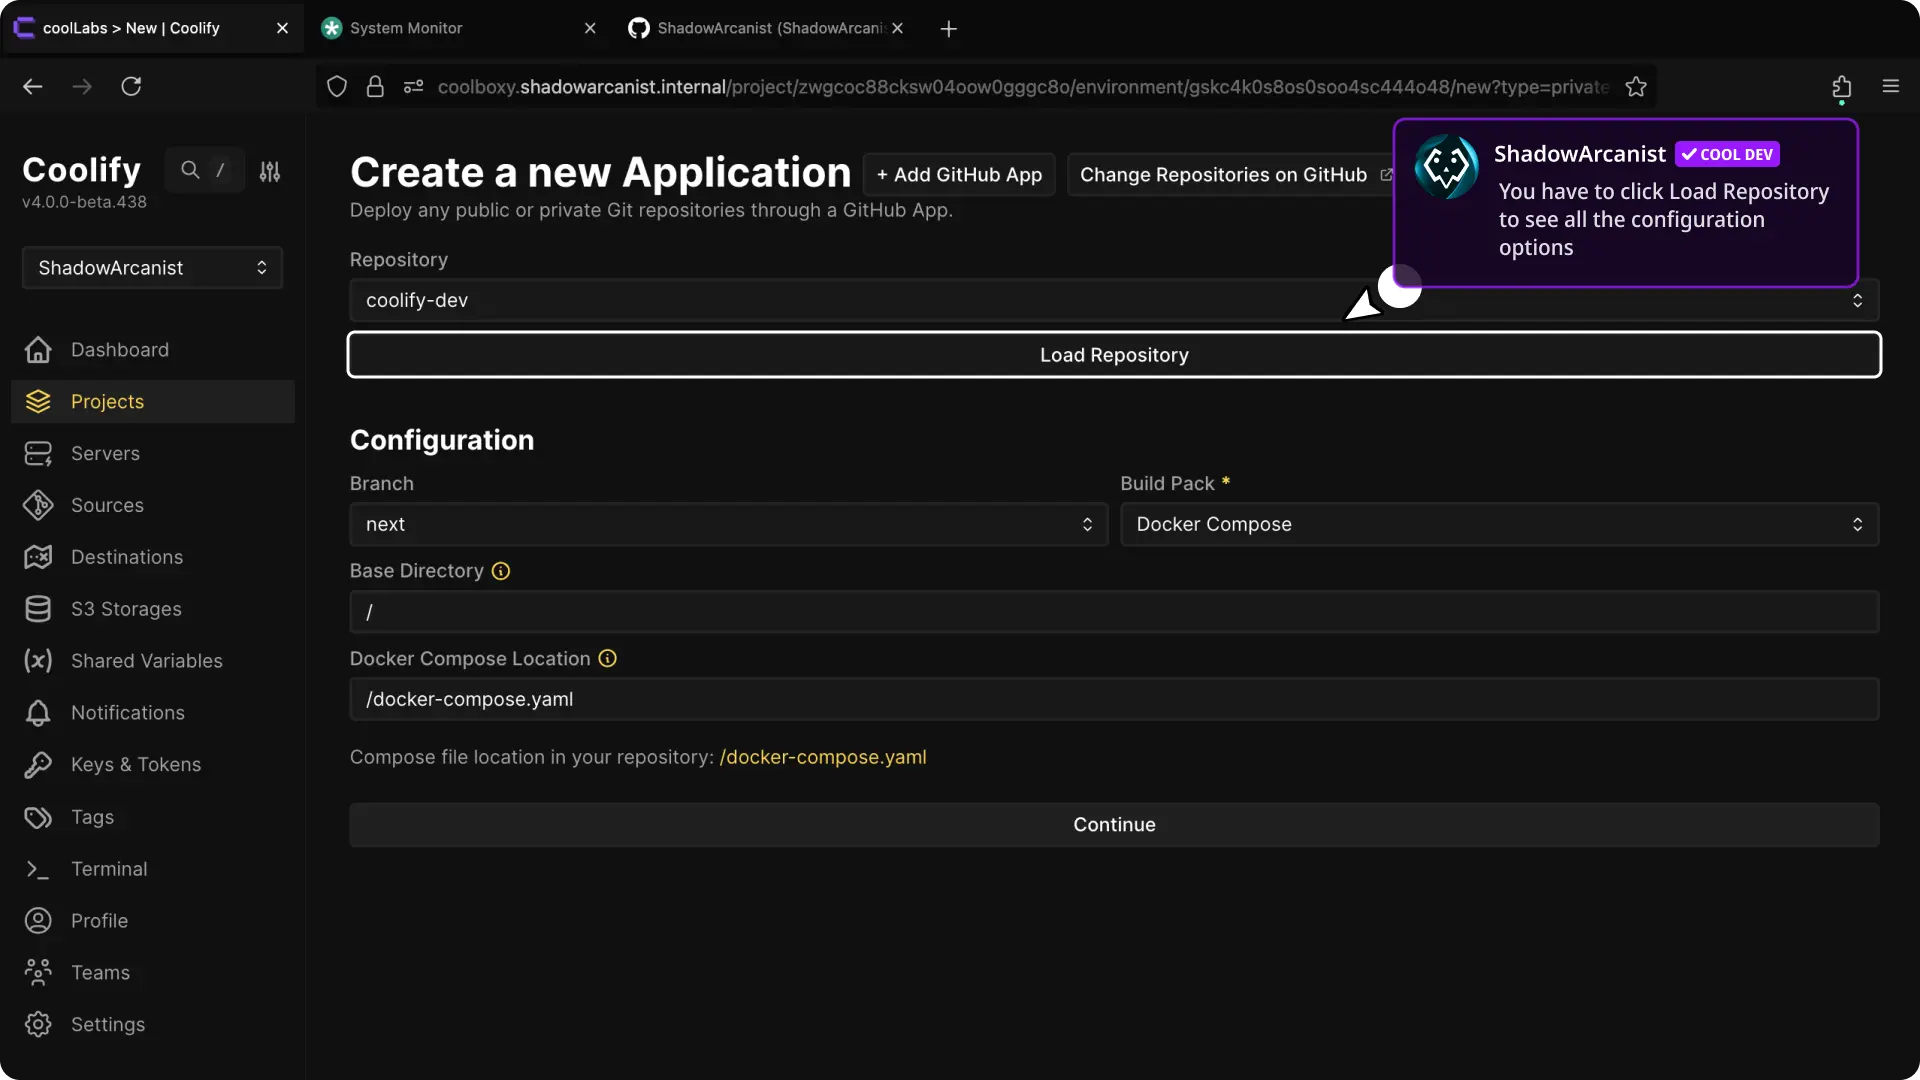
- Choose Repository and click on "Load Repository" button.
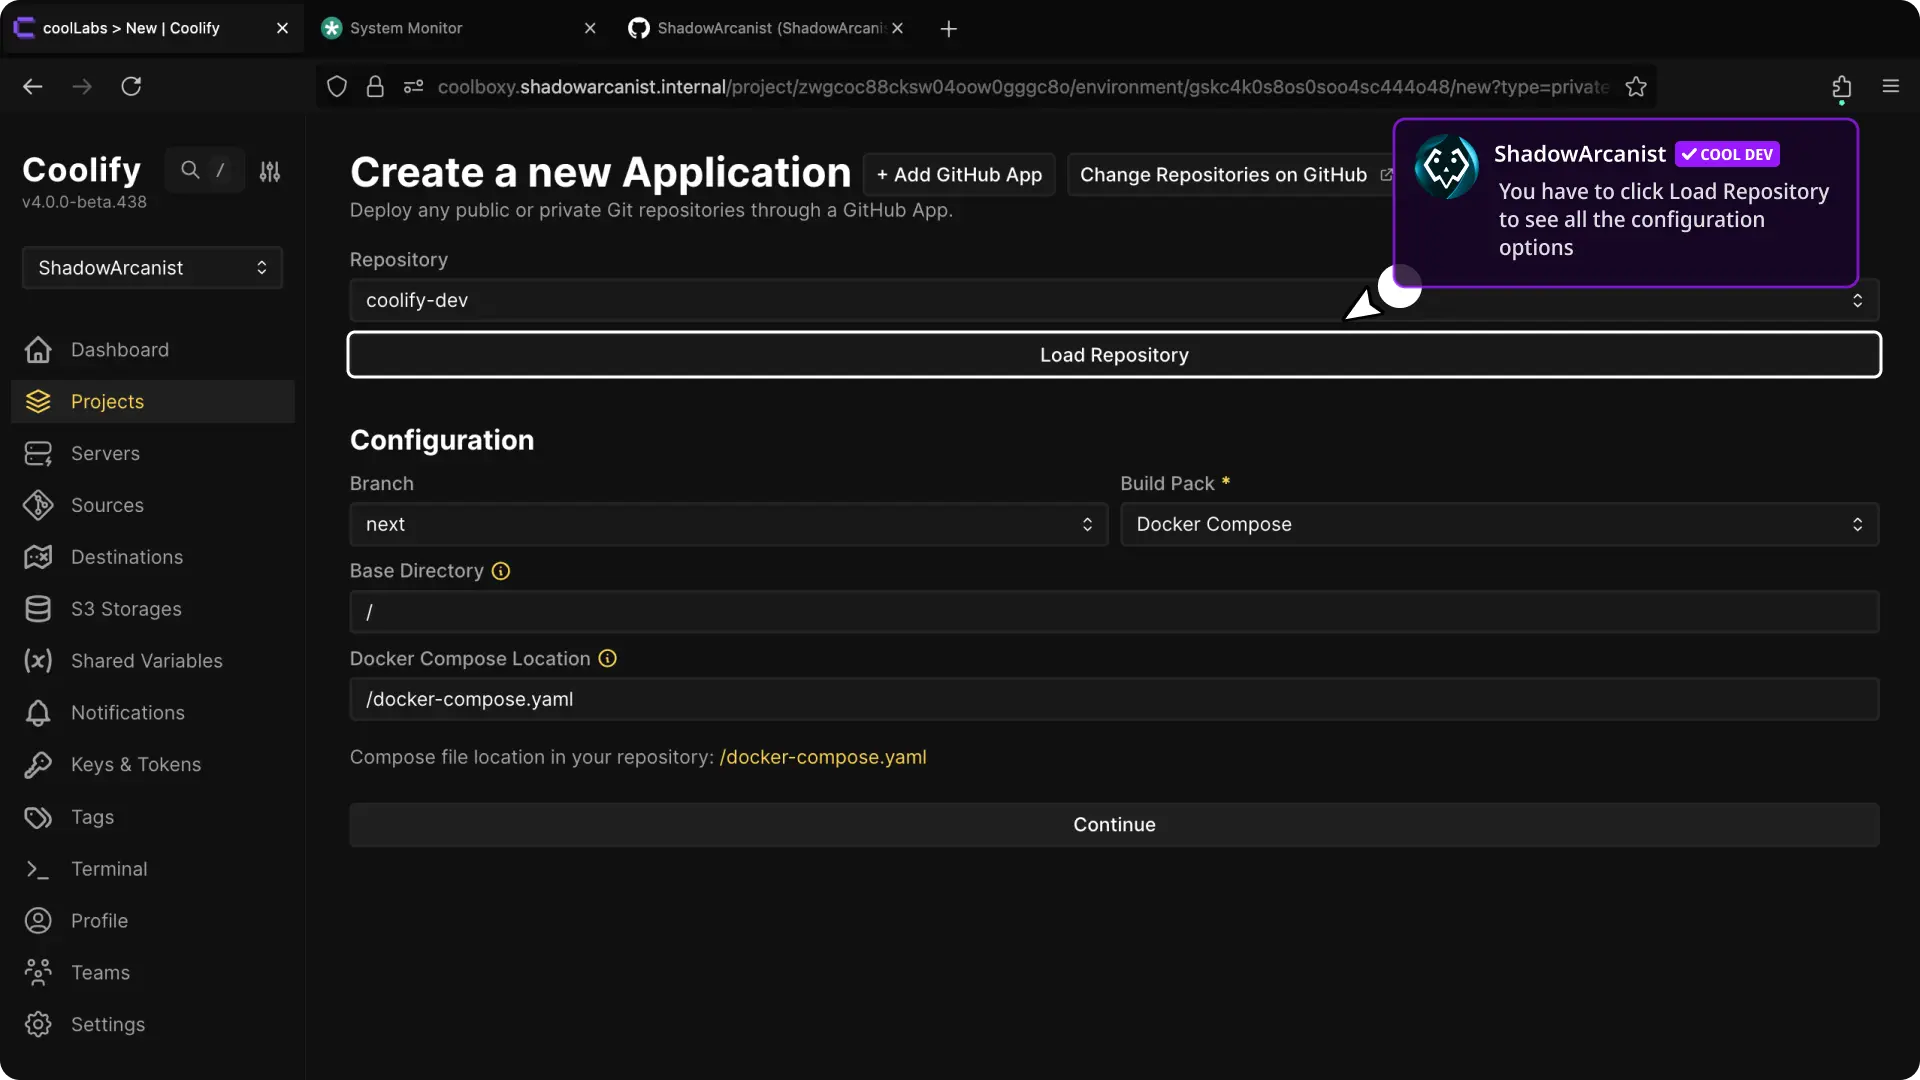
- After selecting the repository, configure the buildpack, ports, and other settings. (Refer to our dedicated guide on builds for more details.)
Once configured, deploy your application.
That's it!
HEADS UP!
The Automated installation guide ends here. If you’ve followed the steps above, you can start using Github Apps now. The guide below is for those who want to manually install and set up Github App.
Manual Installation
1. Create a Github App on Coolify
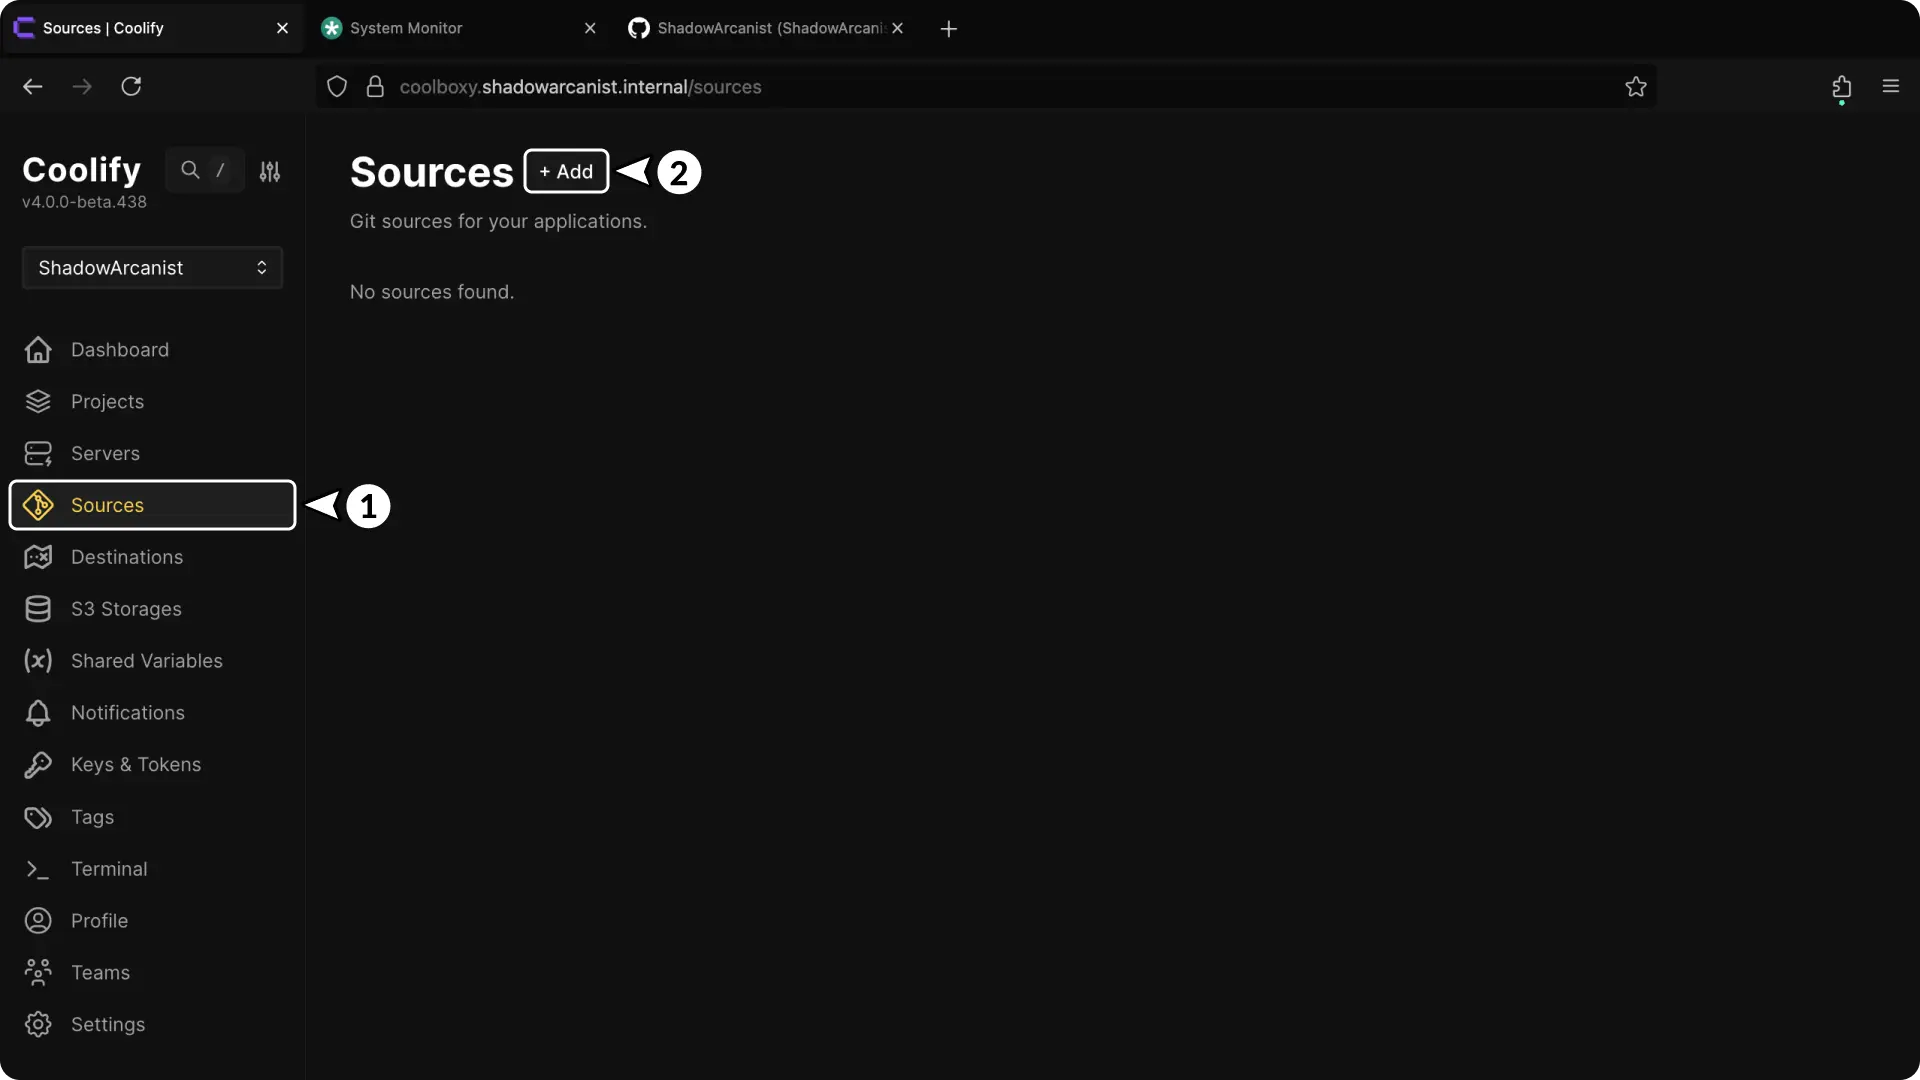
- In your Coolify dashboard, click on Sources from the sidebar.
- Click the + Add button to create a new github app.

- Enter a Name for your App
- Enter your github organization name (if you are adding the github app to your github account then leave this field empty) and click continue
- If you are using Selfhost or Enterprise version of Github then you can enter your github details on the Selhost/Enterprise github section.
- The "System wide" option allows all teams you have on your coolify instance to use this specific github app, if you only want the current team to use the github app then leave this option unchecked.
Coolify cloud users won't see the option "System wide" because this option will enable your github app to all Cloud users so this option is disabled on Coolify Cloud
- Click on Continue button
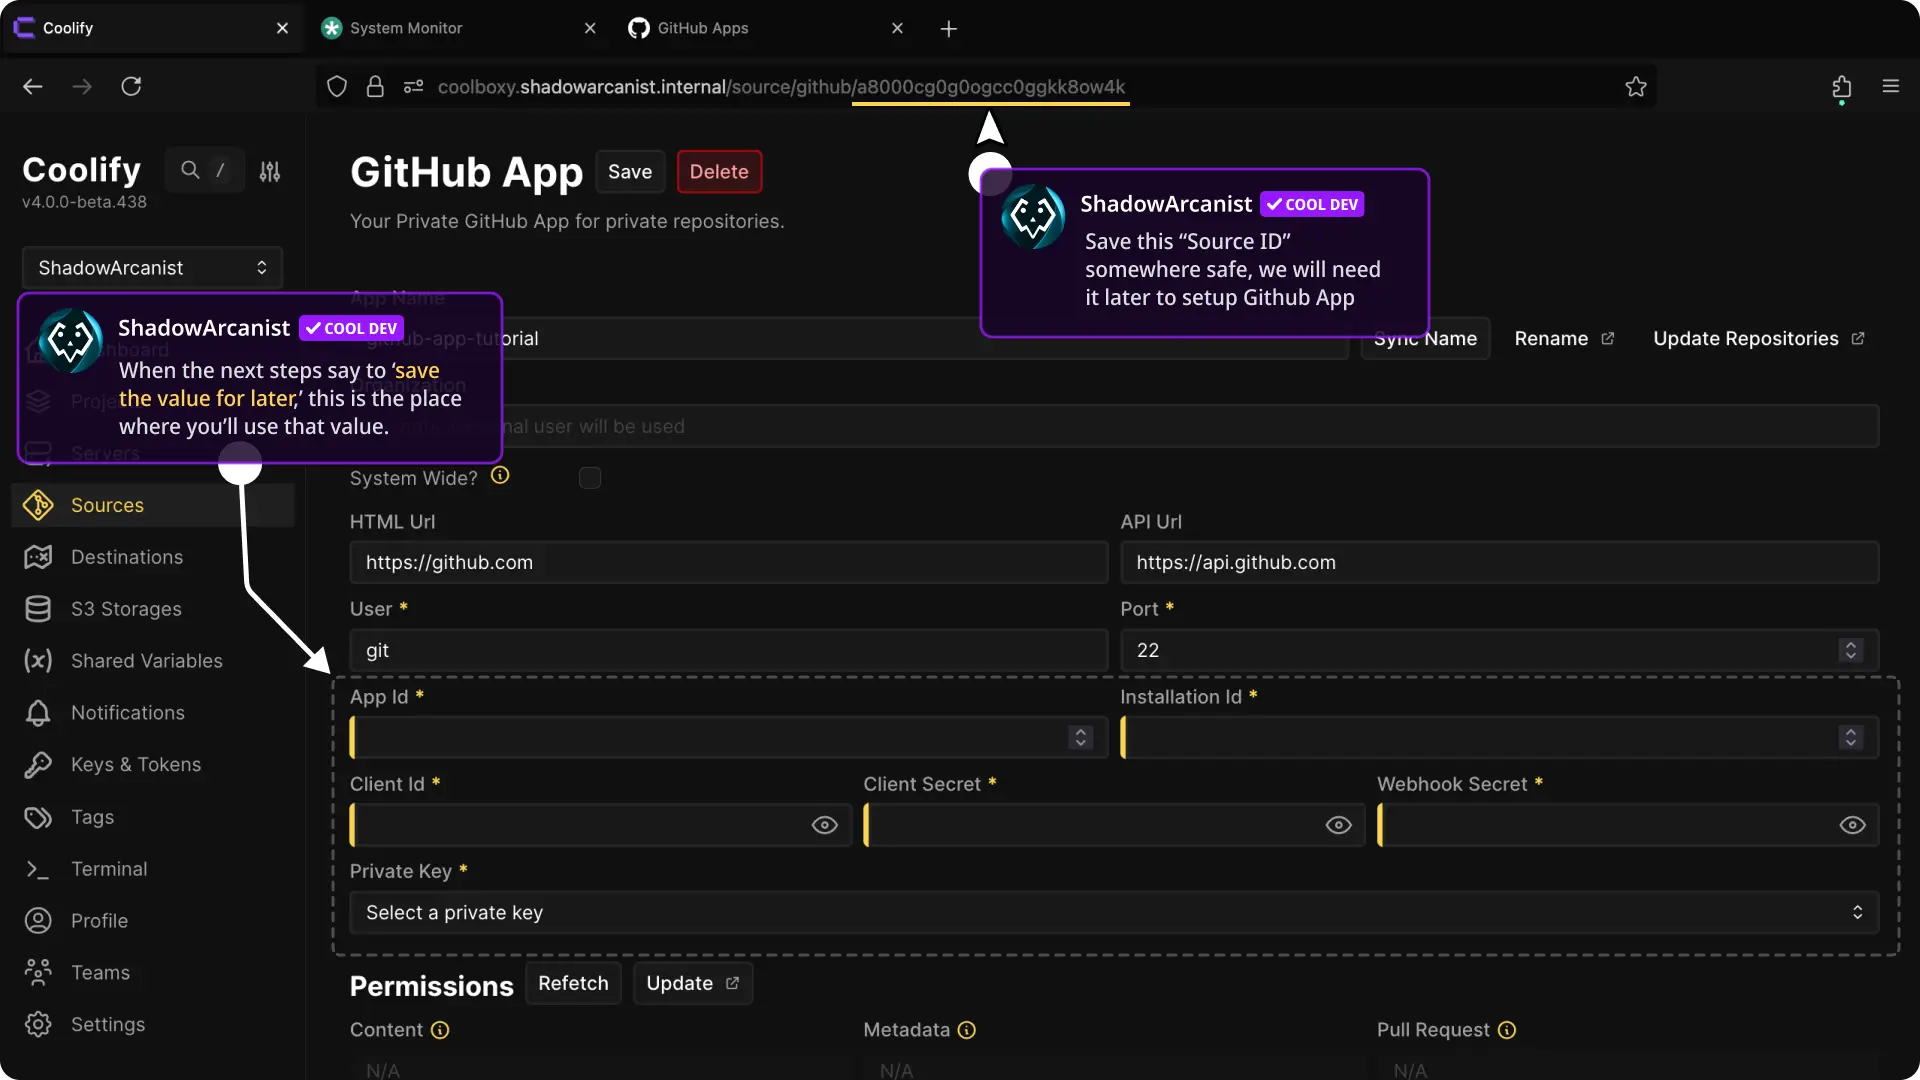
- Save the Source ID of github app somewhere safe (source id is the UUID you see on your url bar after
/github/)
We will need the following data to setup the github app:
- App ID
- Installation ID
- Client ID
- Client Secret
- Webhook Secret
- SSH Key
We will get these data in the next few steps.
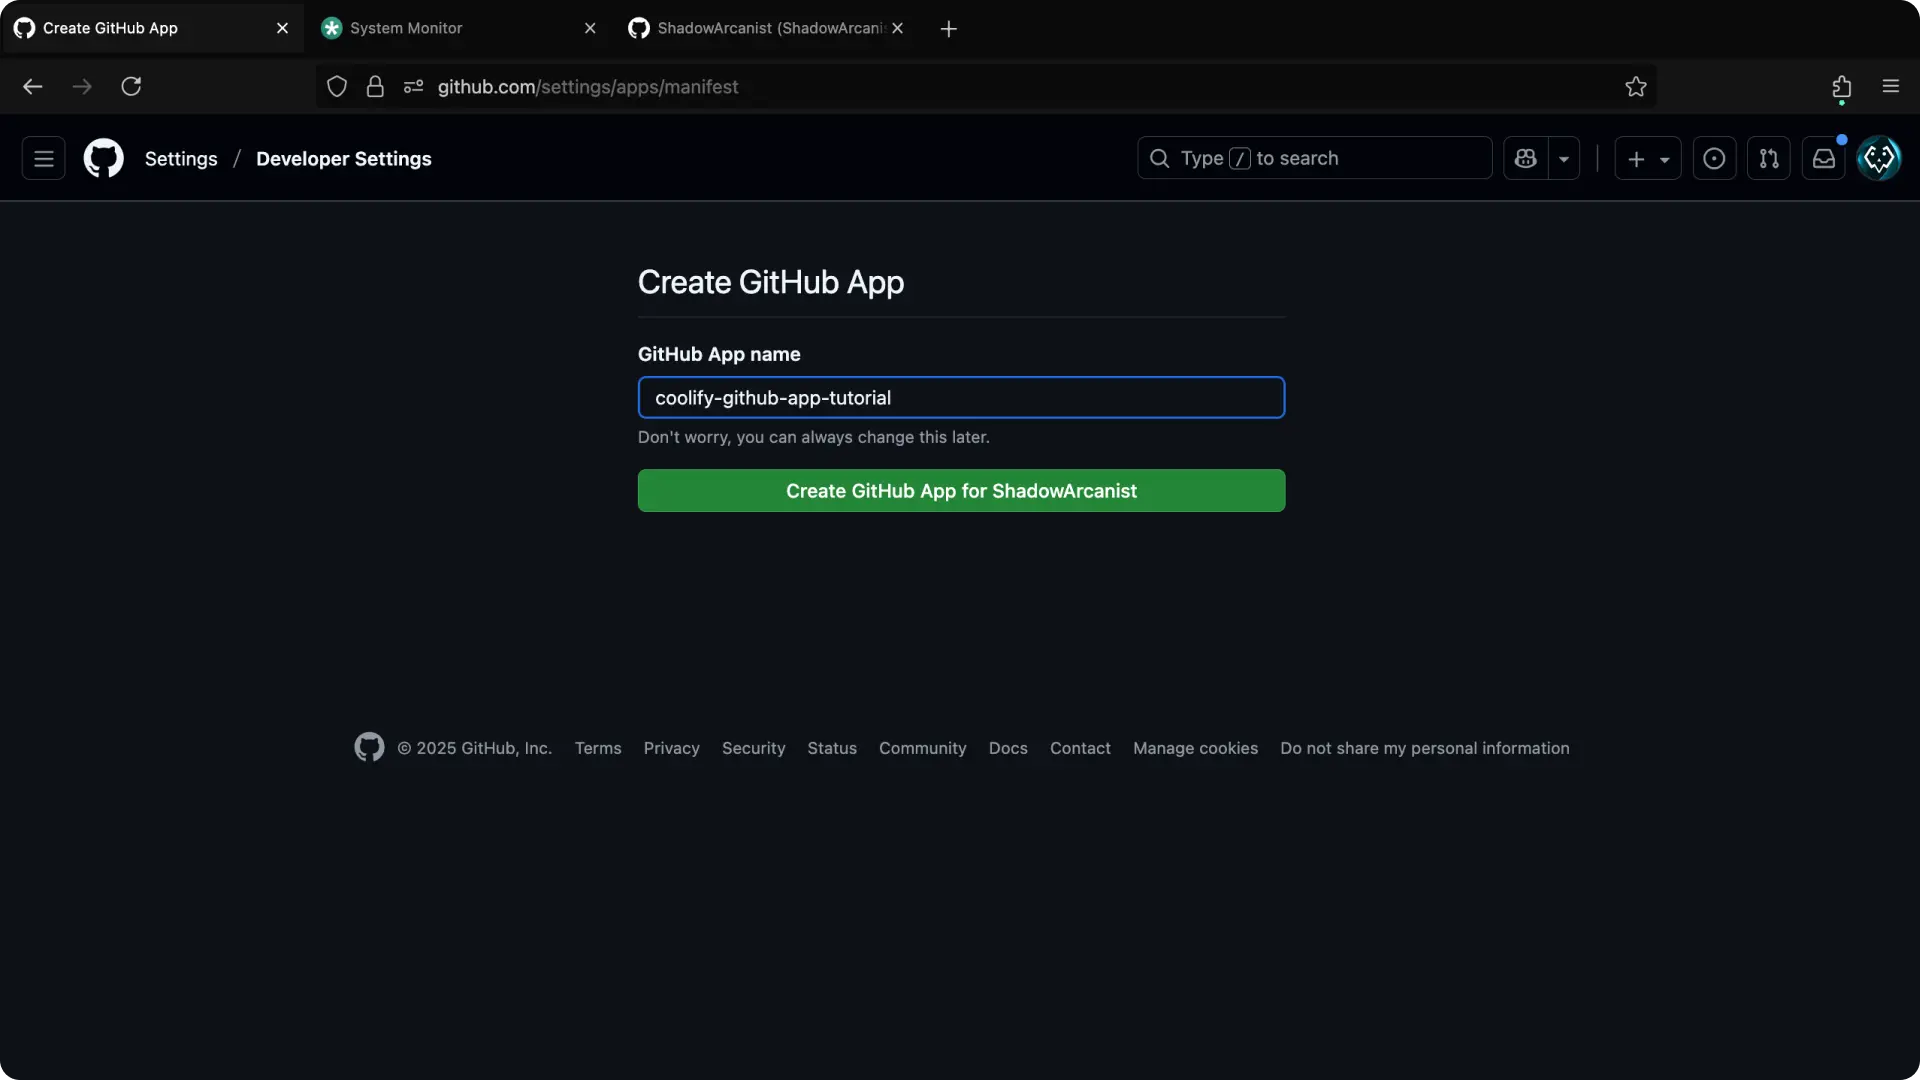
2. Create a App on Github
Creating apps on github slightly varies for personal accounts and organizations so choose the correct one from the below section
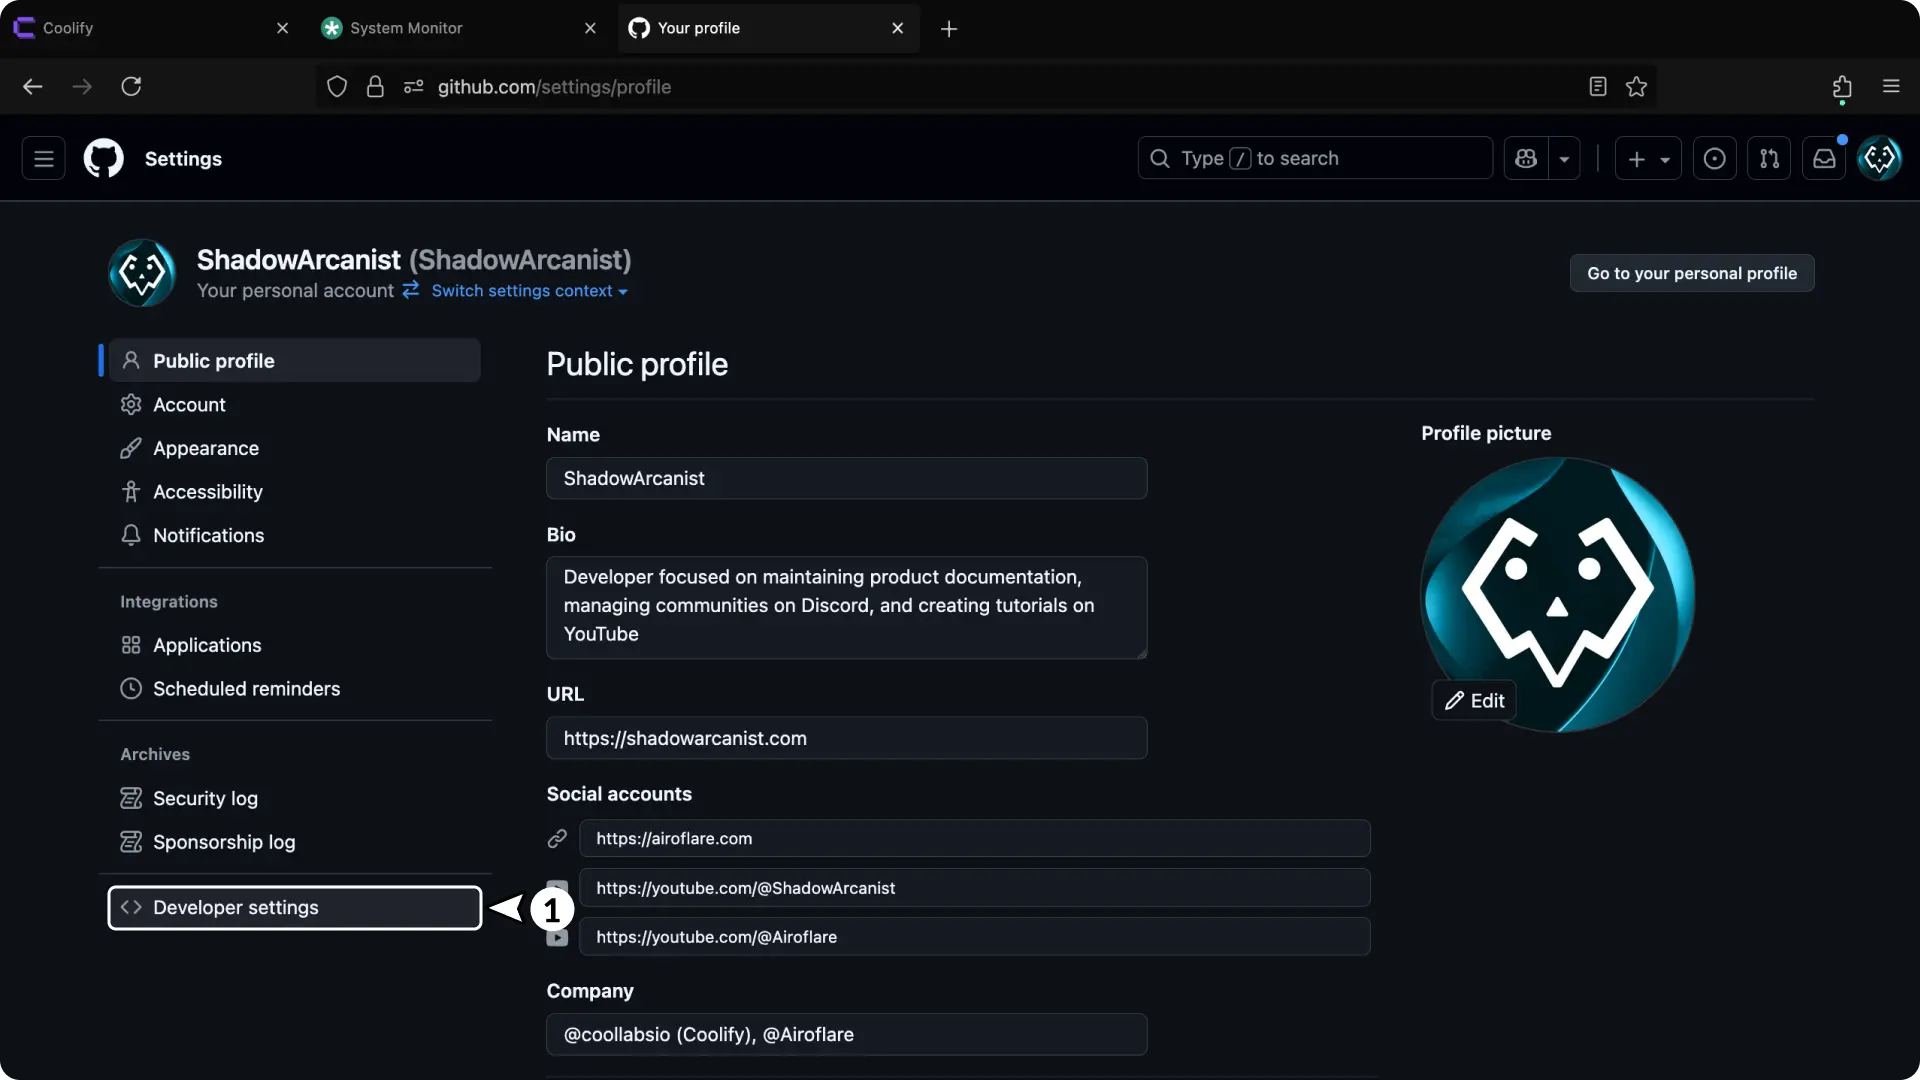
- Go to your github account settings
- On the sidebar scroll down till you see "developer settings" and click on it
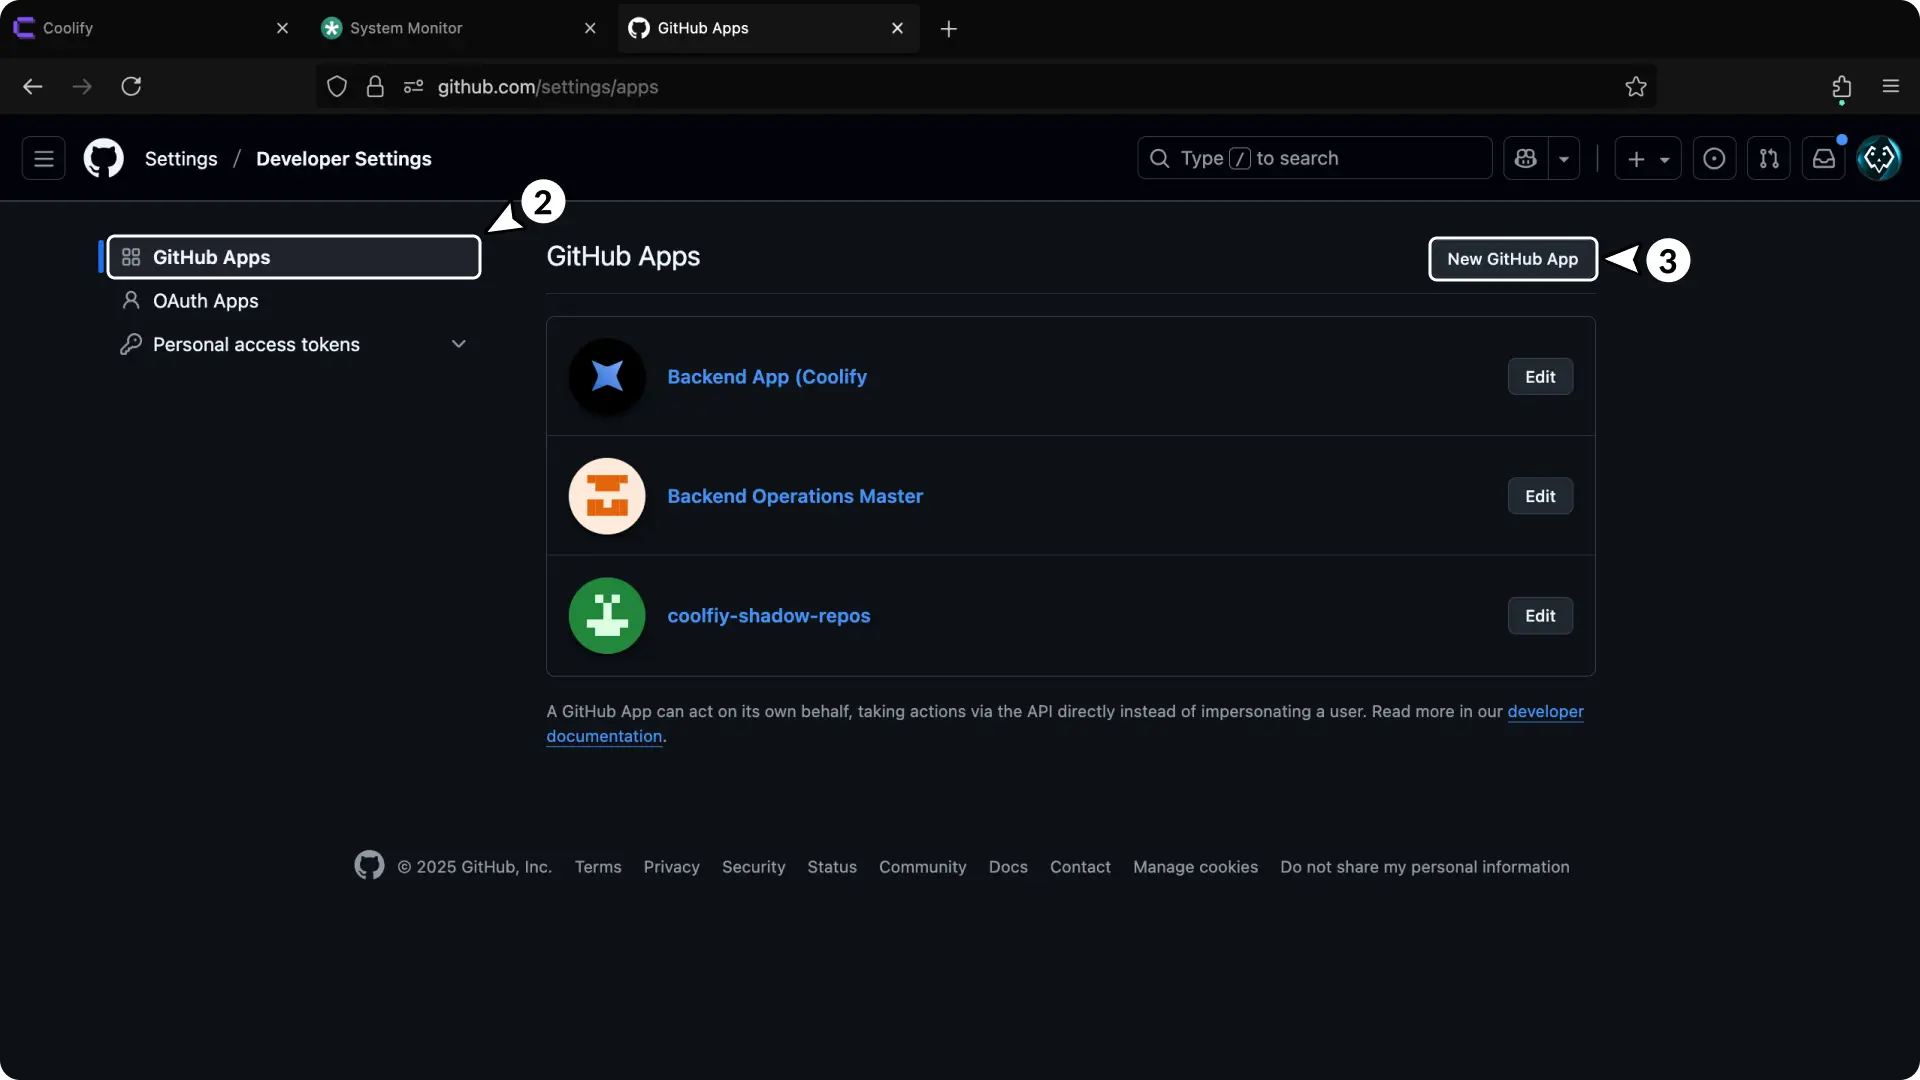
- Click the "New github app" button
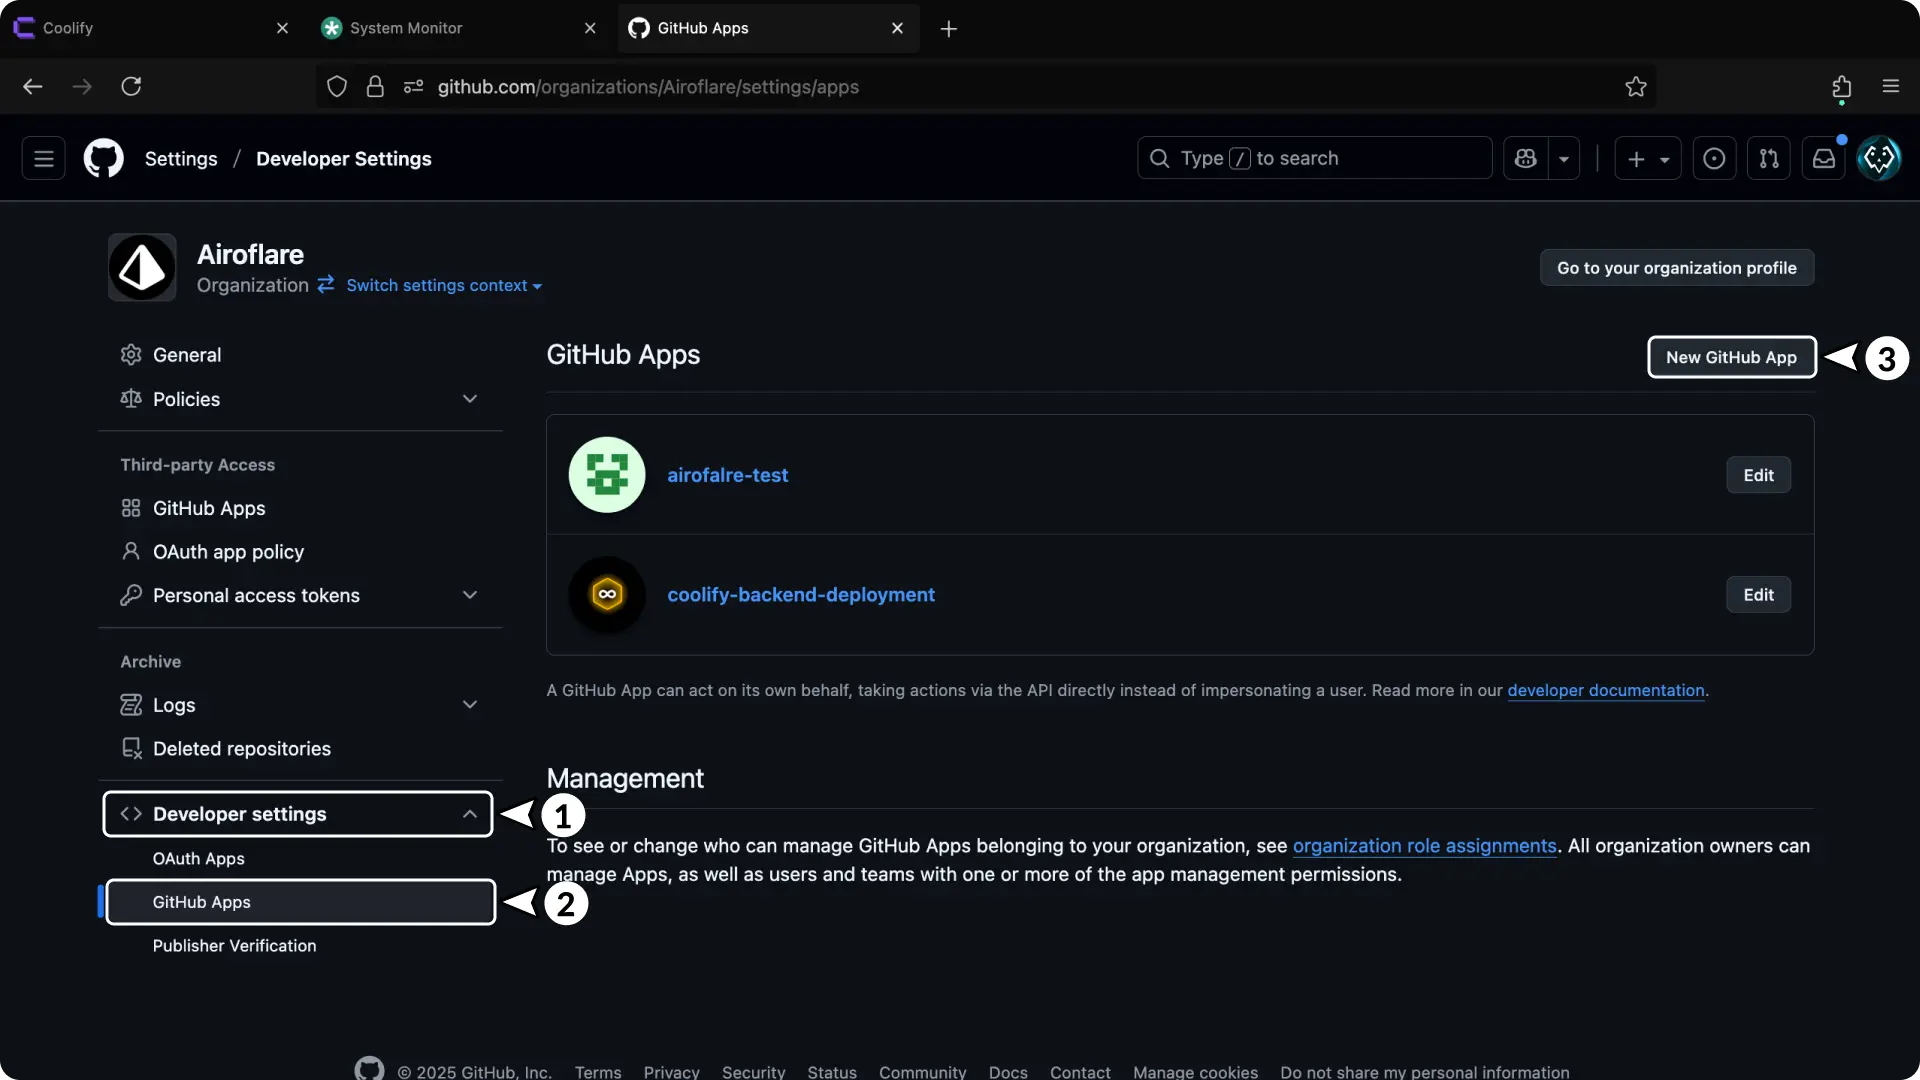
- Go to your github Organization settings
- On the sidebar scroll down till you see "developer settings" and click on it
- Click on "Github Apps"
- Click the "New github app" button
3. Setup the Github App on Github
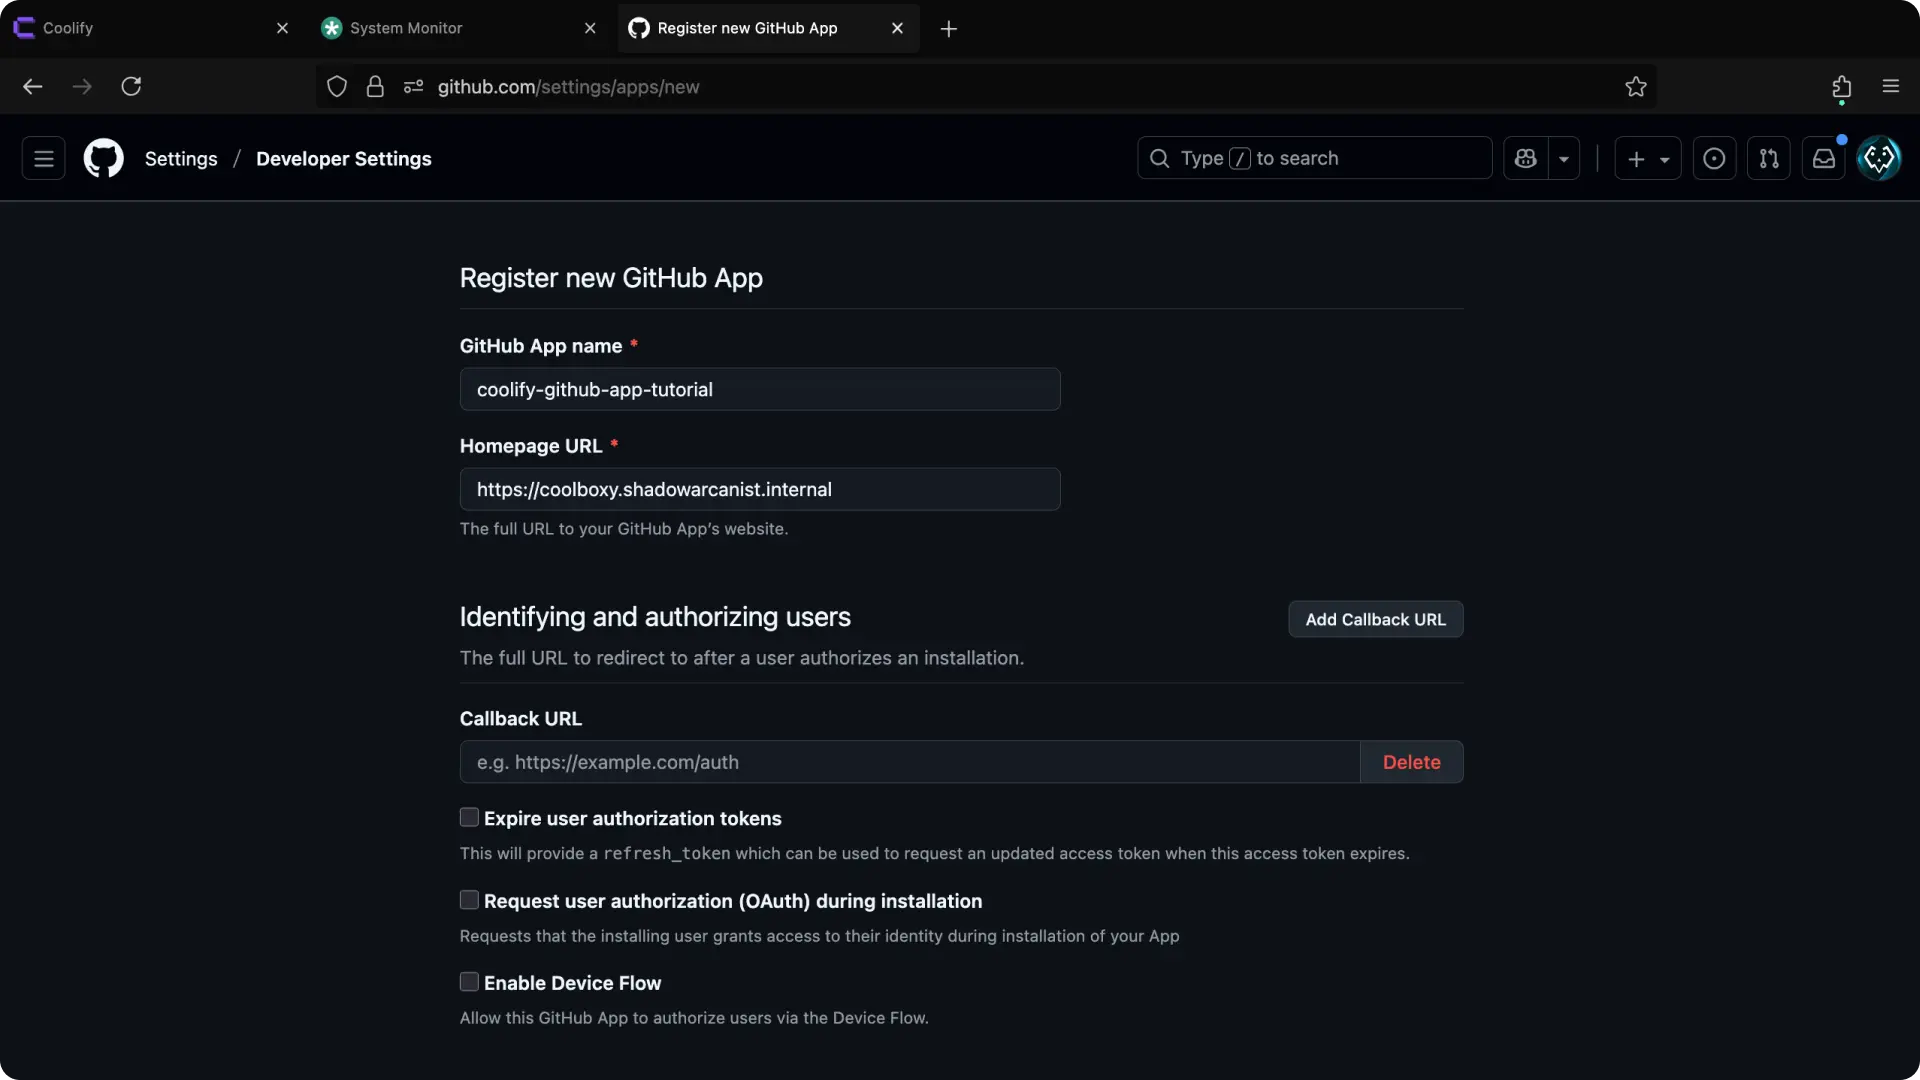
- Give your app a name
- Enter homepage url for your app (this can be anything)
-
Scroll down till you see the "Post Installation" section
-
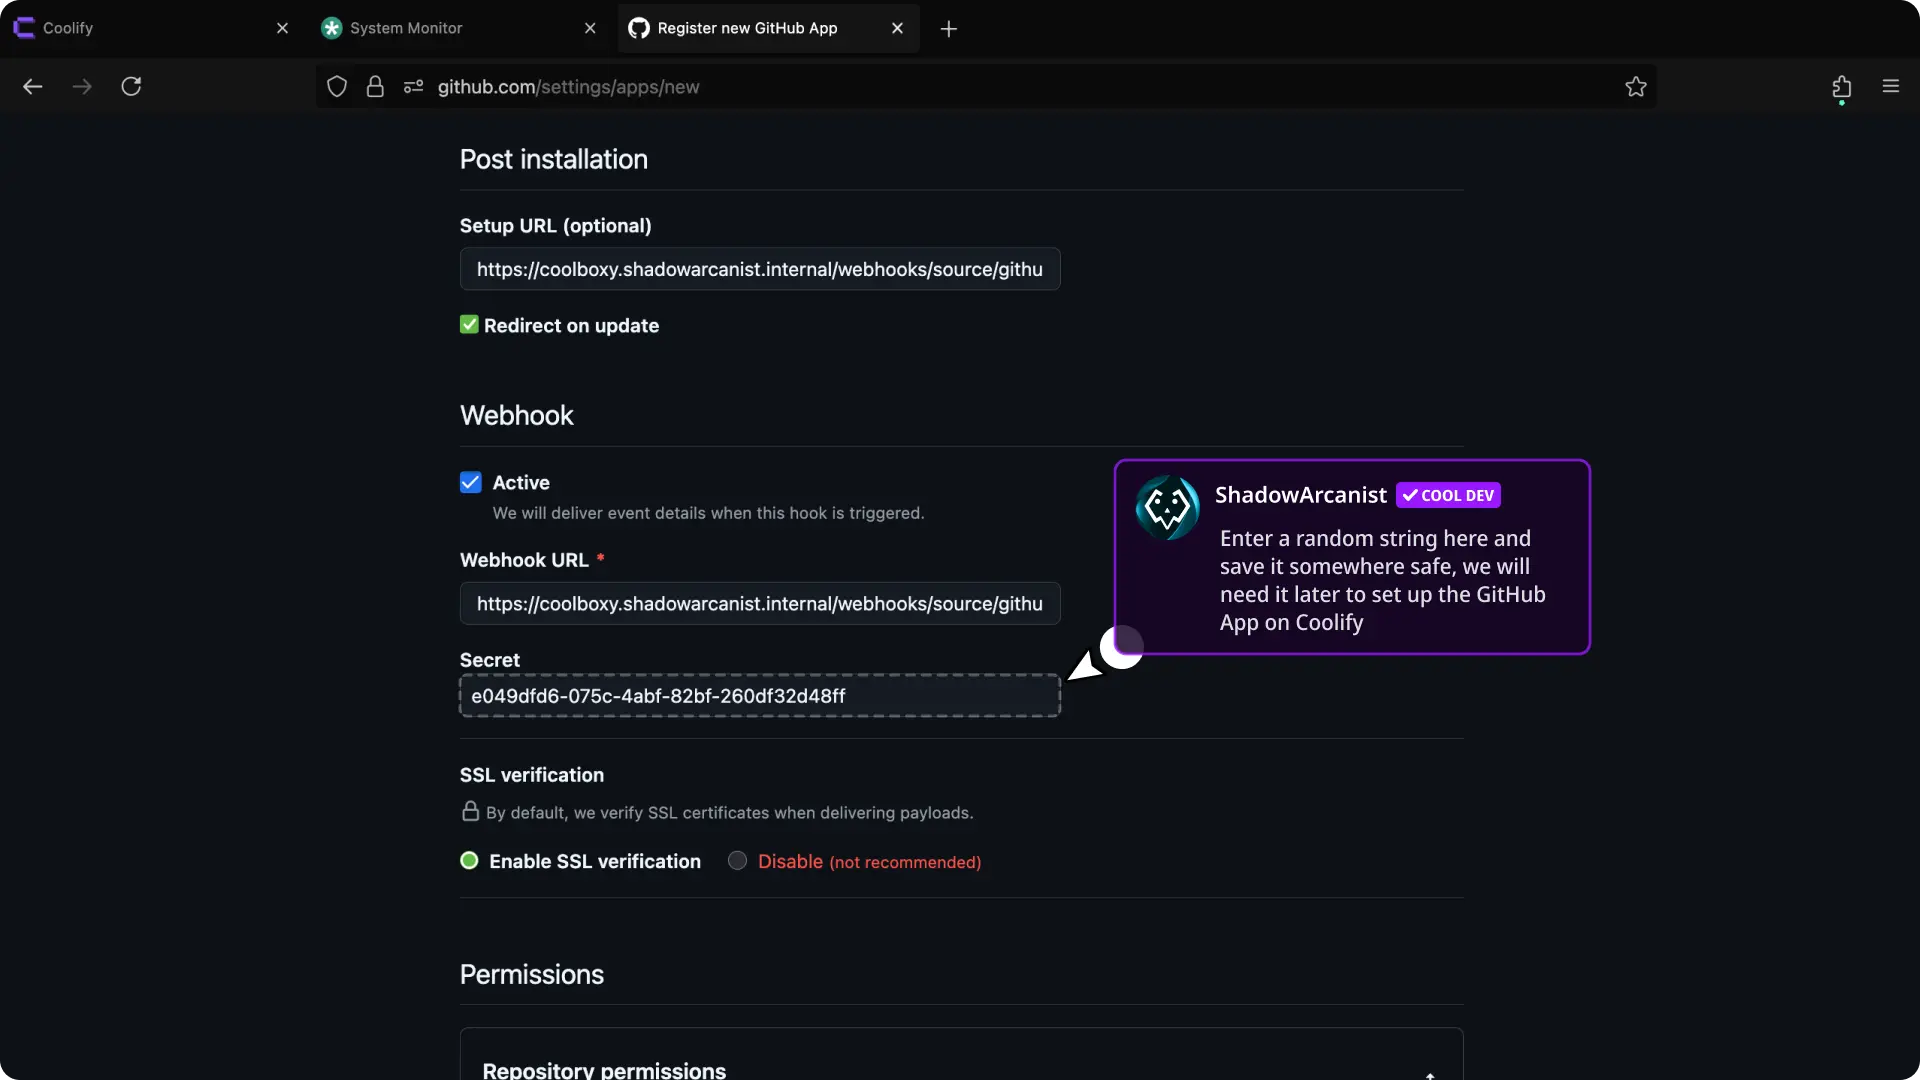
Enter Setup URL:
https://coolboxy.shadowarcanist.internal/webhooks/source/github/install?source=a8000cg0g0ogcc0ggkk8ow4k -
Enable the option
Redirect on Update -
Enter Webhook URL:
https://coolboxy.shadowarcanist.internal/webhooks/source/github/events
You have to replace https://coolboxy.shadowarcanist.internal with your Coolify dashboard url and replace a8000cg0g0ogcc0ggkk8ow4k with the Source ID Step 1
- Enter Webhook Secret (this has to be a random string, you can use tools like Random String Generator)
- Enable the option
Enable SSL verification

- Scroll down till you see the "Permissions" section
- Set Access to
Read-onlyforContents - Set Access to
Read and writeforPull Requests(Only needed if you plan to use Preview deployments feature) - Set Access to
Read-onlyforEmail addresses
HEADS Up!
On the screenshot above for permissions section we have hidden lot of Permission and only shown the Permission needed to setup Github app for Coolify.
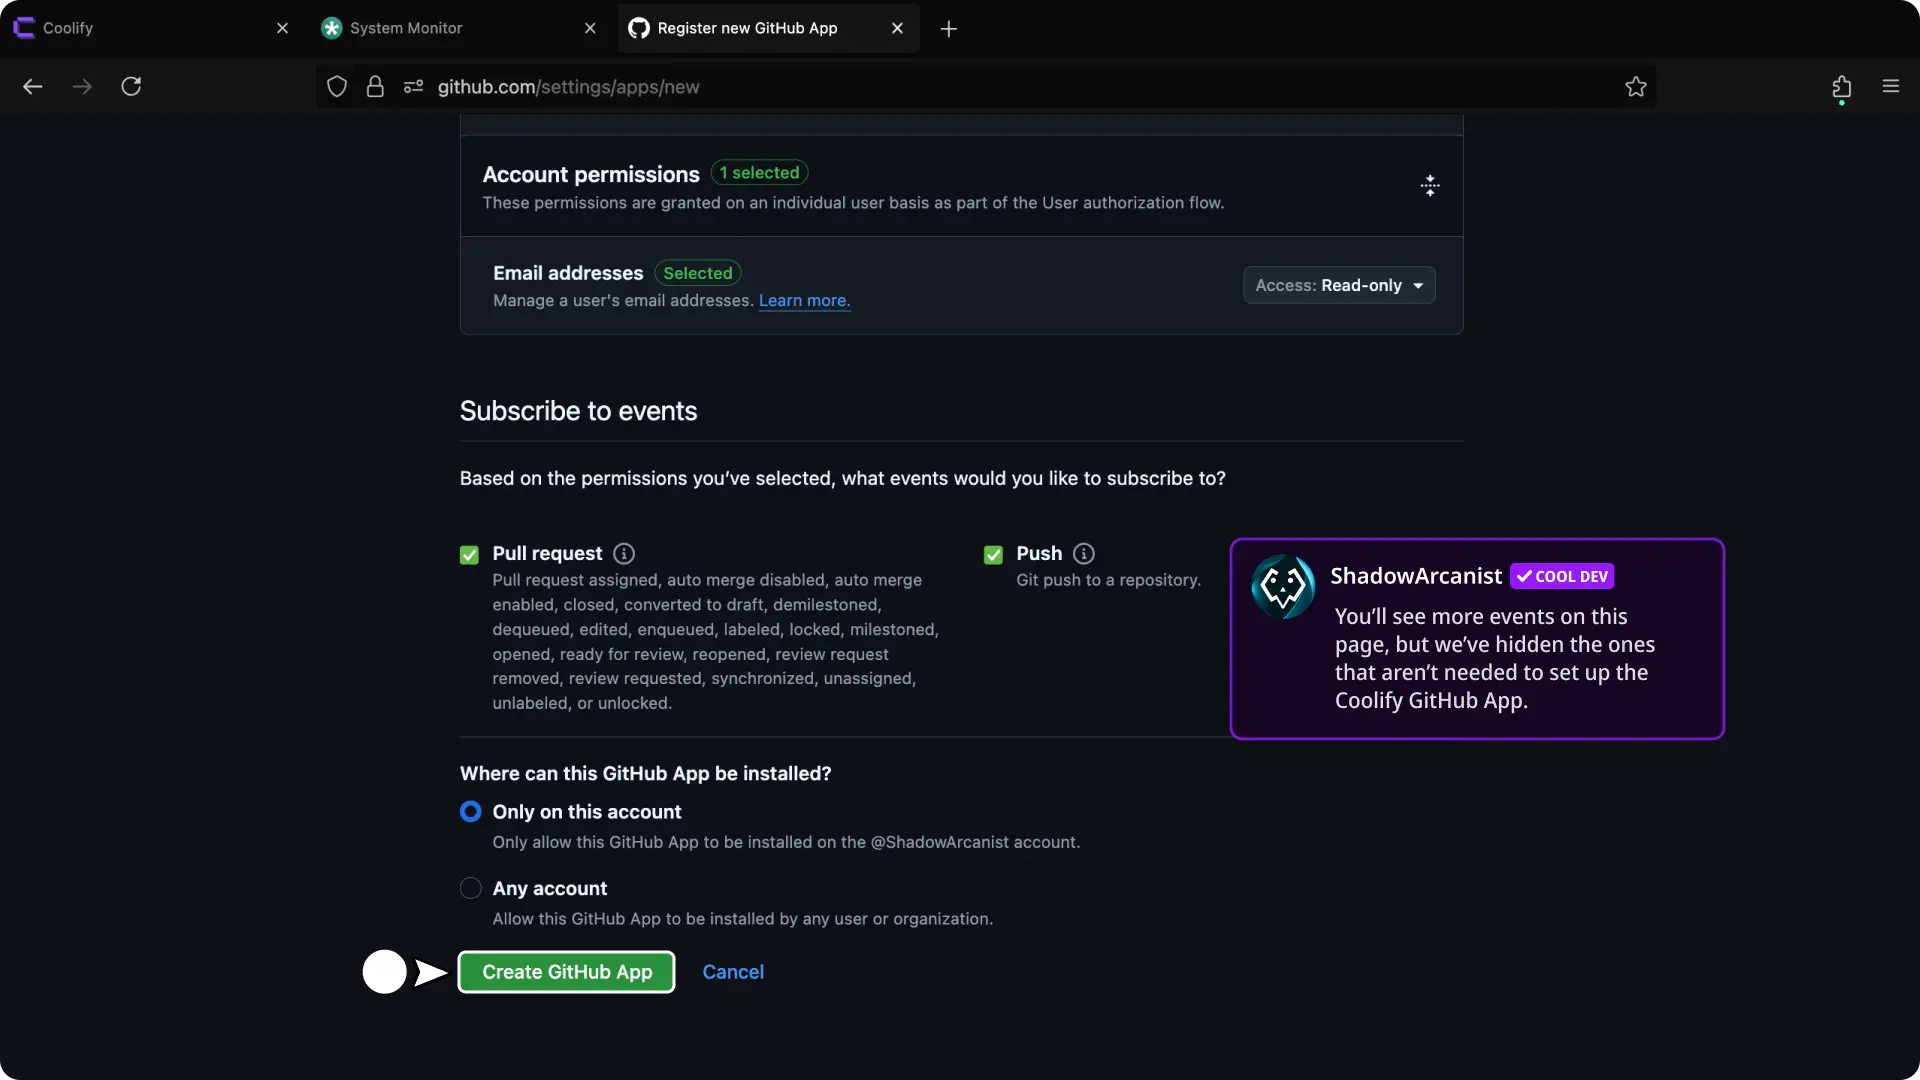
- Scroll down till you see the "Subscribe to events" section
- Enable the option
Push - Enable the option
Pull requests(Only needed if you plan to use Preview deployments feature) - Select the option
Only on this account(Prevents others from installing our Github app to their github accounts) - Click the button "Create Github App"
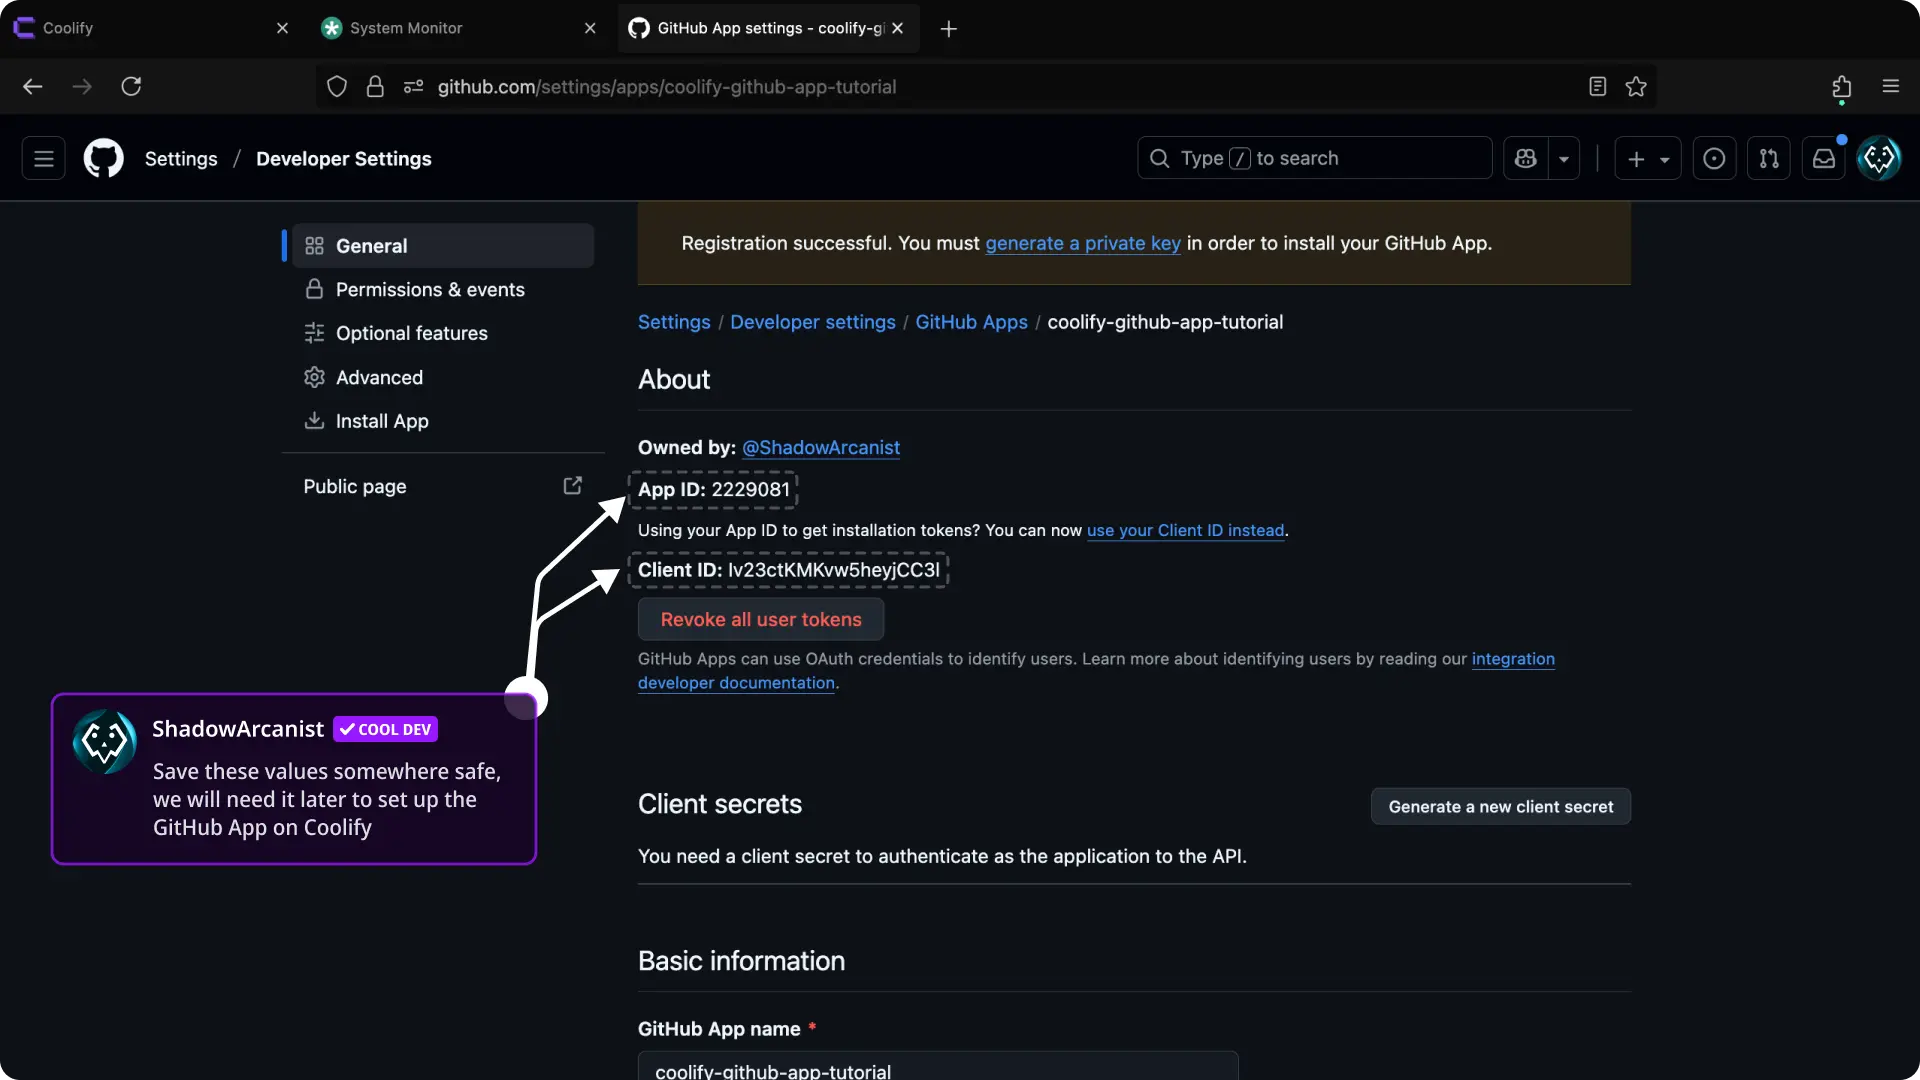
- Save the
App IDandClient IDsomewhere safe (we have to enter this on Coolify later)
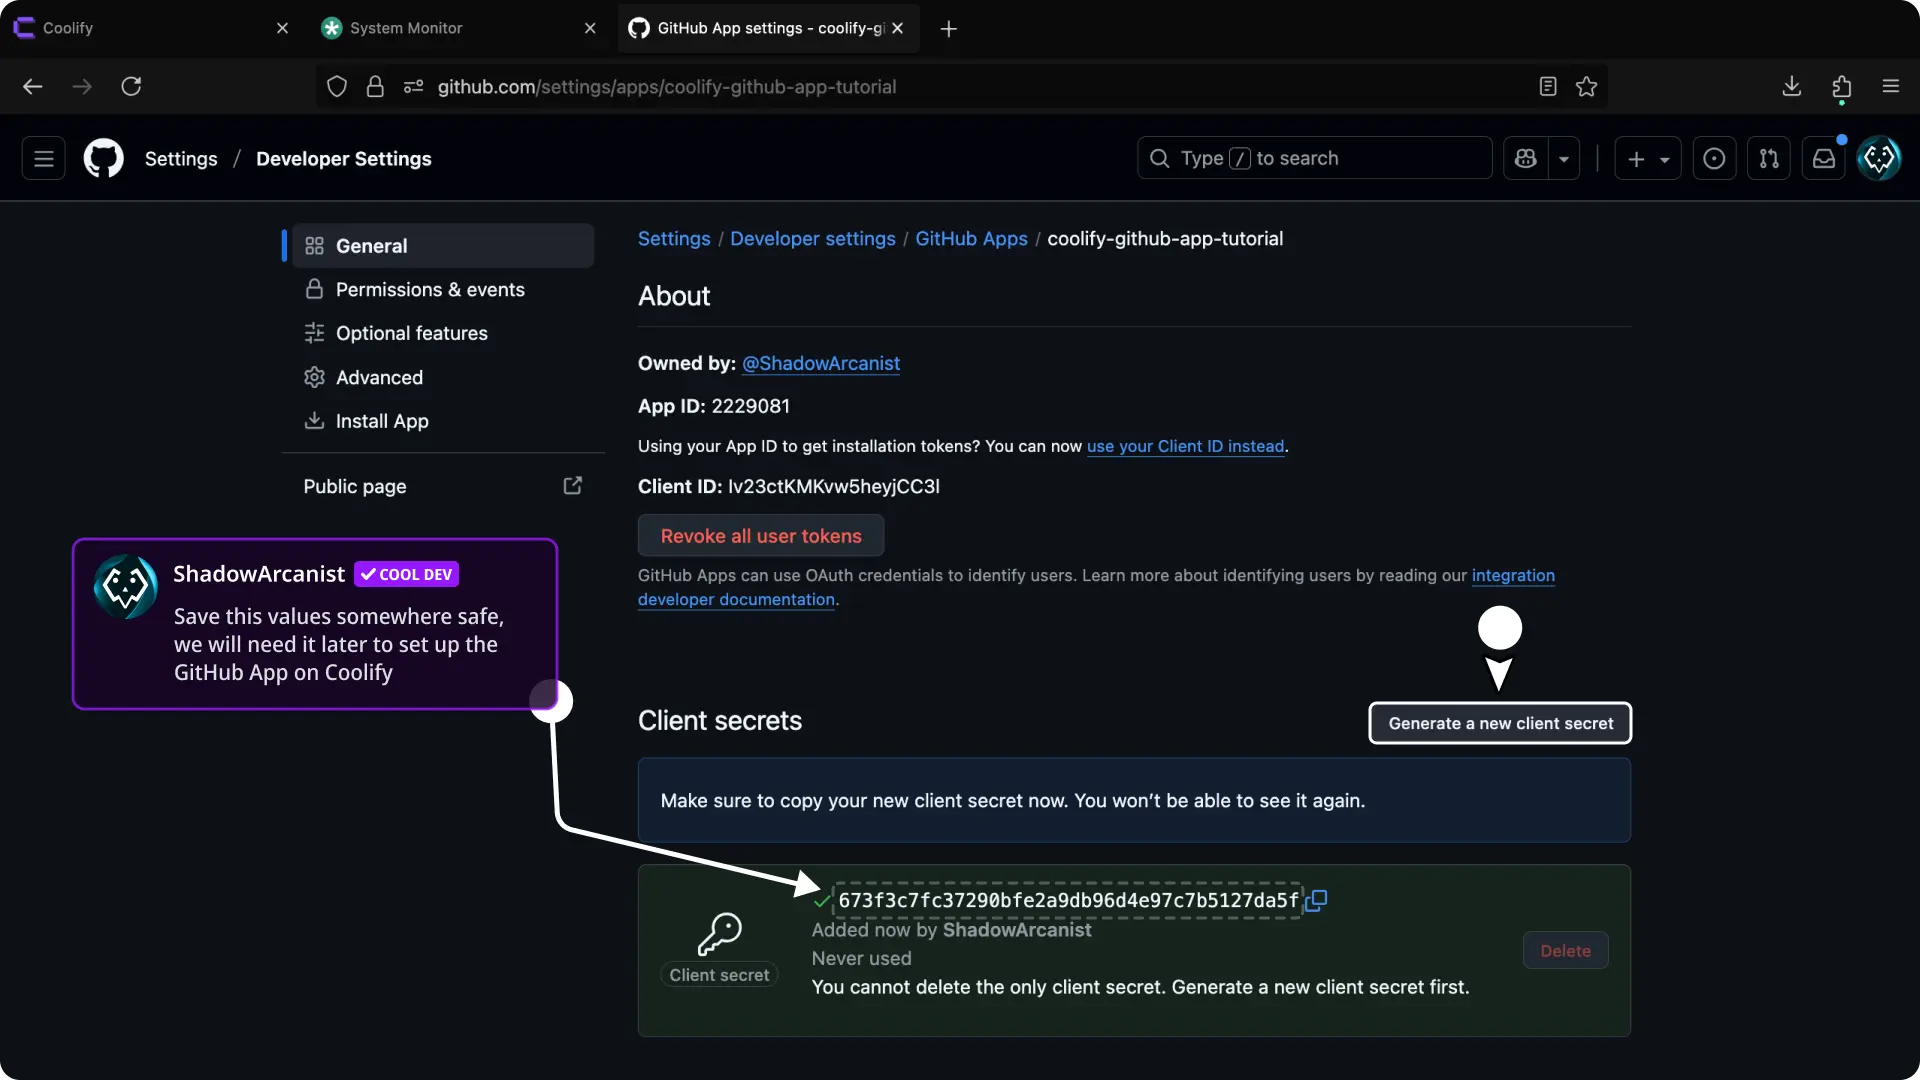
- Click the
Generate a new client secretbutton - Save the
client secretsomewhere safe (we have to enter this on Coolify later)

- Scroll down till you see the "Private keys" section
- Click the
Generate a private keybutton (this will automatically download the private key as a.pemfile)

- Click "Install App" from the sidebar
- Click the "Install" button
- Select the repositories you want the app to have access to.
- Click the "Install" button

- Click the Settings icon (this will take you to your account or organization applications page)
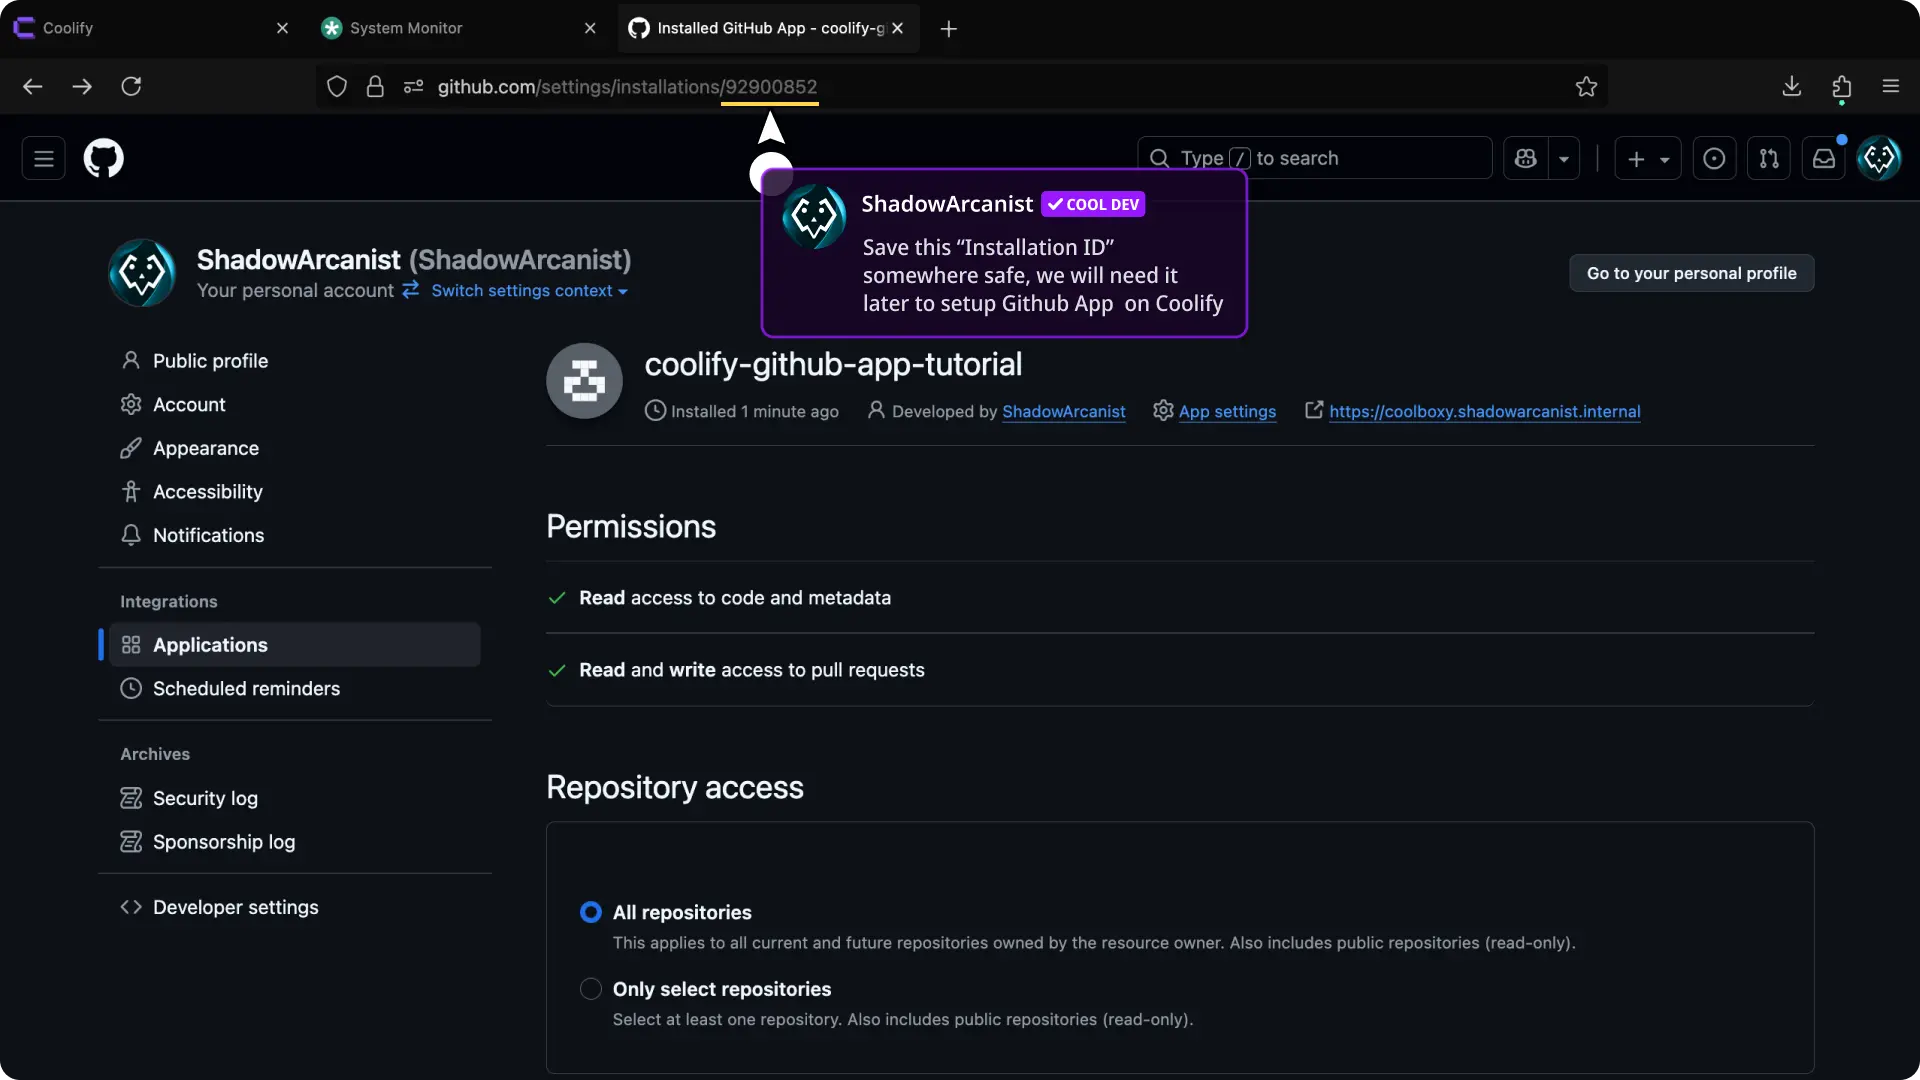
- Save the
Installation IDsomewhere safe (Installation ID is the number you see on your url bar after/installations/)
4. Add Private keys on Coolify
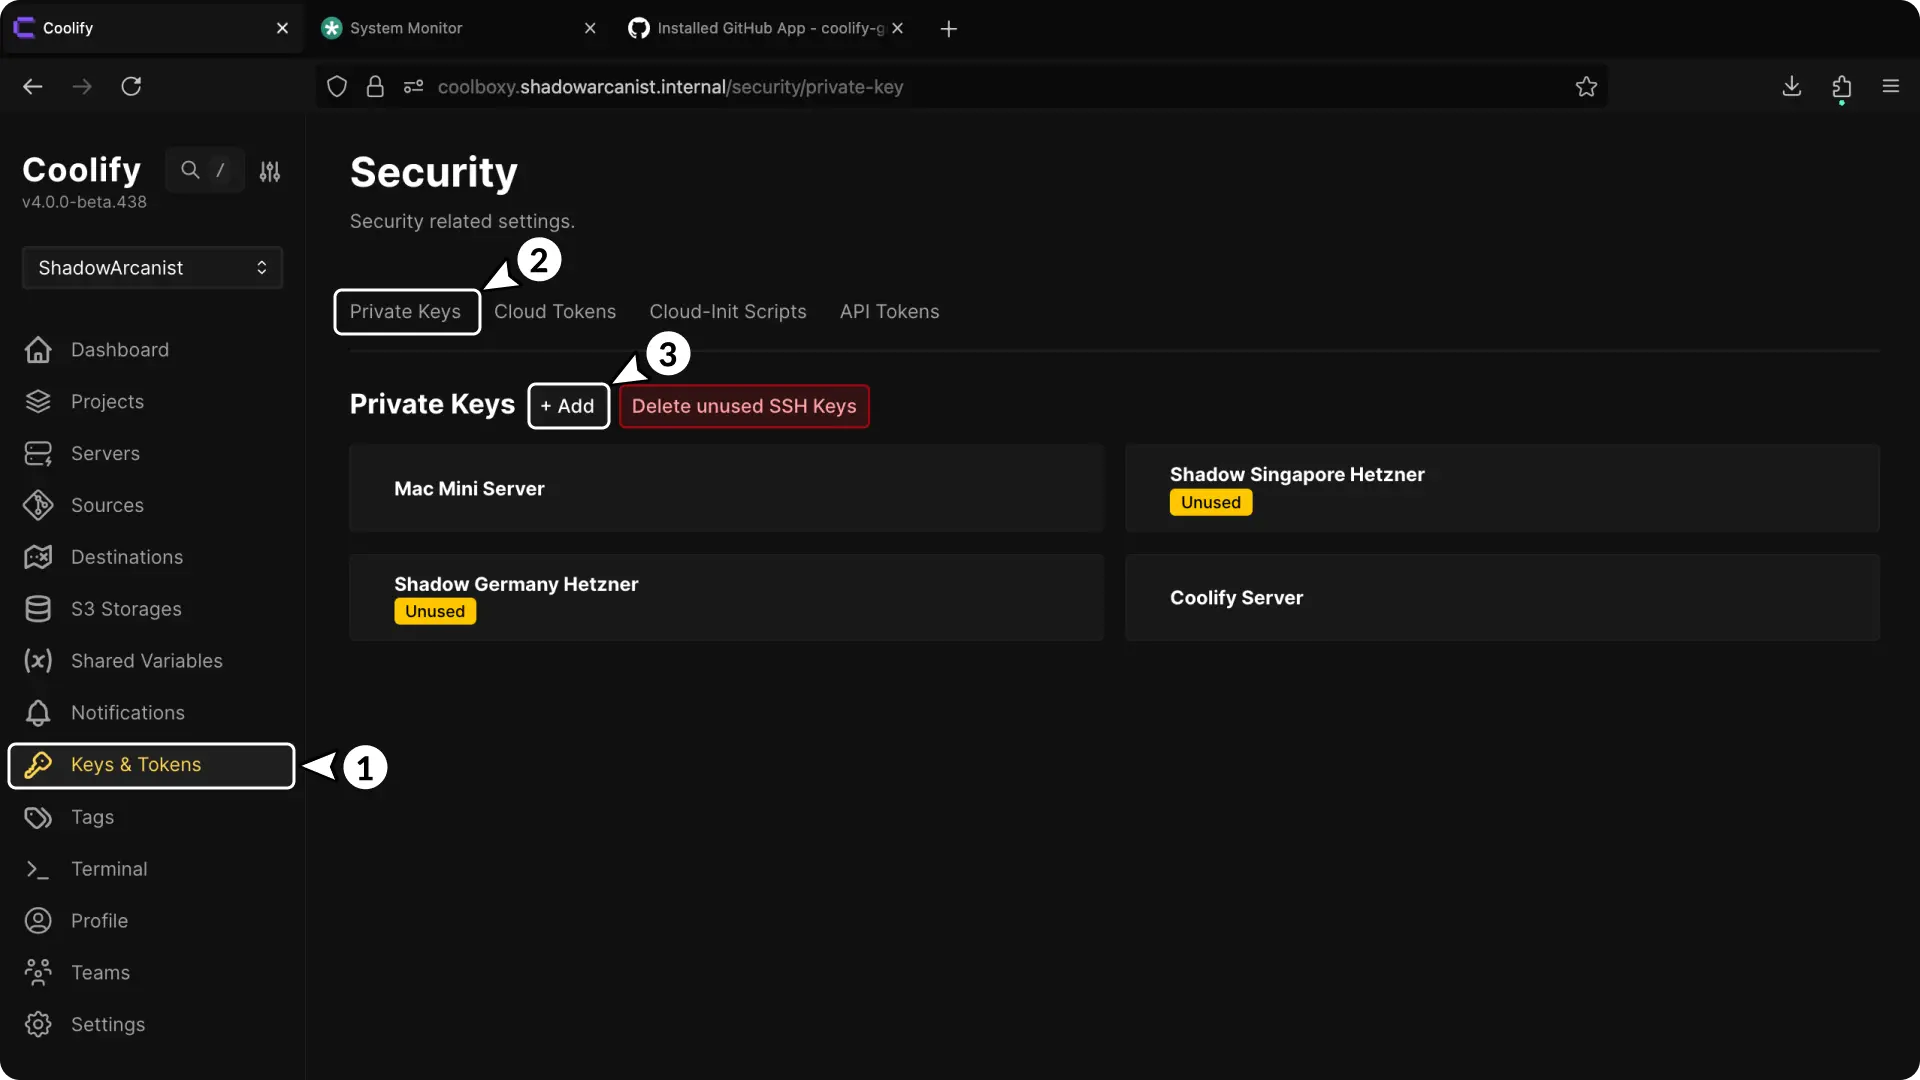
- In your Coolify dashboard, click on Keys & Tokens from the sidebar.
- Click on Private keys tab.
- Click the + Add button to add a new private key.
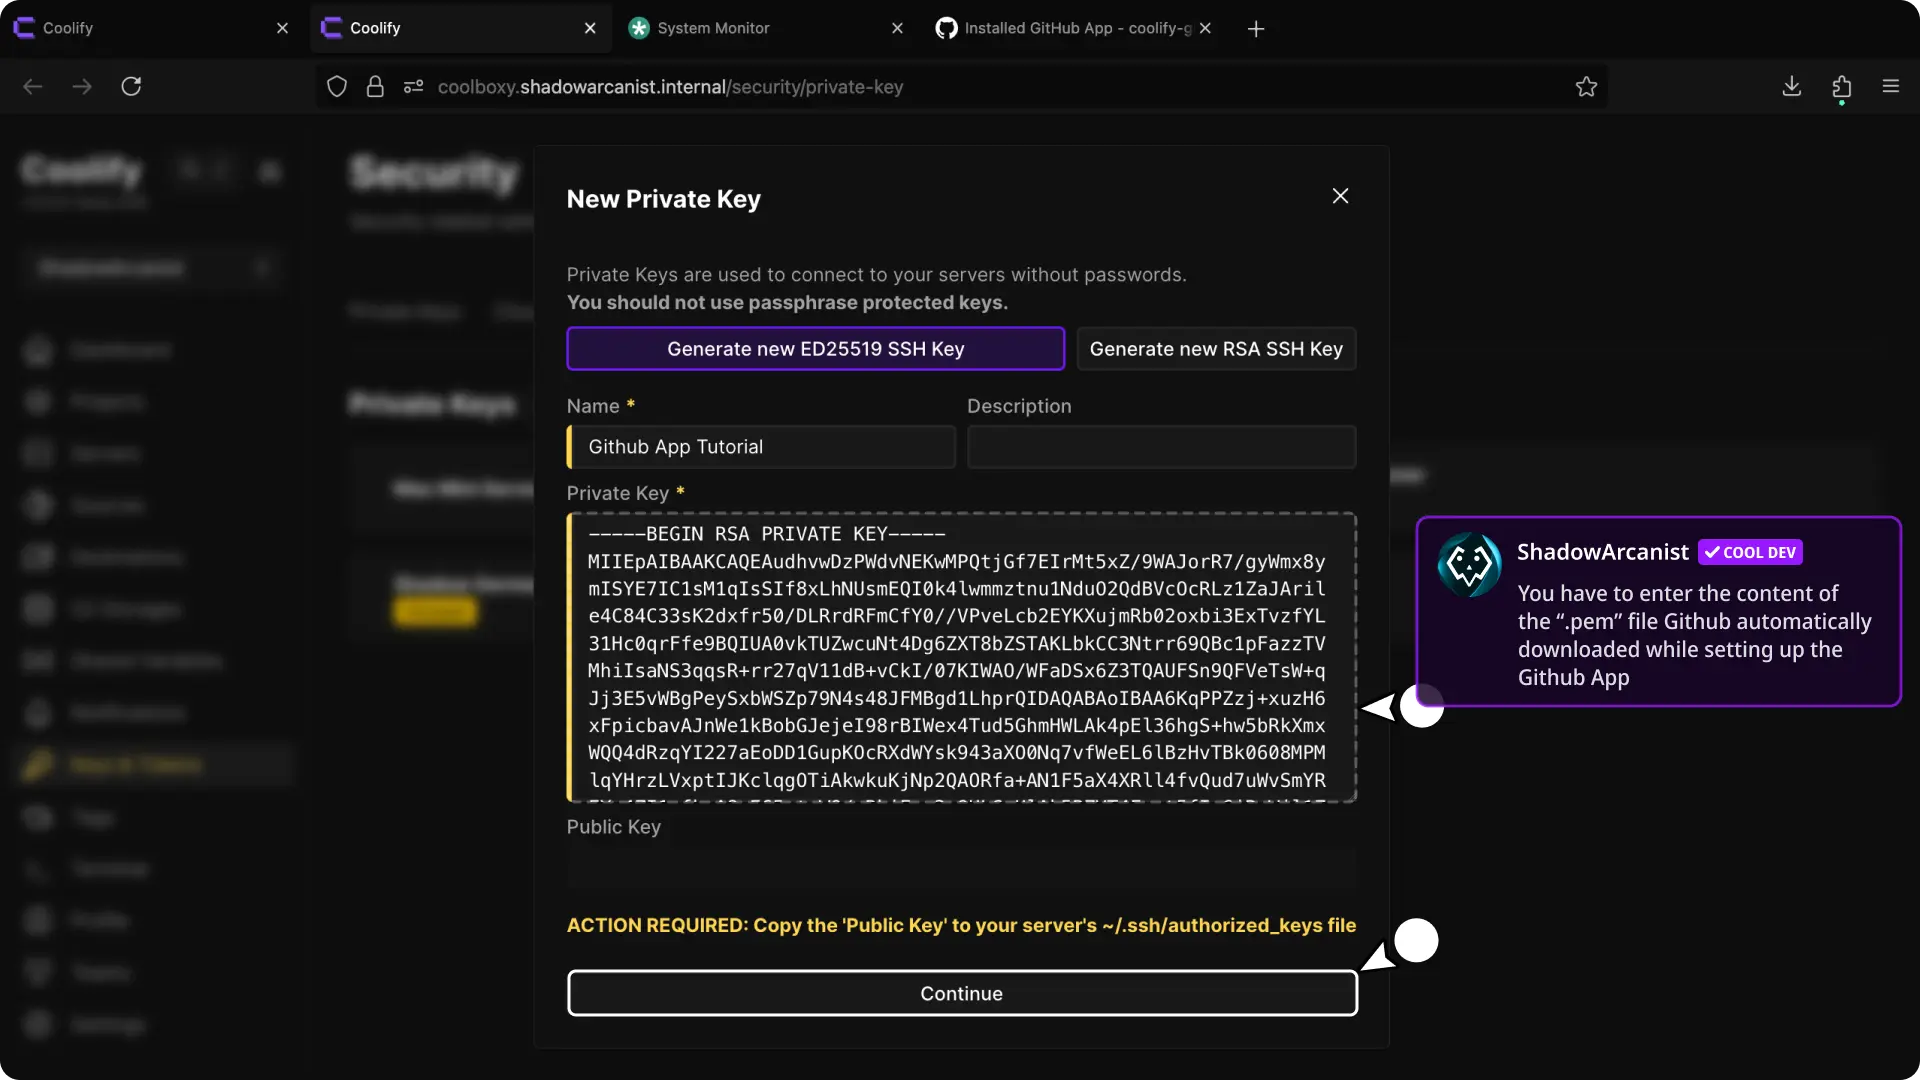
- Give your Private key a name
- Paste the content of the
.pemfile which github automatically downloaded to your machine when you setup the Github App on Github - Click on "Continue" button
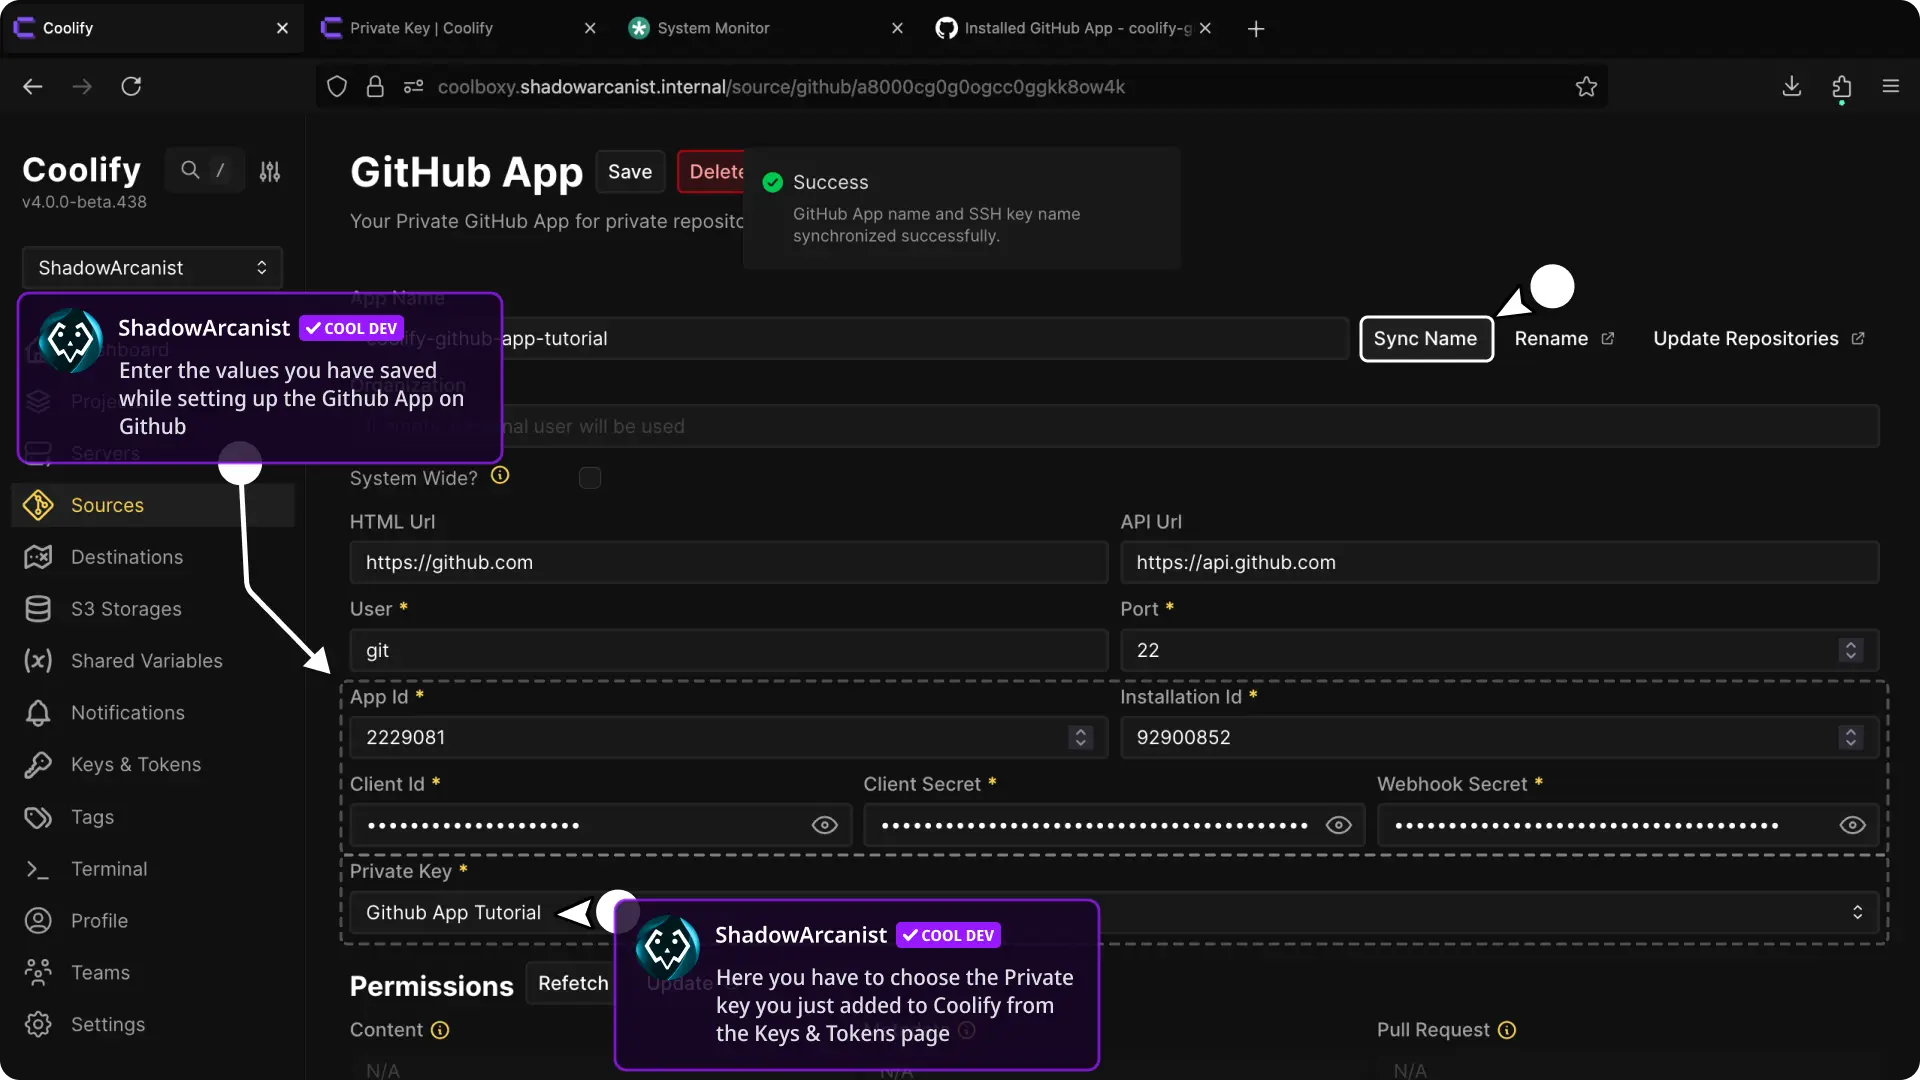
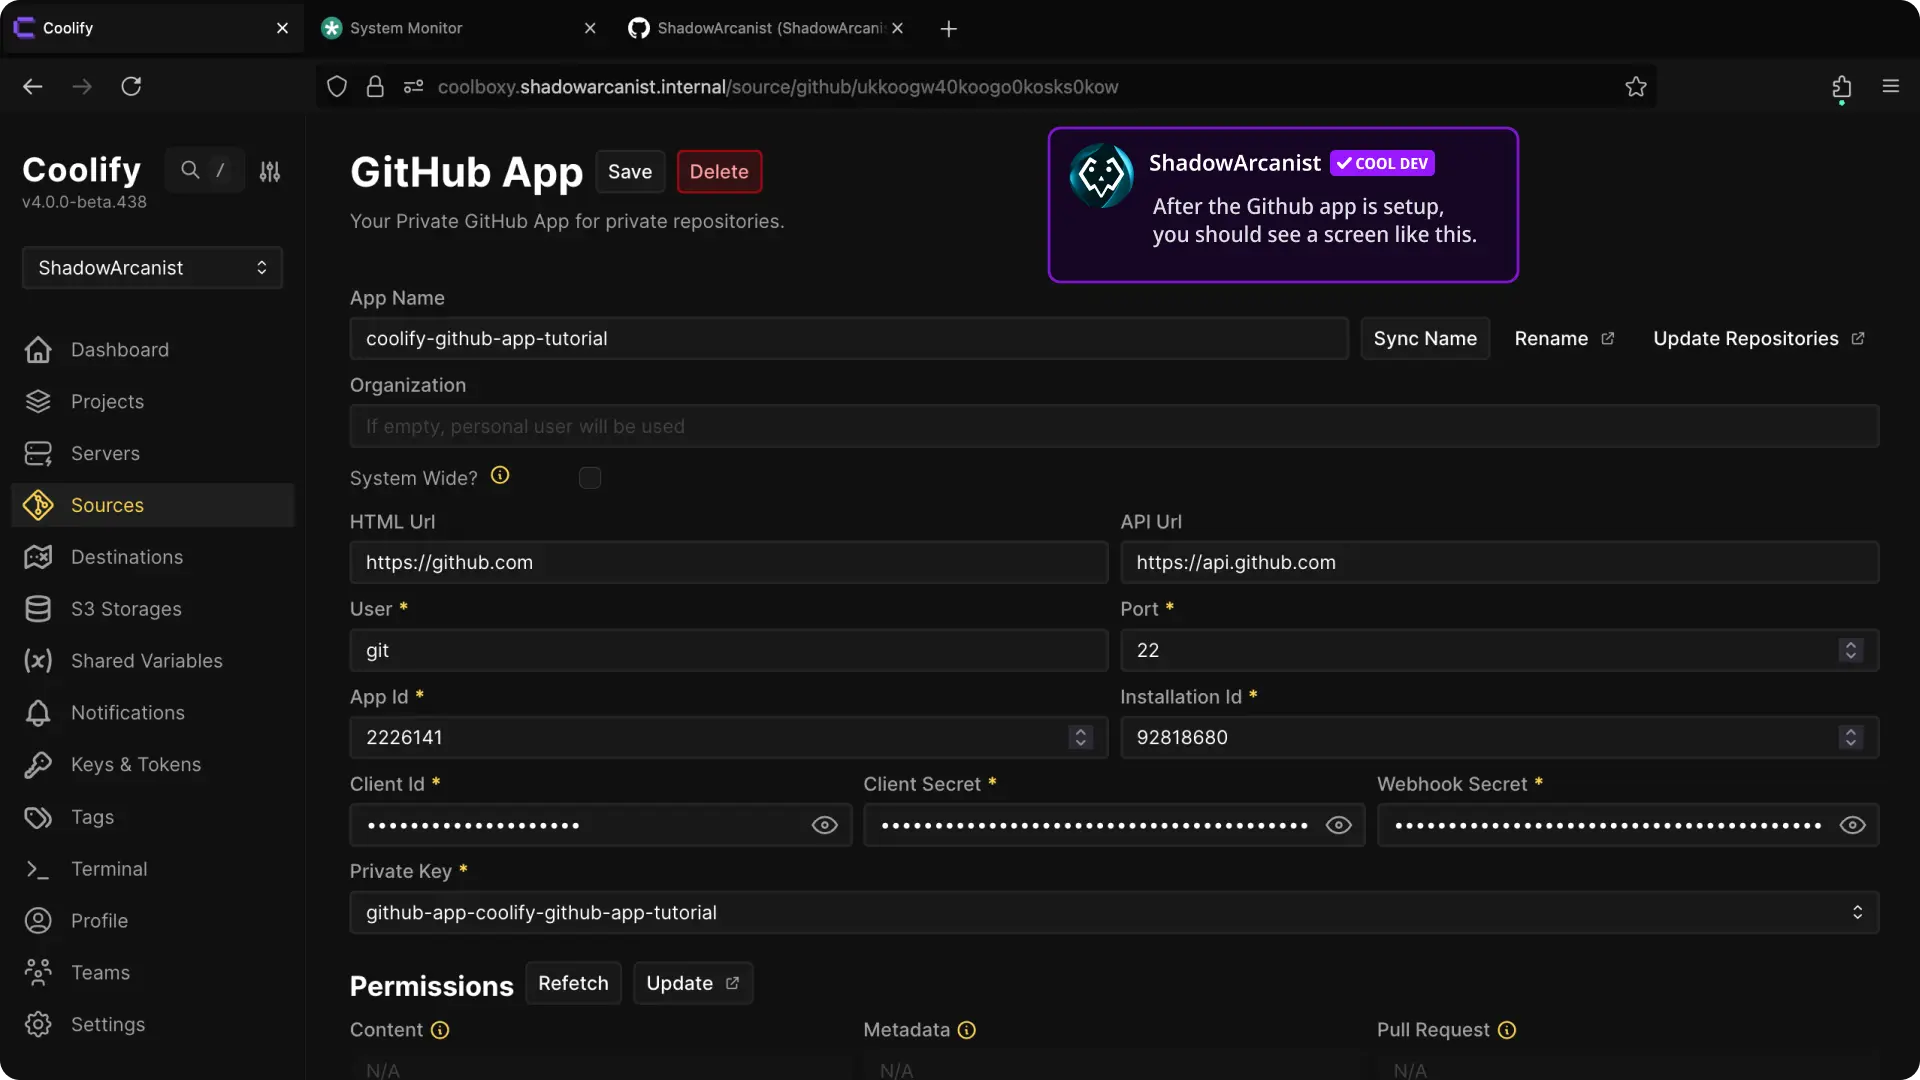
- In your Coolify dashboard, click on Sources from the sidebar and select your Github app from the list
- Enter the details (App ID, Installation ID etc..) you saved on previous steps
- On "Private key" select the key you just added to Coolify
- Click on "Sync Name" button, if you see a success message then you have done everything correctly and you can start using the Github app!
5. Create a New Resource on Coolify
- Select your project from the Coolify dashboard.
- Click the + New button to create a new resource.
6. Select Private Repository (with Github App) as Resource Type

Select Private Repository (with Github App) from the available resource types.
6. Choose Your Server
HEADS UP!
Coolify automatically selects the localhost server if you don't have any remote servers connected. In such cases, skip to the next step.
Choose the server where you want to deploy the application.
7. Choose Your Github App
Select the Github App you created in Coolify from the list of available Apps.
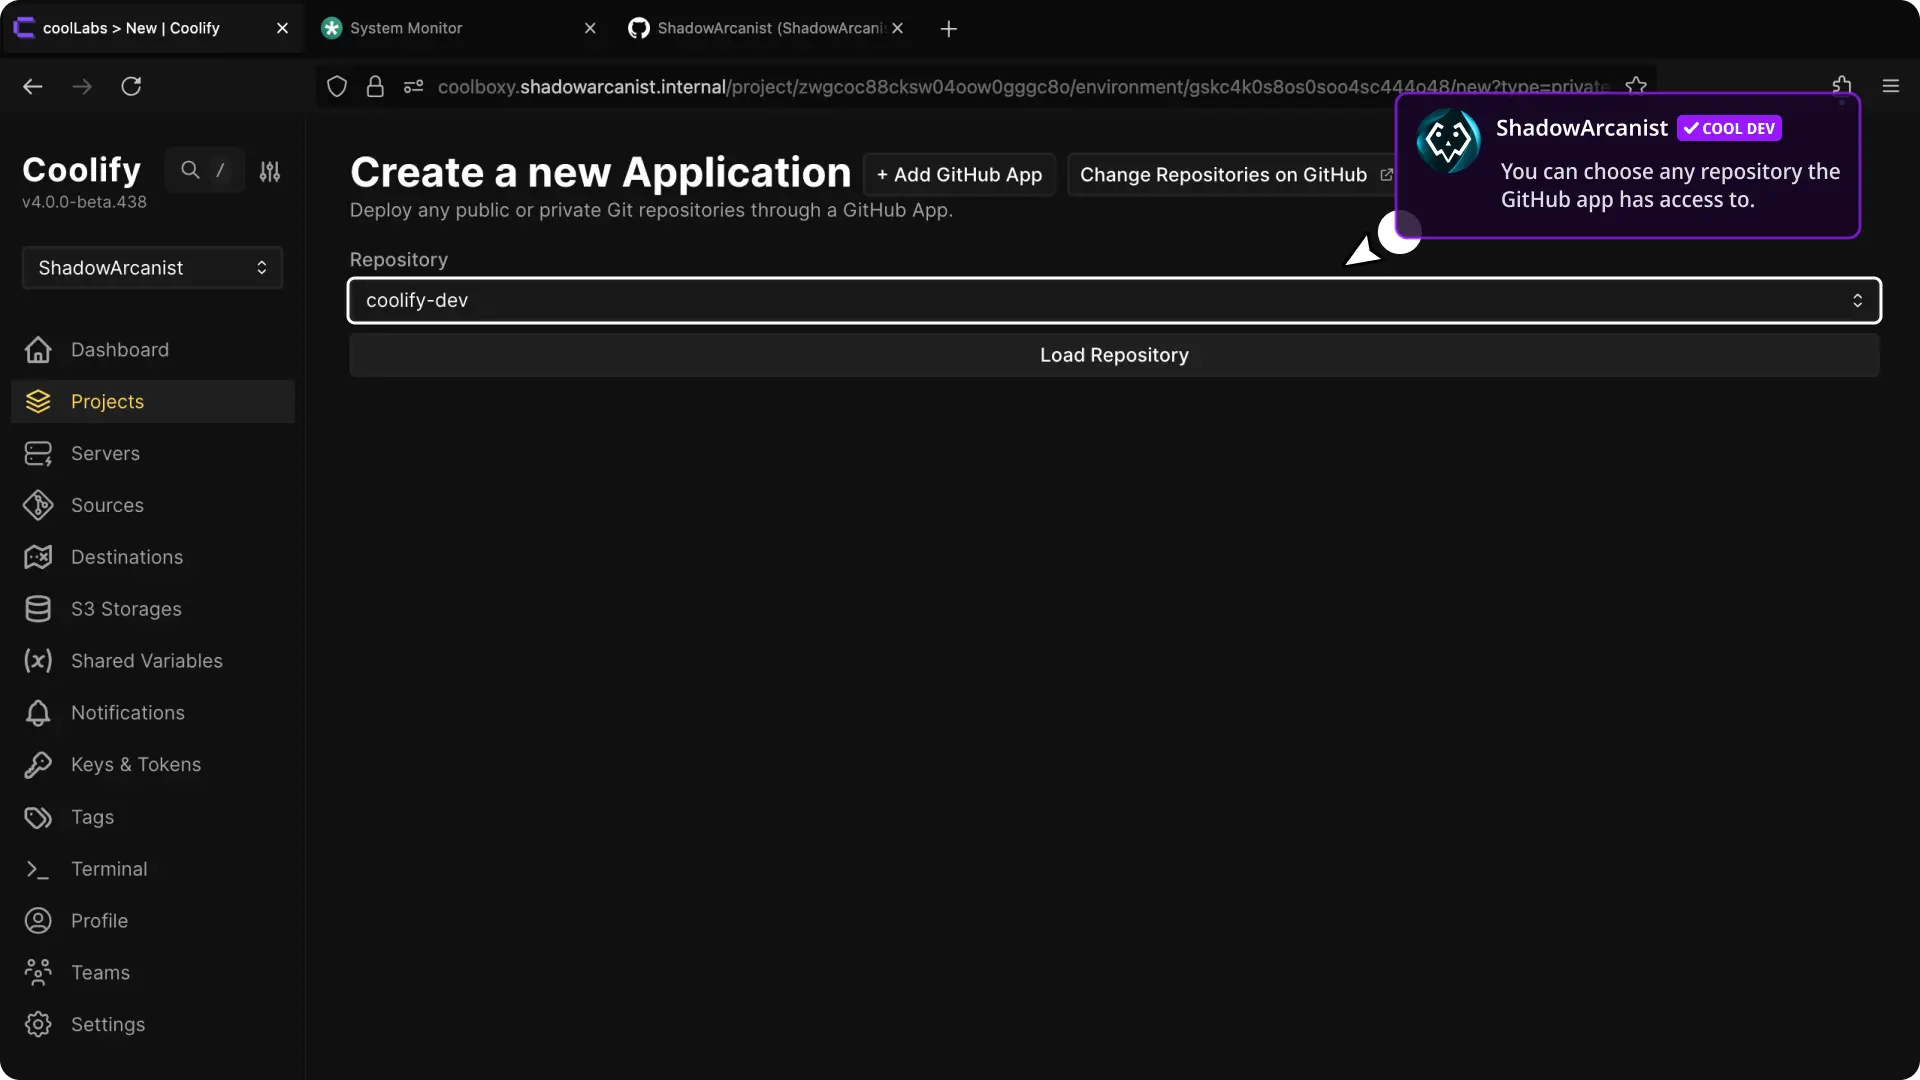
8. Configure the Application and Deploy

- Choose Repository and click on "Load Repository" button.
- After selecting the repository, configure the buildpack, ports, and other settings. (Refer to our dedicated guide on builds for more details.)
Once configured, deploy your application.
That's it!