Dockerfile includes step-by-step instructions to build a Docker image that Coolify uses to deploy your application or website.
The Dockerfile build pack allows you to use your own Dockerfile to deploy your application, you have complete control over how your application is built and deployed on Coolify.
How to use Dockerfile?
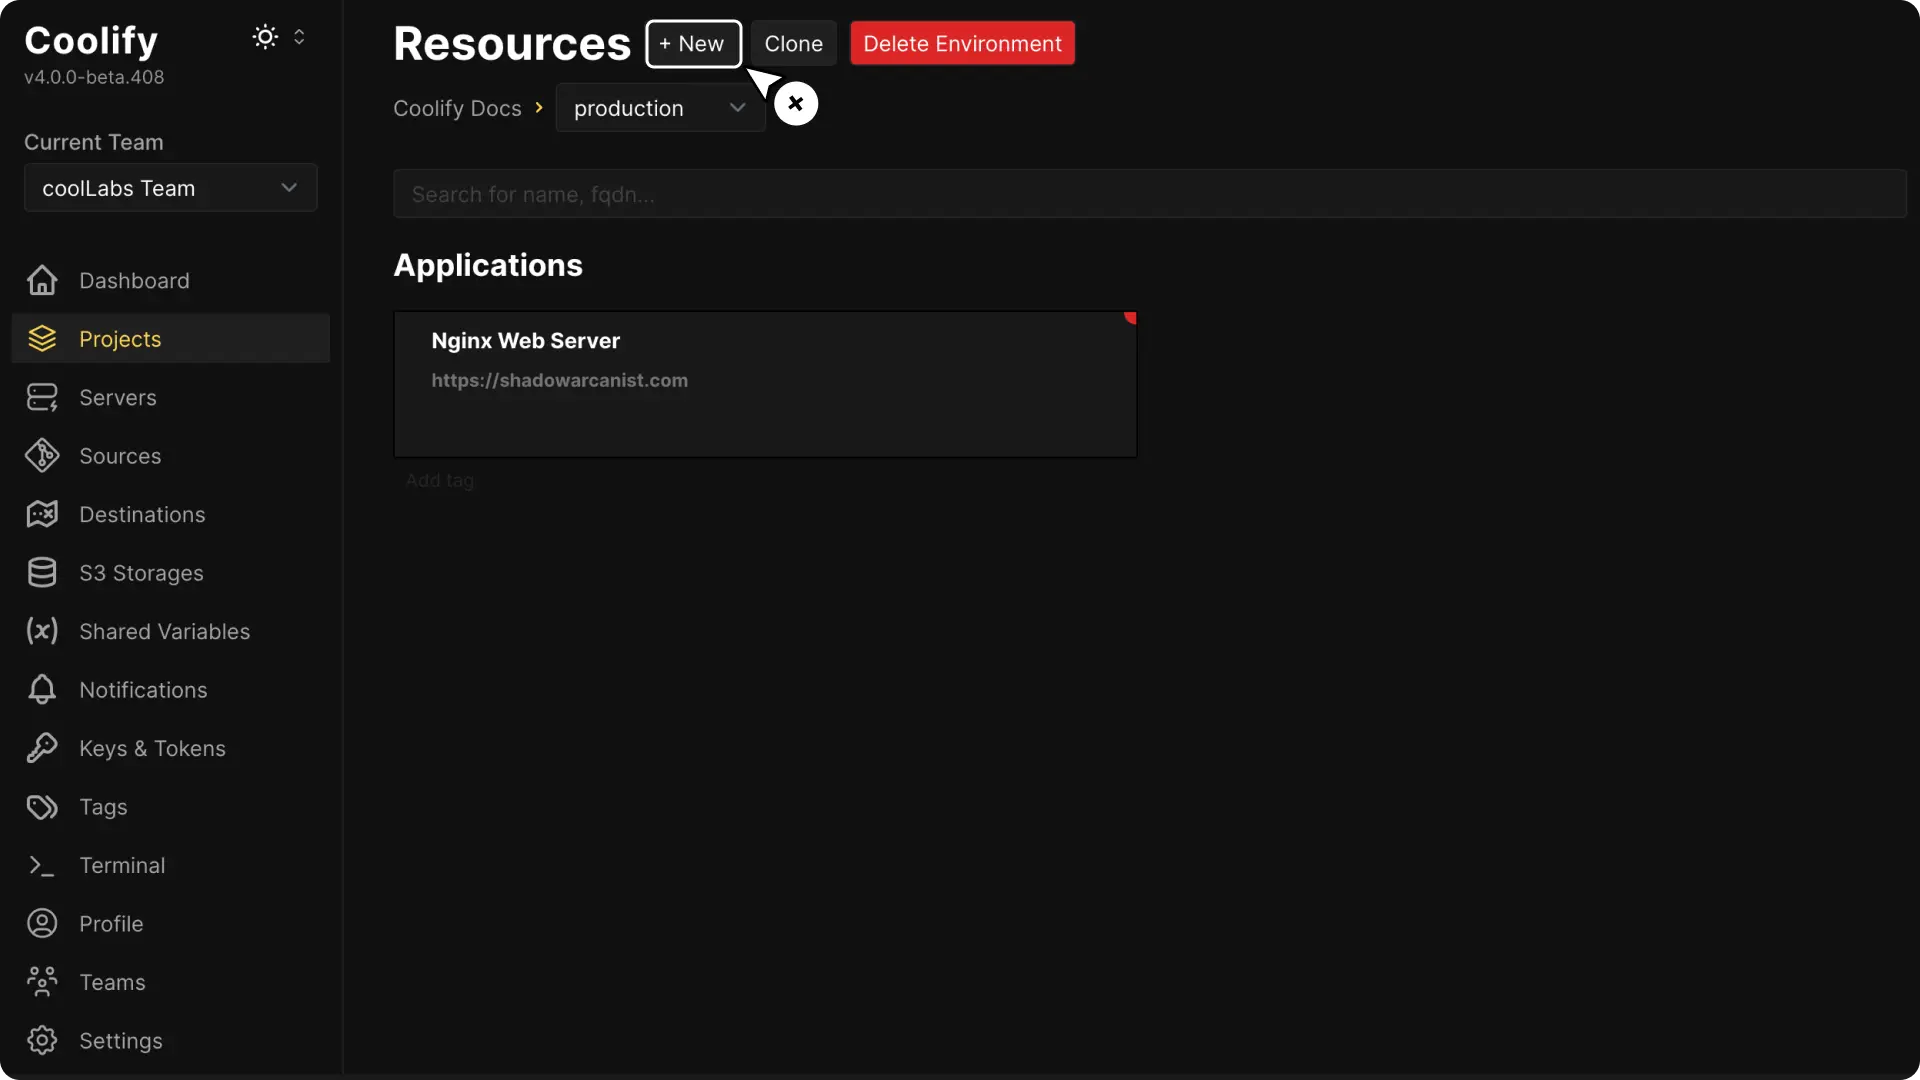
1. Create a New Resource in Coolify
On the Coolify dashboard, open your project and click the Create New Resource button.
2. Choose Your Deployment Option
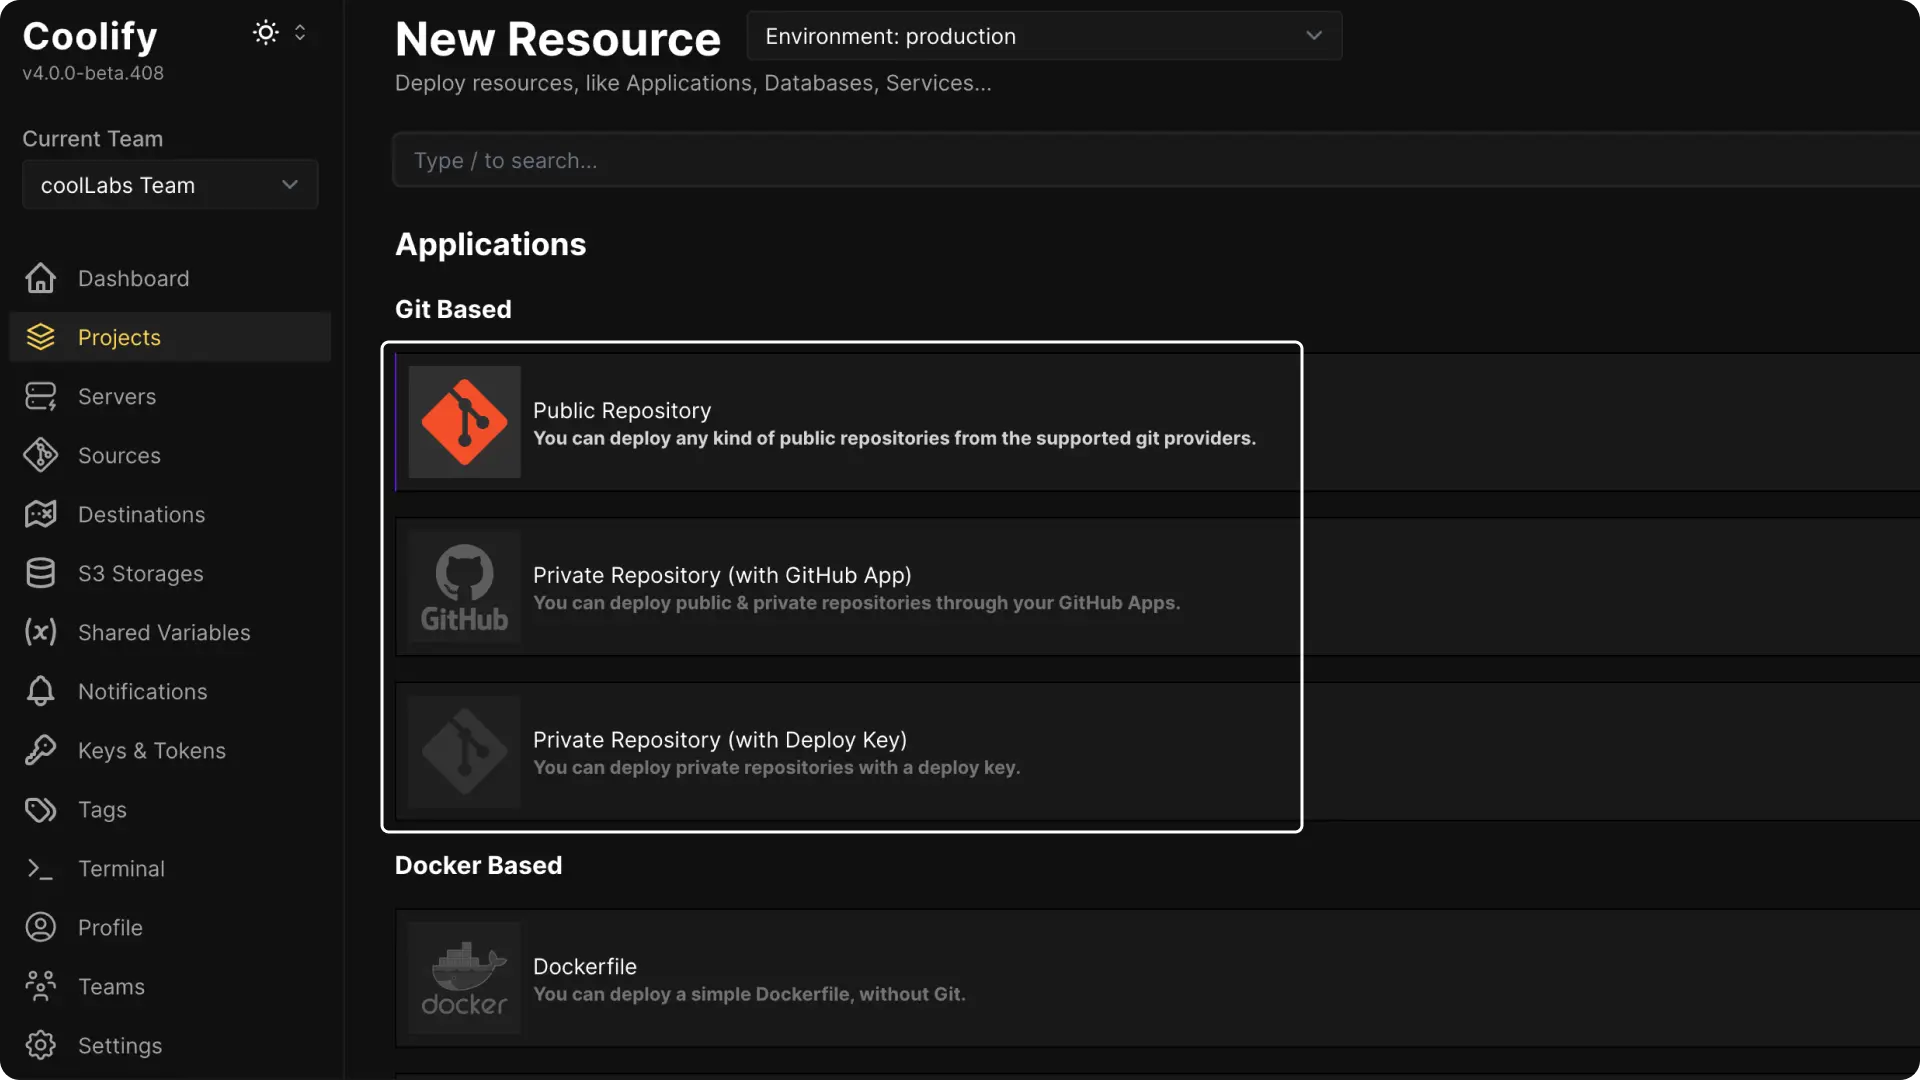
A. If your Git repository is public, choose the Public Repository option.
B. If your repository is private, you can select Github App or Deploy Key. (These methods require extra configuration. You can check the guides on setting up a Github App or Deploy Key if needed.)
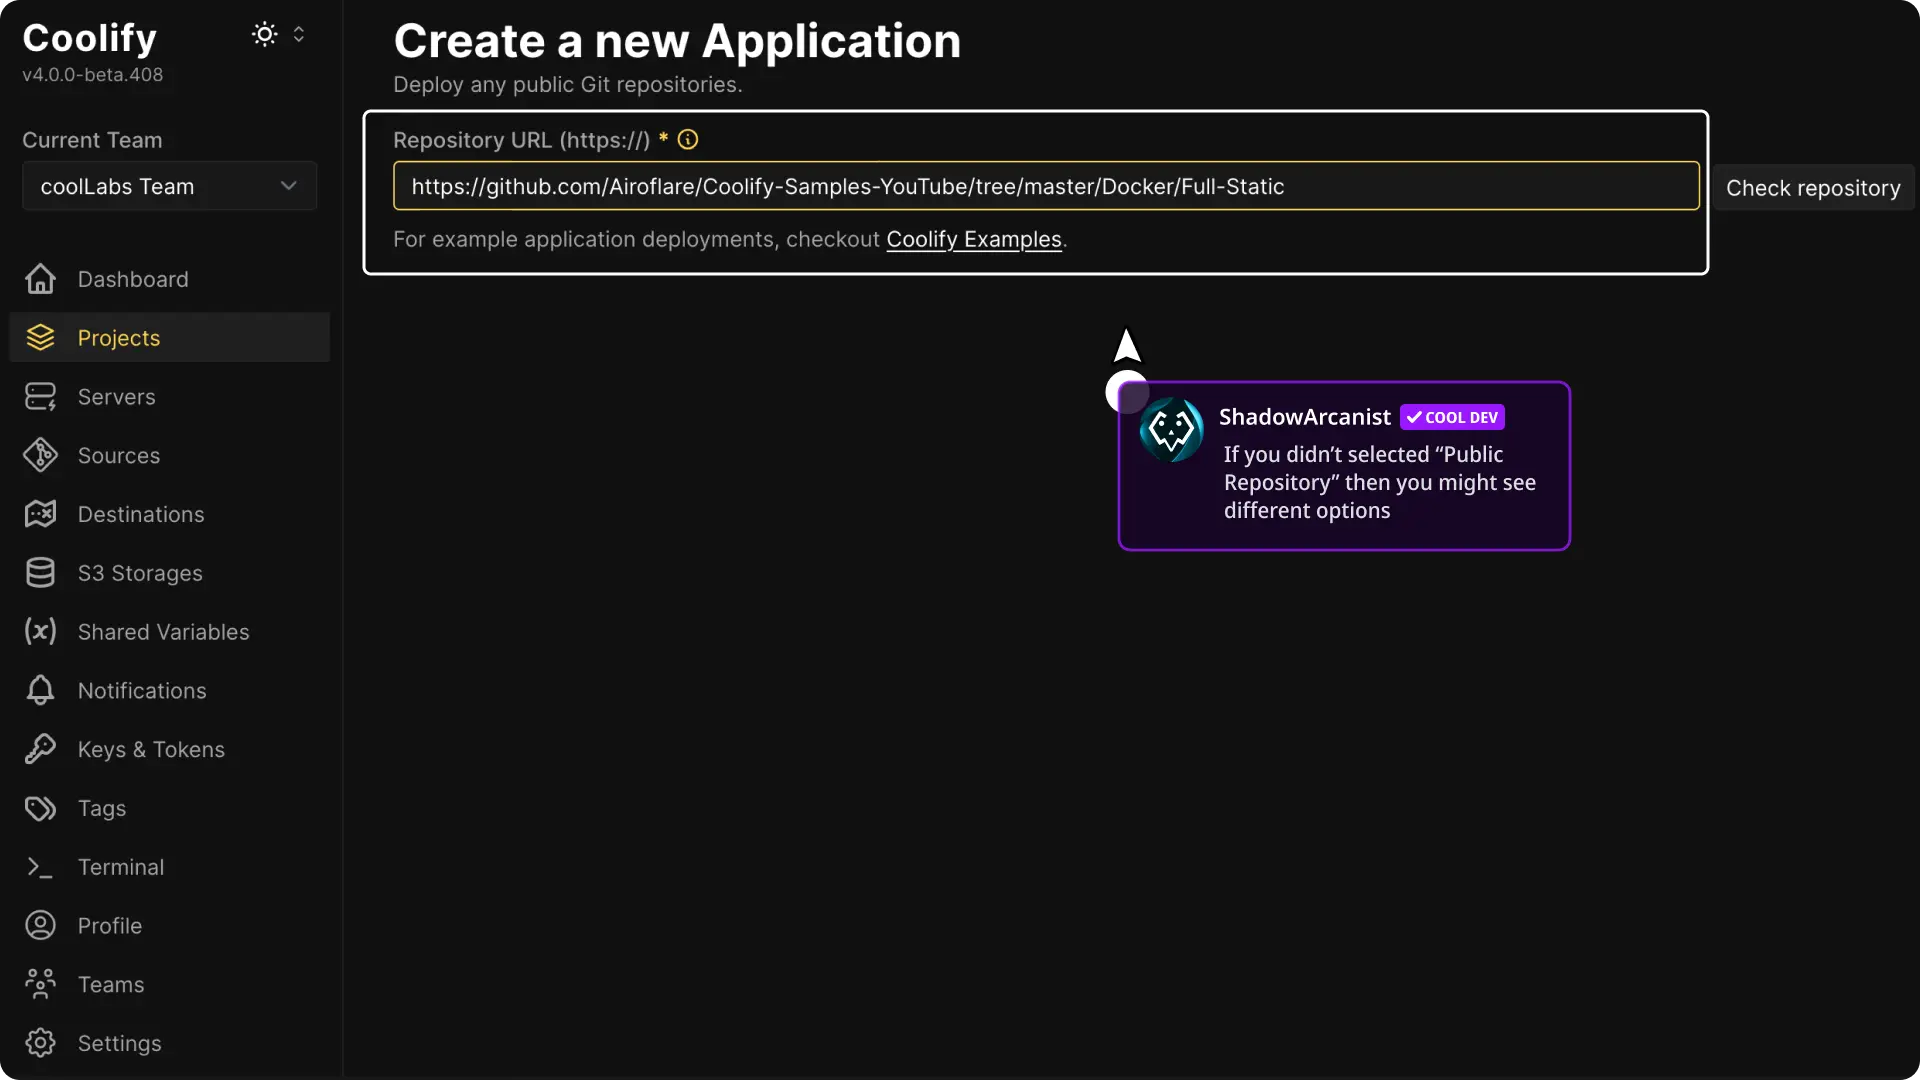
3. Select Your Git Repository
If you are using a public repository, paste the URL of your GitHub repository when prompted. The steps are very similar for all other options.
4. Choose the Build Pack
Coolify defaults to using Nixpacks. Click the Nixpacks option and select Dockerfile as your build pack from the dropdown menu.

5. Configure the Build Pack
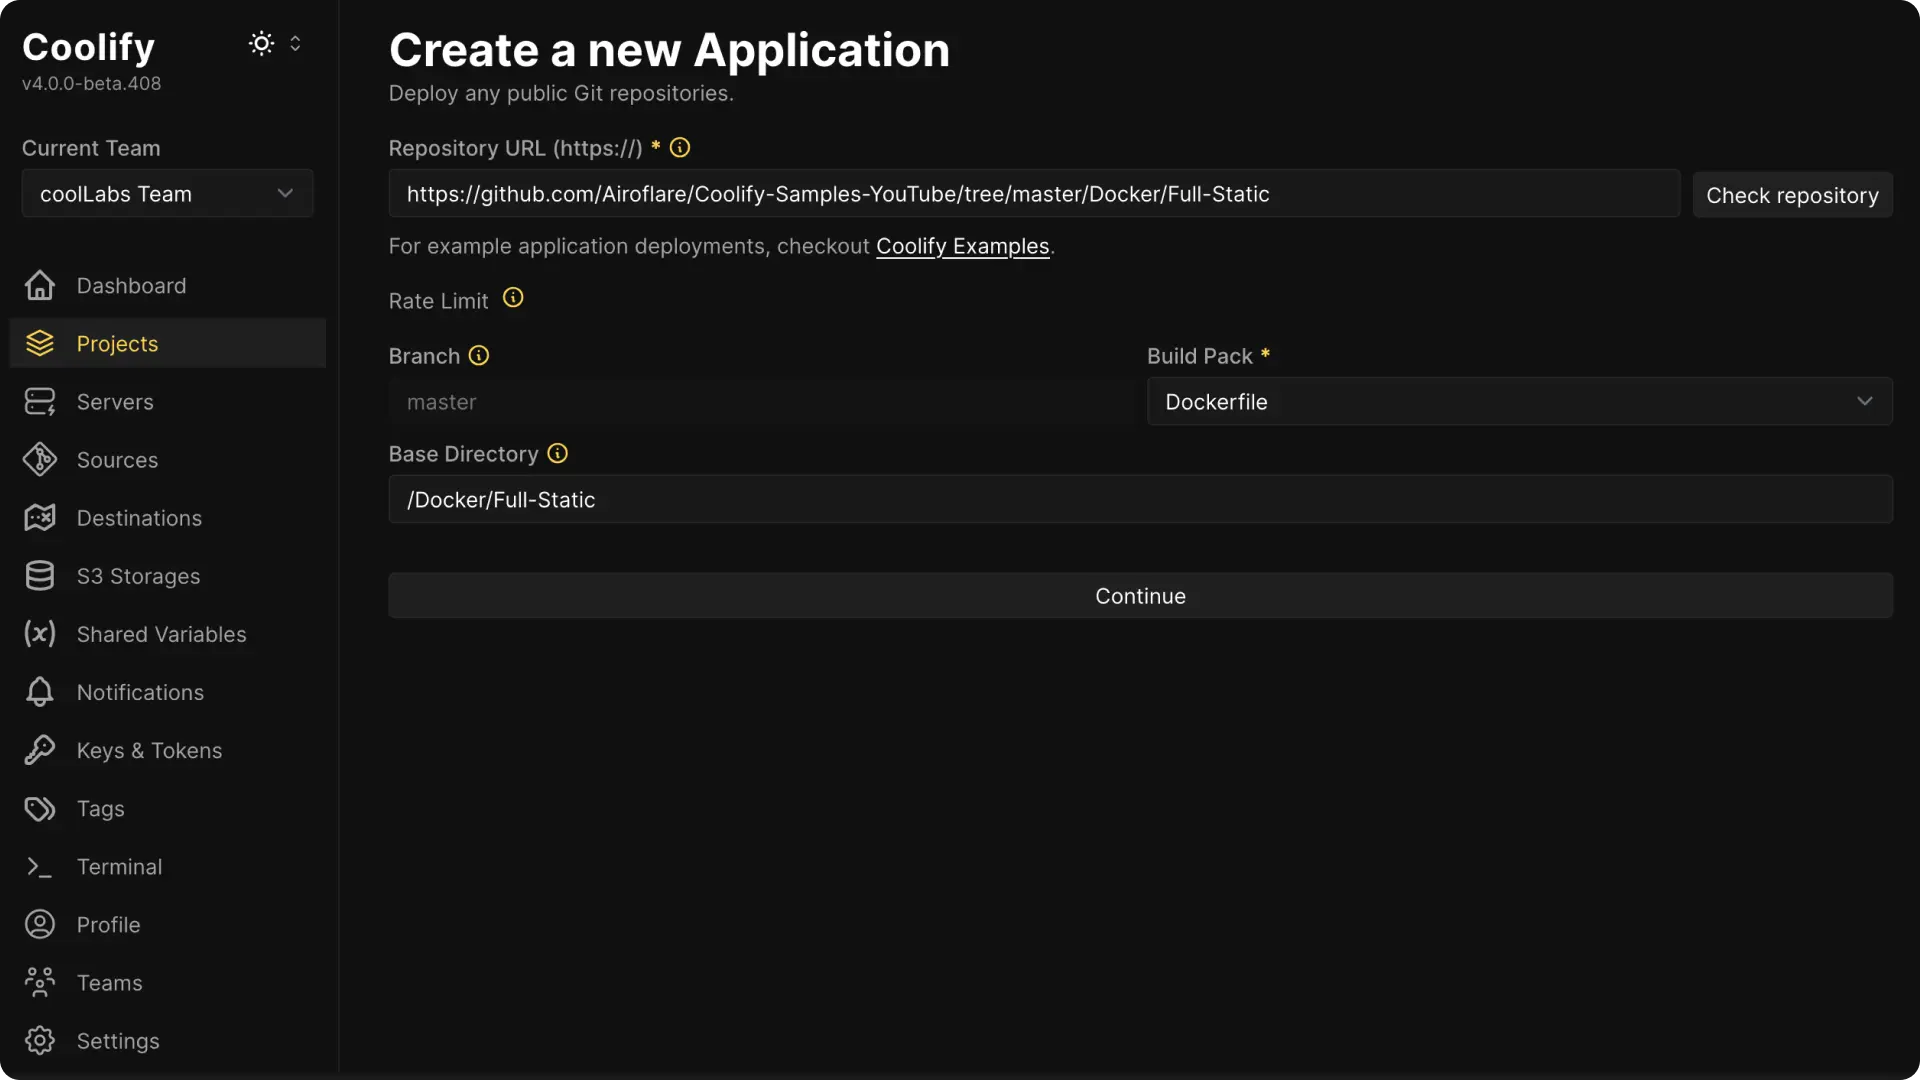
- Branch: Coolify will automatically detect the branch in your repository.
- Base Directory: Enter the directory that Coolify should use as the root. Use
/if your files are at the root or specify a subfolder (like/backendfor a monorepo).
Click on Continue button once you have set all the above settings to correct details.
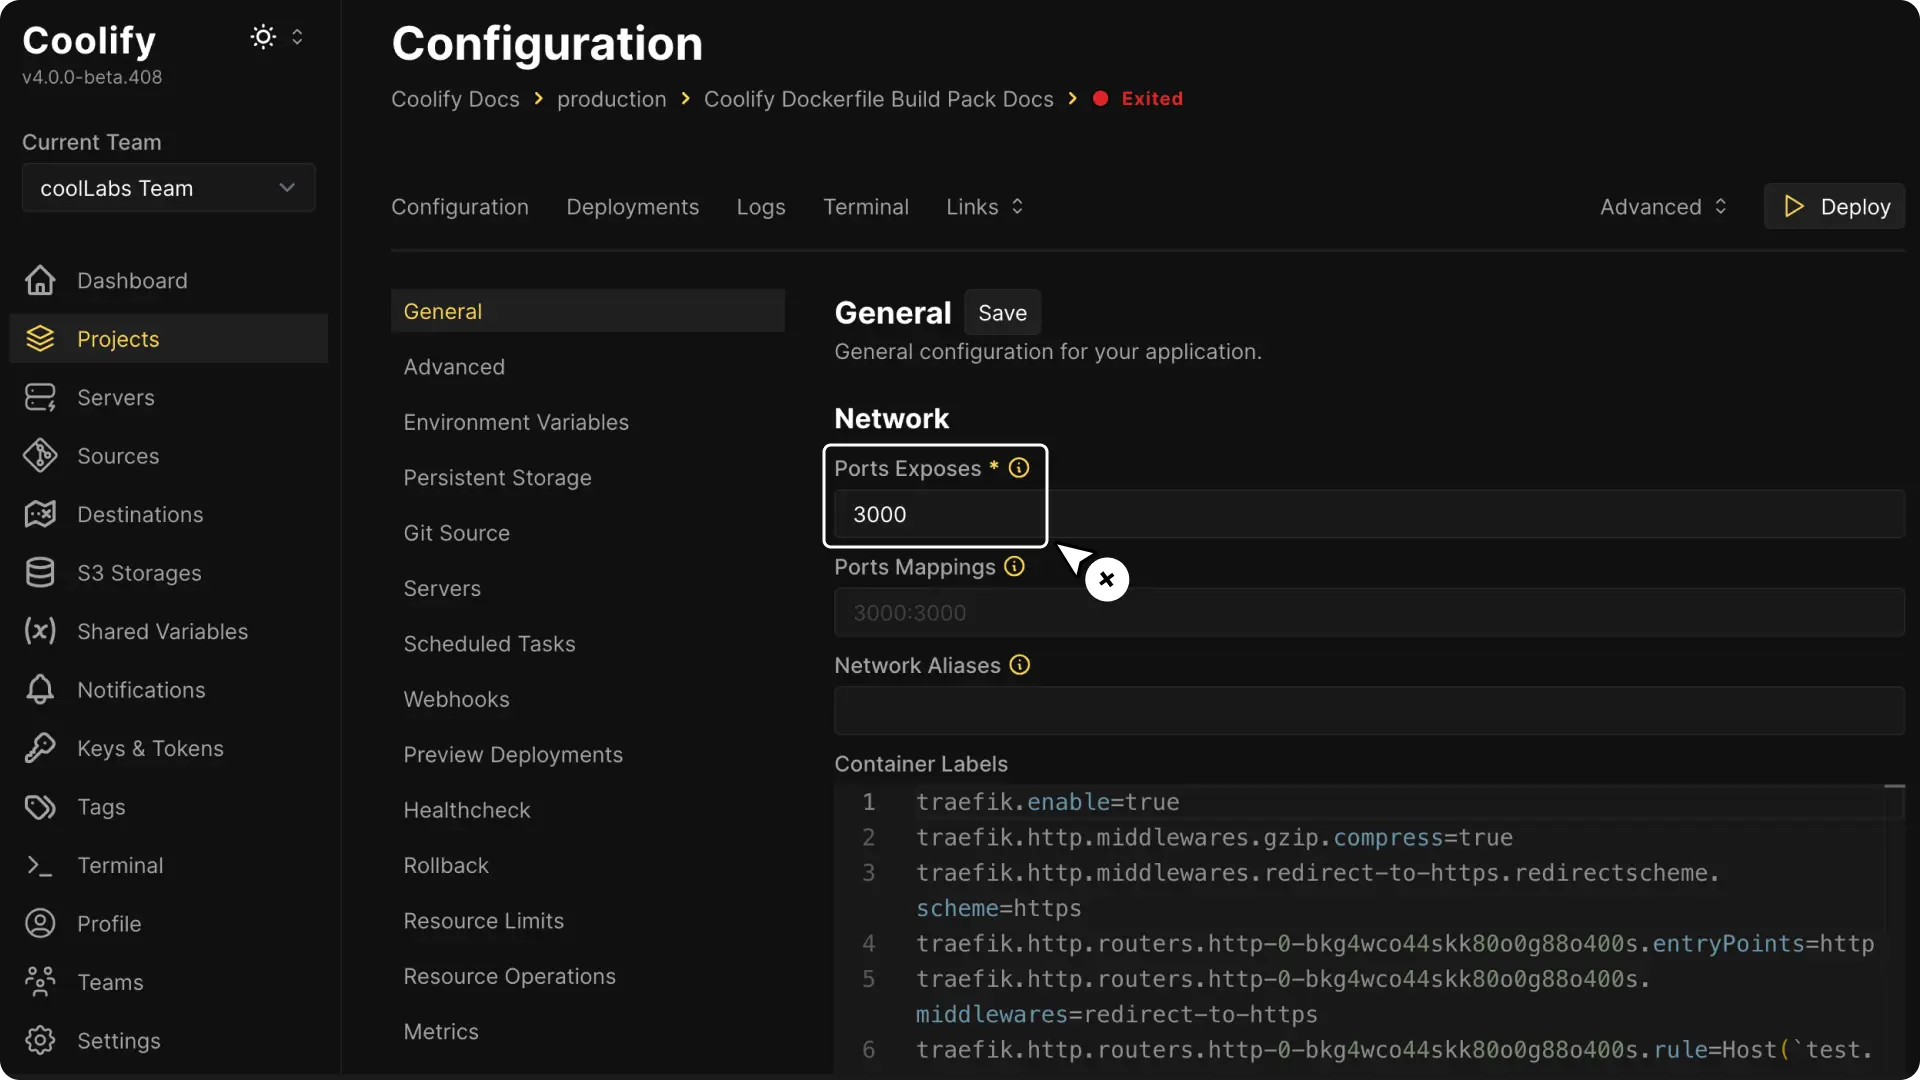
6. Configure Network Settings
After clicking Continue, update settings like your domain and environment variables (if needed).
The important option is the port where your application runs. Coolify sets the default port to 3000, so if your application listens on a different port, update the port number on the network section.
Advanced Configuration
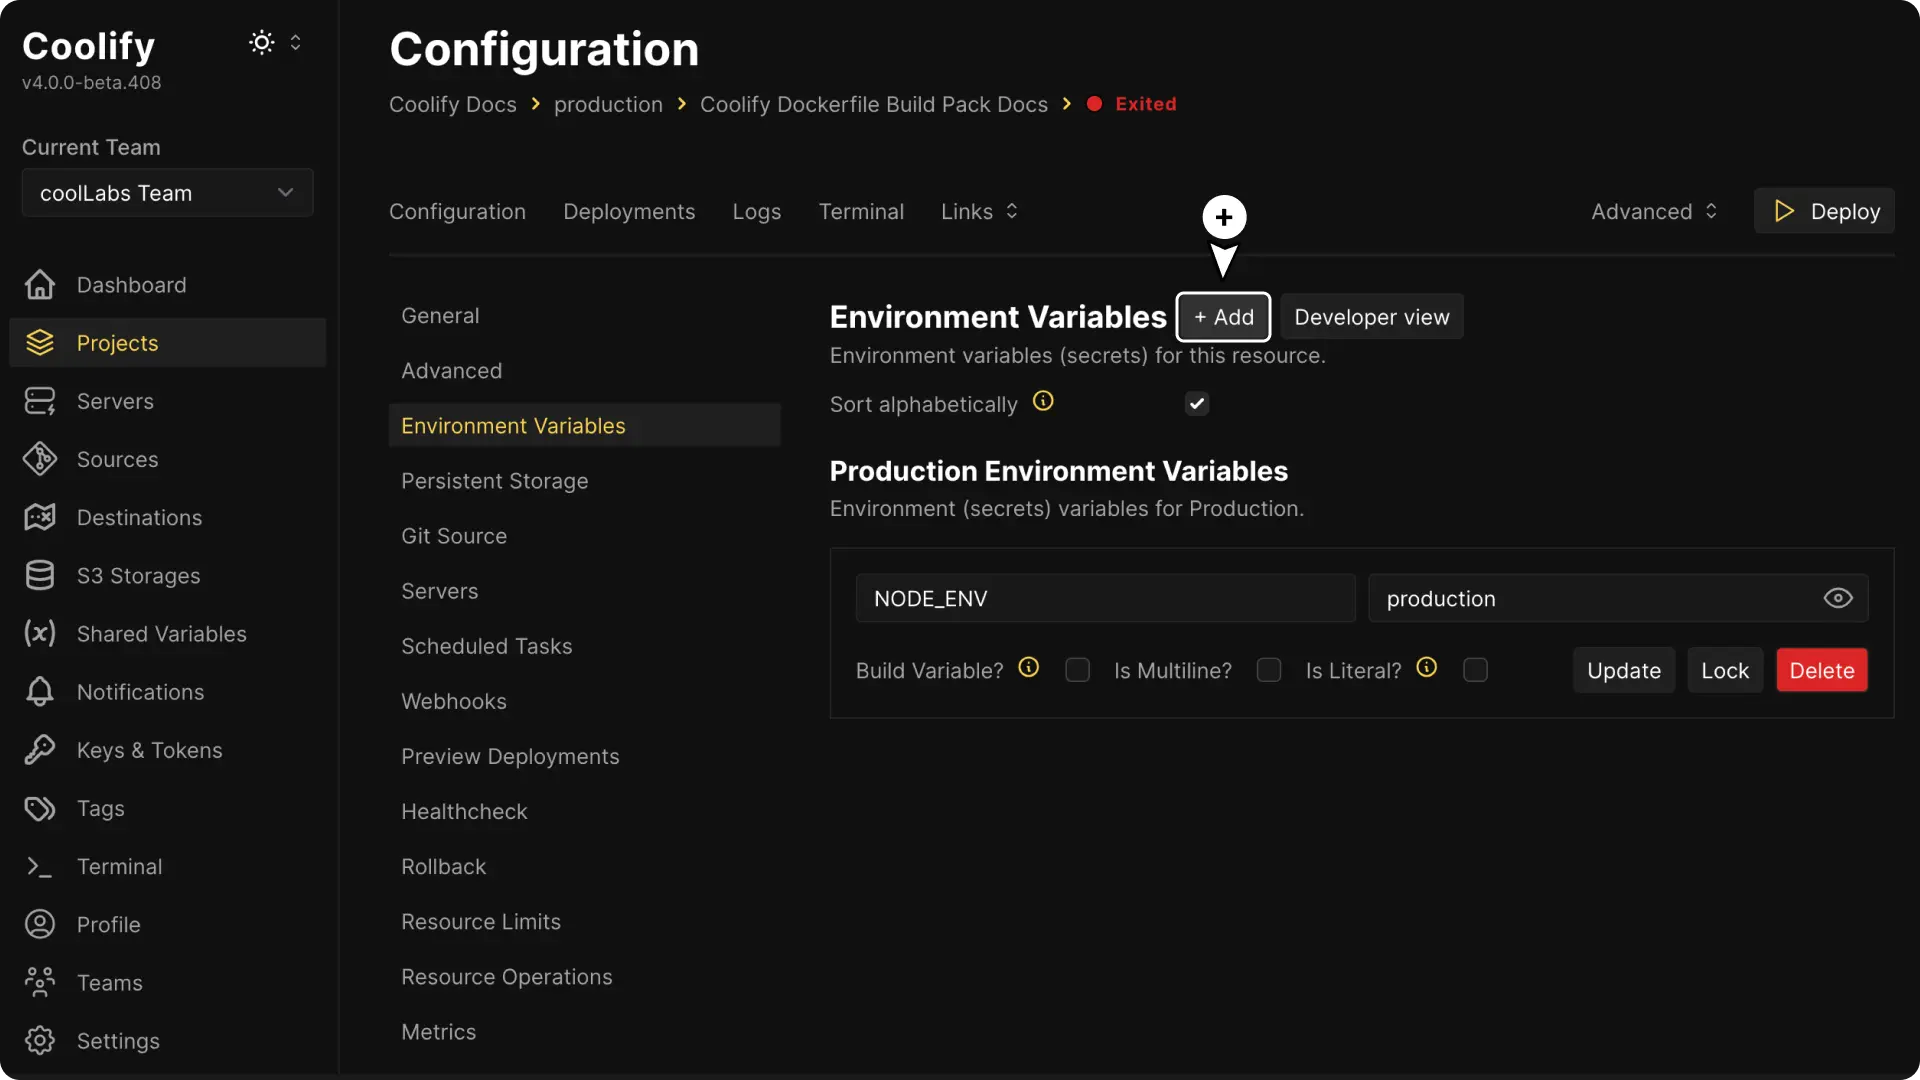
Environment Variables
You can manage your environment variables from the Coolify UI.
Click on the Environment Variables tab to add or update them.
Pre/Post Deployment Commands
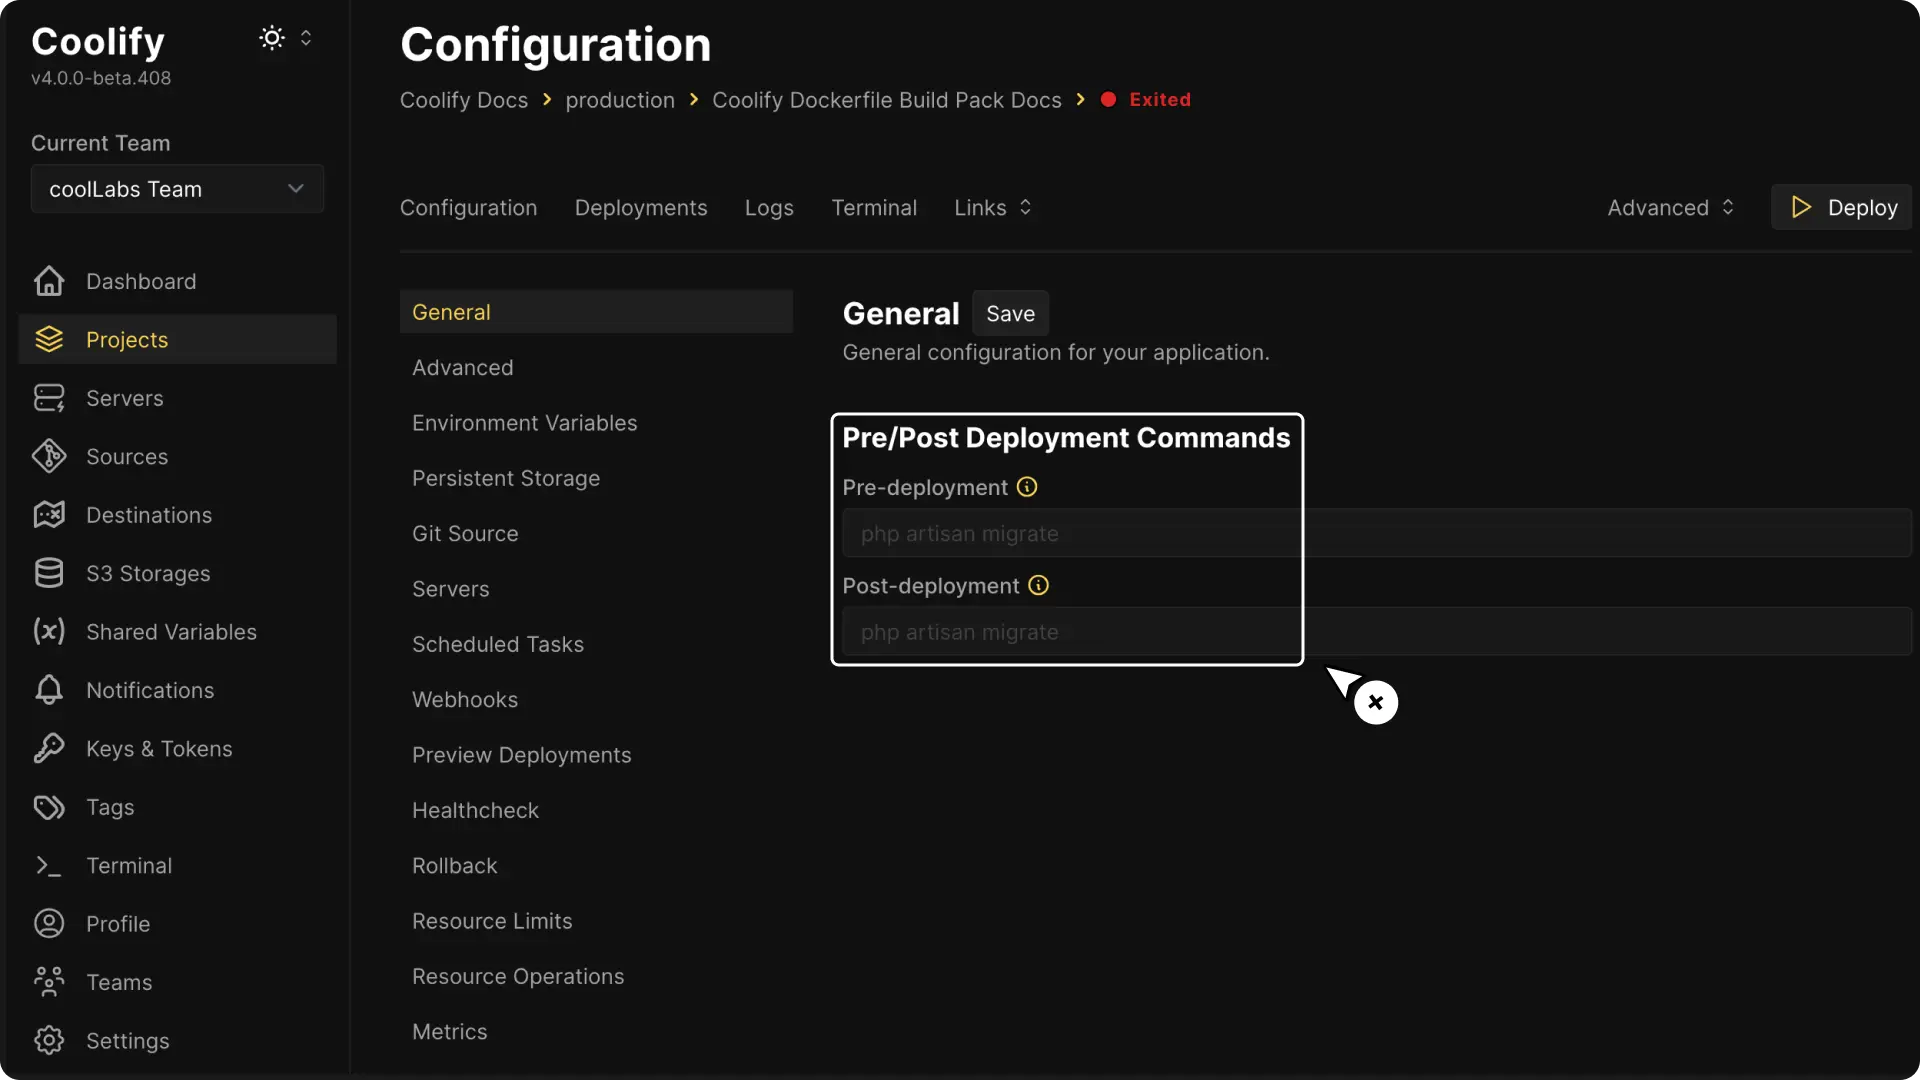
- Pre-deployment: Optionally, specify a script or command to execute in the existing container before deployment begins. This command is run with
sh -c, so you do not need to add it manually. - Post-deployment: Optionally, specify a script or command to execute in the newly built container after deployment completes. This command is also executed with
sh -c.
Build Arguments
Coolify automatically injects build arguments into your Dockerfile during the build process. These include environment variables you've configured and predefined system values like SOURCE_COMMIT.
You can configure these settings in the Advanced menu of your application.
Inject Build Args to Dockerfile
By default, Coolify injects Docker build arguments (ARG statements) into your Dockerfile. If you prefer to manage build arguments manually in your Dockerfile, you can disable this behavior in the Advanced menu.
- Enabled (default): Coolify automatically injects build arguments
- Disabled: You manage
ARGstatements yourself in the Dockerfile
Include Source Commit in Build
The SOURCE_COMMIT variable contains the Git commit hash of your source code. By default, this is excluded from the build to preserve Docker's build cache. You can enable this in the Advanced menu if needed.
- Disabled (default):
SOURCE_COMMITis not included, improving cache utilization - Enabled:
SOURCE_COMMITis included as a build argument
Build Cache Optimization
Enabling "Include Source Commit in Build" will cause Docker's build cache to be invalidated on every commit, since the commit hash changes each time. Only enable this if your build process requires the commit hash.
Node.js Multi-Core Scaling
A plain Node.js process only uses one CPU core. To make a Node.js (or Bun) app use every core on the host from a single Dockerfile build, see the Node.js Multi-Core Scaling guide.
Known Issues and Solutions
Railpack Build Pack
Build applications with Railpack — the successor to Nixpacks — automatically detecting your codebase, building optimized images, and deploying static sites or dynamic apps.
Docker Compose Build Packs
Deploy multi-container applications with Docker Compose using custom domains, magic environment variables, storage volumes, and service networking.