
Instance settings
Instance settings control the Coolify control plane itself. These settings change the Coolify instance itself, not a project, application, database, service, or server.
If you use Coolify Cloud, the Coolify team manages the Coolify instance for you. Coolify Cloud users cannot access or edit these settings.
The following data is used as an example in this guide. Please replace it with your actual data when following the steps:
- Domain Name:
shadowarcanist.com - Coolify Dashboard:
https://coolify.shadowarcanist.com
Open Settings in the left sidebar, or visit:
https://coolify.shadowarcanist.com/settings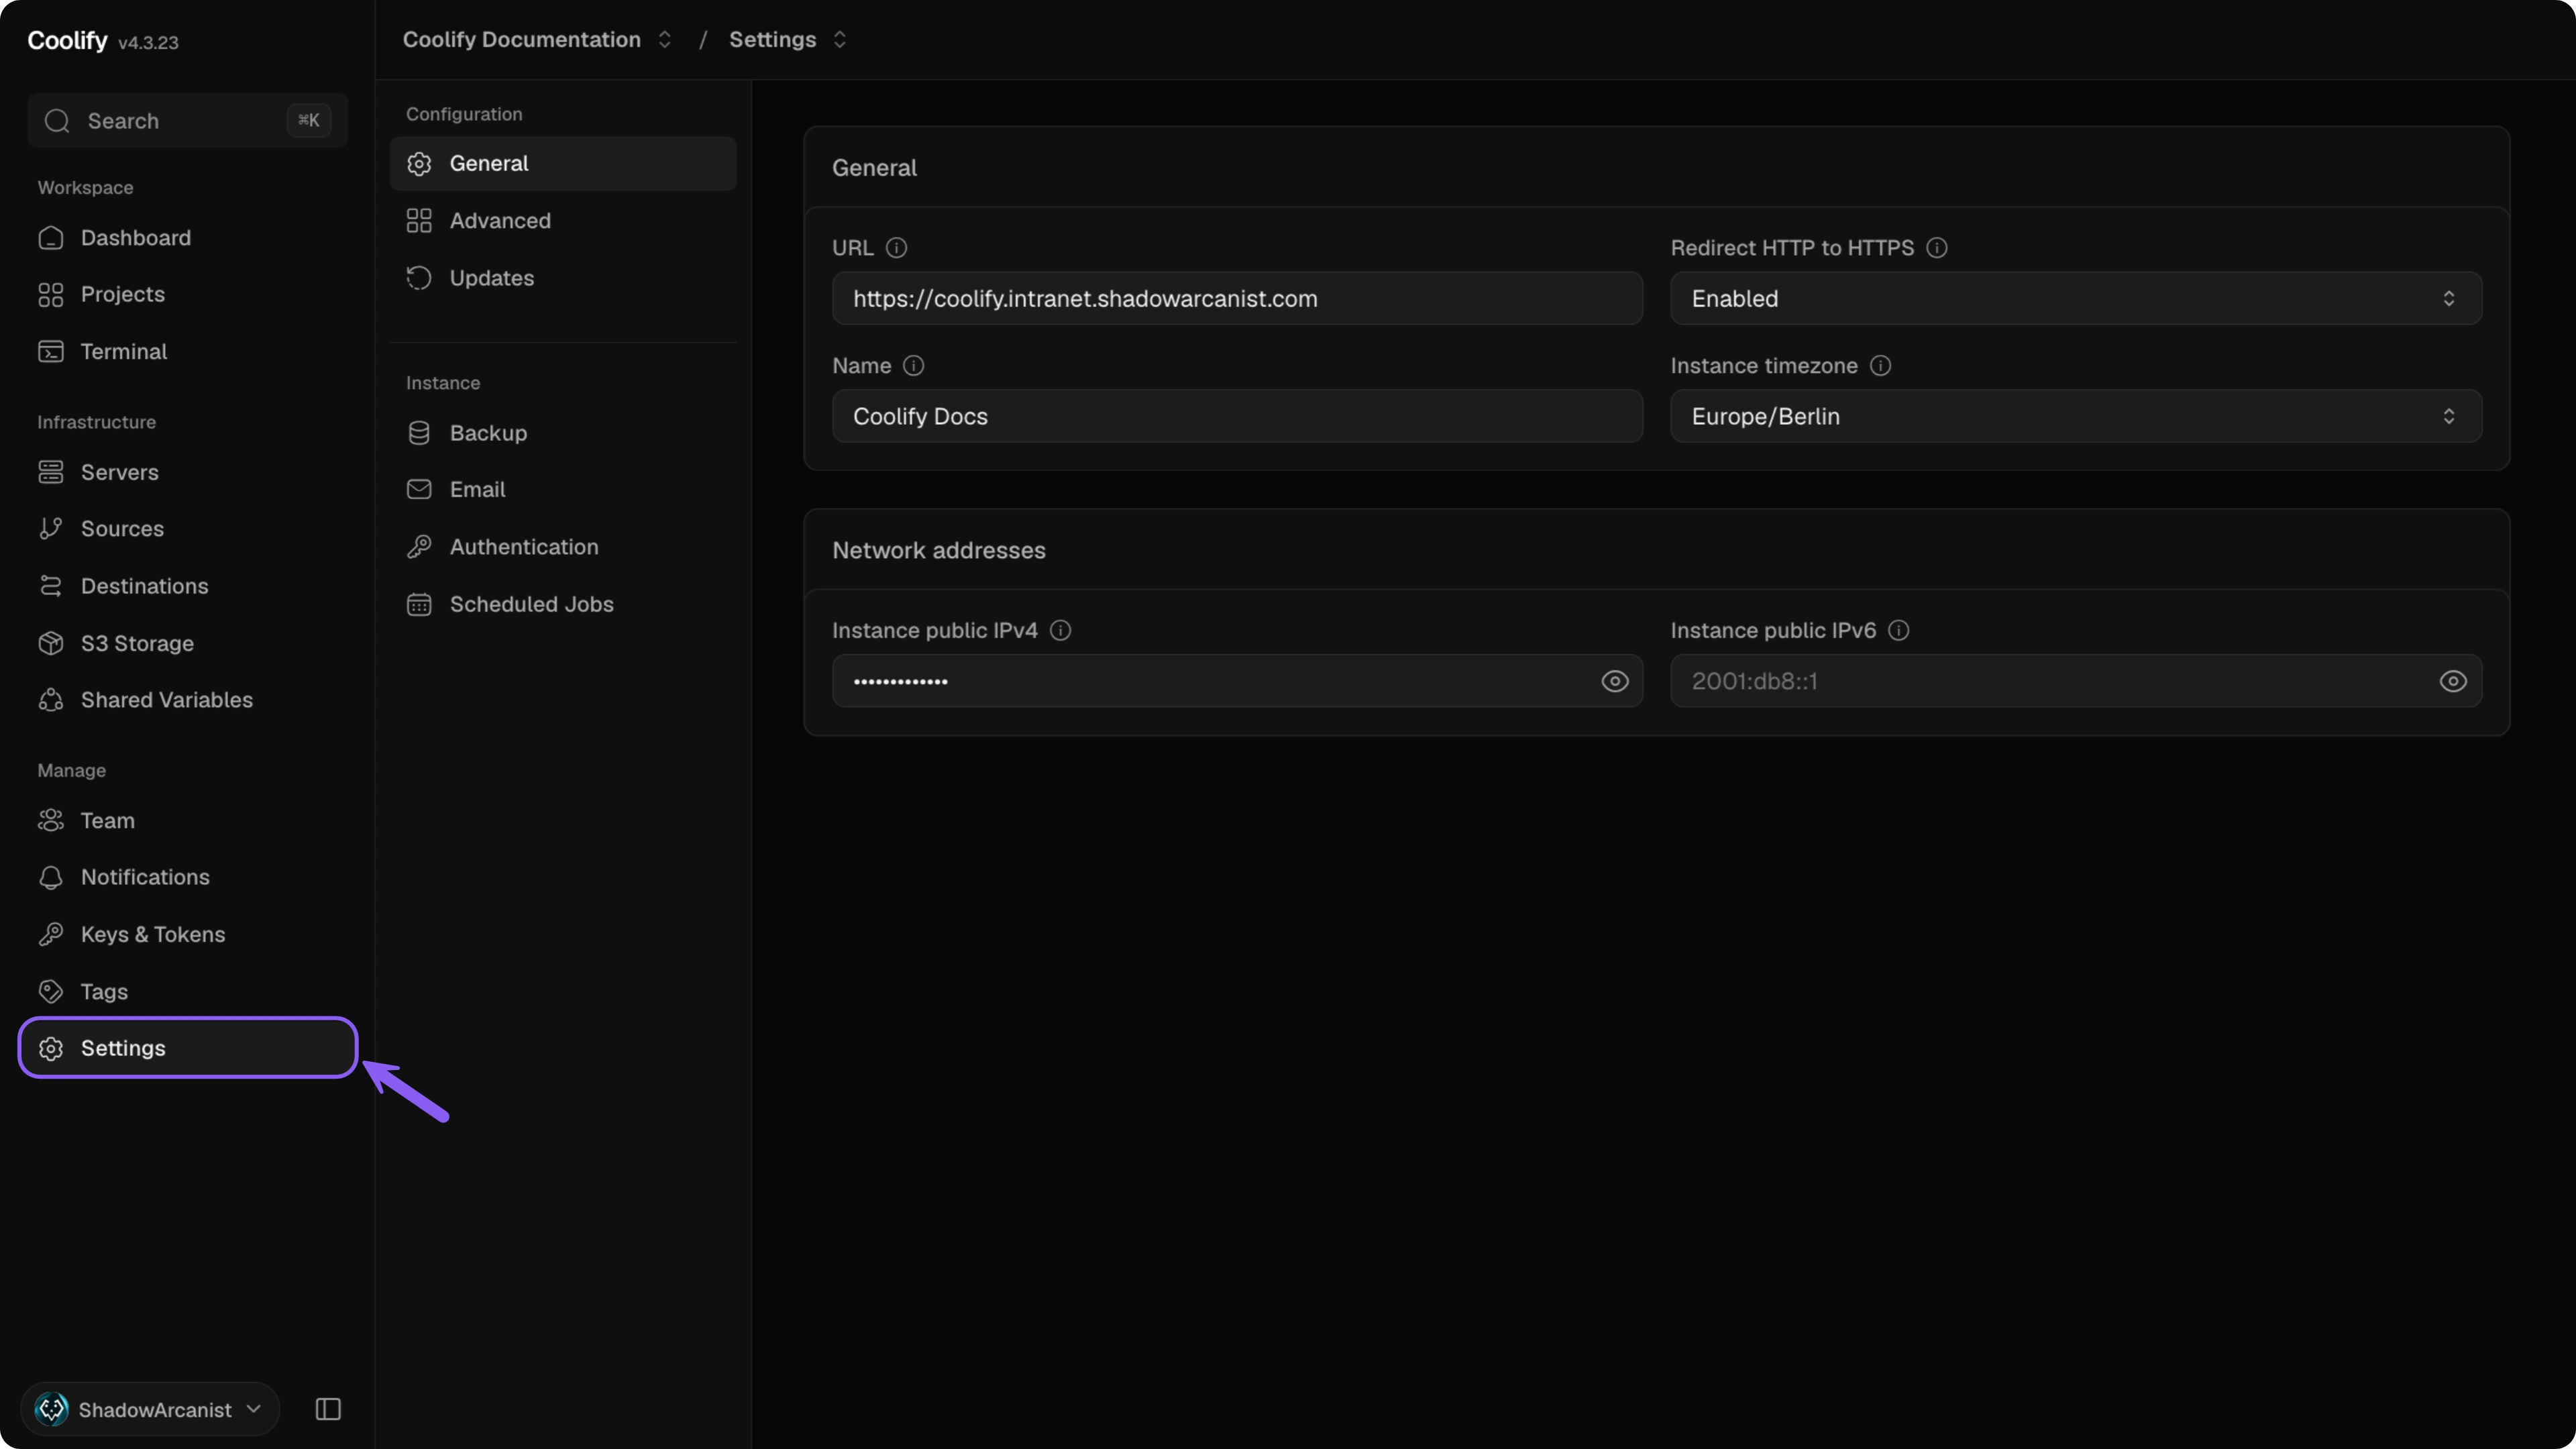
The Settings page groups options under Configuration (General, Advanced, and Updates) and Instance (Backup, Email, and Authentication). Select a section from the Settings navigation, then use Save changes to apply your edits.
Configuration
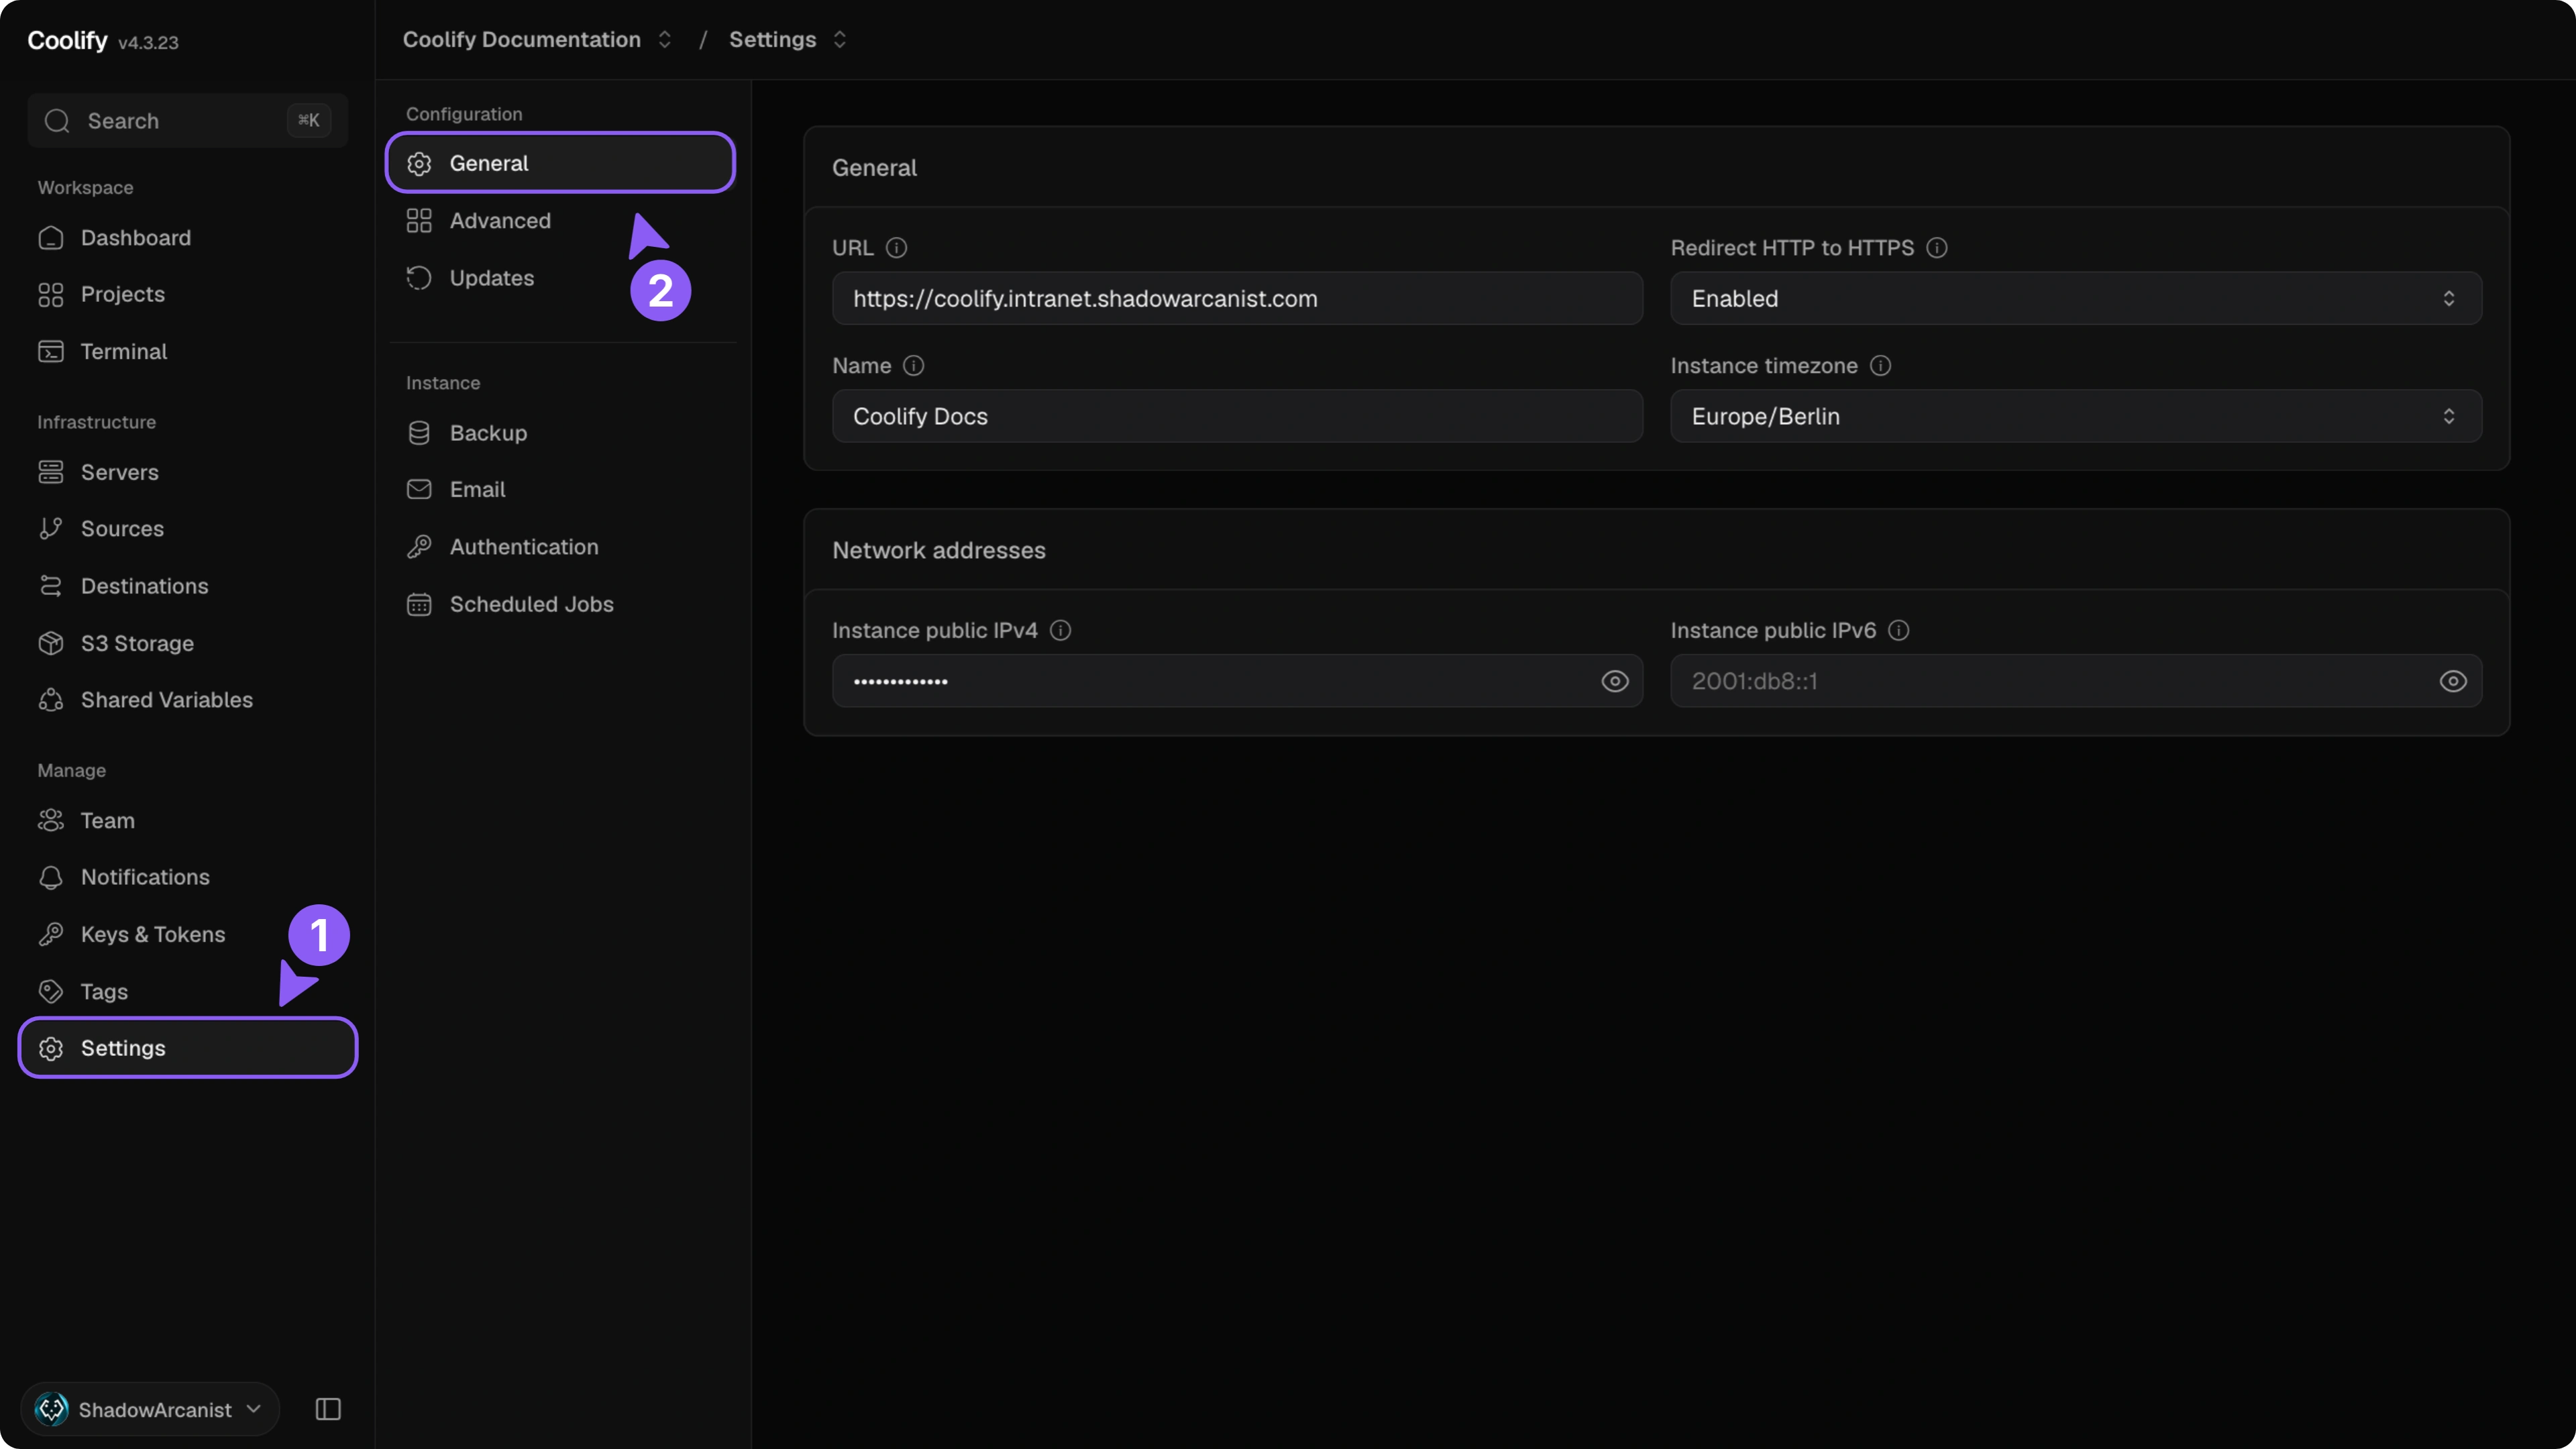
Use General for the dashboard URL, HTTP-to-HTTPS behavior, instance label, timezone, and network addresses Coolify should use.
URL
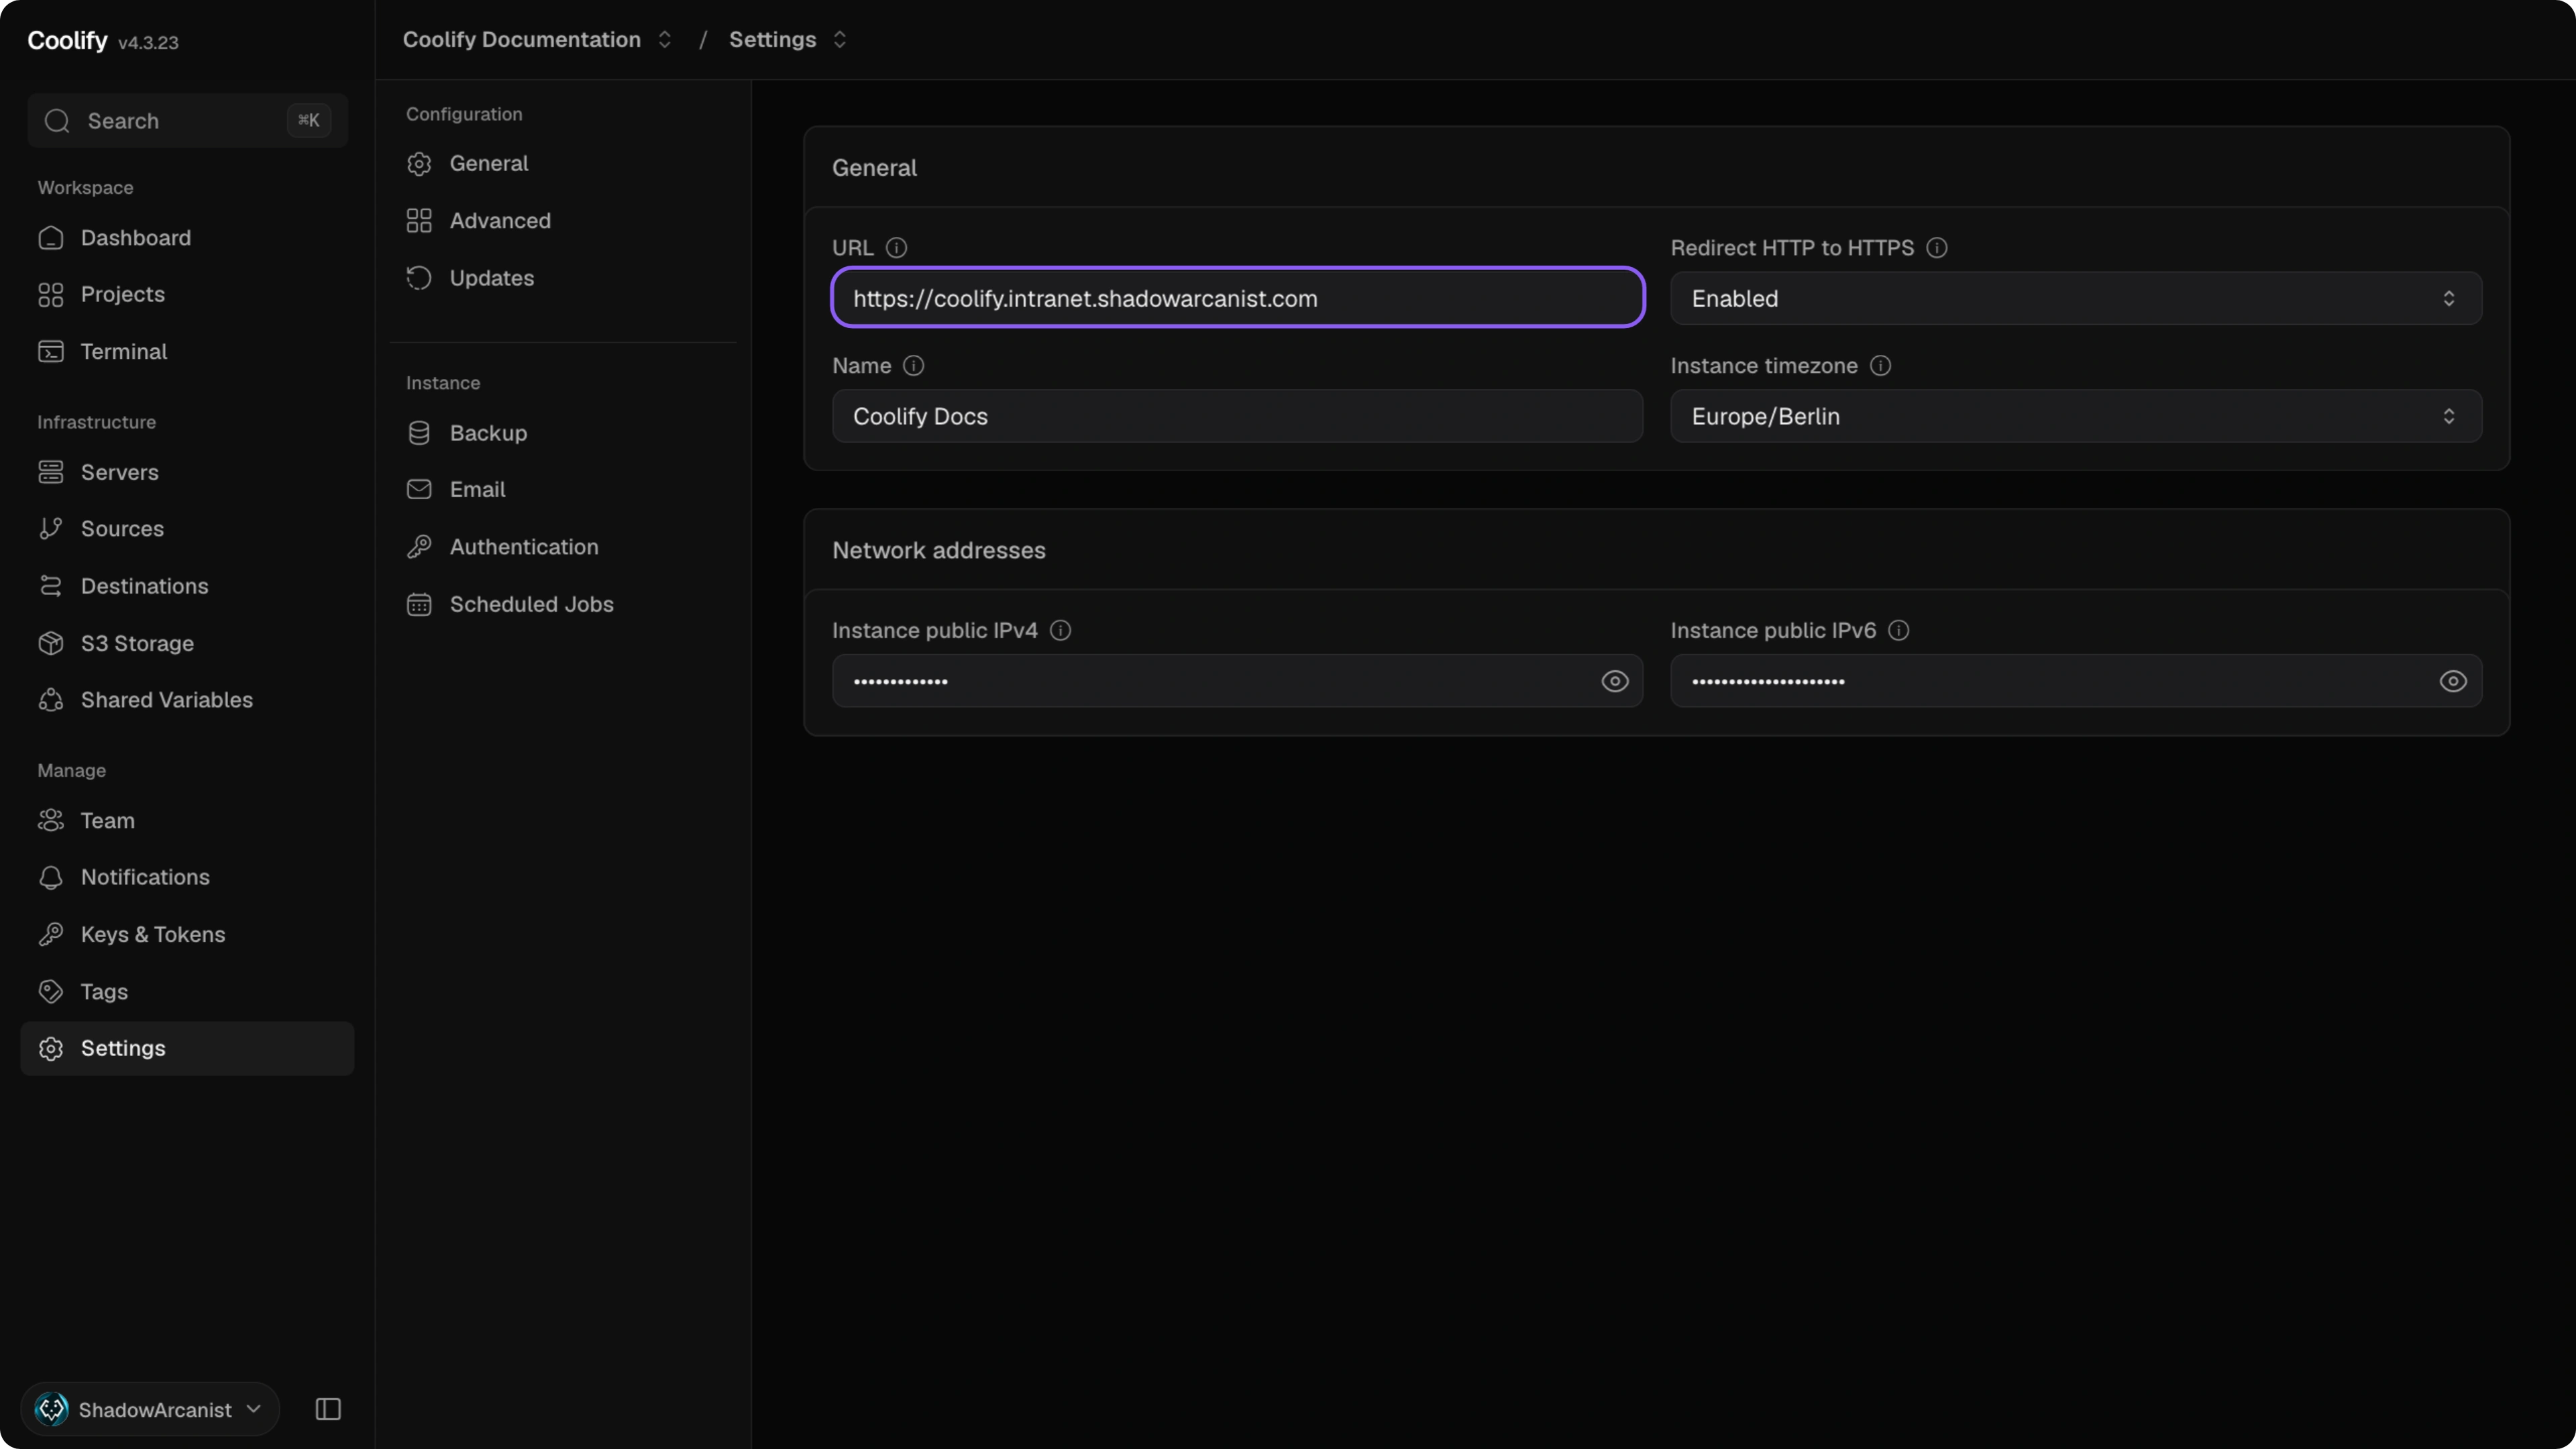
This is the address you use to open the Coolify dashboard. Coolify also uses it when it needs to generate links back to the instance. If you want the dashboard to use HTTPS, the value must start with https://.
Enter the full dashboard URL in URL and click Save changes. Before changing it, make sure DNS for the domain points to the server where Coolify is running. If DNS validation is enabled, Coolify checks the domain. Coolify also warns you when the instance URL is already used by another resource.
Accepted values:
- A full URL with a protocol, for example
https://coolify.shadowarcanist.com. - Use
https://when the dashboard should be served over HTTPS. - A root domain or subdomain.
Notes:
- Path-based URLs such as
https://shadowarcanist.com/coolifyare not supported. - Do not reuse an application or service domain for the dashboard. If the instance URL conflicts with a resource domain, SSL certificates and routing can become unpredictable.
Redirect HTTP to HTTPS
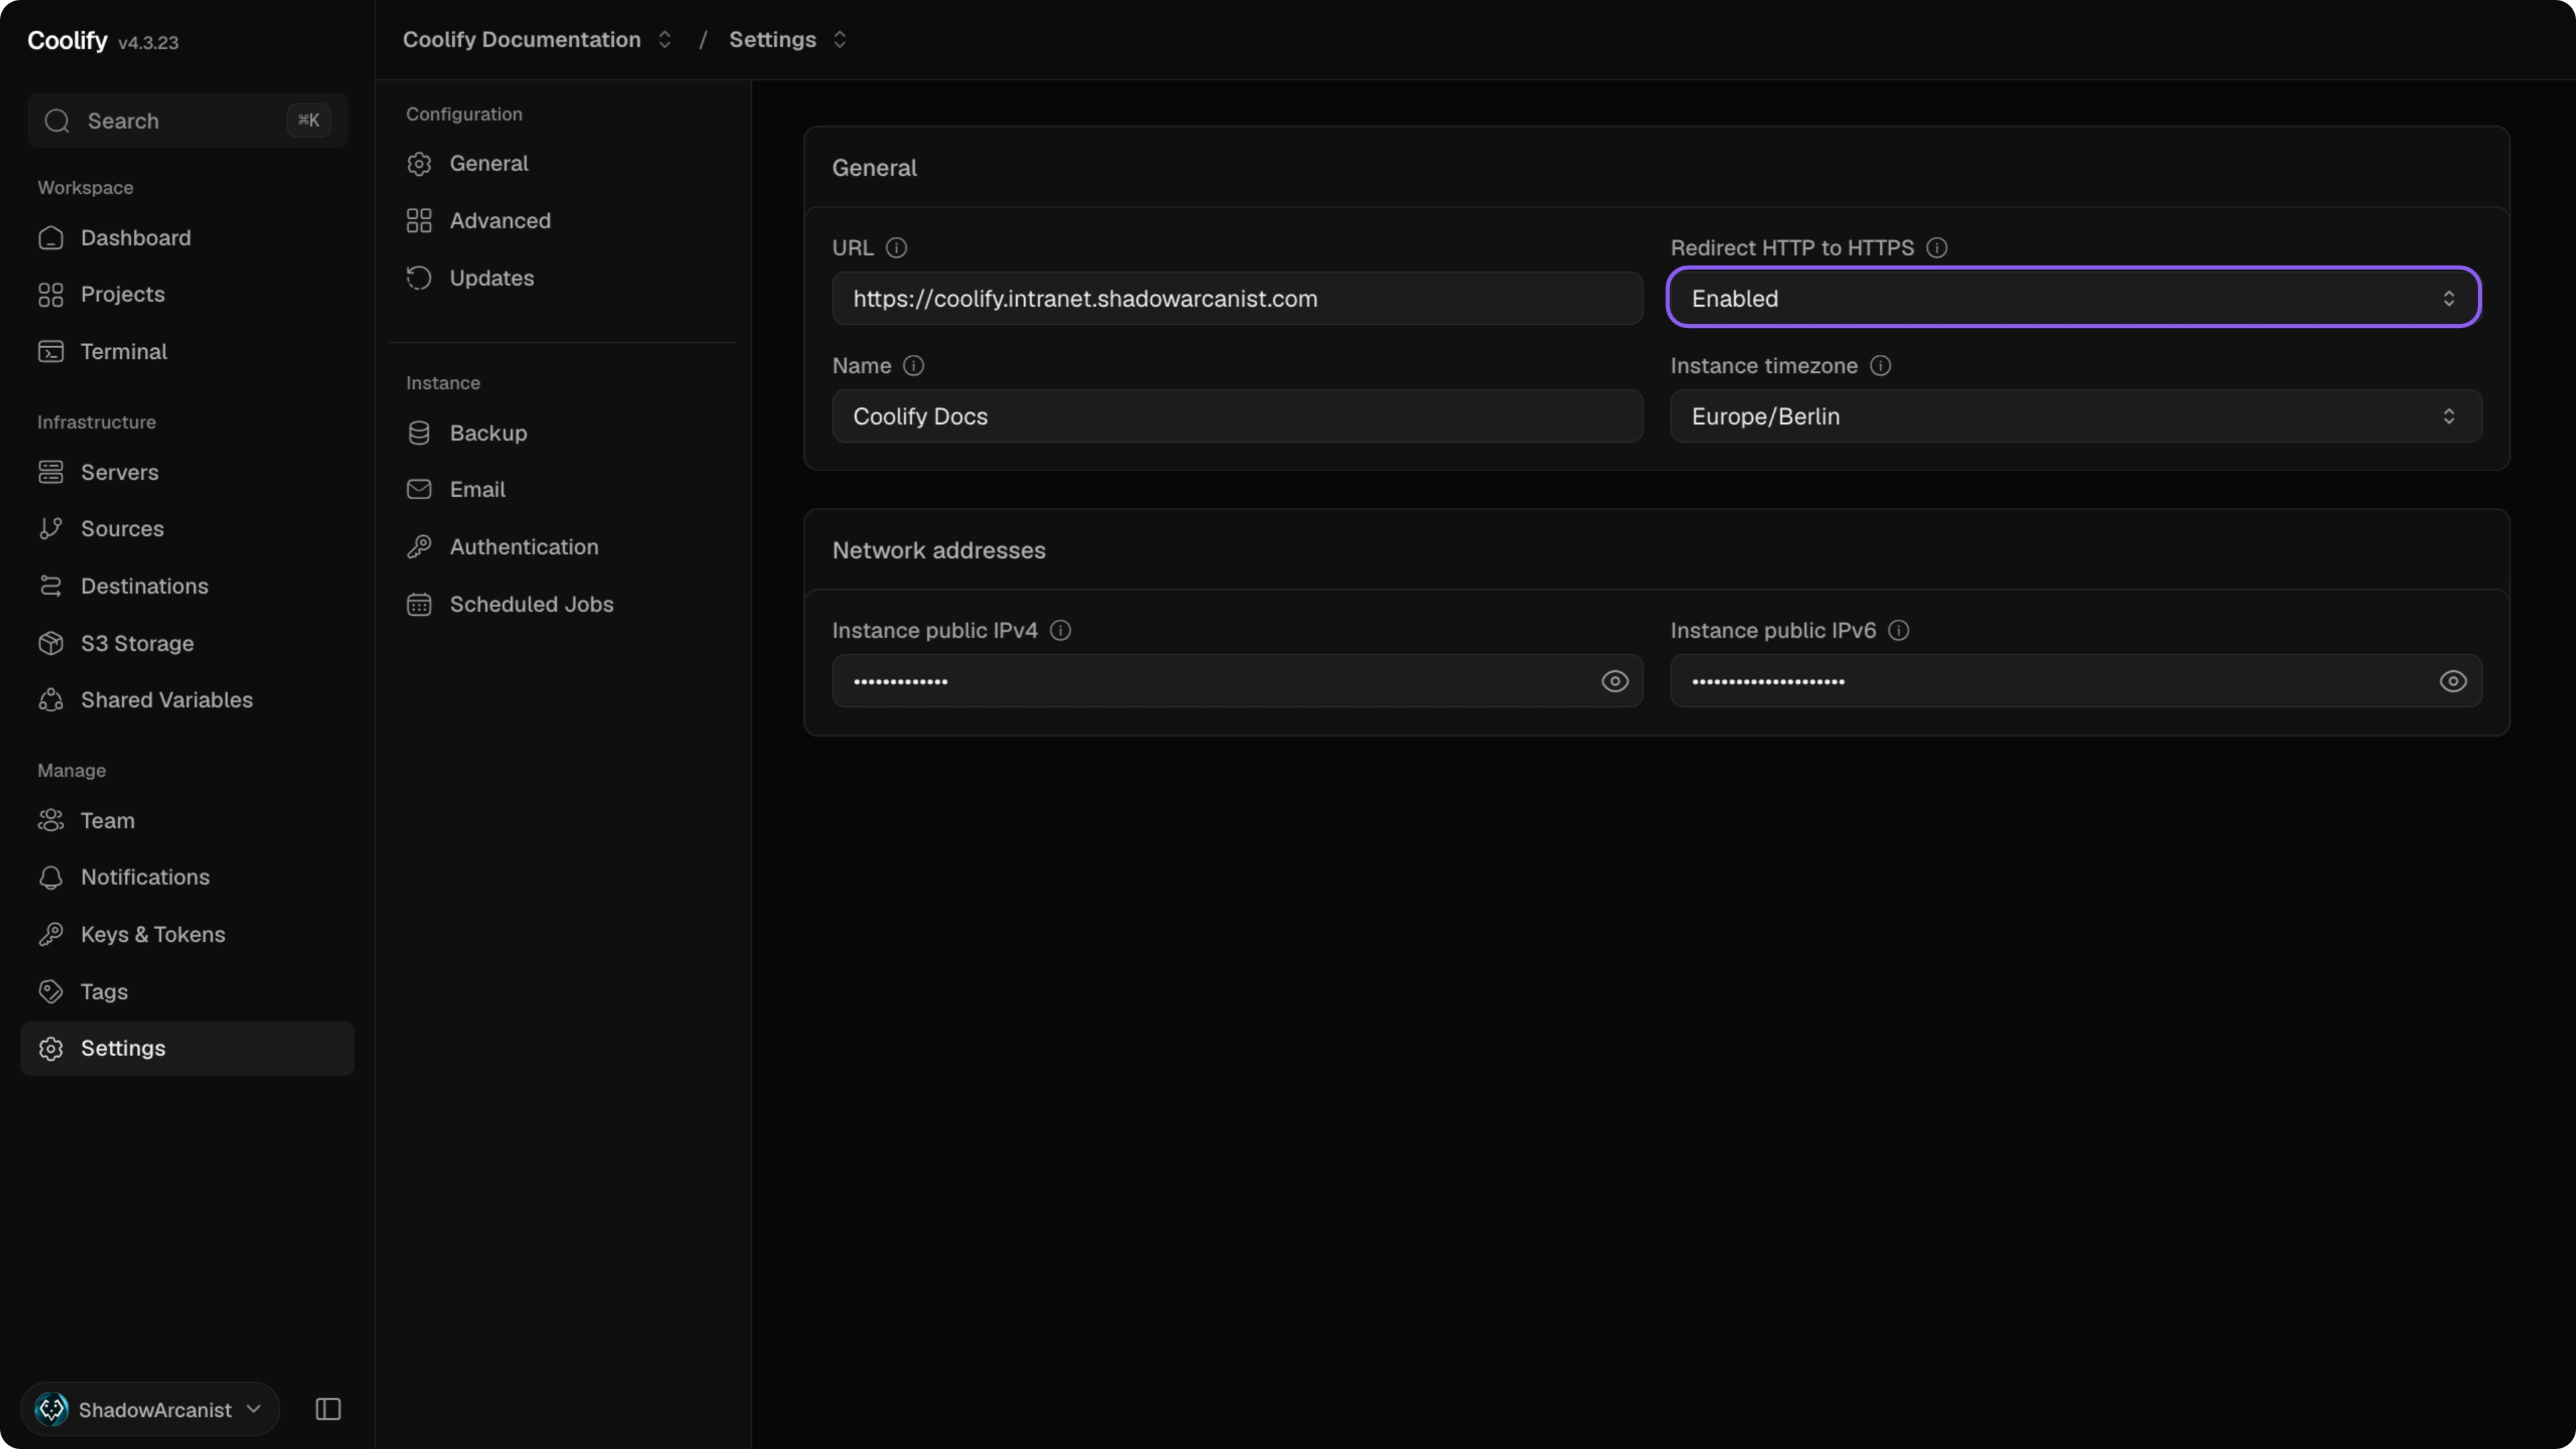
Controls whether requests to the Coolify dashboard over HTTP are redirected to HTTPS.
Choose Enabled or Disabled, then click Save changes.
Notes:
- If a reverse proxy or Cloudflare Tunnel connects to Coolify over HTTP while users access the dashboard over HTTPS, enabling this setting can create a redirect loop. Disable the redirect in Coolify when your proxy handles HTTPS redirection.
- Keep this enabled when Cloudflare uses Full or Full (Strict) SSL.
Accepted values:
- Enabled: redirect HTTP requests to HTTPS.
- Disabled: do not redirect HTTP requests.
Name
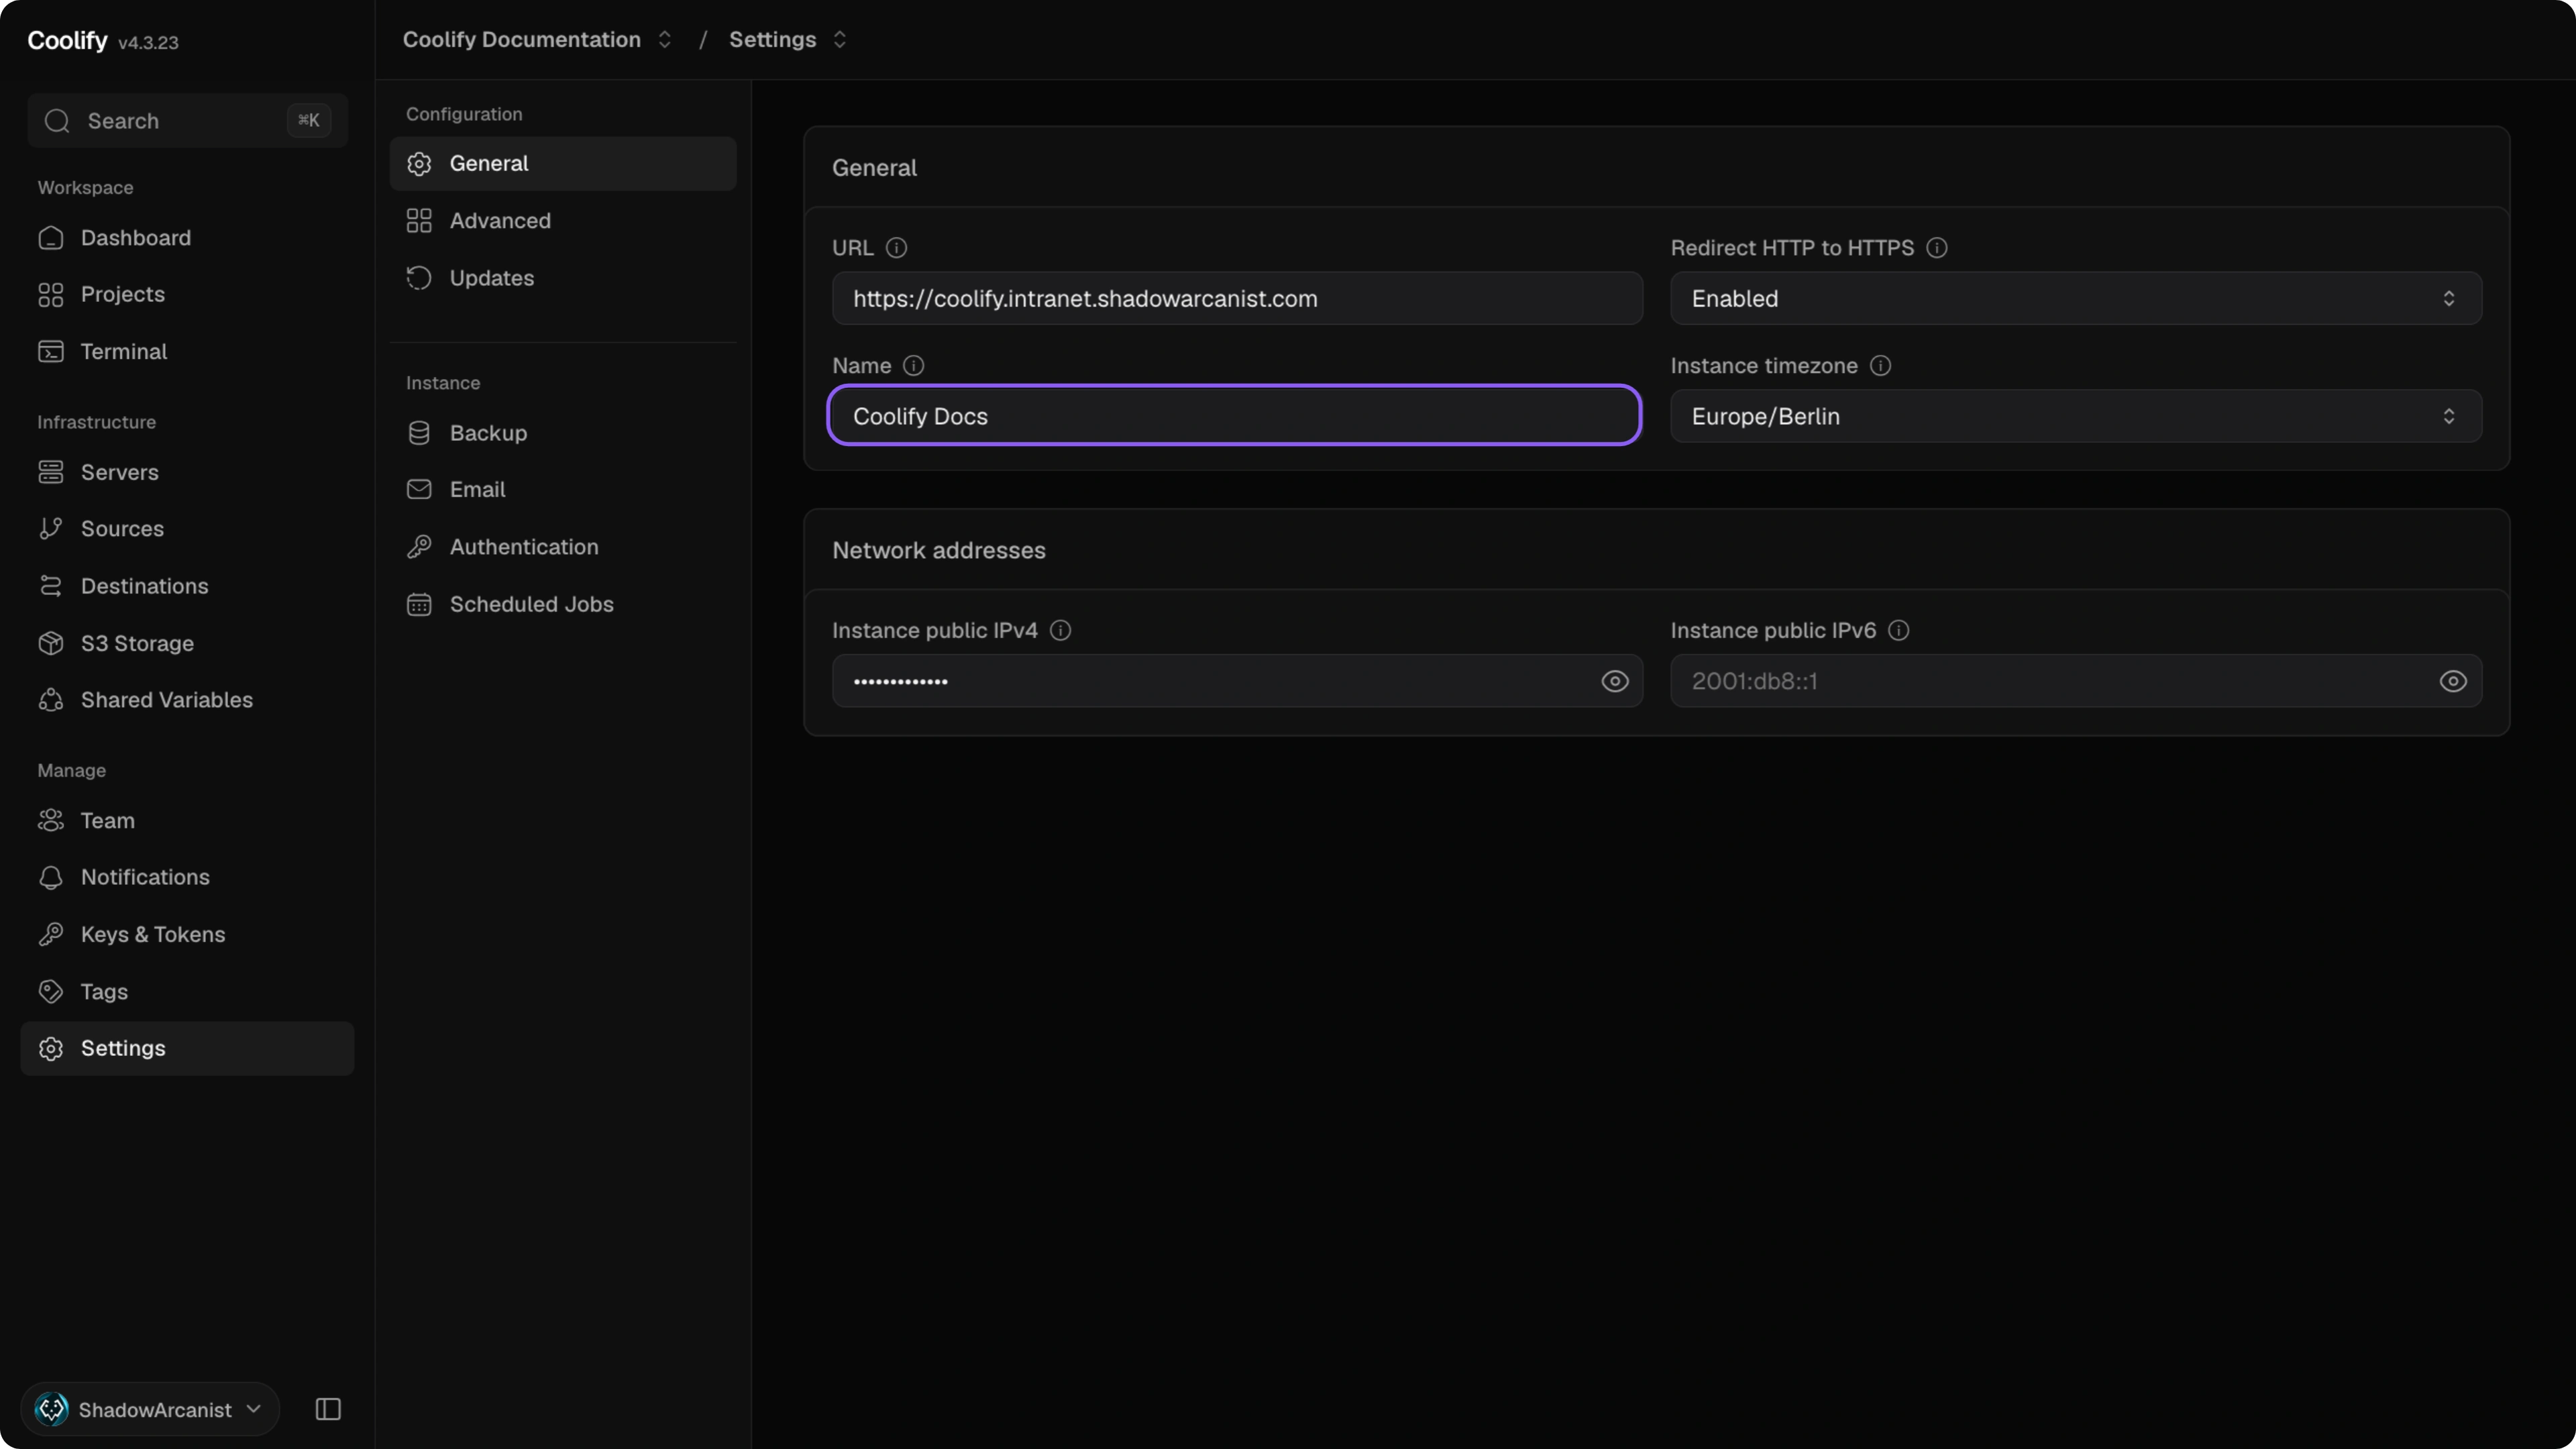
Adds the instance name in brackets before the page title shown in the browser tab. For example, a name of Production appears as [Production] Settings | Coolify. It does not change the Coolify name or logo in the sidebar.
Update Name and click Save changes.
Accepted values:
- Any text value up to 255 characters.
- Leave it empty to keep the default Coolify instance name.
Instance timezone
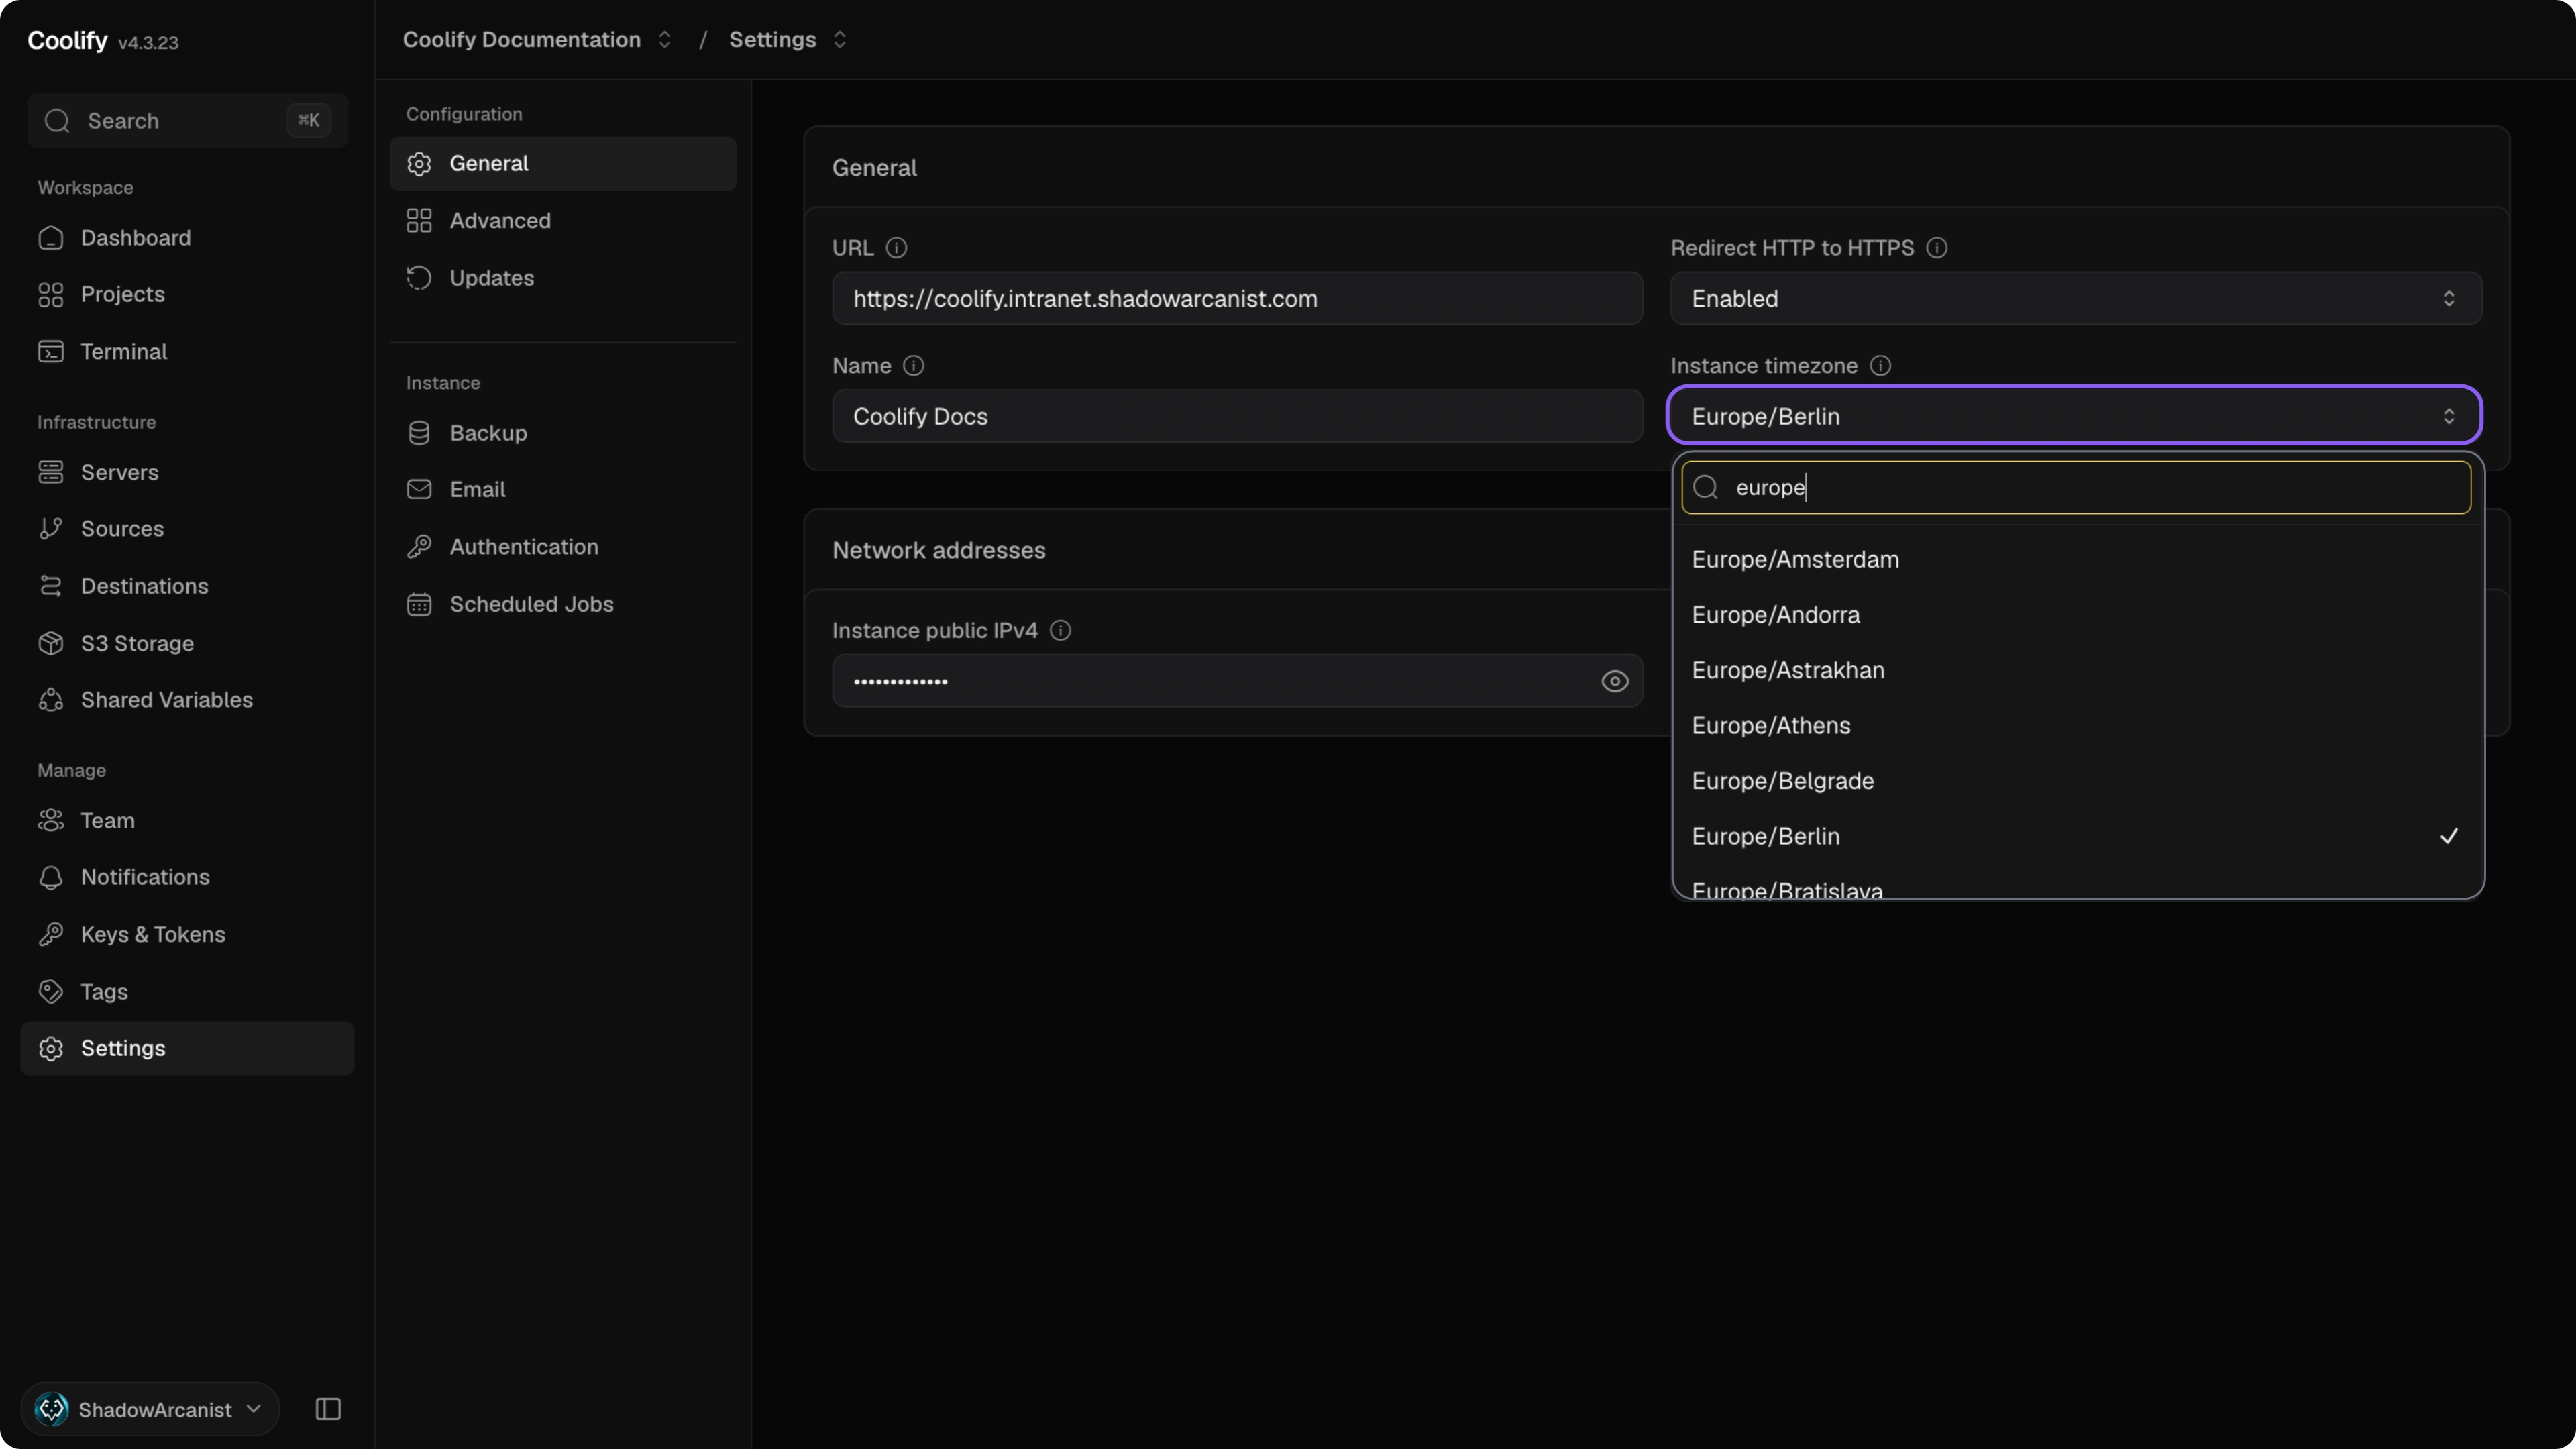
This timezone is used by instance-level schedules, including update checks and automatic updates. It does not change the timezone inside your applications or databases.
Search for the timezone in Instance timezone, select it from the list, and click Save changes.
Accepted values:
- A valid timezone identifier from the dashboard list, for example
UTC,Europe/Berlin, orAmerica/New_York.
Notes:
- Database backup schedules can use the server timezone when the server has one configured. Otherwise, they fall back to the instance timezone.
Instance public IPv4
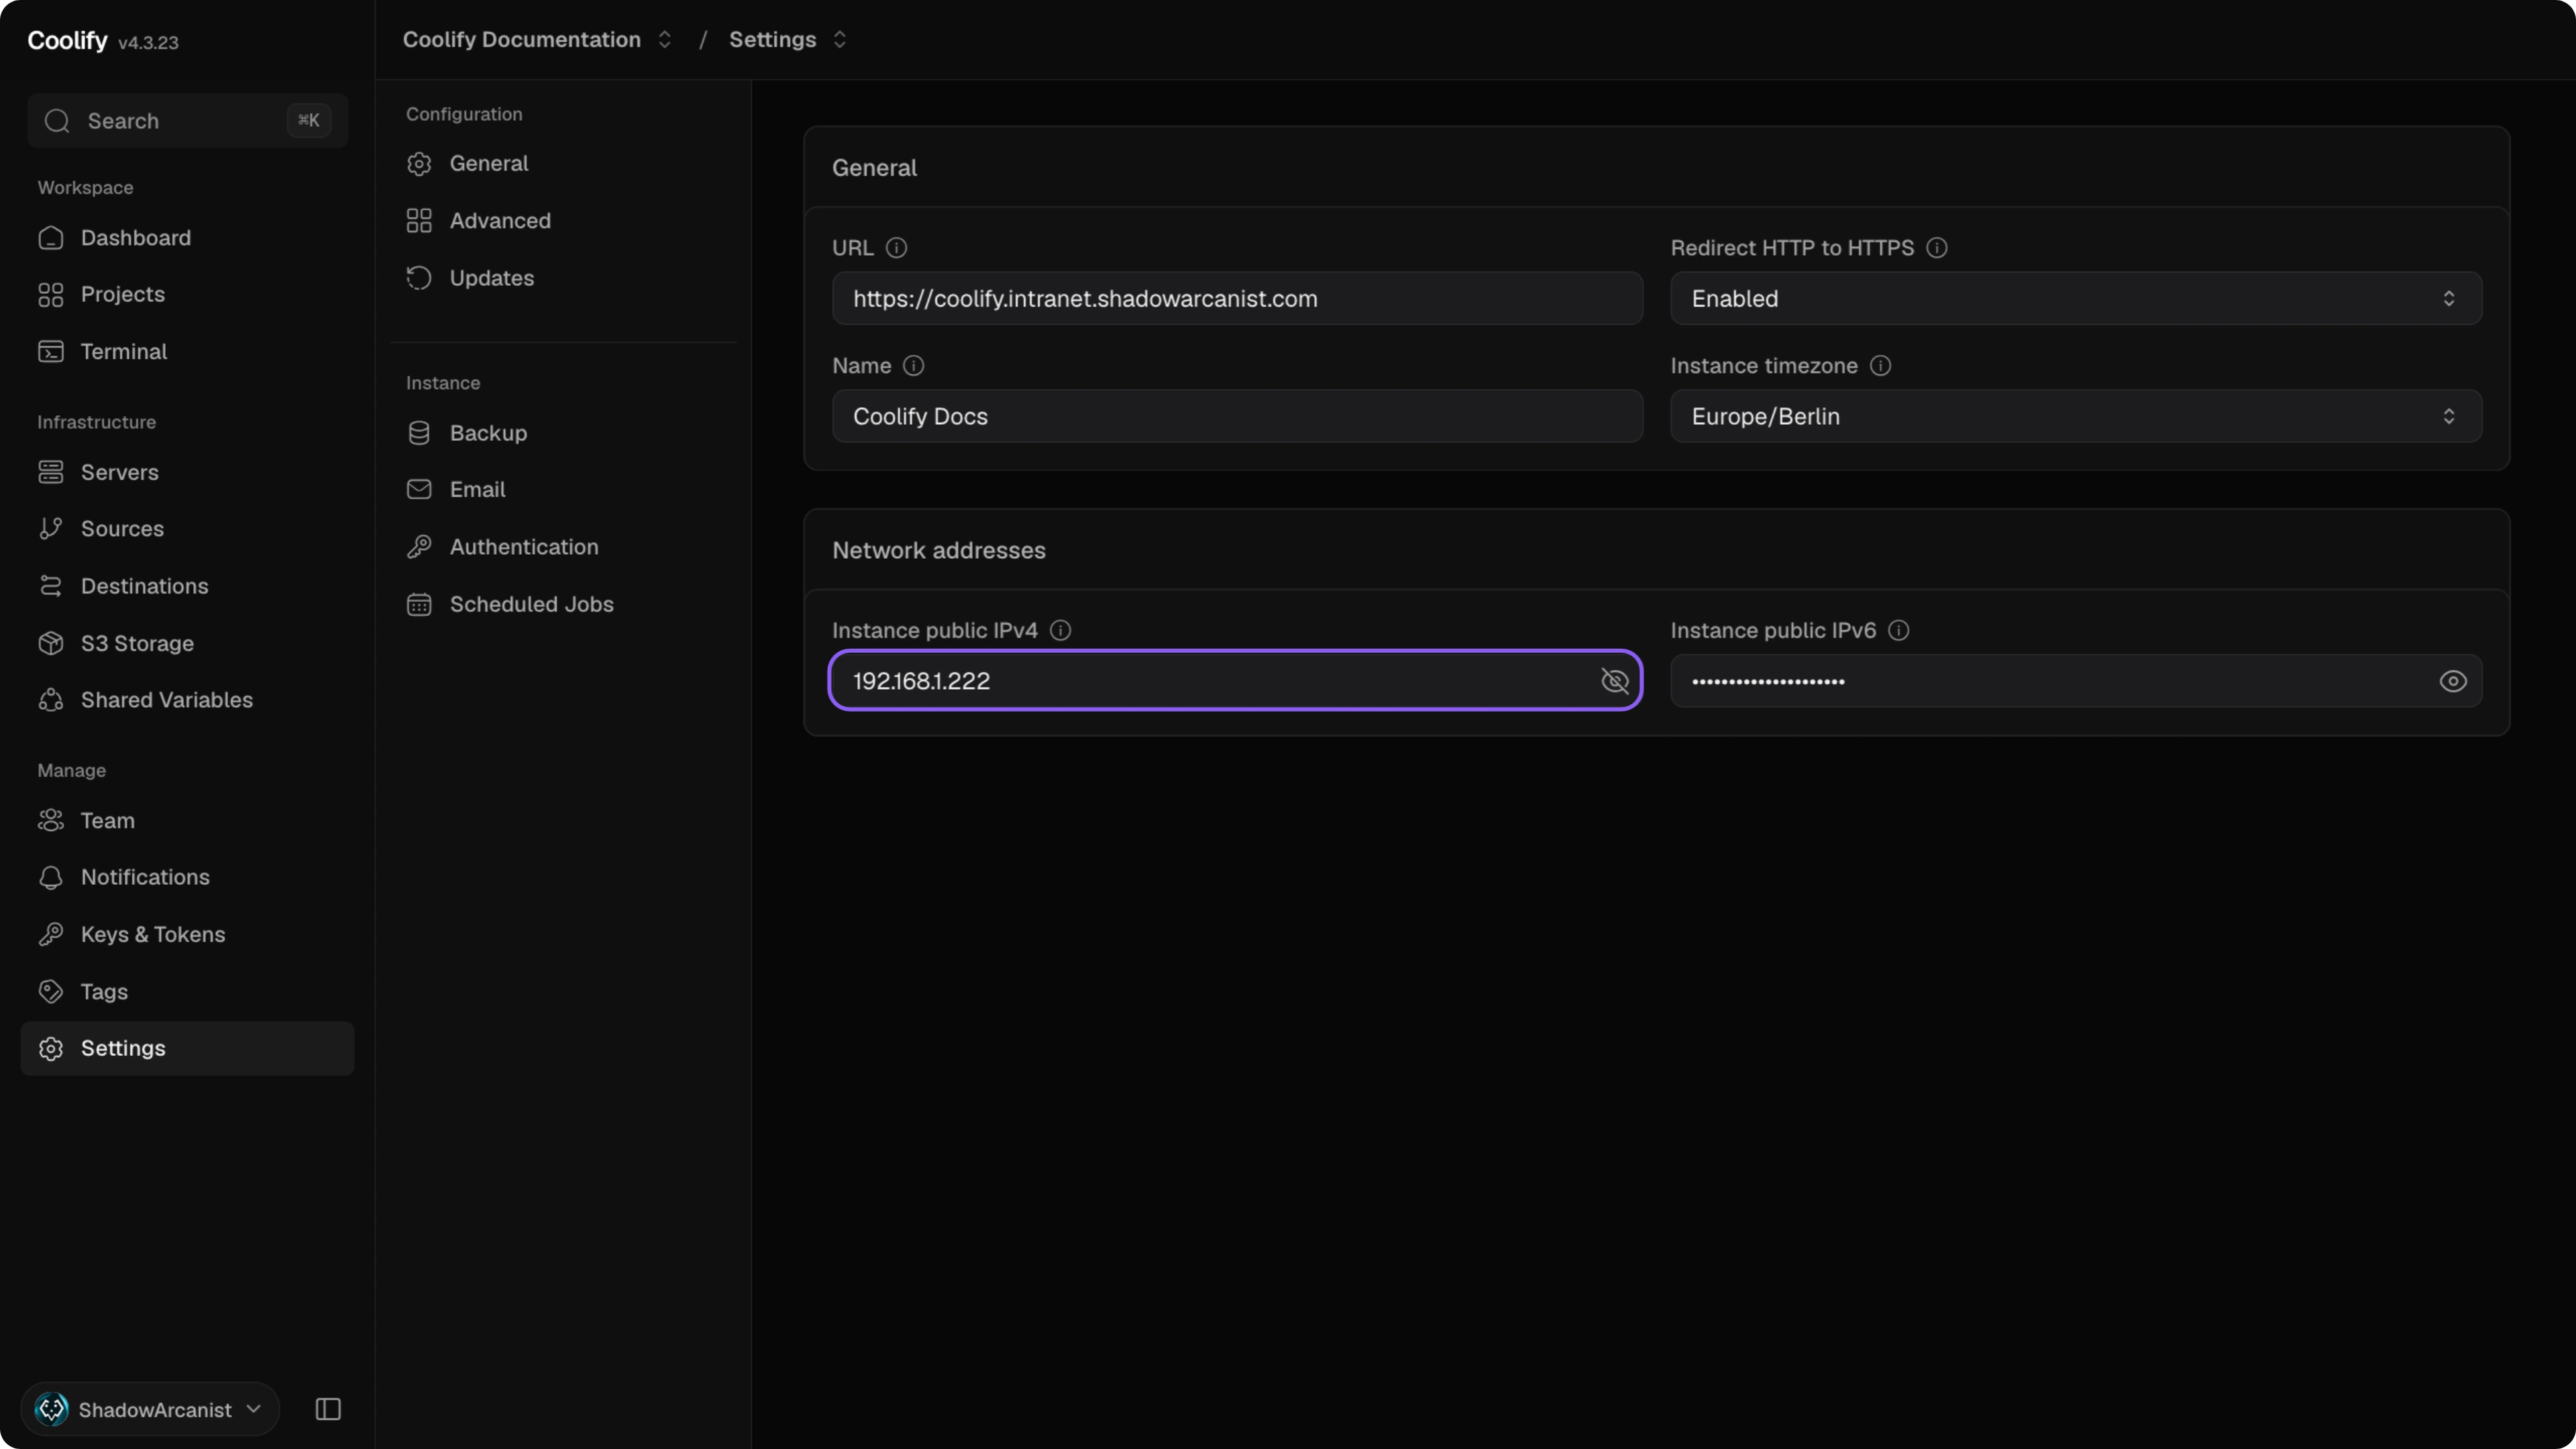
Coolify normally detects the public IPv4 address of the server that runs the instance. Use this field only when the detected address is wrong, usually on servers with multiple public IPs.
Enter the IPv4 address Coolify should use and click Save changes.
Accepted values:
- Leave it empty to let Coolify use the detected address.
- A valid IPv4 address, for example
203.0.113.10.
Instance public IPv6
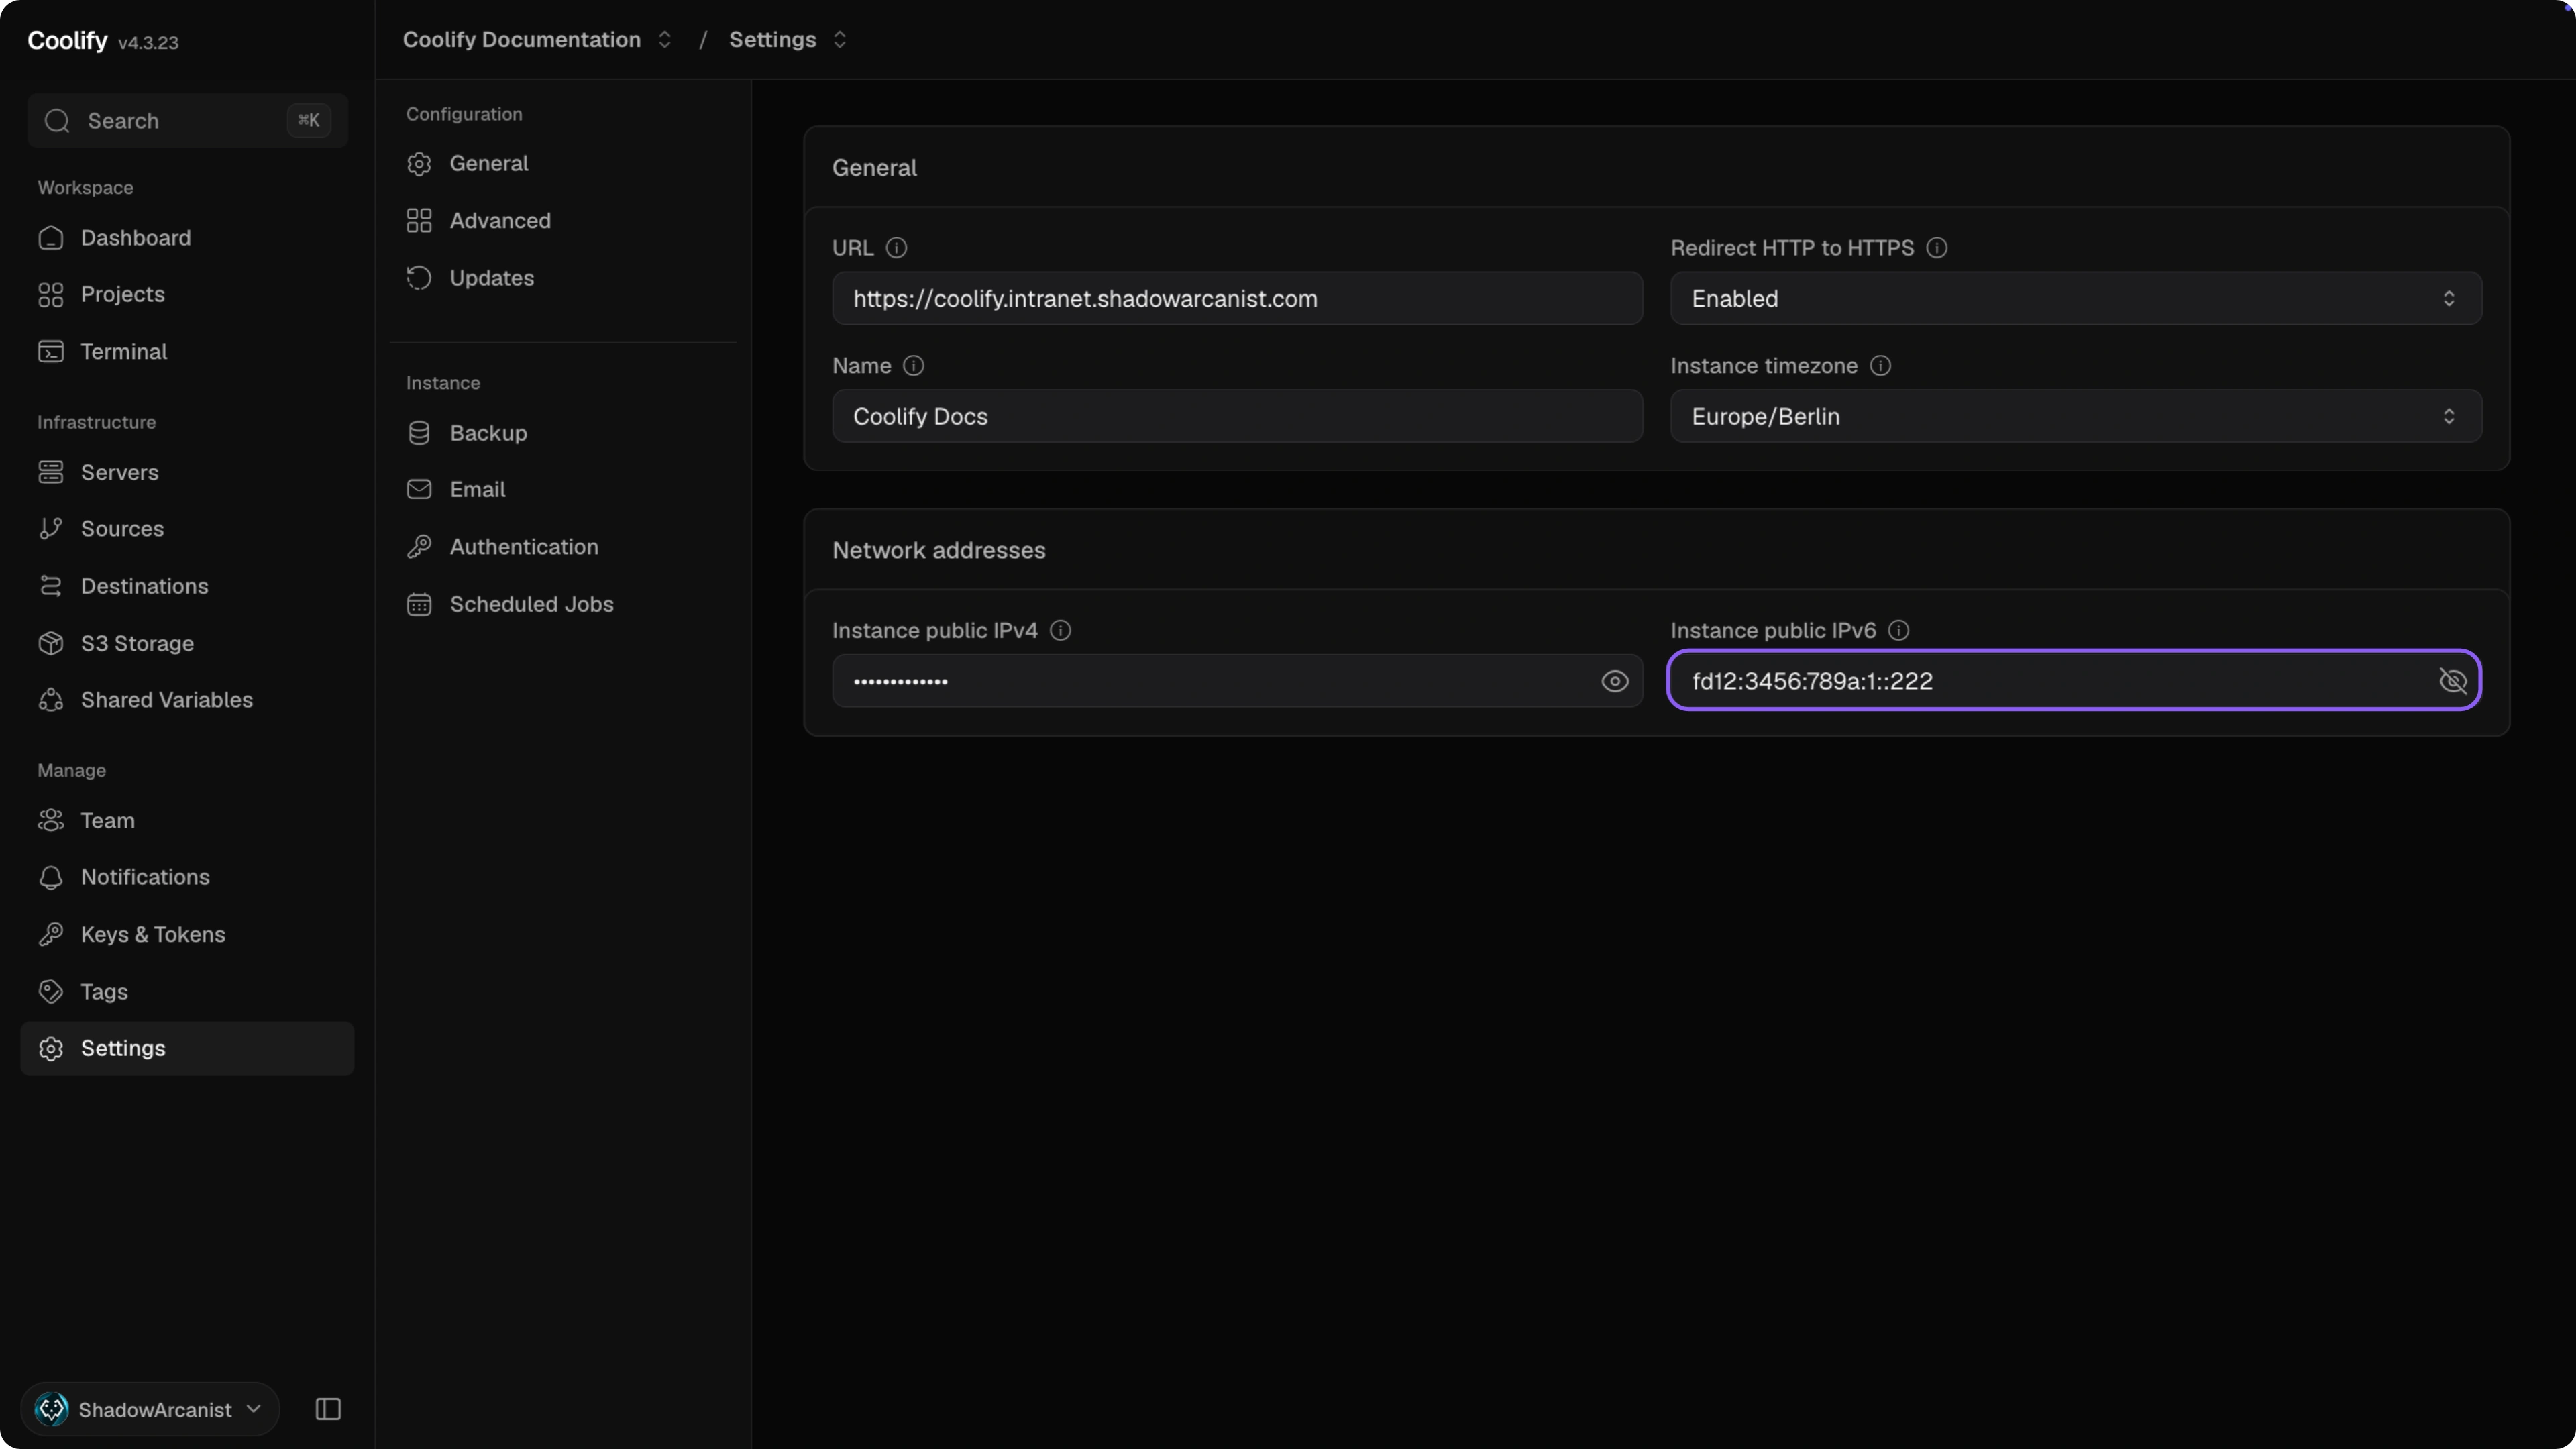
Coolify normally detects the public IPv6 address of the server that runs the instance. Use this field only when Coolify picks the wrong IPv6 address or cannot detect it.
Enter the IPv6 address Coolify should use and click Save changes.
Accepted values:
- Leave it empty to let Coolify use the detected address.
- A valid IPv6 address, for example
2001:db8::1.
Instance
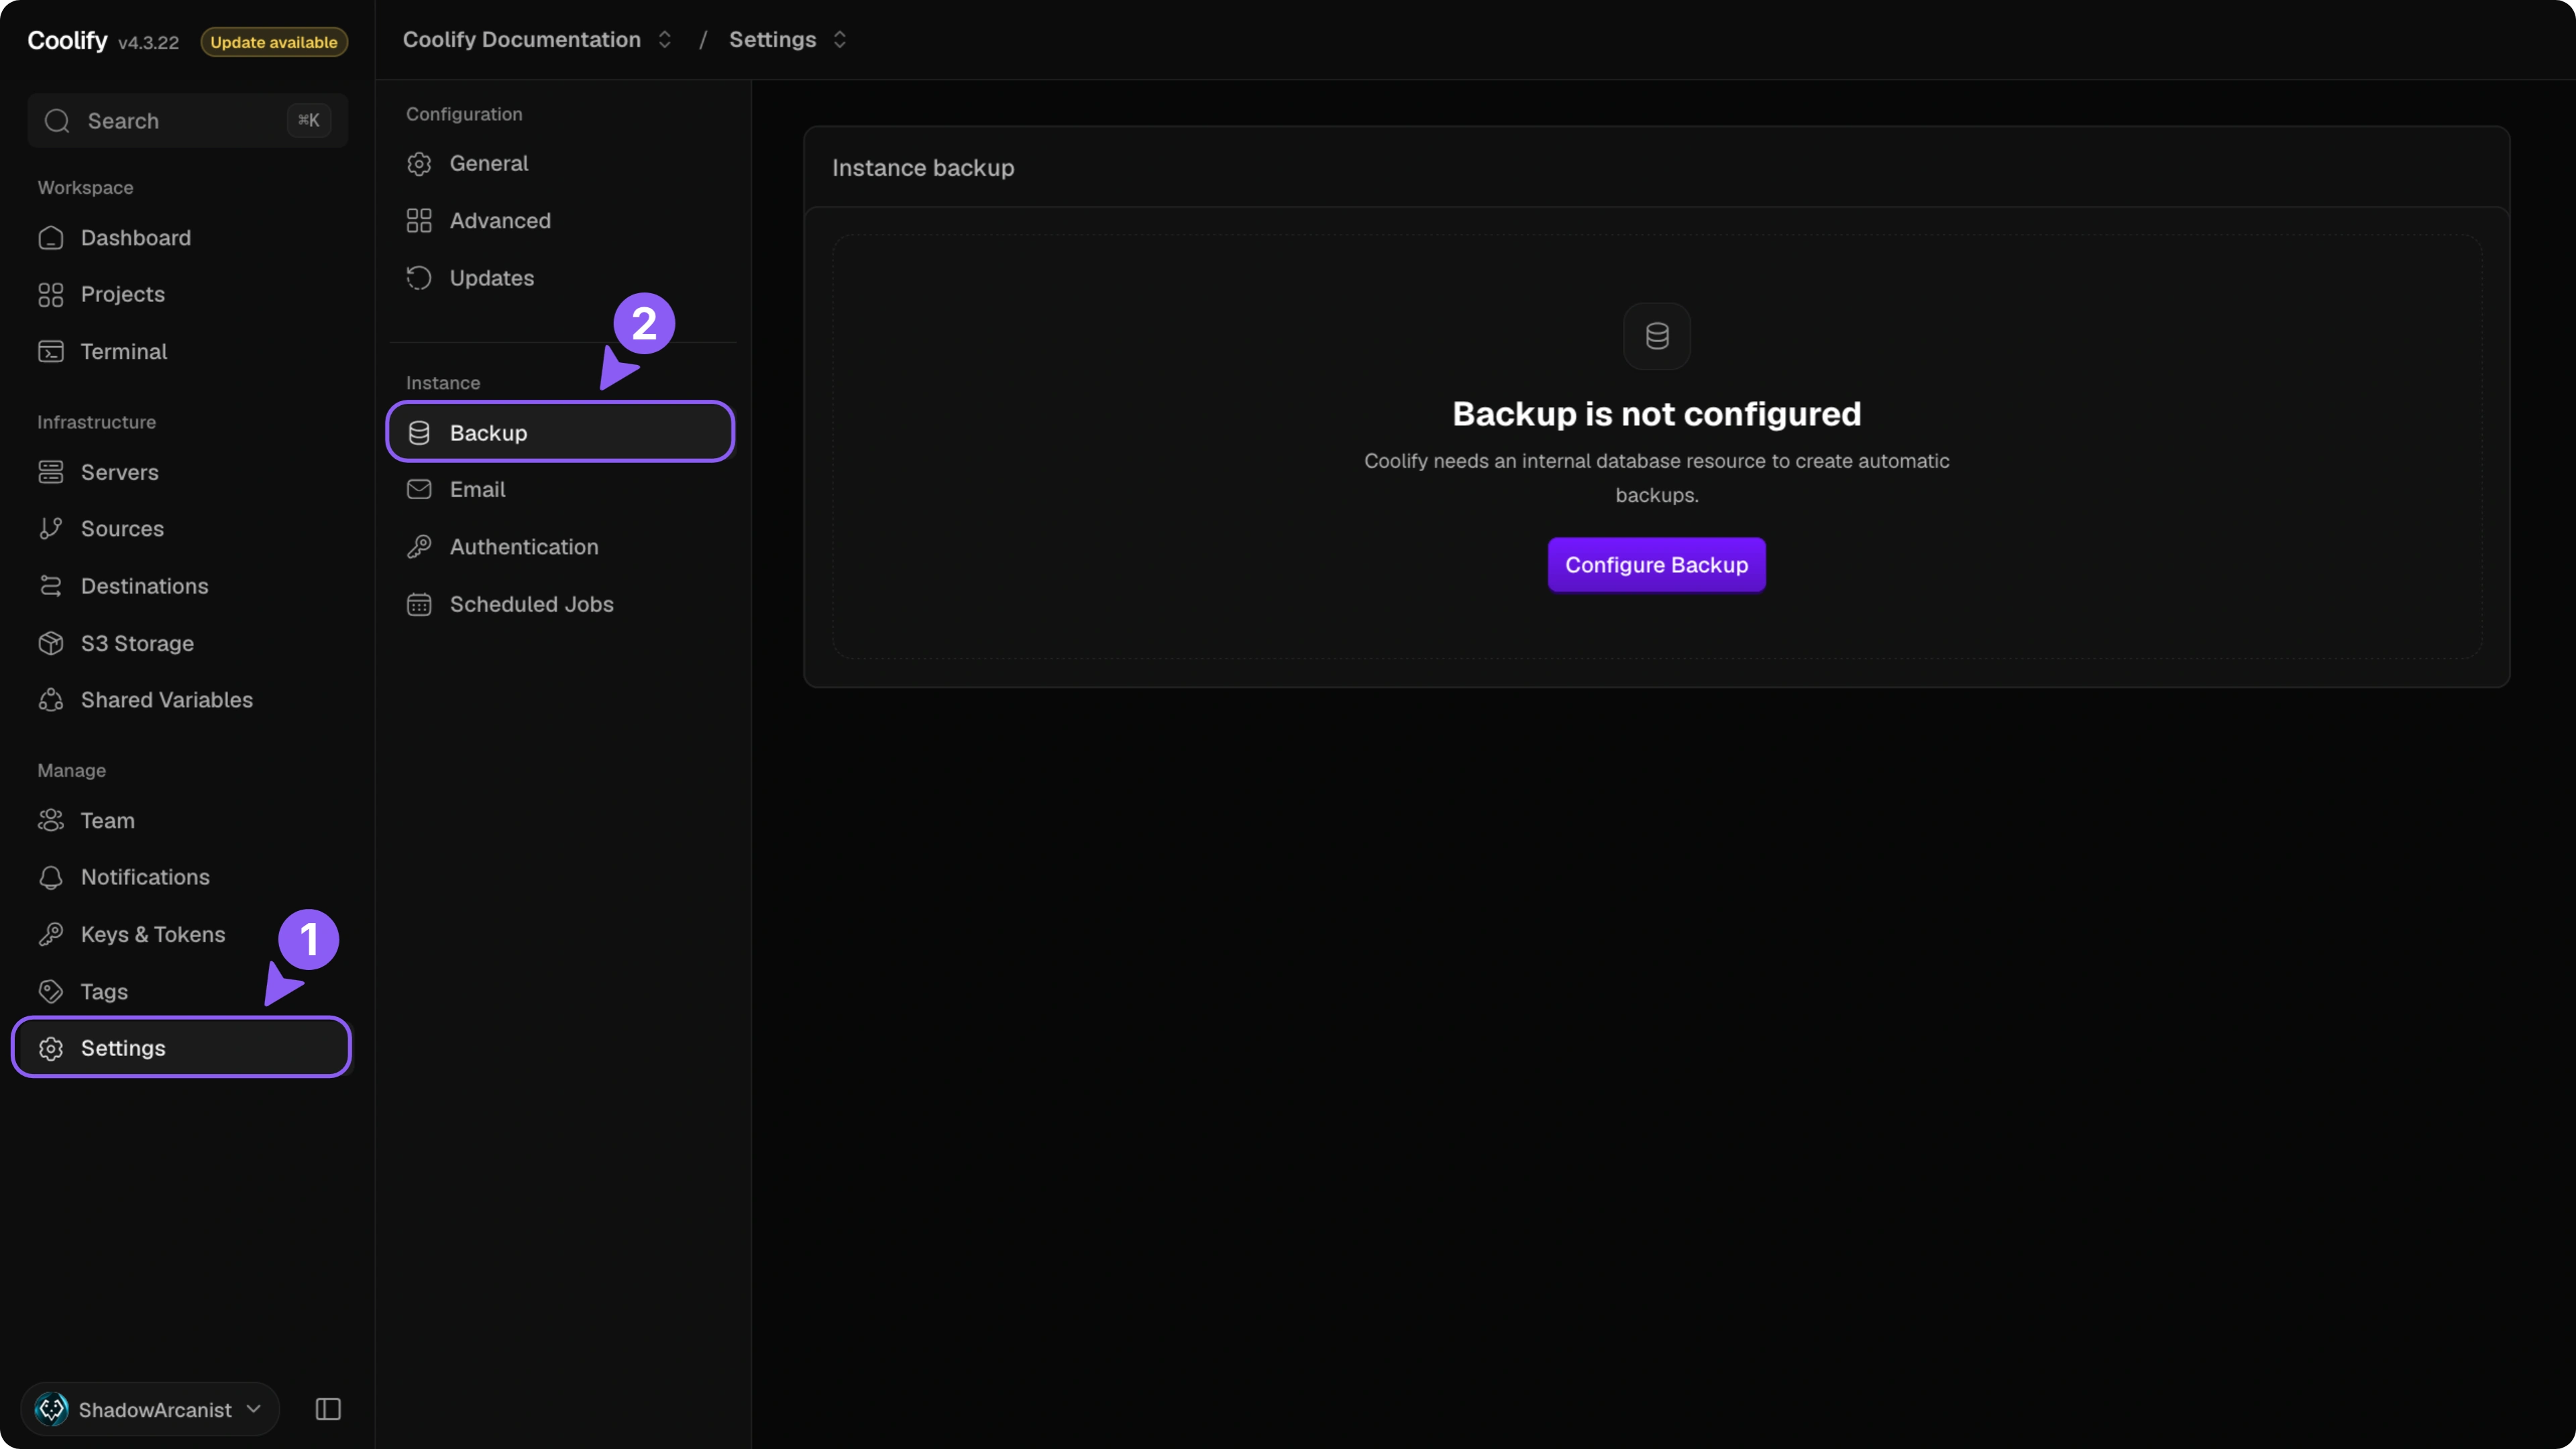
The Backup page manages backups of Coolify's internal database. It does not back up application volumes or external databases. For the full backup guide, see Instance backup.
First-time setup
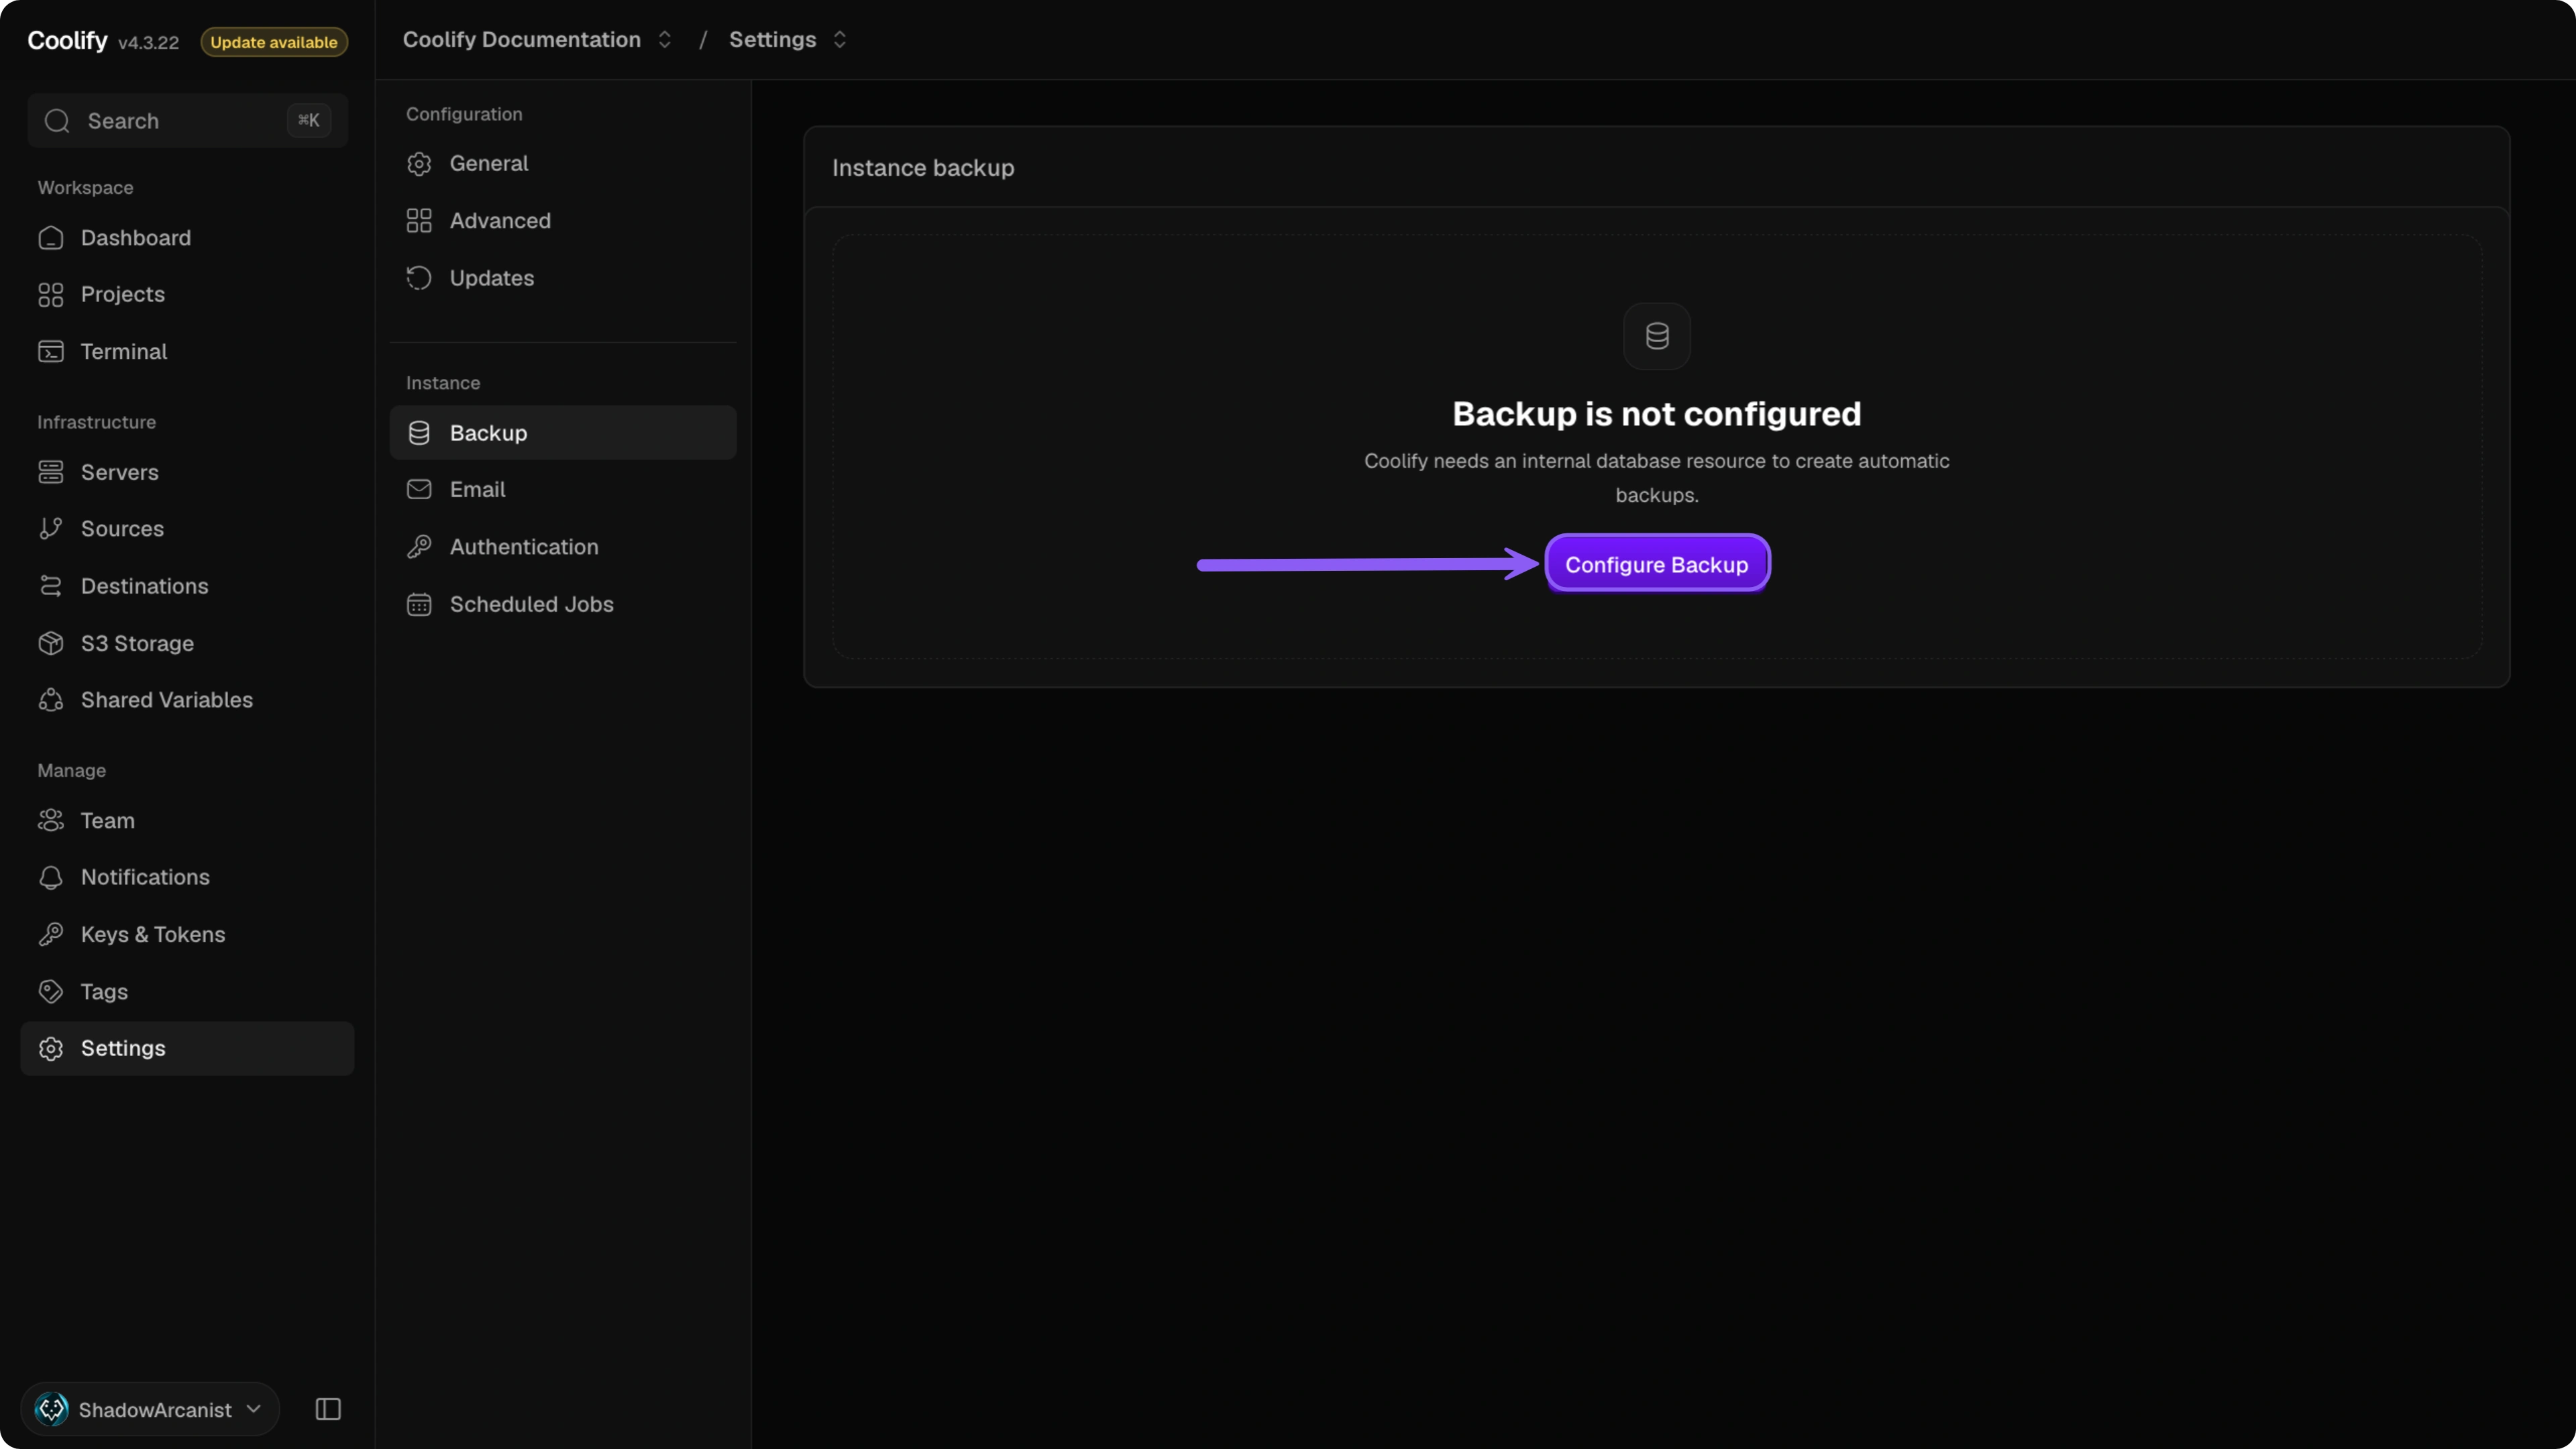
When instance backup has not been configured, the page shows Backup is not configured. Click Configure backup to create the internal coolify-db resource and its scheduled backup. The localhost server must be functional; if it is not, open server settings and validate the localhost connection first.
Instance database
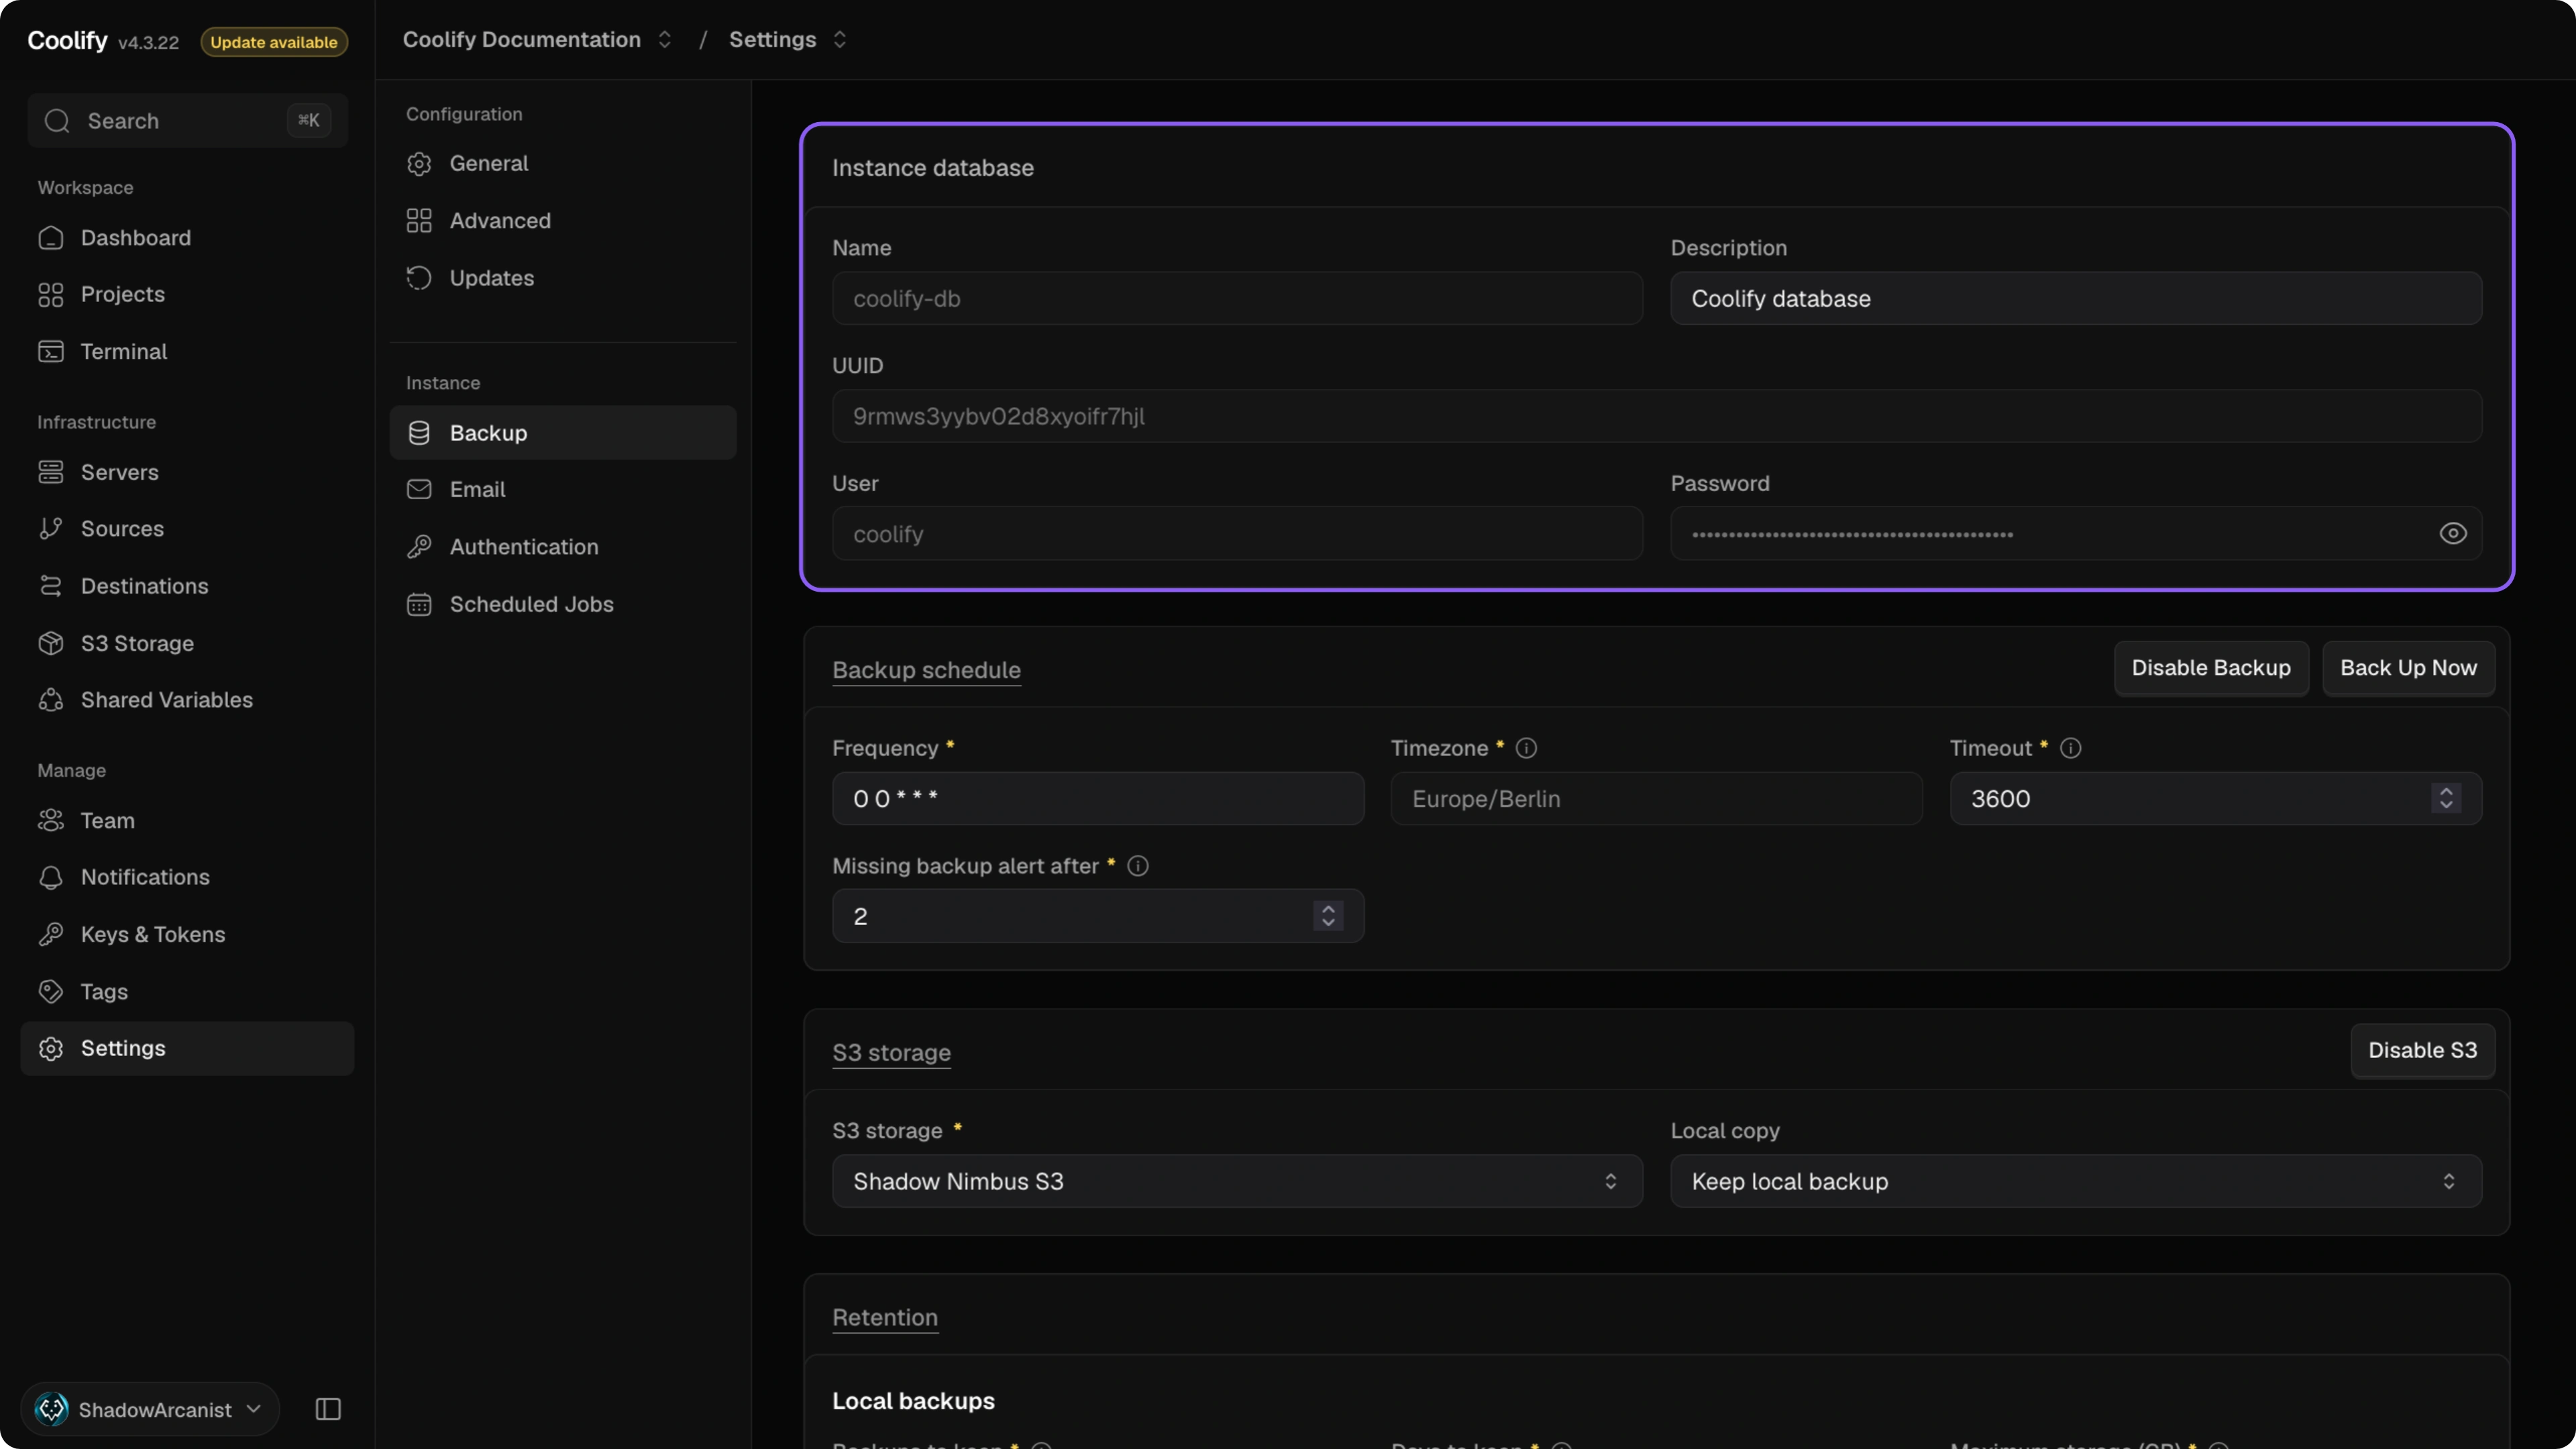
This section shows Coolify's internal coolify-db resource used for instance backups. Its Name, UUID, User, and Password are read-only. You can edit the Description and click Save changes.
Backup schedule
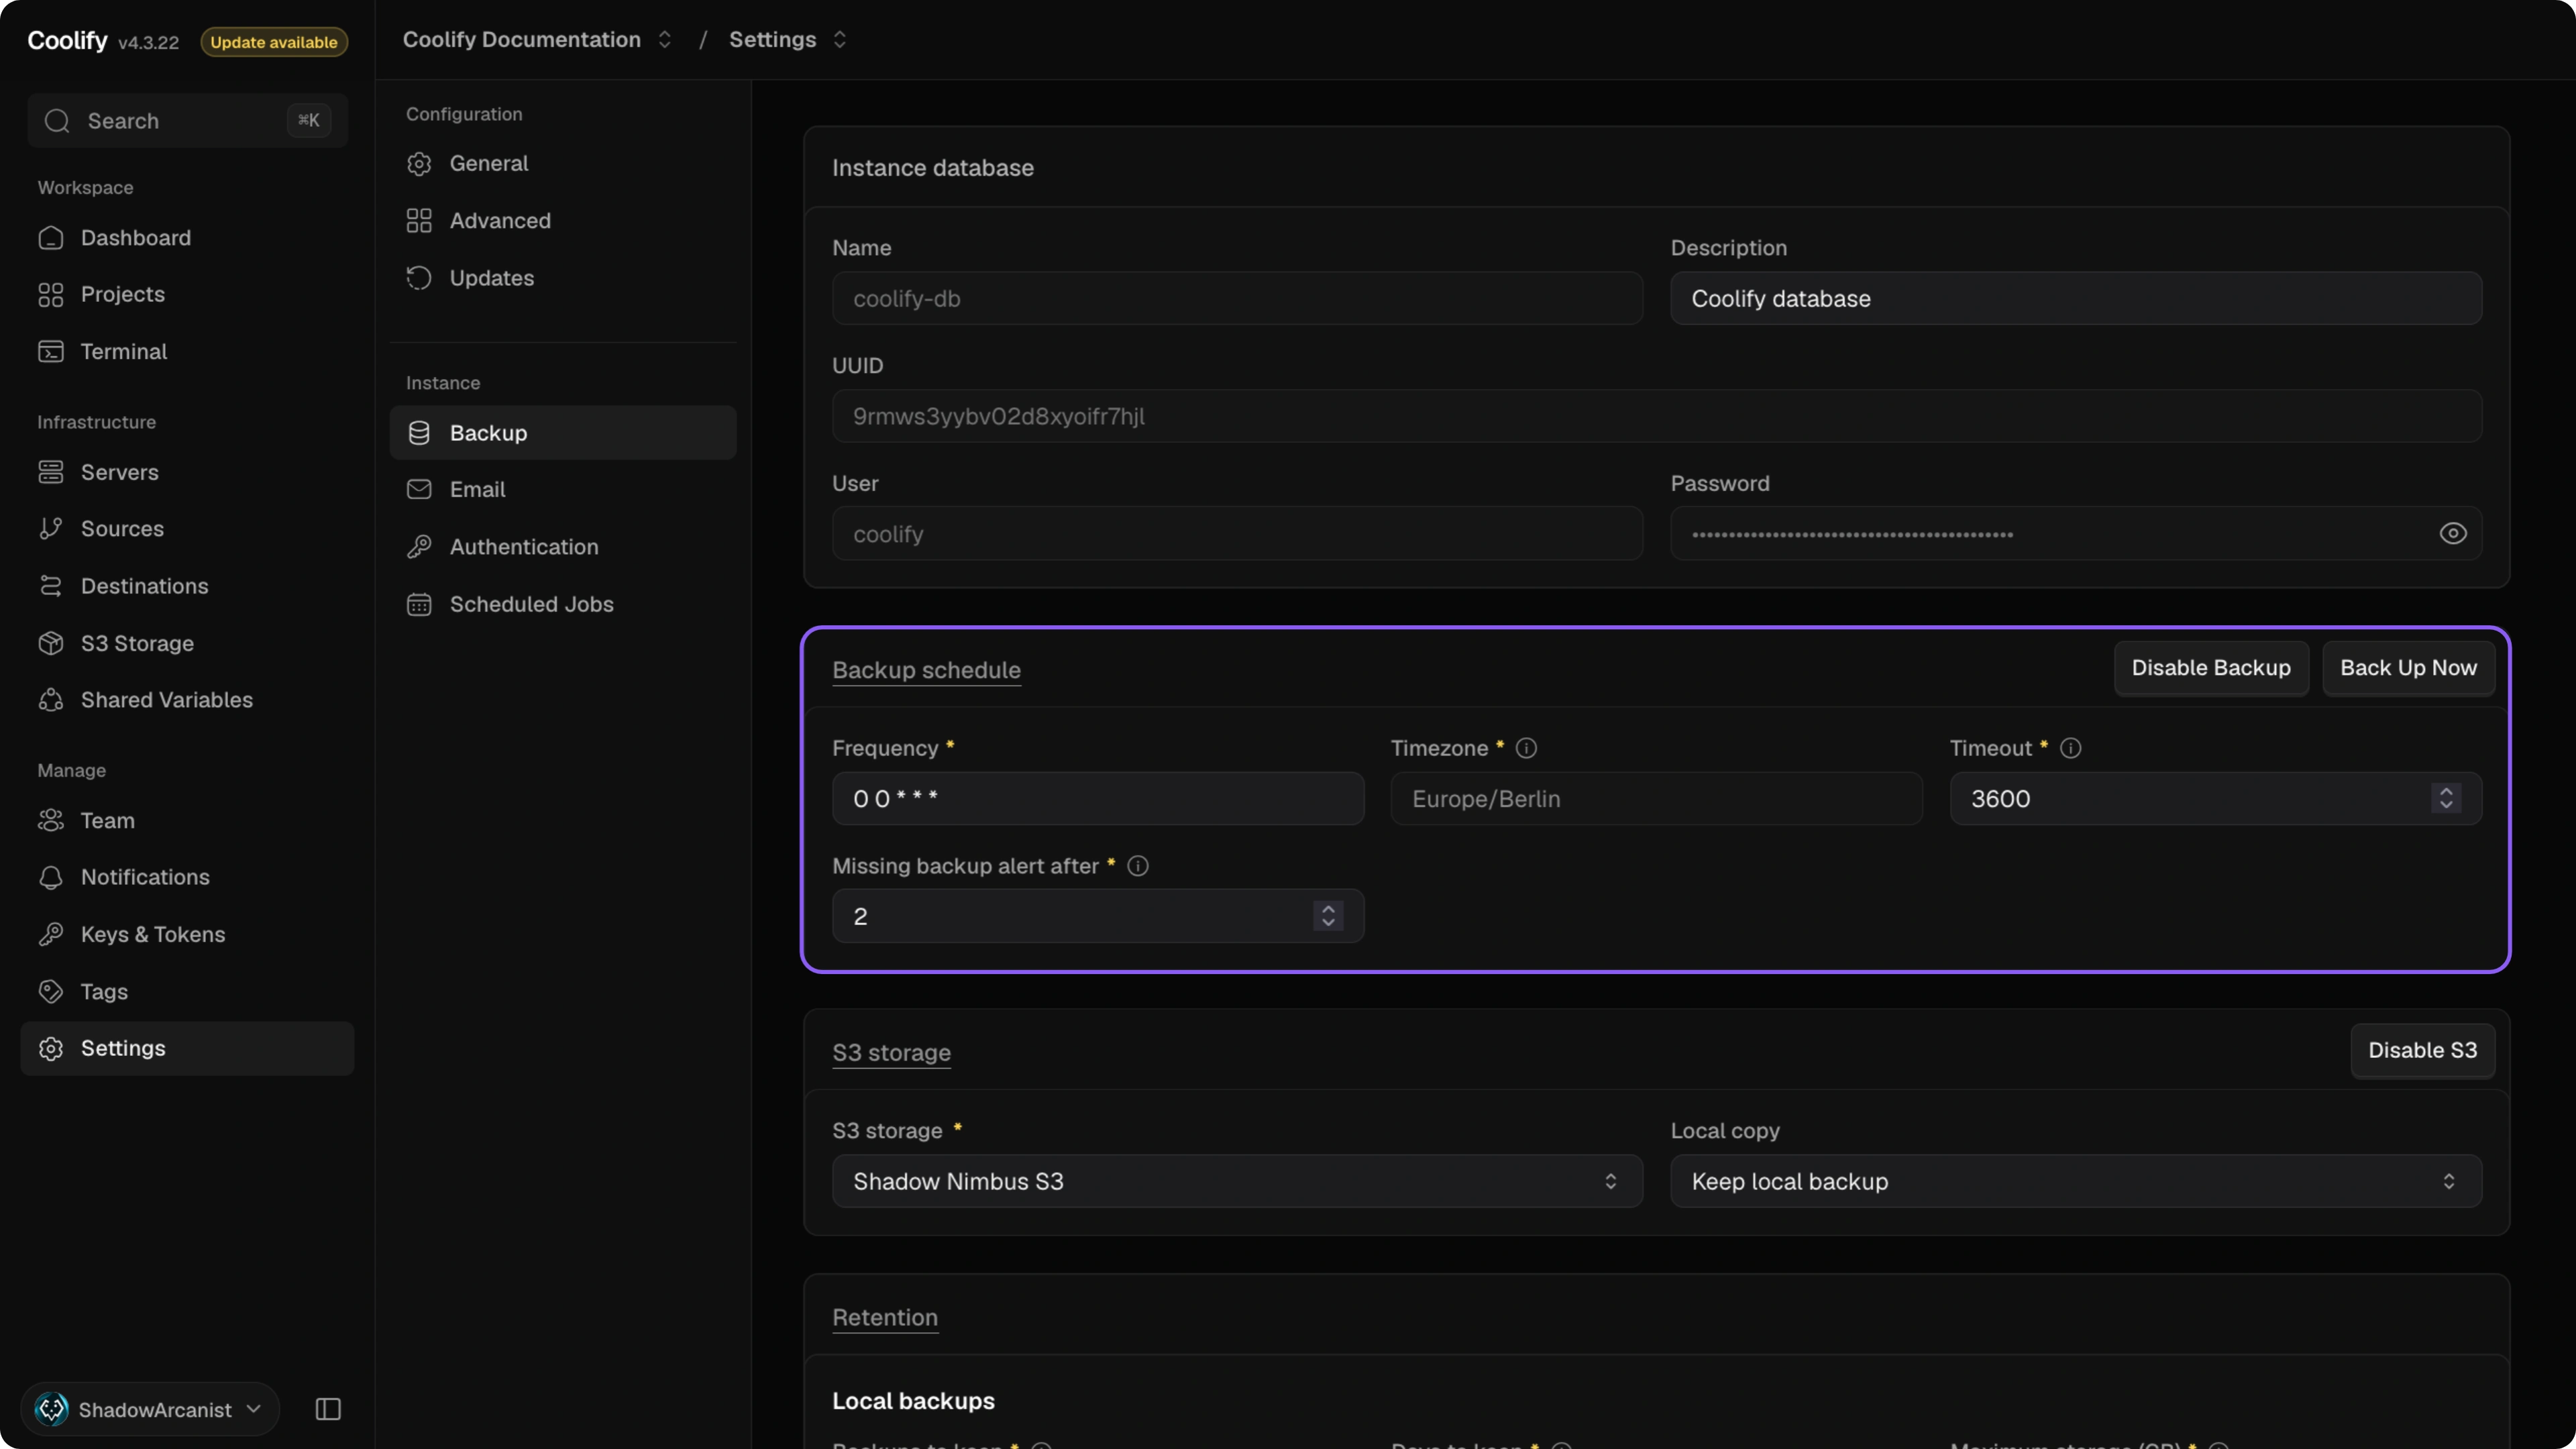
Enable or disable backups
Use Enable backup or Disable backup to turn the scheduled backup job on or off. This action saves immediately.
Click Back up now to start a backup without waiting for the next scheduled run. The database must be running for this action.
Frequency
Sets how often the internal Coolify database is backed up. Enter a preset such as hourly, daily, weekly, monthly, or yearly, every_minute, or a valid cron expression, then click Save changes. For example, 0 0 * * * runs daily at midnight.
Timezone
Shows the timezone Coolify uses for the backup schedule. This field is read-only and uses the timezone set for Coolify's localhost server, or the instance timezone if no server timezone is set.
Timeout
Sets the maximum backup runtime in seconds. If a backup exceeds this time, Coolify marks that execution as failed. Enter a value from 60 to 36000, then click Save changes.
Missing backup alert after
Sets how many days can pass without a backup execution before Coolify sends an alert through backup failure notification channels. Enter 0 to disable this alert, or a value from 1 to 365, then click Save changes.
S3 storage
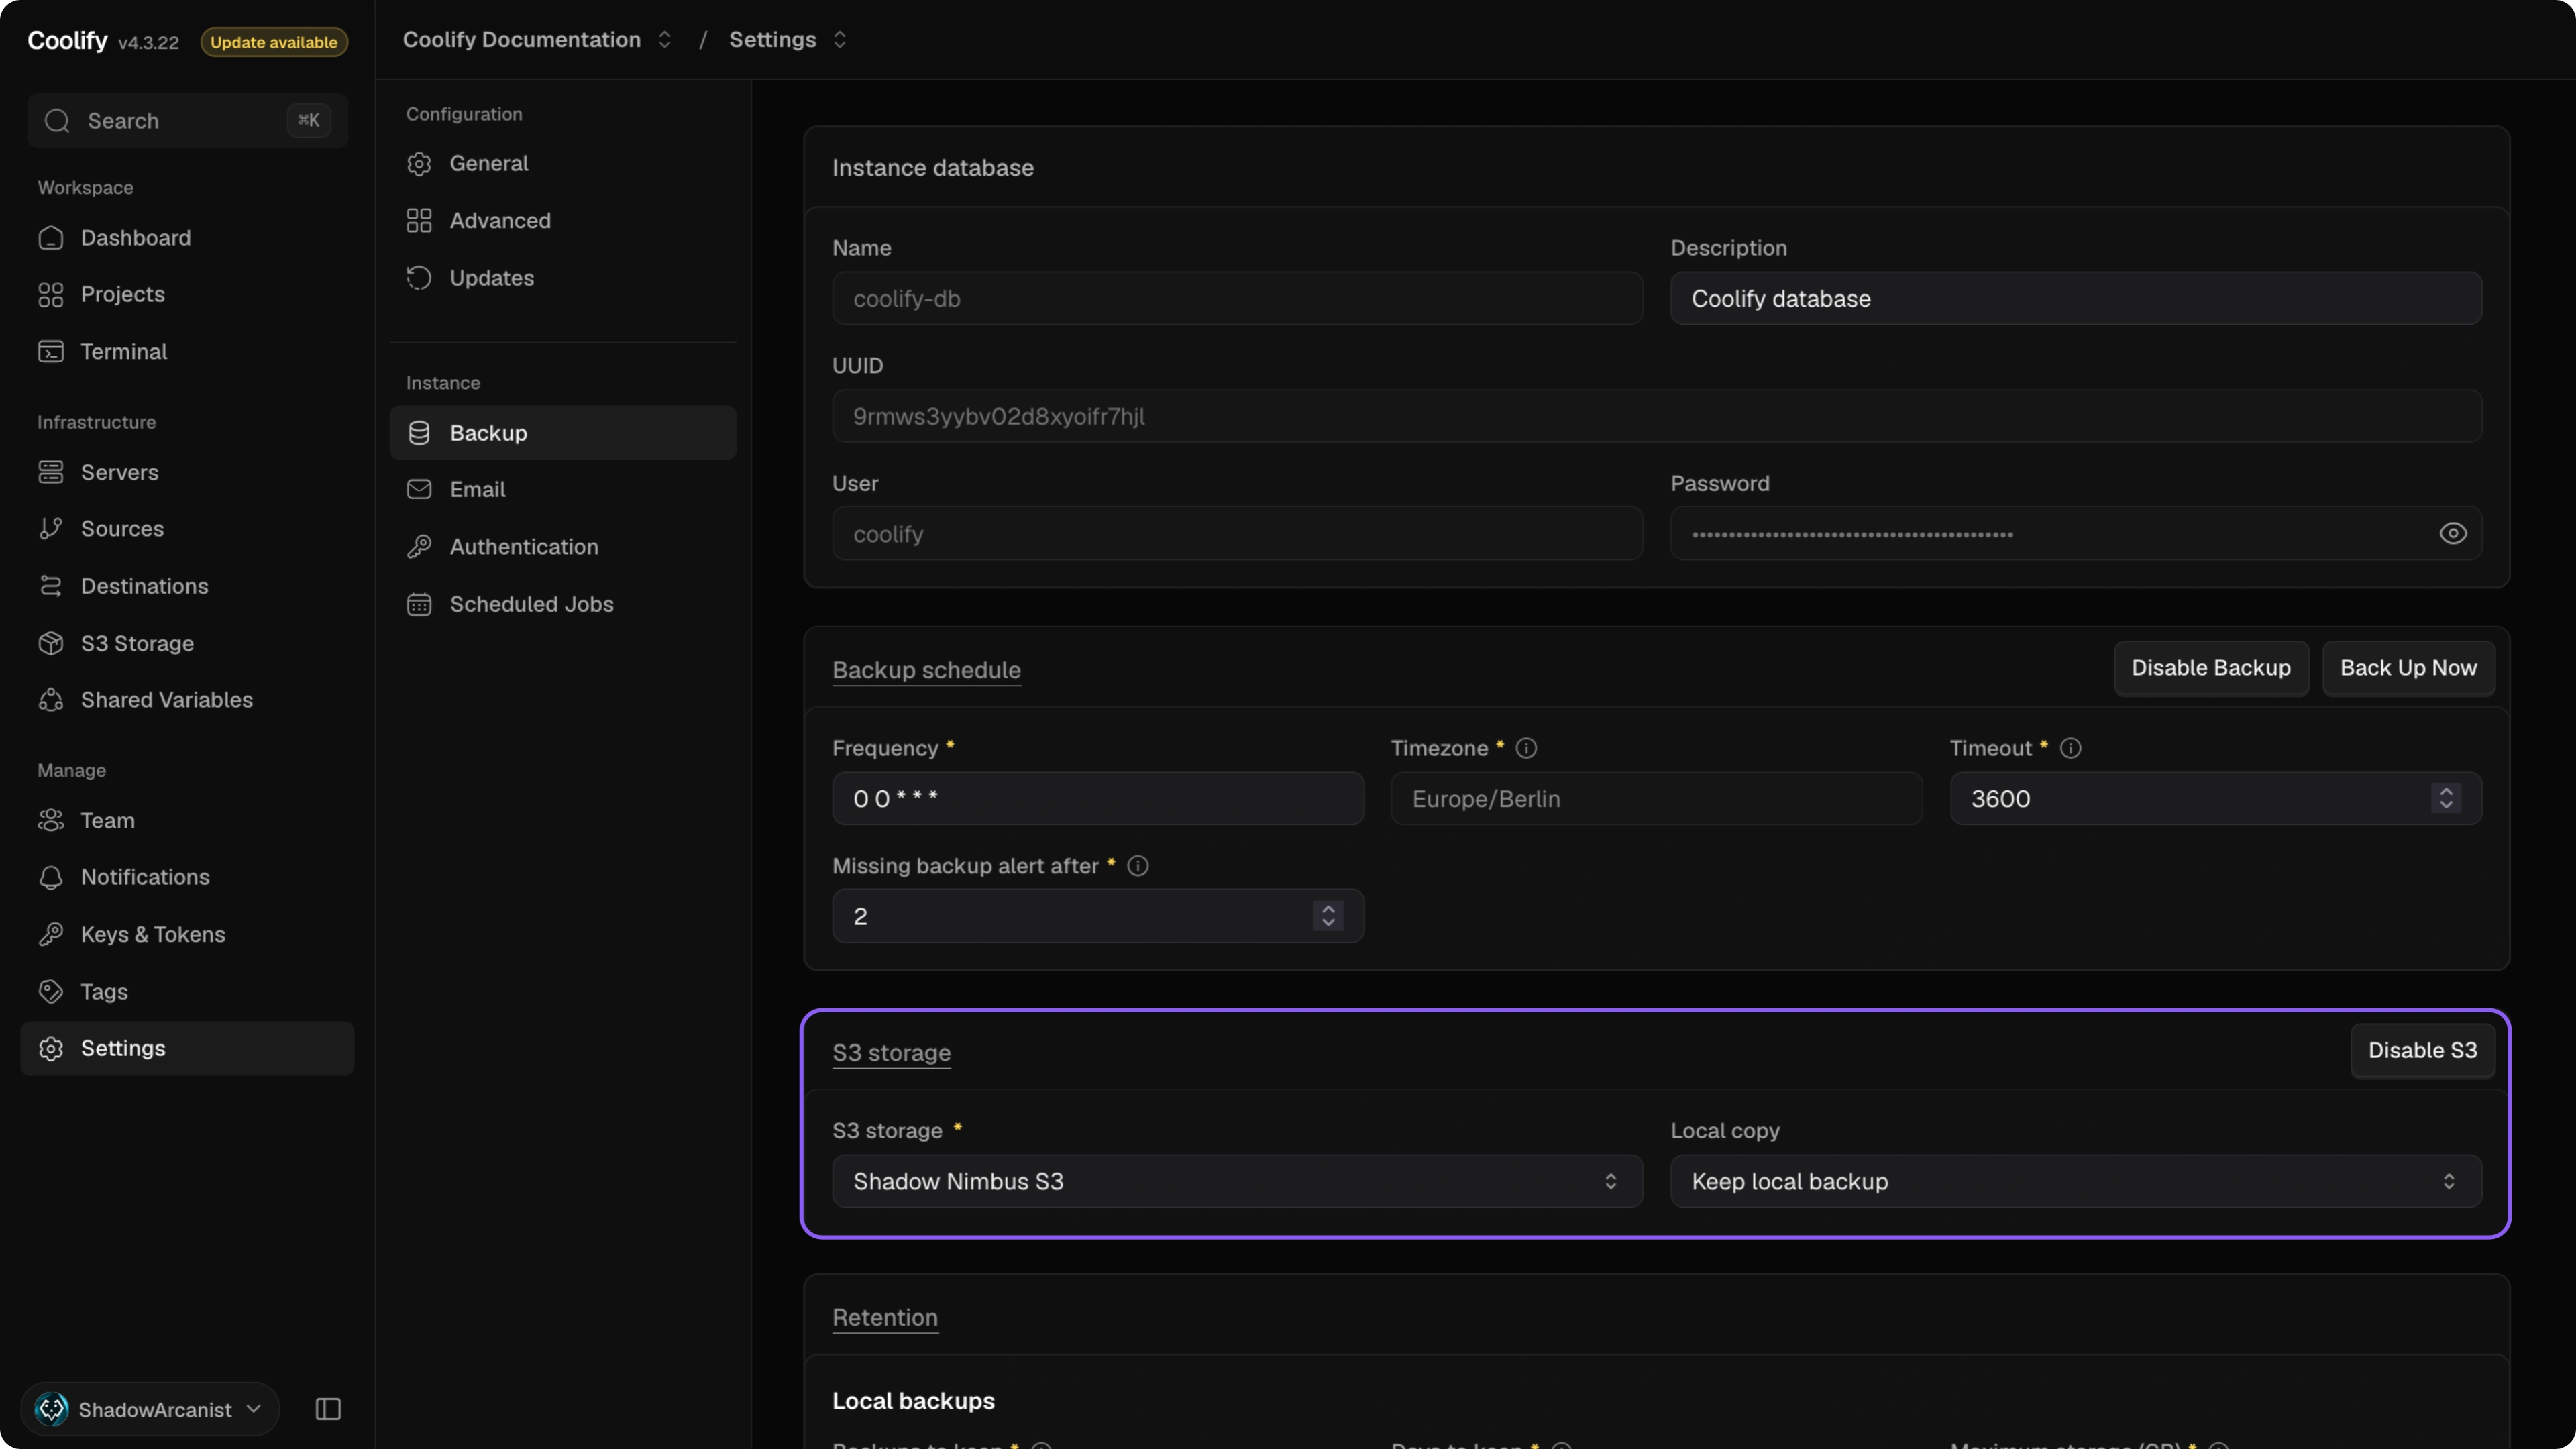
Use S3 storage to keep a remote copy of each instance backup. Set up and validate an S3 storage destination before enabling S3 backups.
Click Enable S3 to turn on uploads, then select an S3 storage destination. Choose whether Local copy should Keep local backup or Delete after S3 upload. Save changes after updating the local copy option. The storage selector is unavailable until a validated destination exists.
Retention
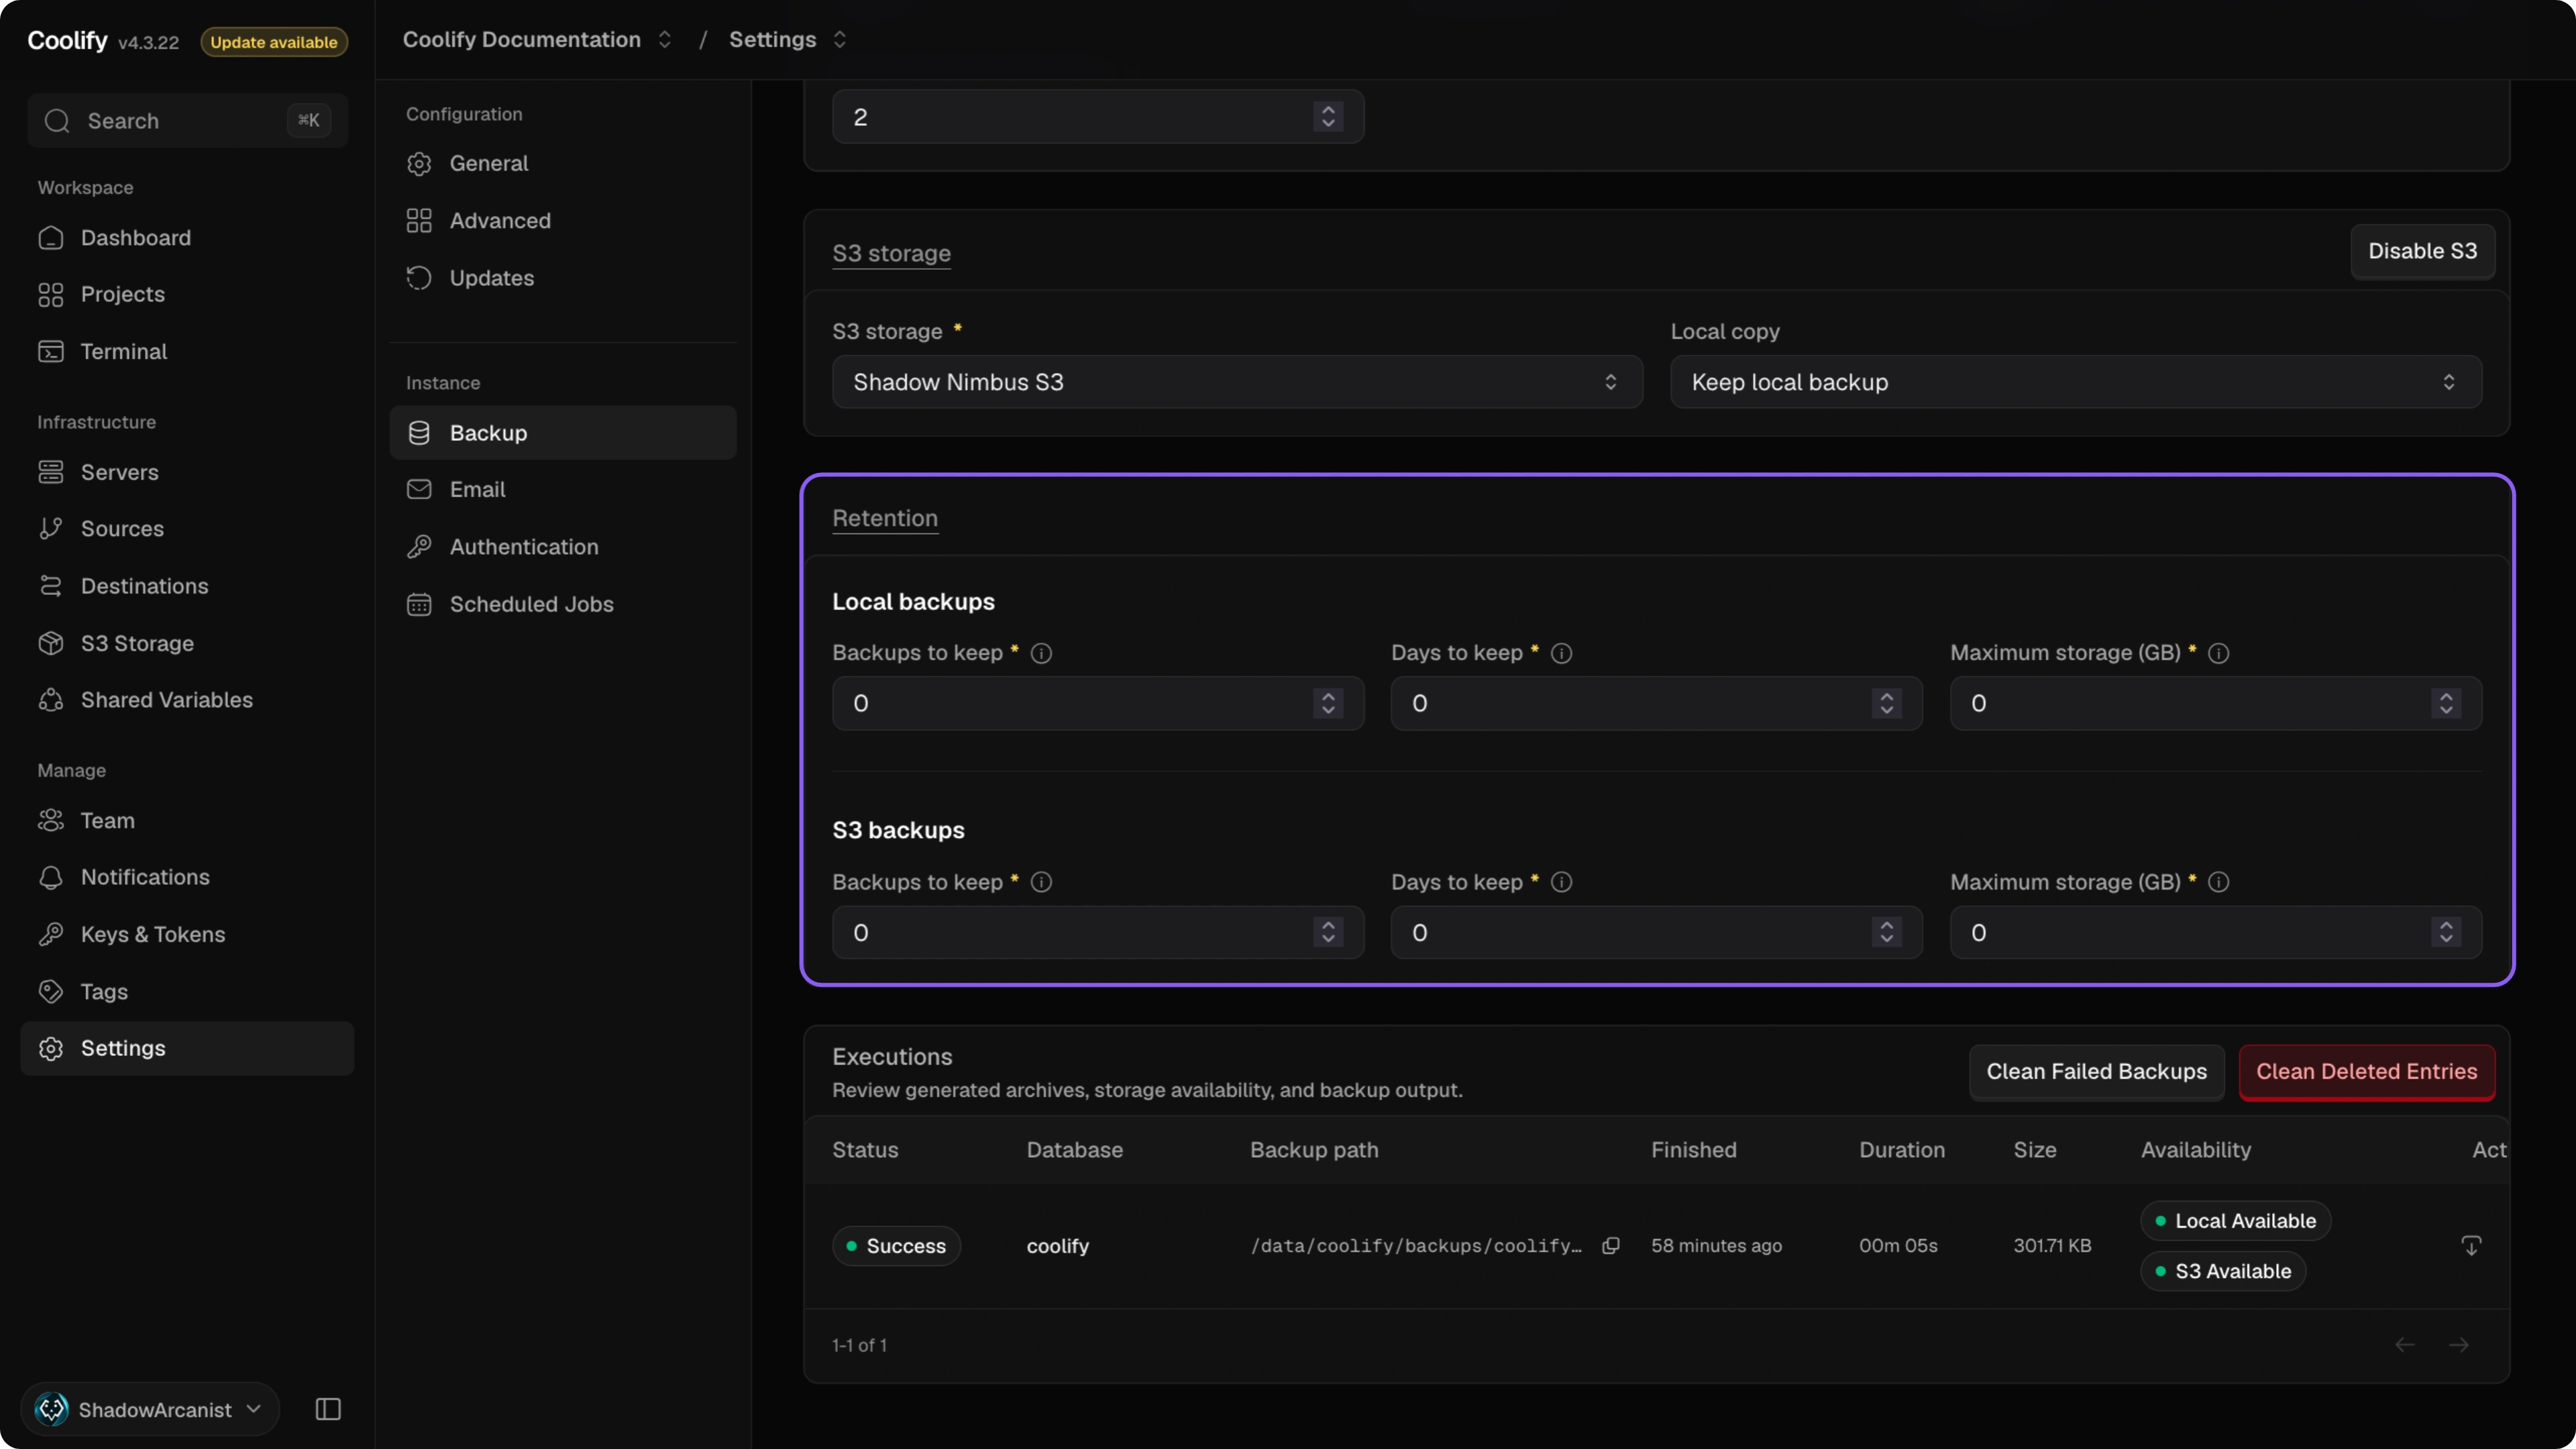
Set separate retention limits for Local backups and S3 backups. The first limit reached removes the oldest backup. A value of 0 means unlimited for that limit. Enter the limits, then click Save changes.
For each location, you can set:
- Backups to keep: maximum number of recent backups.
- Days to keep: remove backups older than this many days.
- Maximum storage (GB): remove the oldest backups after the total size reaches this value. Decimal values are accepted.
Executions
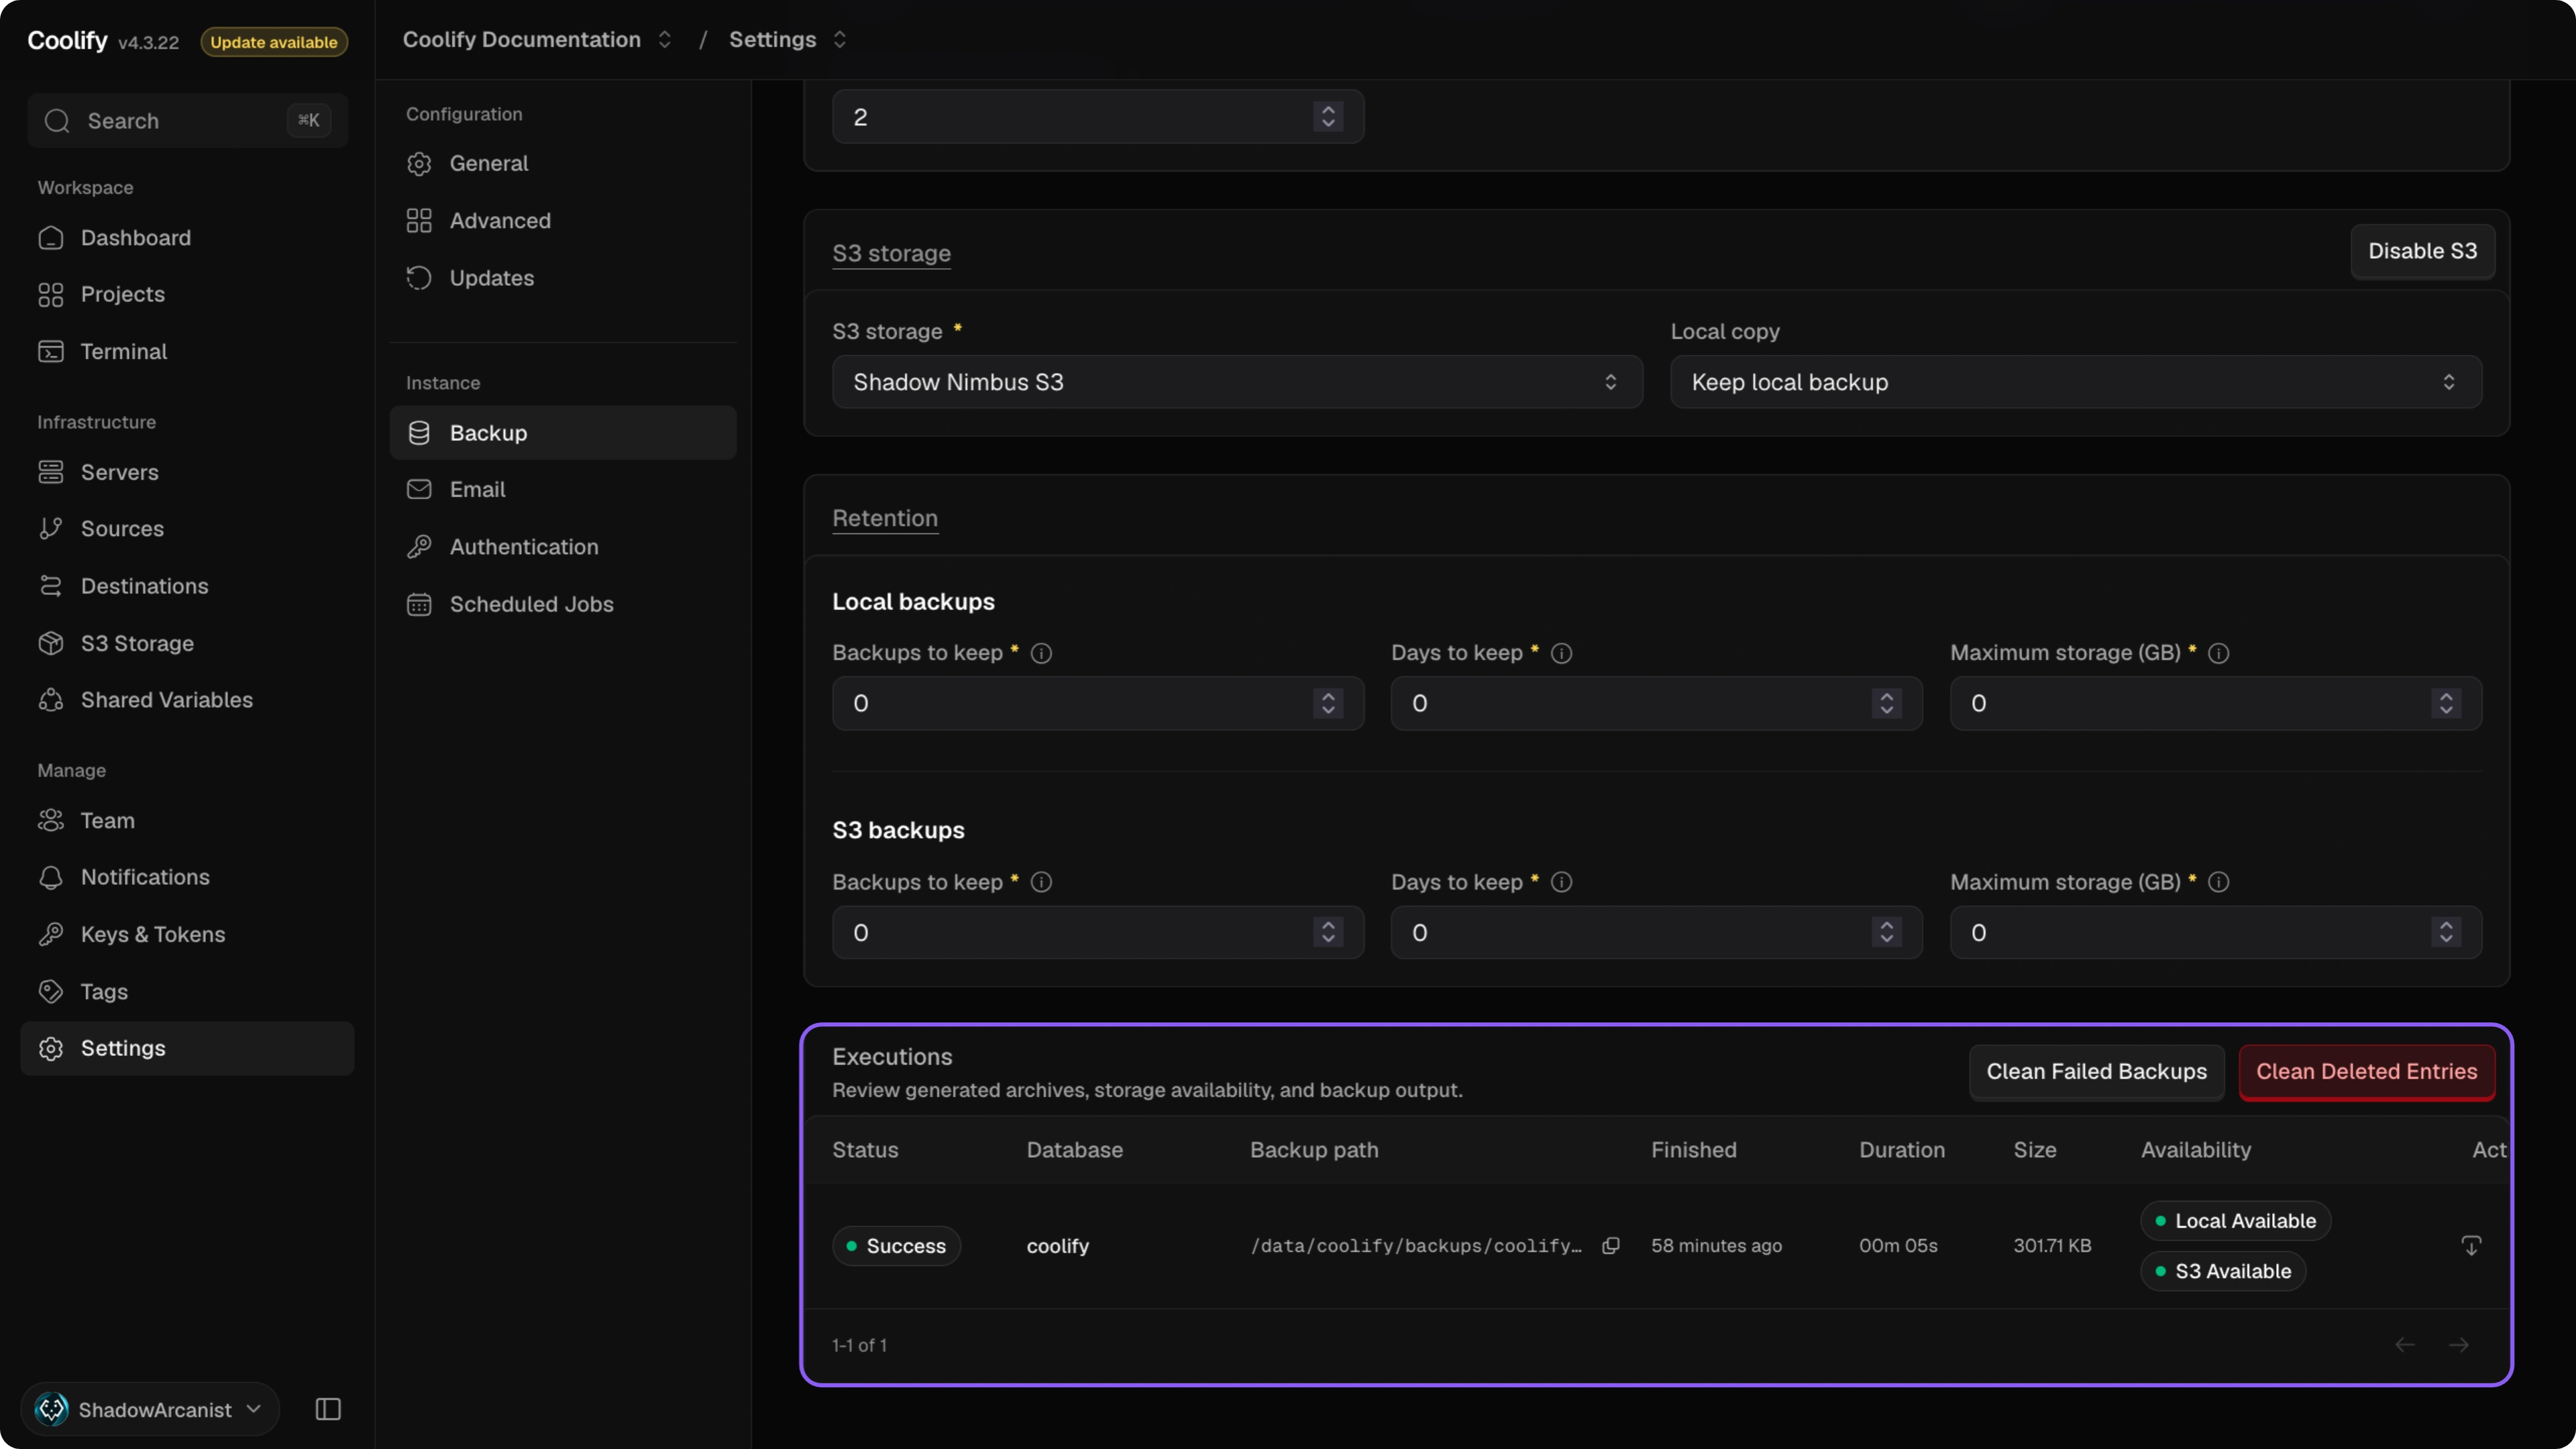
Review backup status, database, file path, finish time, duration, size, and local or S3 availability.
To delete a backup, click its delete icon. Whether Coolify asks for password confirmation depends on Destructive action confirmation: Require two-step confirmation shows the prompt, while Skip two-step confirmation skips it. Coolify deletes the local backup file, if it is still present, and removes the execution from the list.
Click the download icon on a successful run to download its backup.
Clean failed backups removes rows for unsuccessful runs. Clean deleted entries removes rows for backups whose local files have already been deleted; it does not delete files. Successful runs appear here after a scheduled or manual backup completes.
Instance environment settings
Set HORIZON_ALLOWED_EMAILS in the instance environment to grant additional users access to Laravel Horizon. See Coolify development for the Horizon URL.
SSH_COMMAND_TIMEOUT defaults to 3600 seconds. A value of 0 or an invalid value uses that default rather than disabling the timeout.
PROXY_CONNECT_NETWORKS_INTERVAL_SECONDS and NIGHTWATCH_ENABLED are removed. Proxy networks are connected during destination creation, deployment, and proxy startup/restart. Laravel Nightwatch no longer runs inside the Coolify container.