Creating Destinations
This guide shows you how to create new destinations in Coolify for deploying your applications and databases.
Prerequisites
Before creating a destination, ensure you have:
- At least one server connected to Coolify
- Appropriate permissions to manage destinations
- Basic understanding of Docker networks
Creating a New Destination
Method 1: From Destinations Page
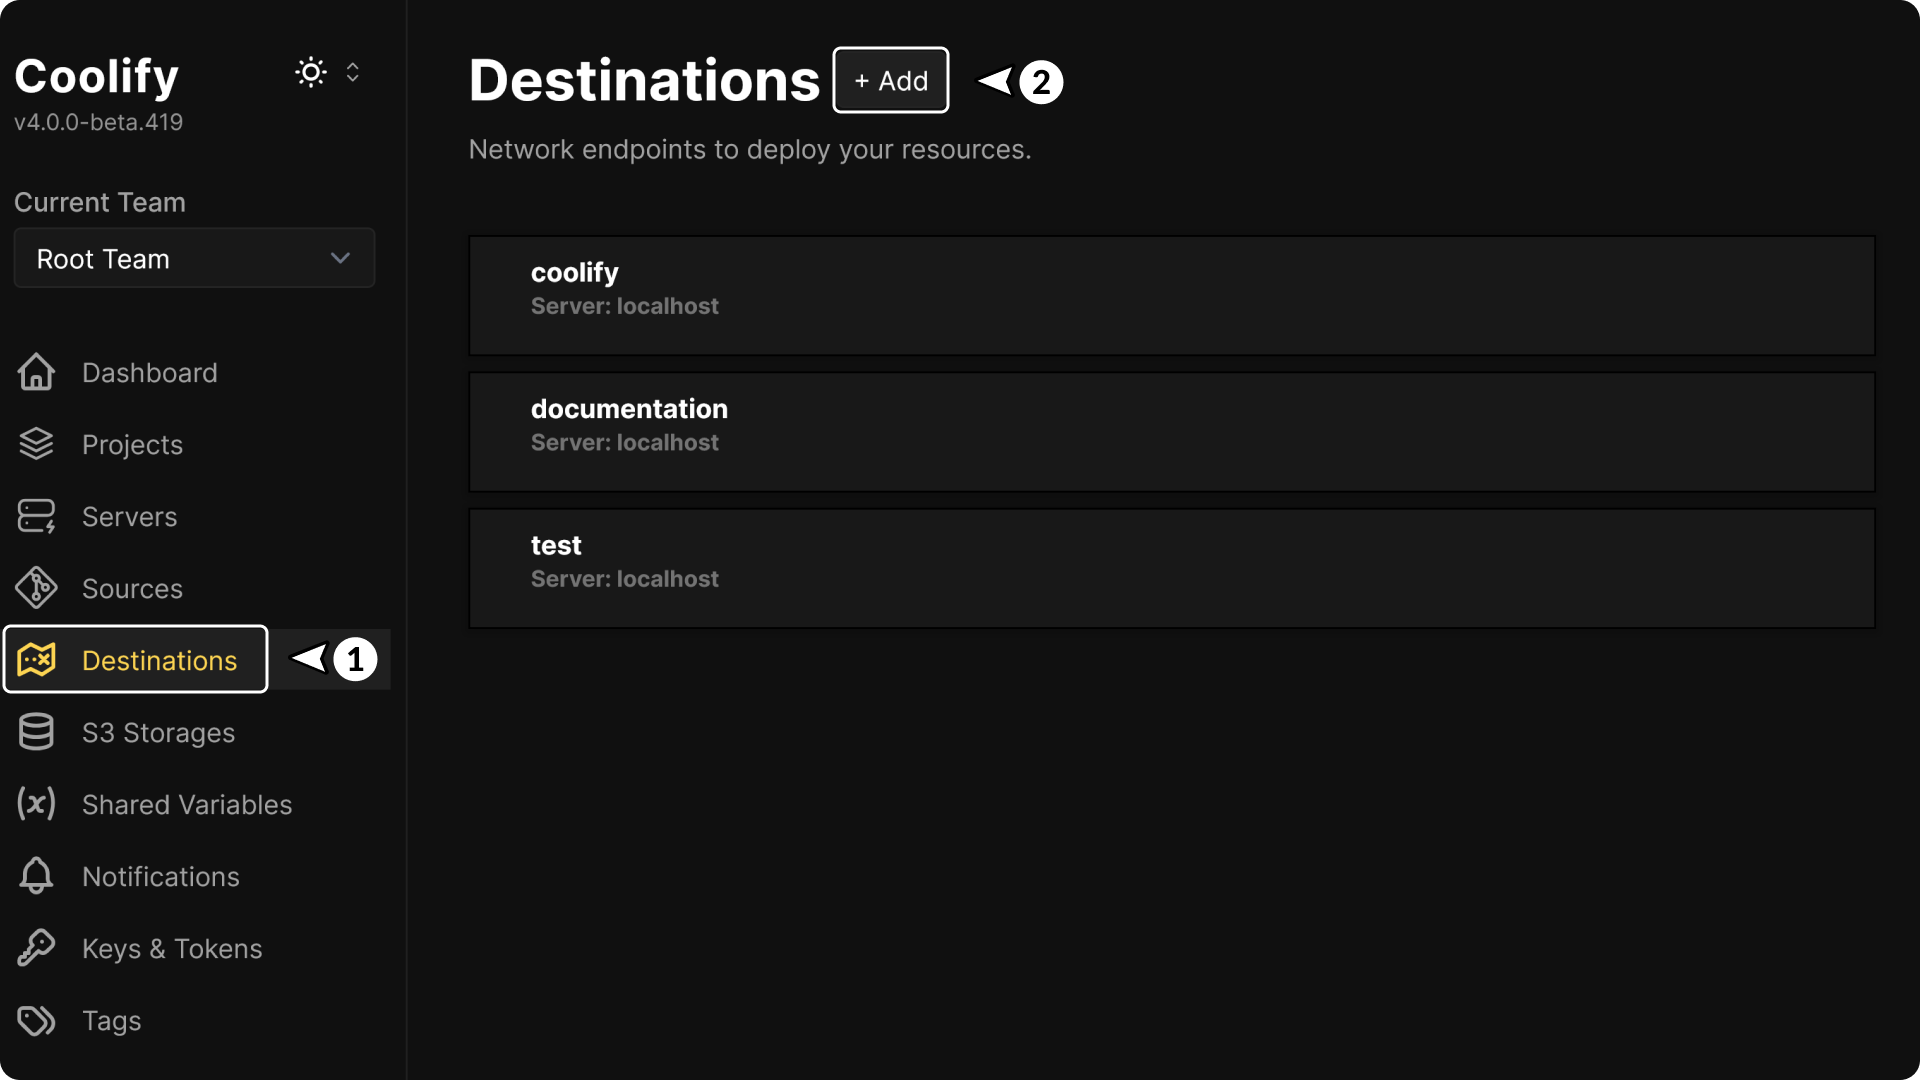
- Navigate to Destinations in the main navigation
- Click on + Add
- Fill in the destination details.
Method 2: From Server Management
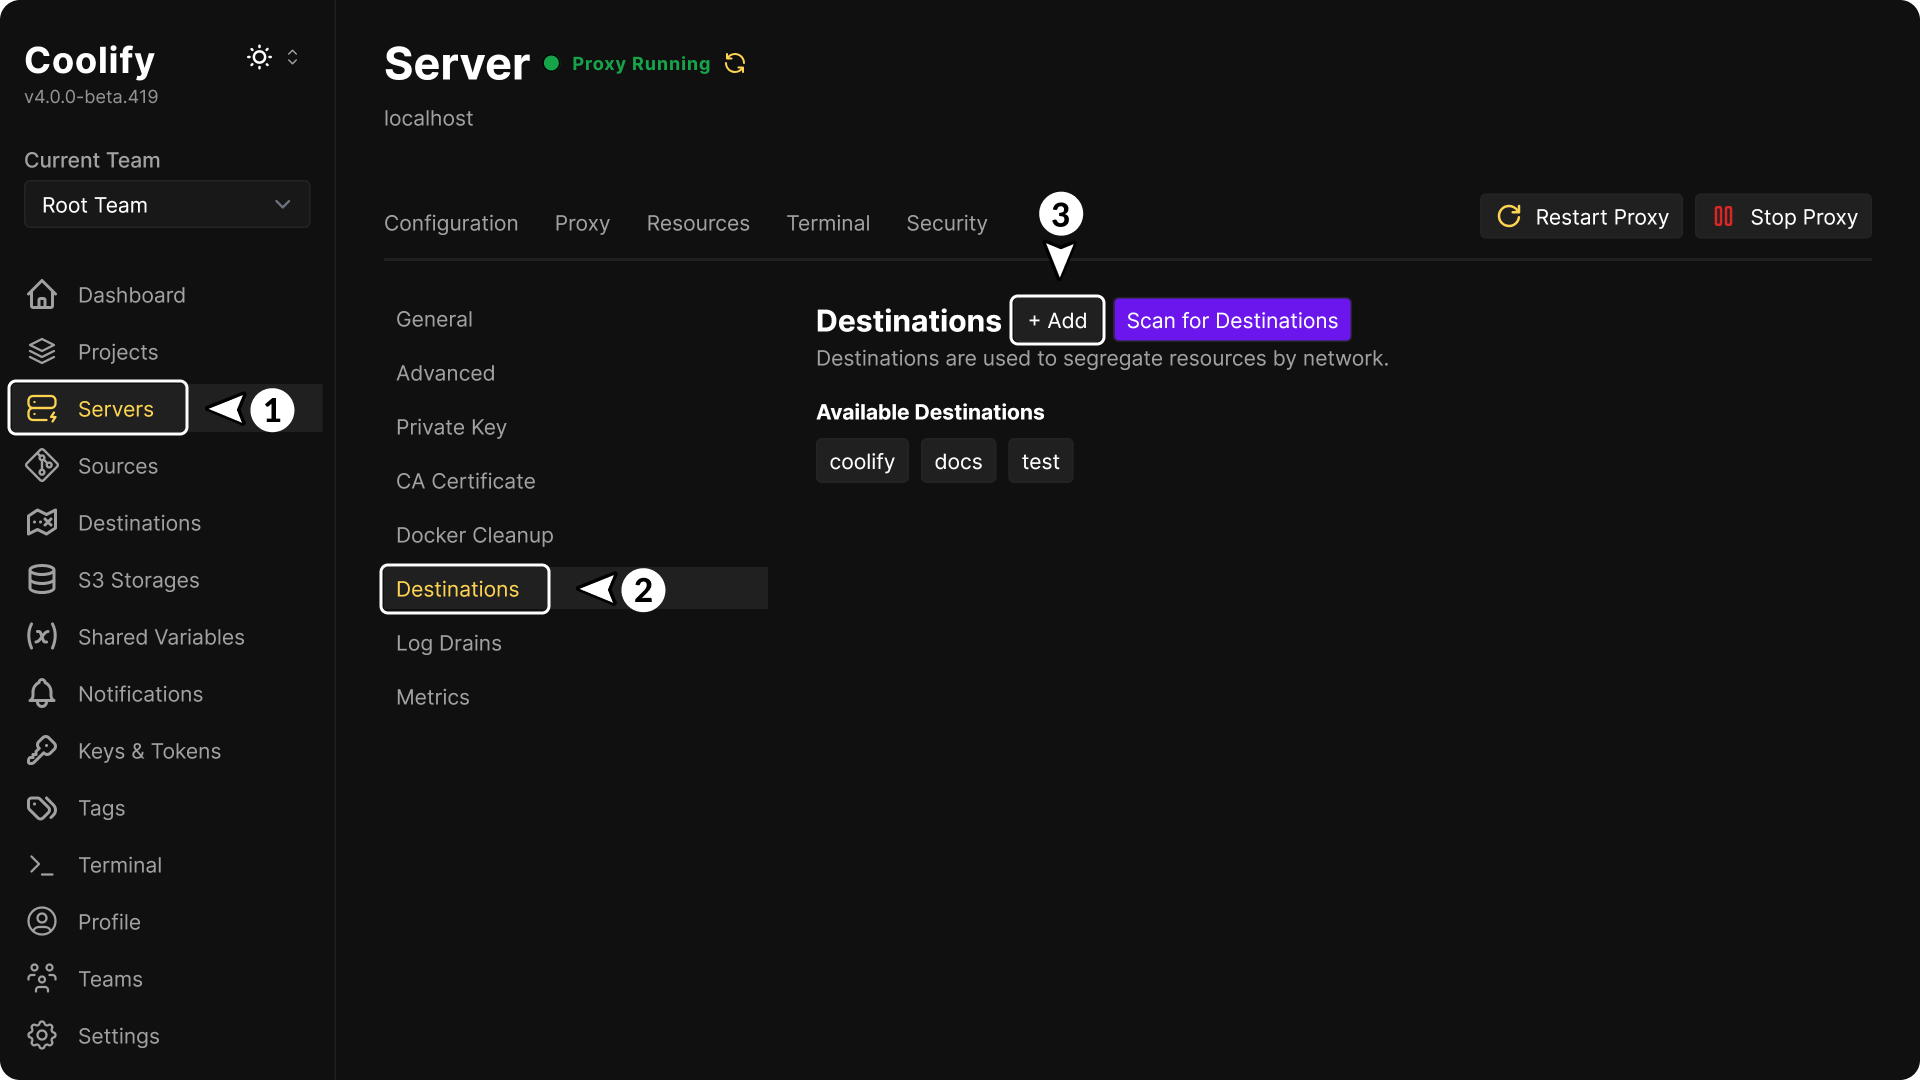
- Go to Servers and select your server
- Navigate to the Destinations tab
- Click + Add
- Fill in the destination details.
Configuration Options
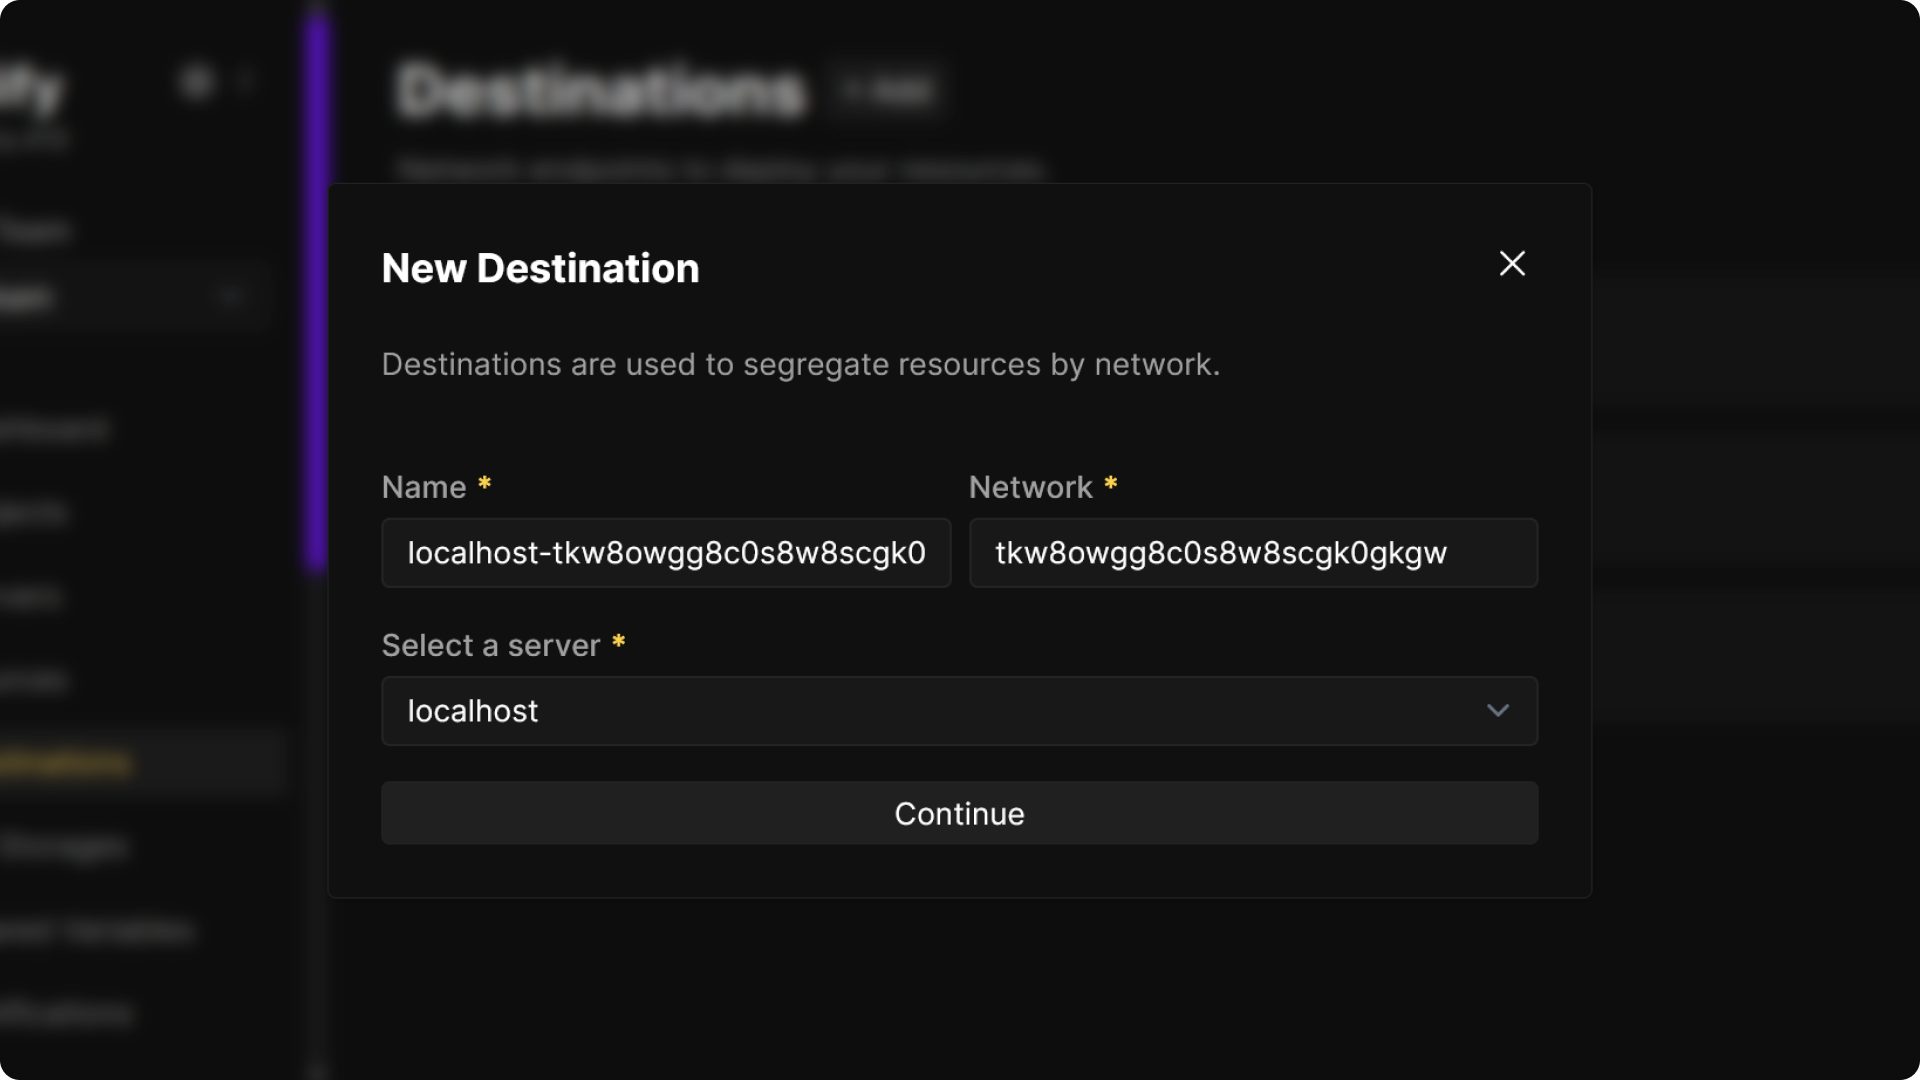
Destination Name
- Auto-generated based on server name and network ID
- Can be customized to be more descriptive
Network Name
- Must be unique per server
- Auto-generated unique identifier (CUID2 format)
- Can be customized to be more descriptive
- Cannot be changed after creation
- Used as the actual Docker network name
Server Selection
- Choose from available servers in your team
- Server must be online and accessible
- Can not be a build server
- Determines where the Docker network will be created
Destination Type
The destination type is automatically determined based on your selected server's configuration:
Standalone Docker
- Automatically selected when the server is configured as a standalone Docker host
- Creates a standard Docker network
- Suitable for single-server deployments
- Supports bridge and custom networks
Docker Swarm
- Automatically selected when the server is configured as a Docker Swarm manager or worker
- Creates overlay networks for multi-node communication
- Server must have Docker Swarm mode enabled during server setup
- Advanced feature for clustered deployments
Server Configuration Determines Type
You cannot manually choose between Standalone Docker and Docker Swarm when creating a destination. The type is determined by how your server was configured when it was added to Coolify.
Automatic Network Creation
When you create a destination, Coolify automatically:
- Creates the Docker network on the target server
- Connects the proxy (Traefik/Caddy) to the network
- Configures network settings for proper isolation
- Enables inter-container communication within the network
Network Scanning
You can also scan existing Docker networks on a server and add them as destinations:
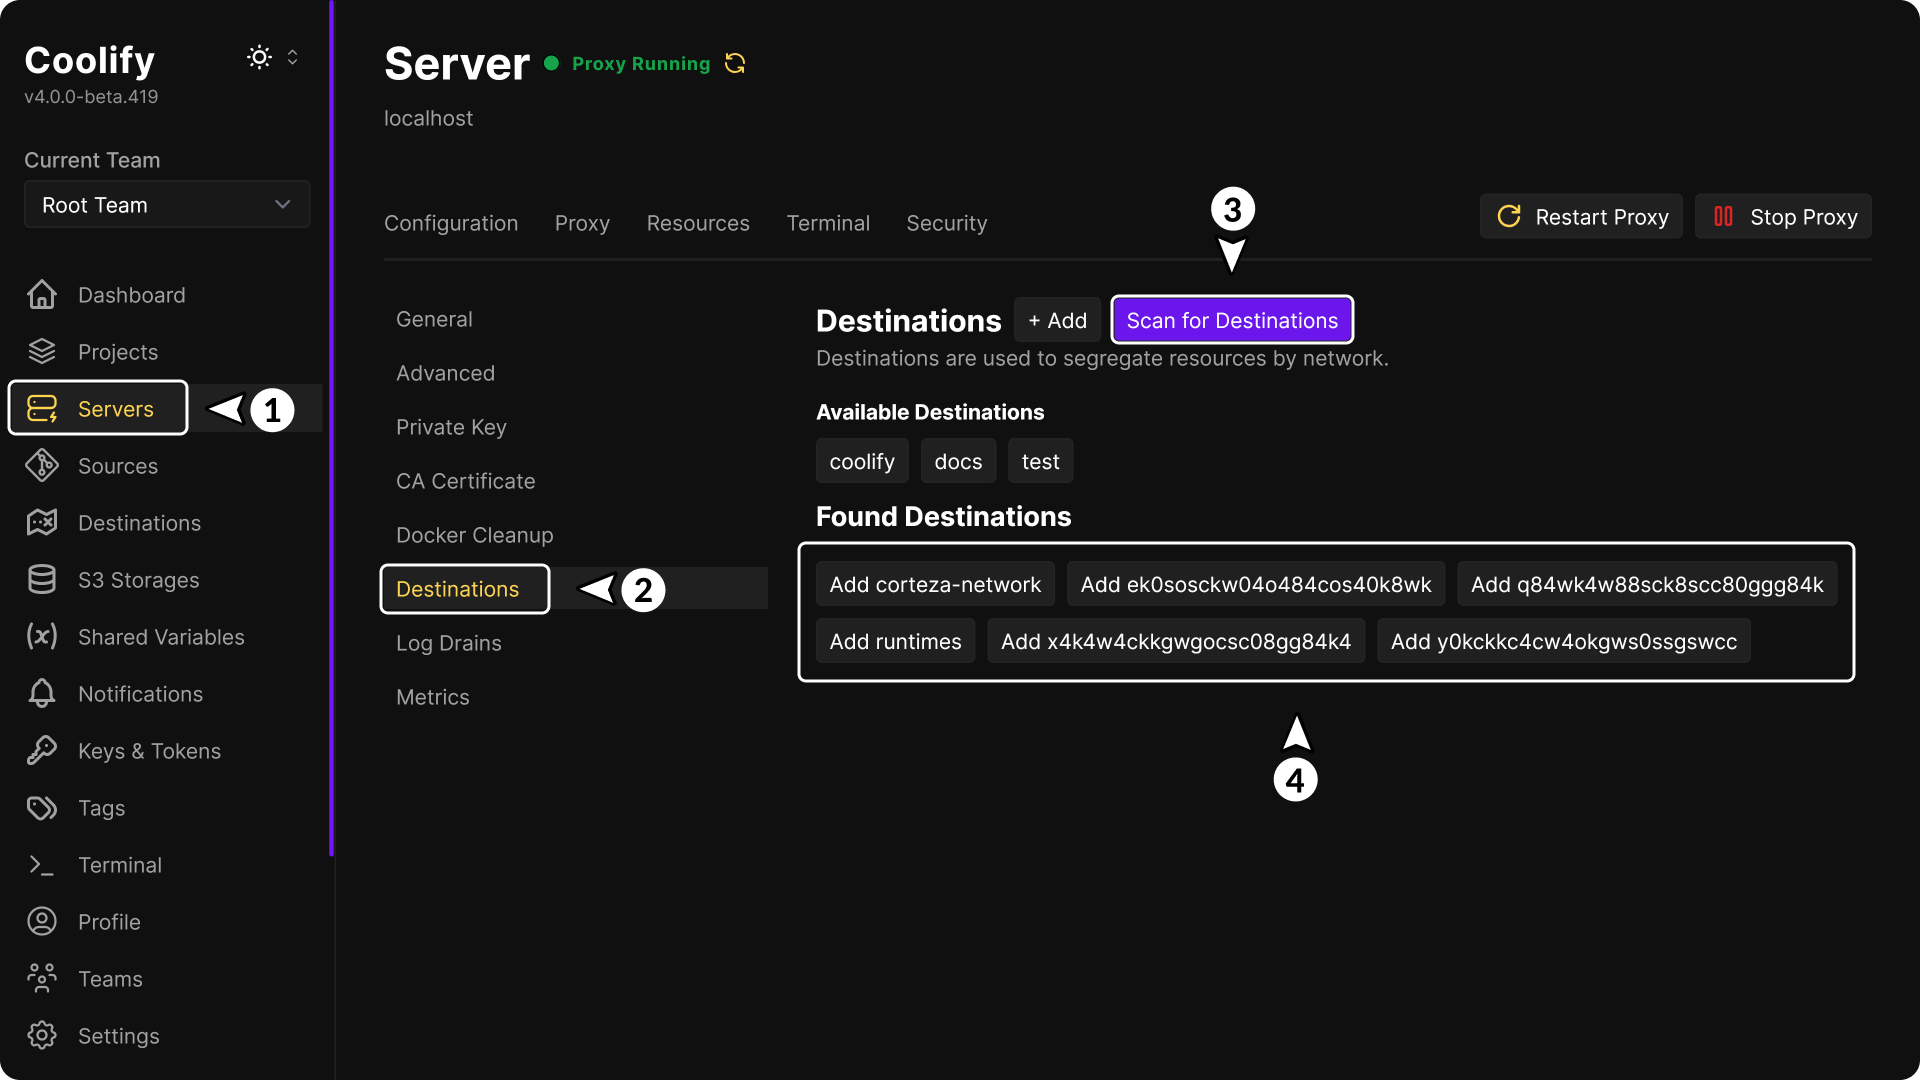
- Go to Server and select your server
- Navigate to Destinations
- Click Scan for Destinations
- Select existing networks to import and Coolify will create destination entries for them
Validation and Errors
Common errors when creating destinations:
- Network already added to this server: The network name conflicts with an existing one
After Creation
Once created, your destination will:
- Appear in the destinations list
- Be available for deploying applications and databases
- Have network connectivity configured automatically
- Be ready to host your containerized resources
Introduction
Manage Docker network destinations in Coolify for isolated deployment environments supporting standalone Docker and Swarm cluster configurations.
Managing Destinations
Manage Coolify destinations including editing, deleting, resource assignment, and connecting service stacks to predefined Docker networks.