Managing Destinations
Learn how to manage your existing destinations in Coolify, and how to assign resources to them.
Viewing Destinations
Destinations Overview
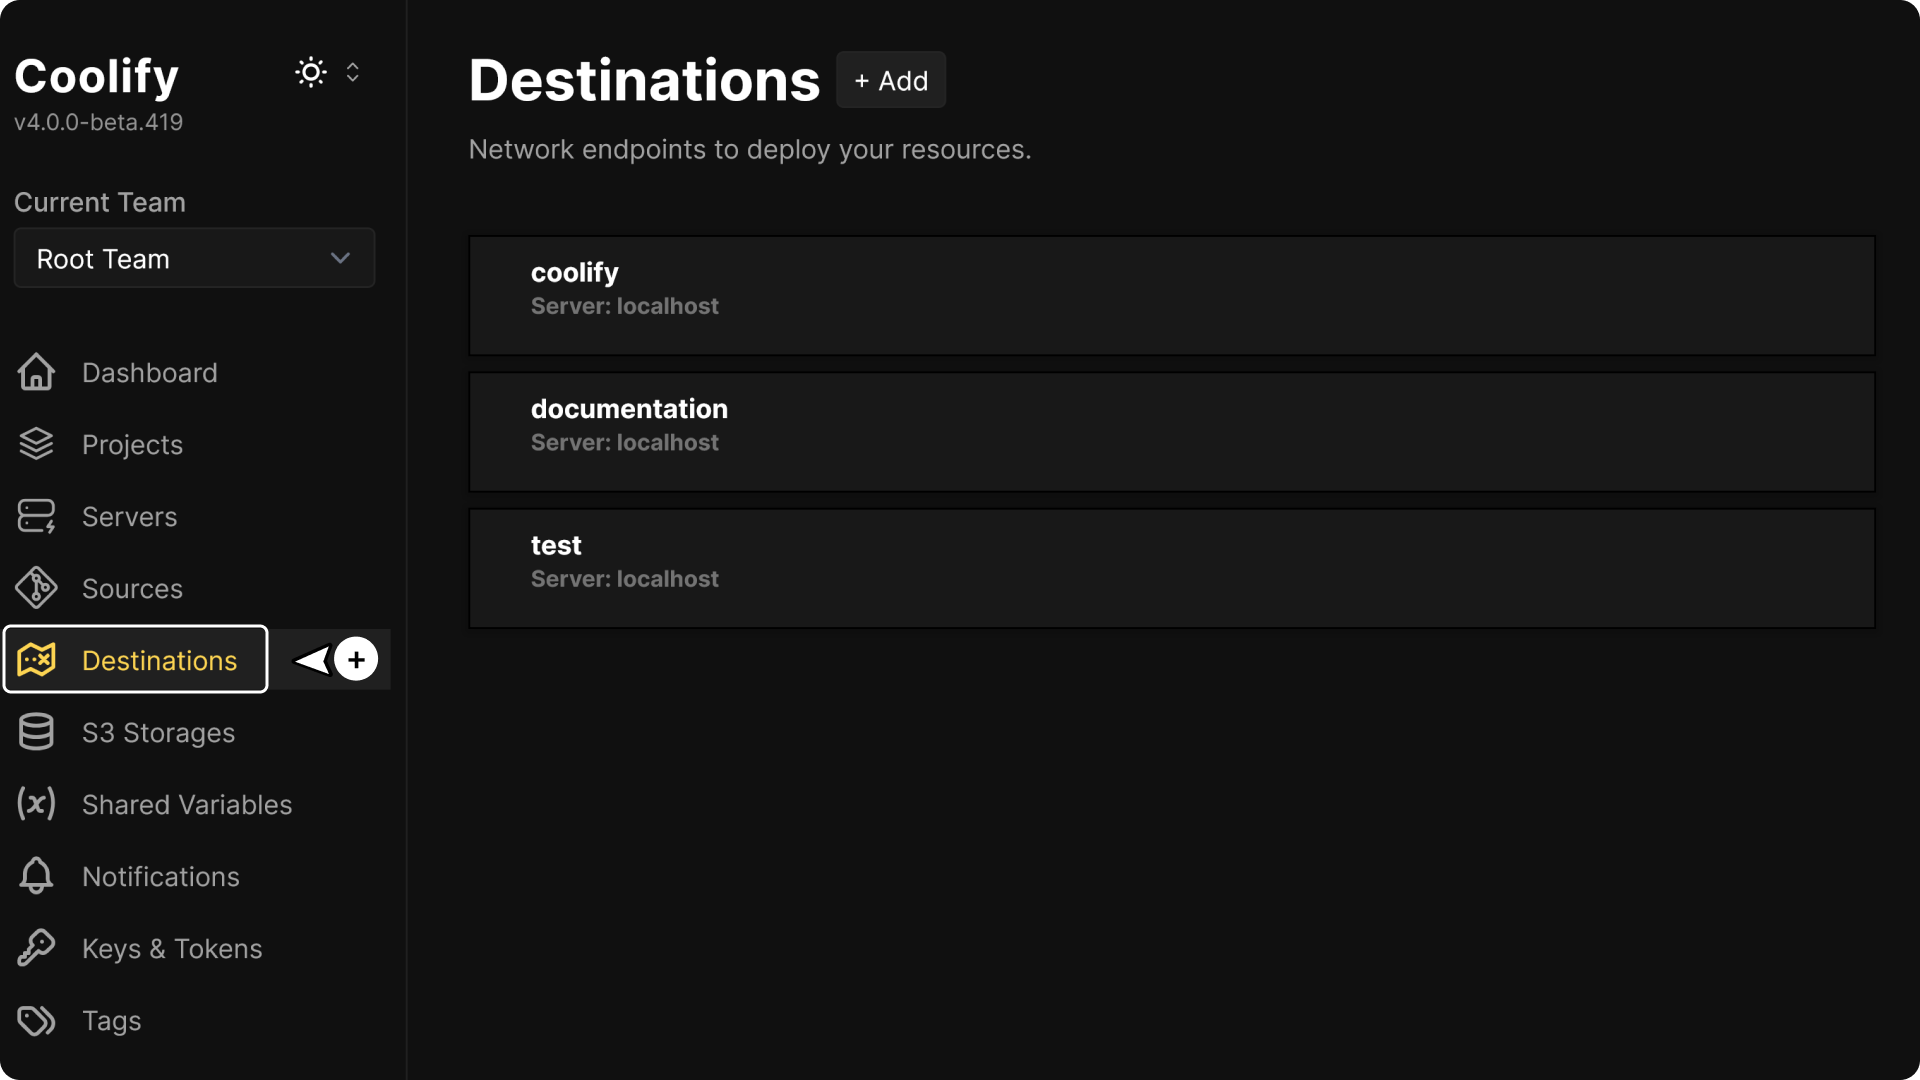
Navigate to Destinations to see all your destinations across all servers.
Server-Specific Destinations
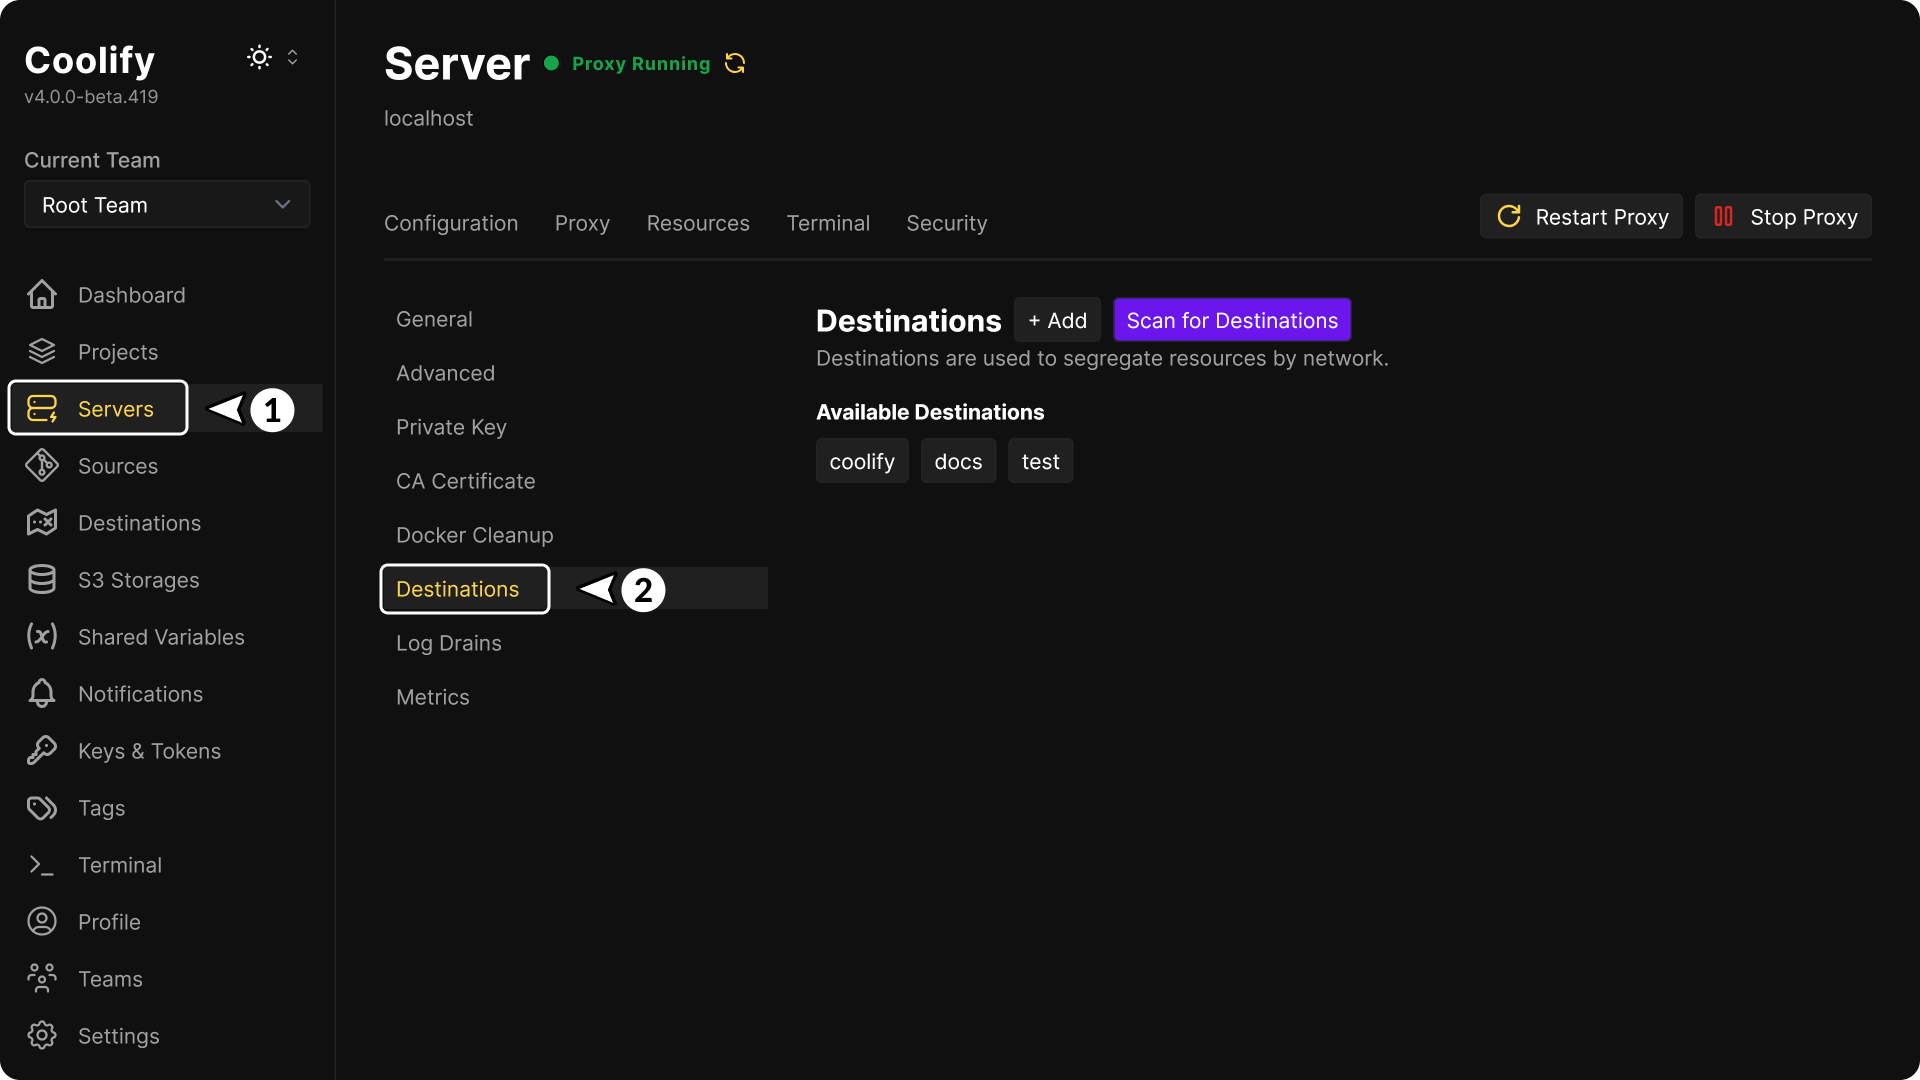
Navigate to Servers → [Server Name] → Destinations to view destinations specific to that server.
Editing & Deleting Destinations
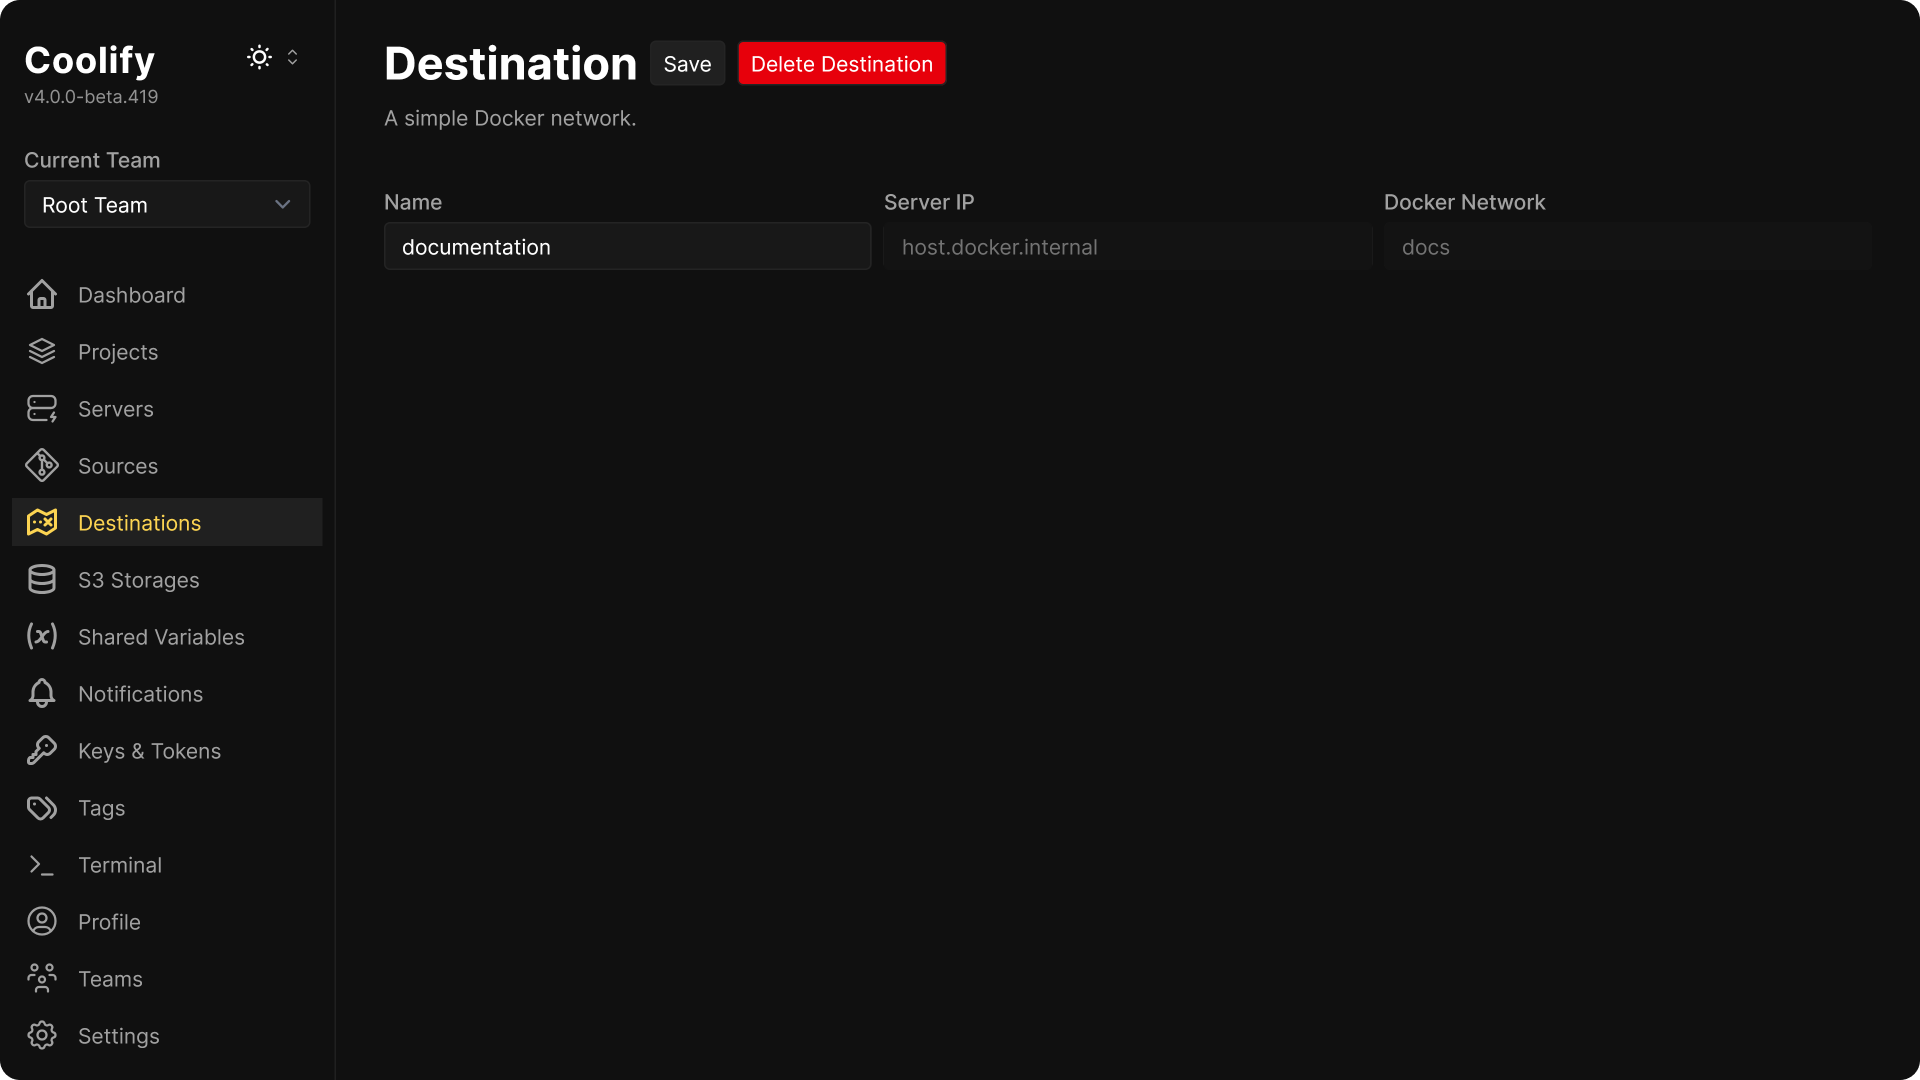
Click on a destination to access its management page where you can either edit or delete it.
Basic Information
- Name: Update the destination display name
- Server IP: View the server IP address where the destination is hosted (read-only)
- Docker Network: View the Docker network name (read-only)
Before You Delete
Check for Active Resources
Coolify won't allow you to delete a destination that has active resources. Therefore, before deleting a destination, ensure it's not being used:
- Applications: No applications deployed to this destination
- Databases: No databases running in this destination
- Services: No services configured for this destination
Resource Dependencies
Verify that no other resources depend on this destination, to avoid issues after deletion:
- Environment Variables: Check for hardcoded references
- Network Dependencies: Ensure no cross-destination communication
- Proxies & Load Balancers: Update load balancer and proxy configuration
Assign Resources to a Destination
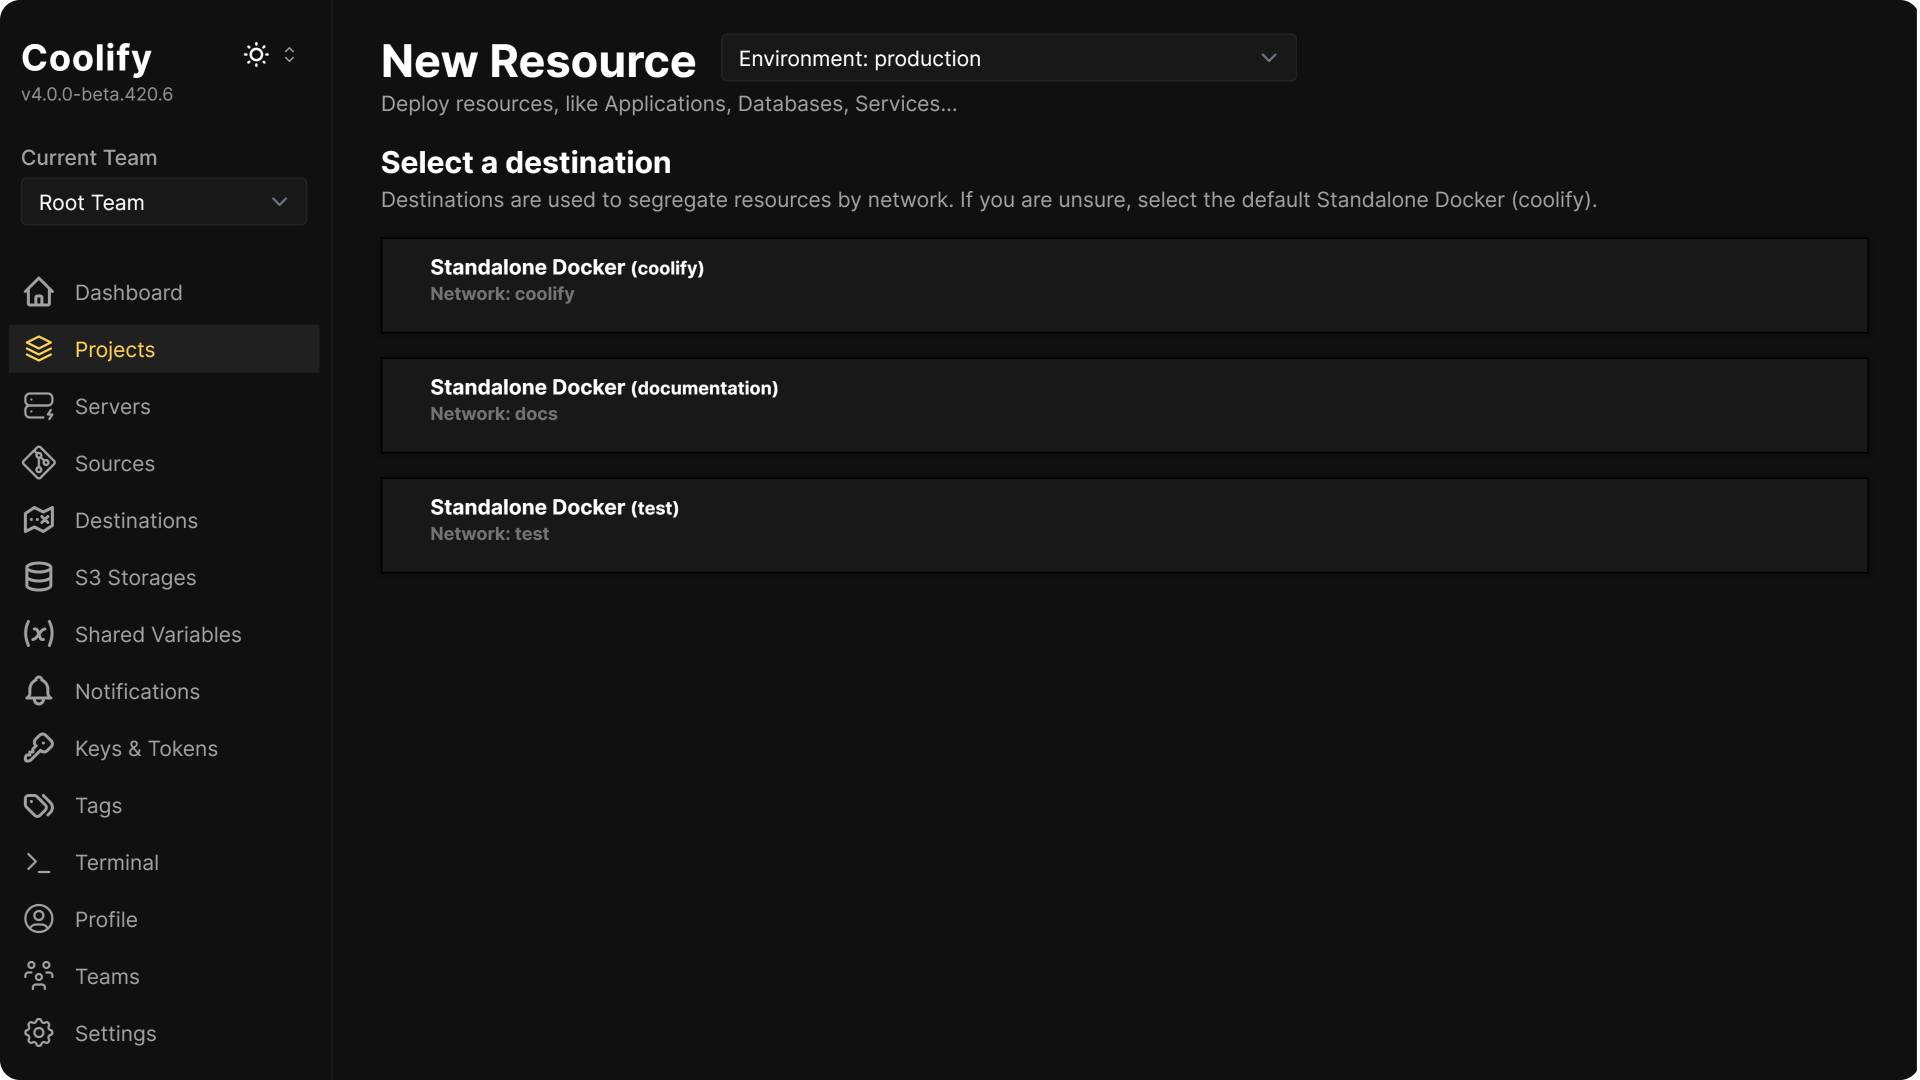
When you have more then one destination on a server, you will get prompted to select a destination when creating a new resource.
If your resource is already created, you can make a Clone of it to another destination:
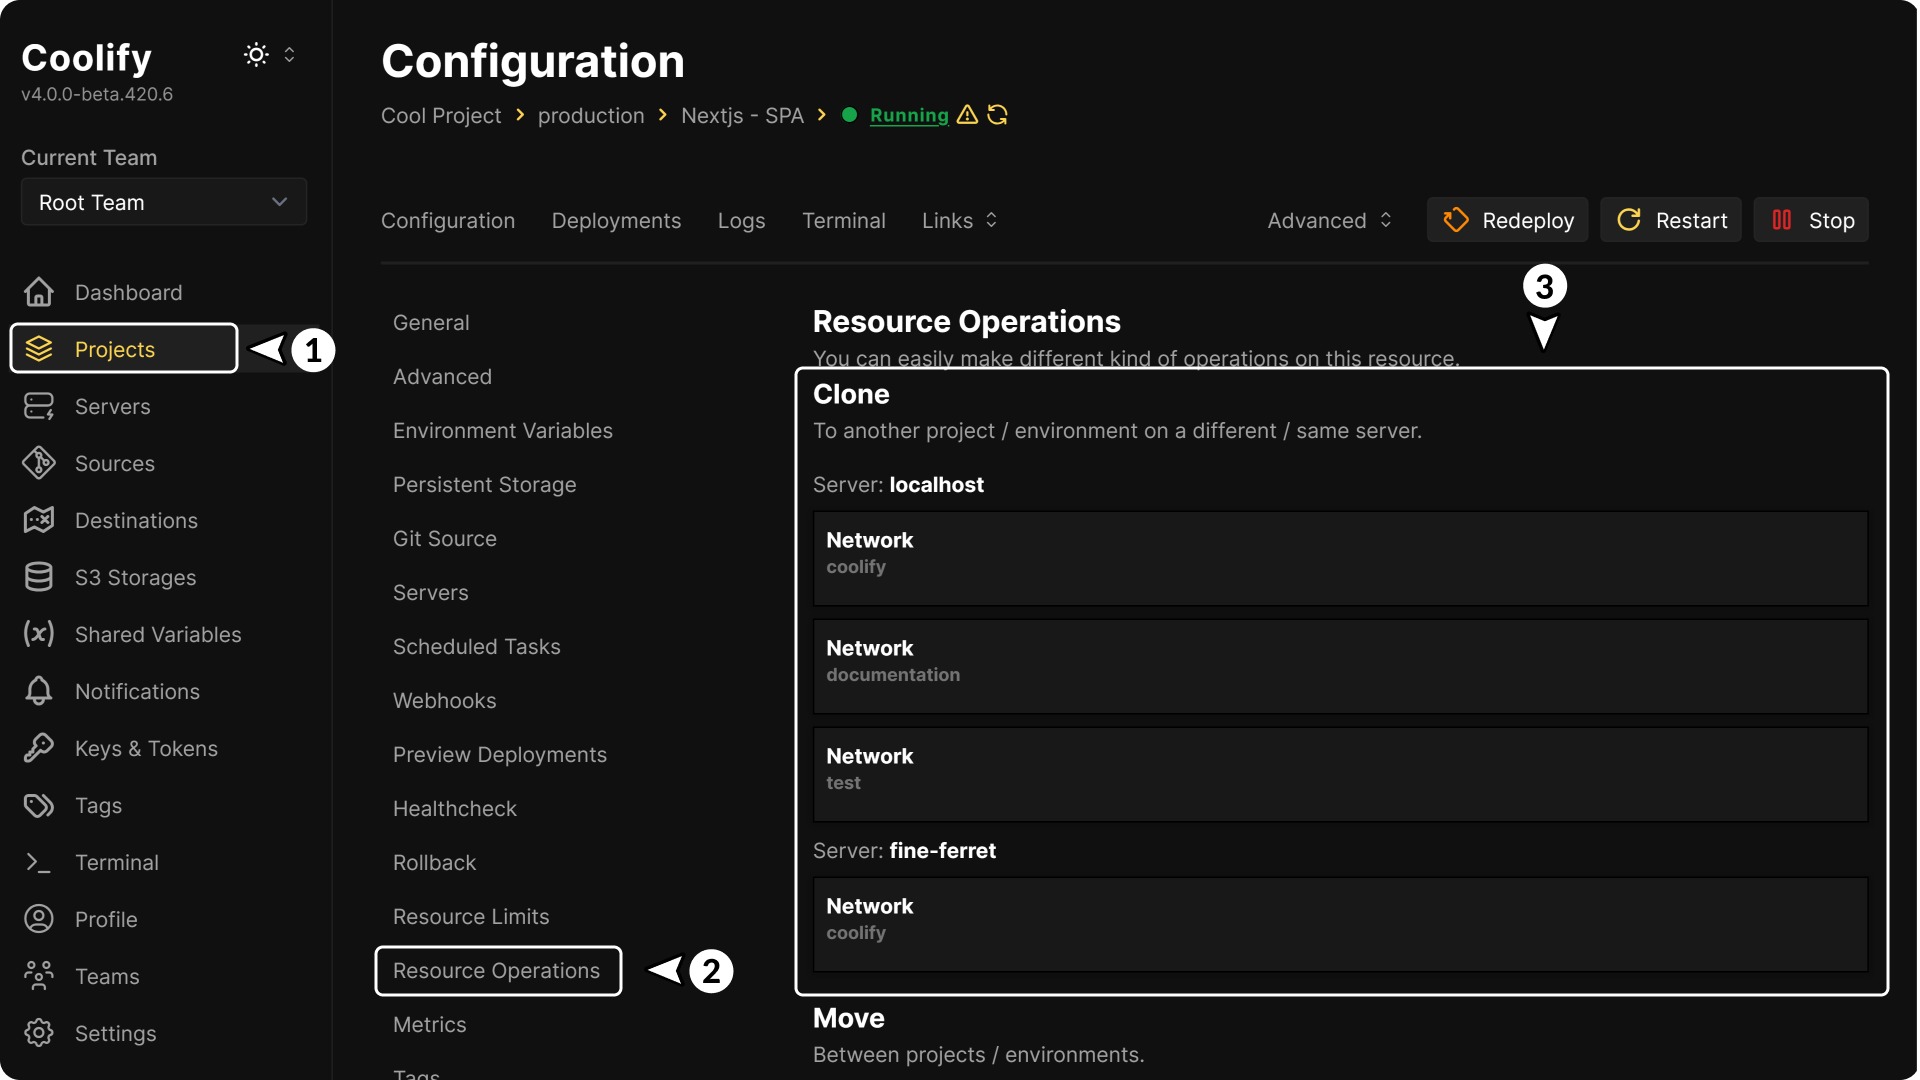
- Navigate to the resource's management page over the Projects tab.
- Go to Resource Operations
- Select the destination
Cloning a resource to another destination will create a new instance of that resource. This will not move the resource or it's data but create a duplicate.
Service Stacks
Unlike applications or databases, service stacks are not by default connected to the assigned destination. This also includes applications using the Docker Compose Build Pack. Coolify creates an isolated network for each service stack, allowing you to run multiple instances of the same service on the same server without conflicts.
If you want to connect a service stack to a destination, enable Connect to Predefined Networks in it's settings. This allows the service stack to communicate with other resources on the same destination.
Avoid defining network configurations directly in your service stack's docker-compose.y[a]ml and instead use Coolify's Destination settings to manage network connections. This could otherwise lead to undesired behavior, such as Gateway Timeout errors.
Best Practices
- Naming Convention: Use descriptive names for destinations
- Resource Organization: Group related applications in the same destination
- Monitoring: Regularly check destination health and resource usage
- Documentation: Document purpose and configuration of each destination
- Cleanup: Remove unused destinations to reduce server load
