Database SSL ^v4.0.0-beta.399
Database SSL in Coolify encrypts the communication between your applications and databases, ensuring that data remains secure.
With automatic certificate binding and generation, this feature simplifies secure setup. It was first introduced in Coolify version v4.0.0-beta.399.
Introduction
Database SSL adds an extra layer of security by encrypting data exchanged with your database. This guide covers:
- Enabling SSL mode for your database connections.
- Selecting the appropriate SSL mode based on your security needs.
- Managing the CA certificate that verifies database connections.
1. How to Enable Database SSL
To secure your database connection with SSL:
-
Access Database Settings
In your Coolify dashboard, access the general settings of the database you want to secure.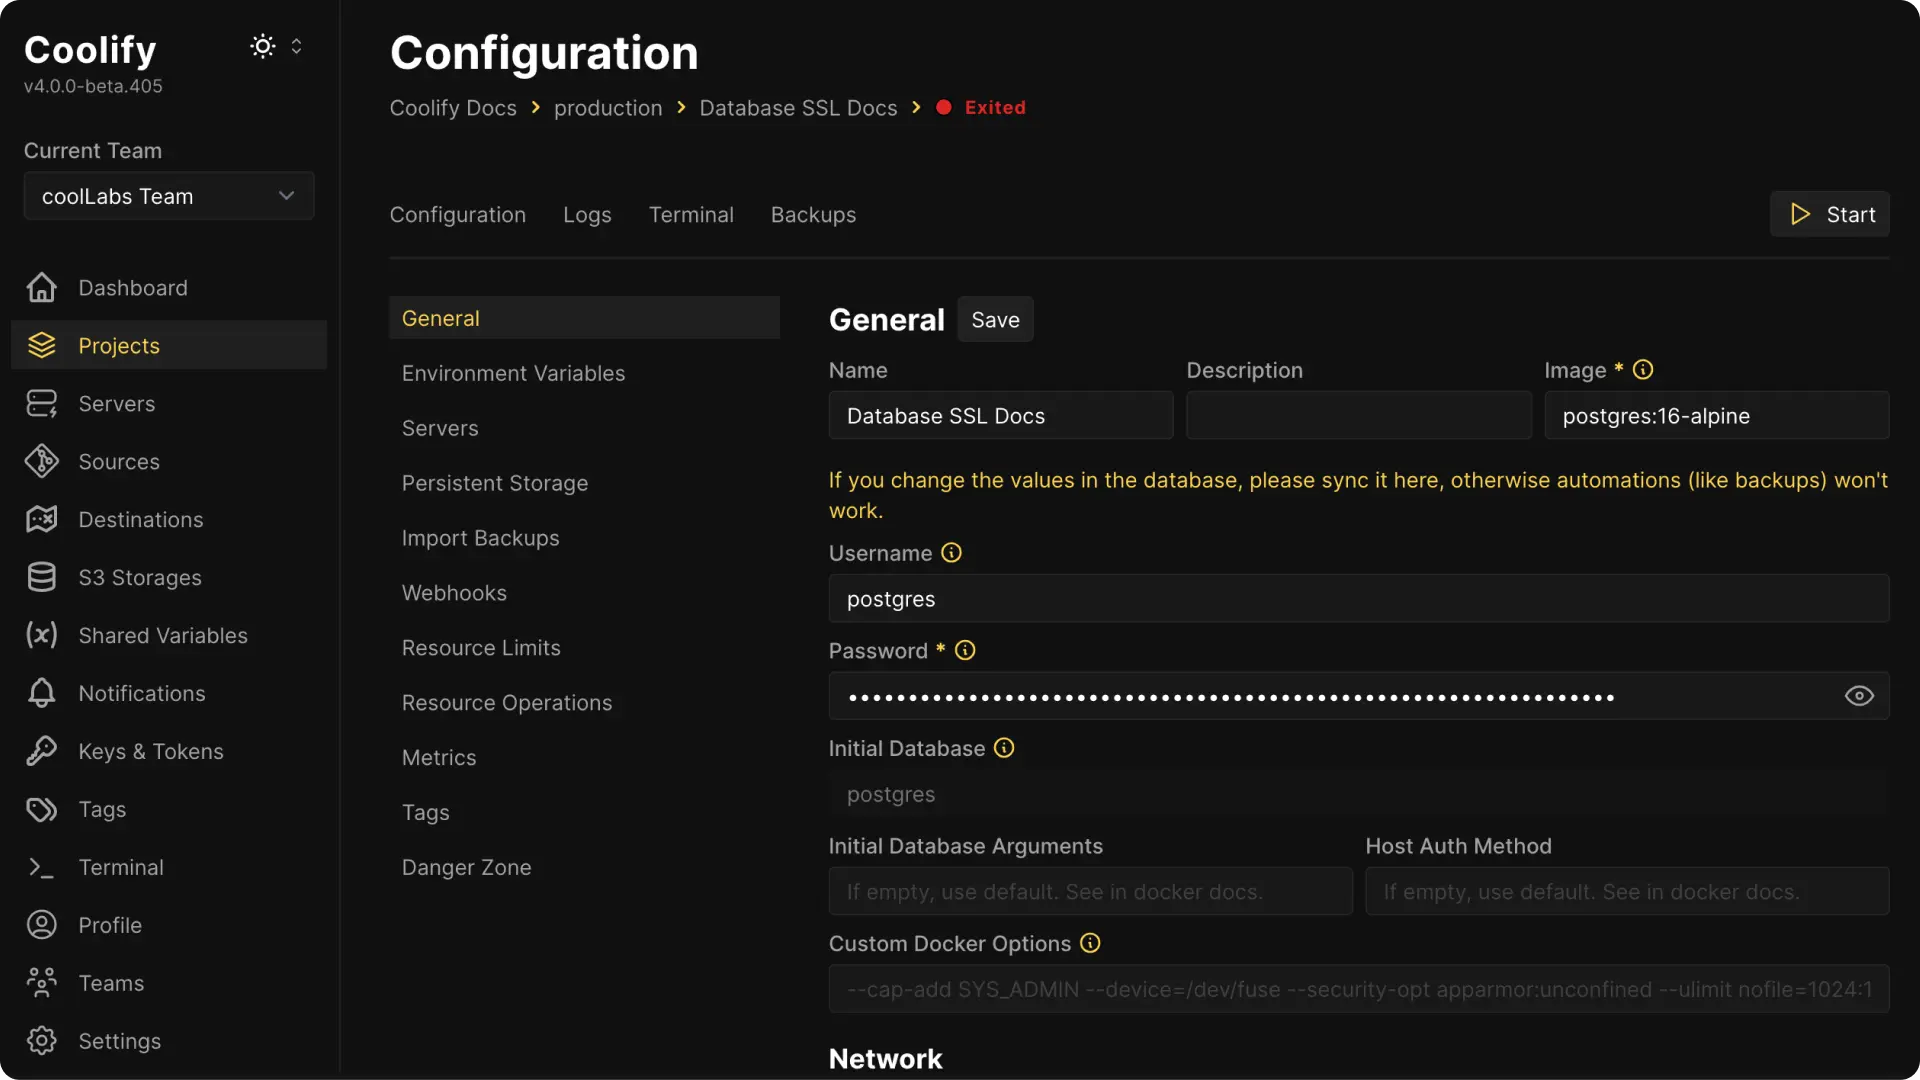
-
Enable SSL Mode
Check the Enable SSL option to activate SSL for the database connection.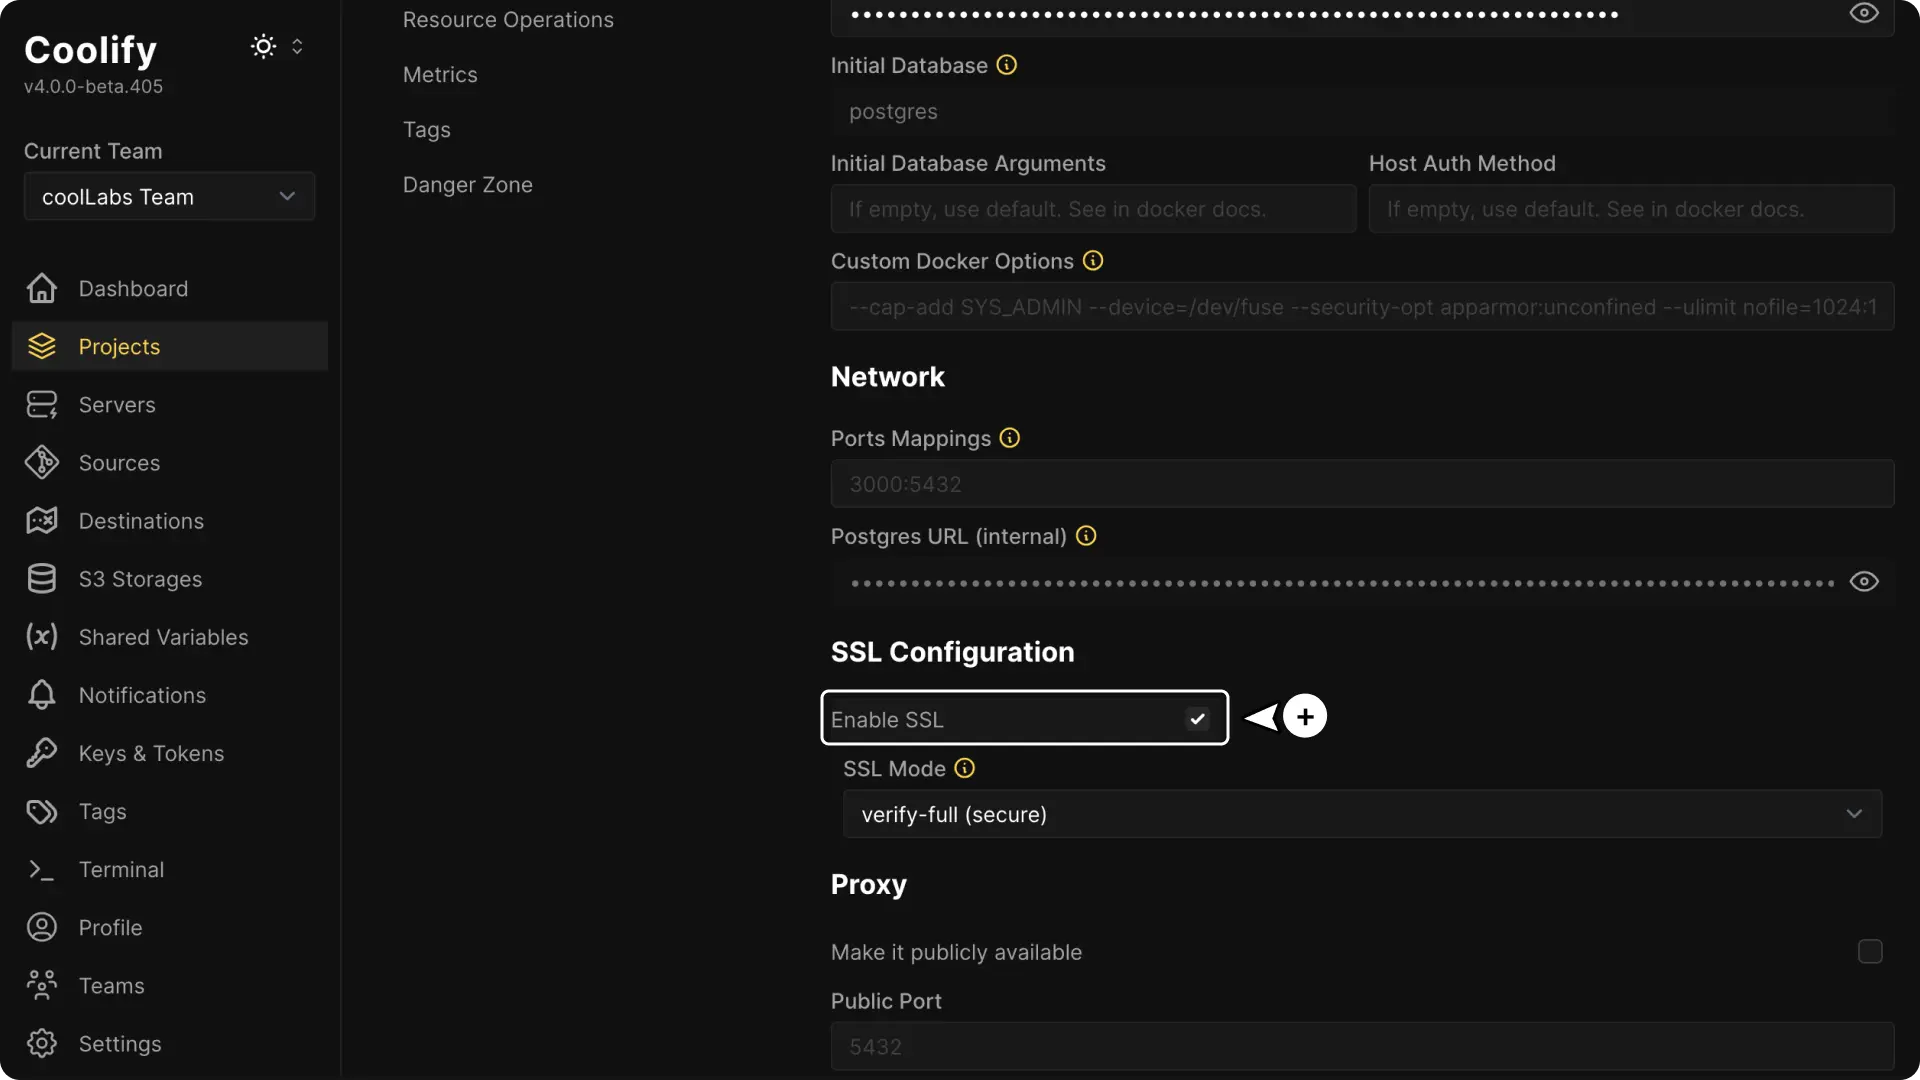
-
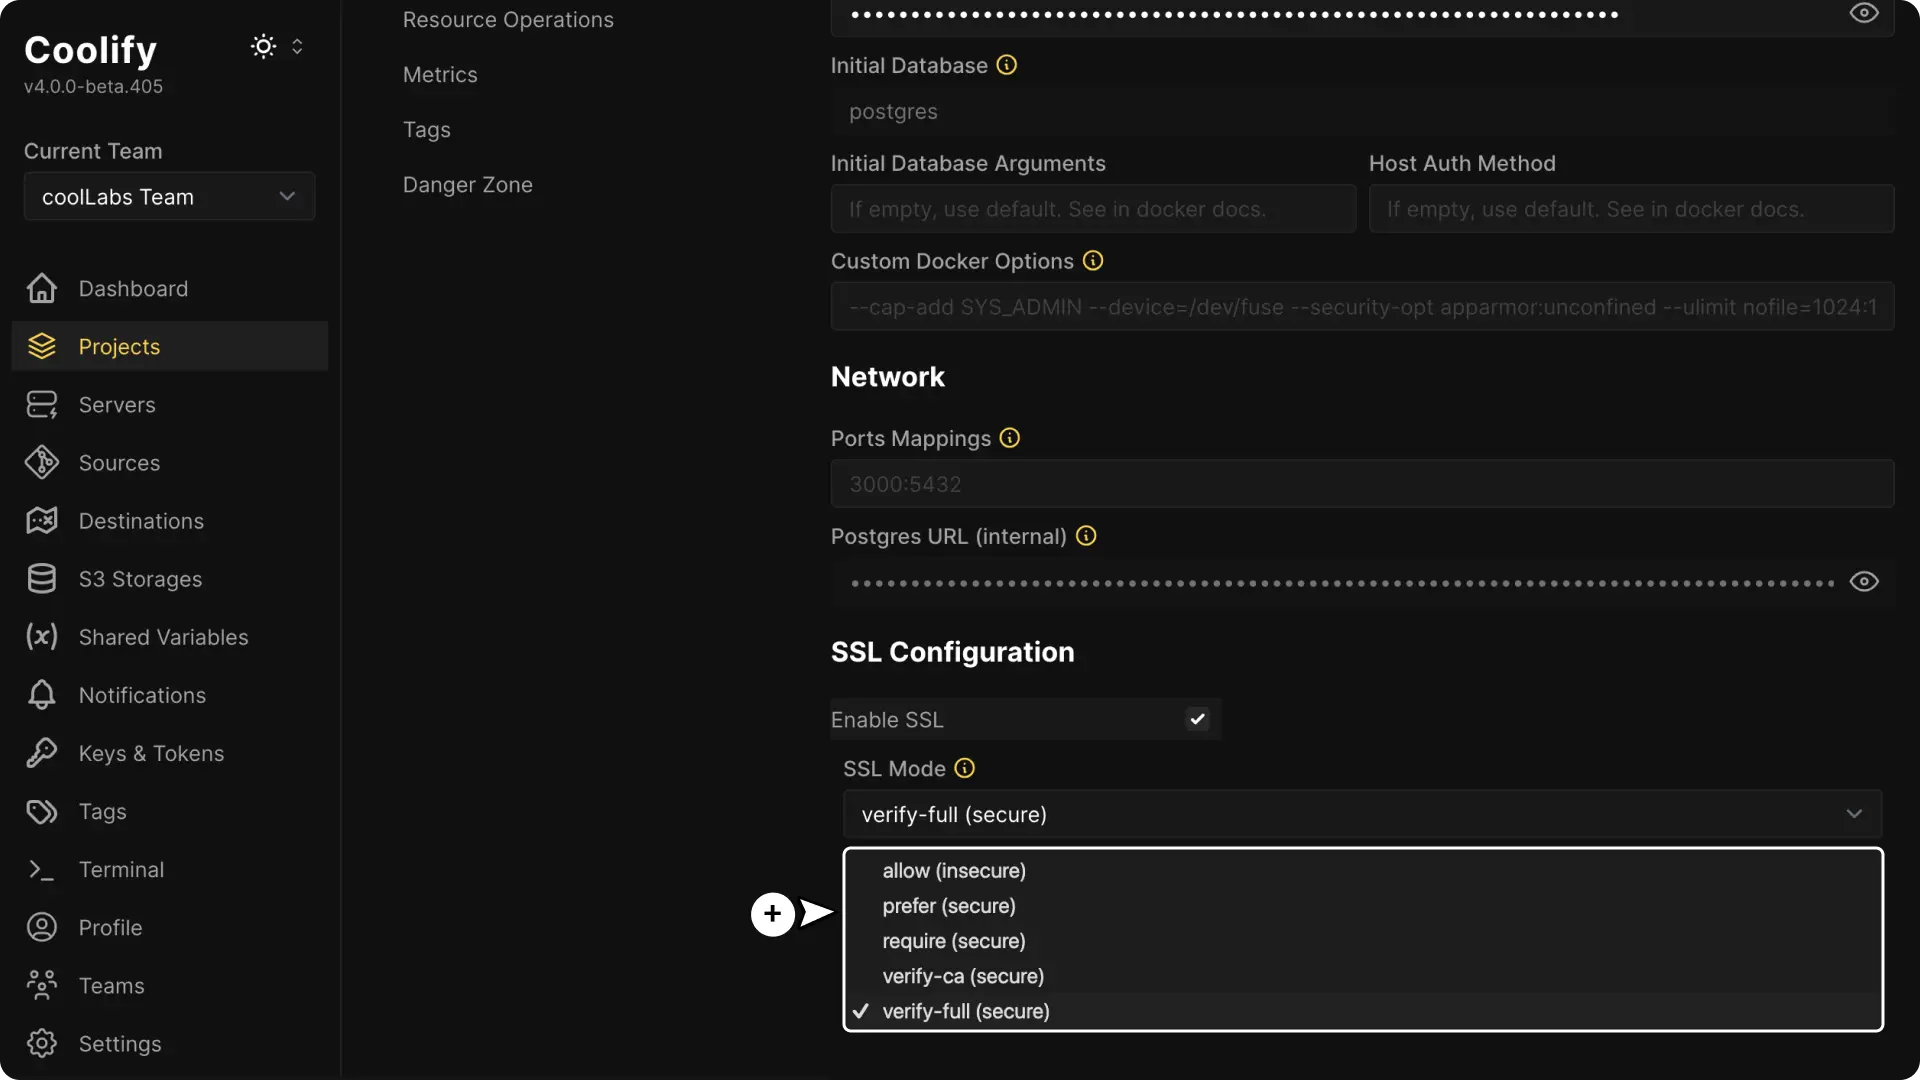
Select the SSL Mode
Choose the SSL mode from the dropdown menu. For example, select verify-full for maximum security.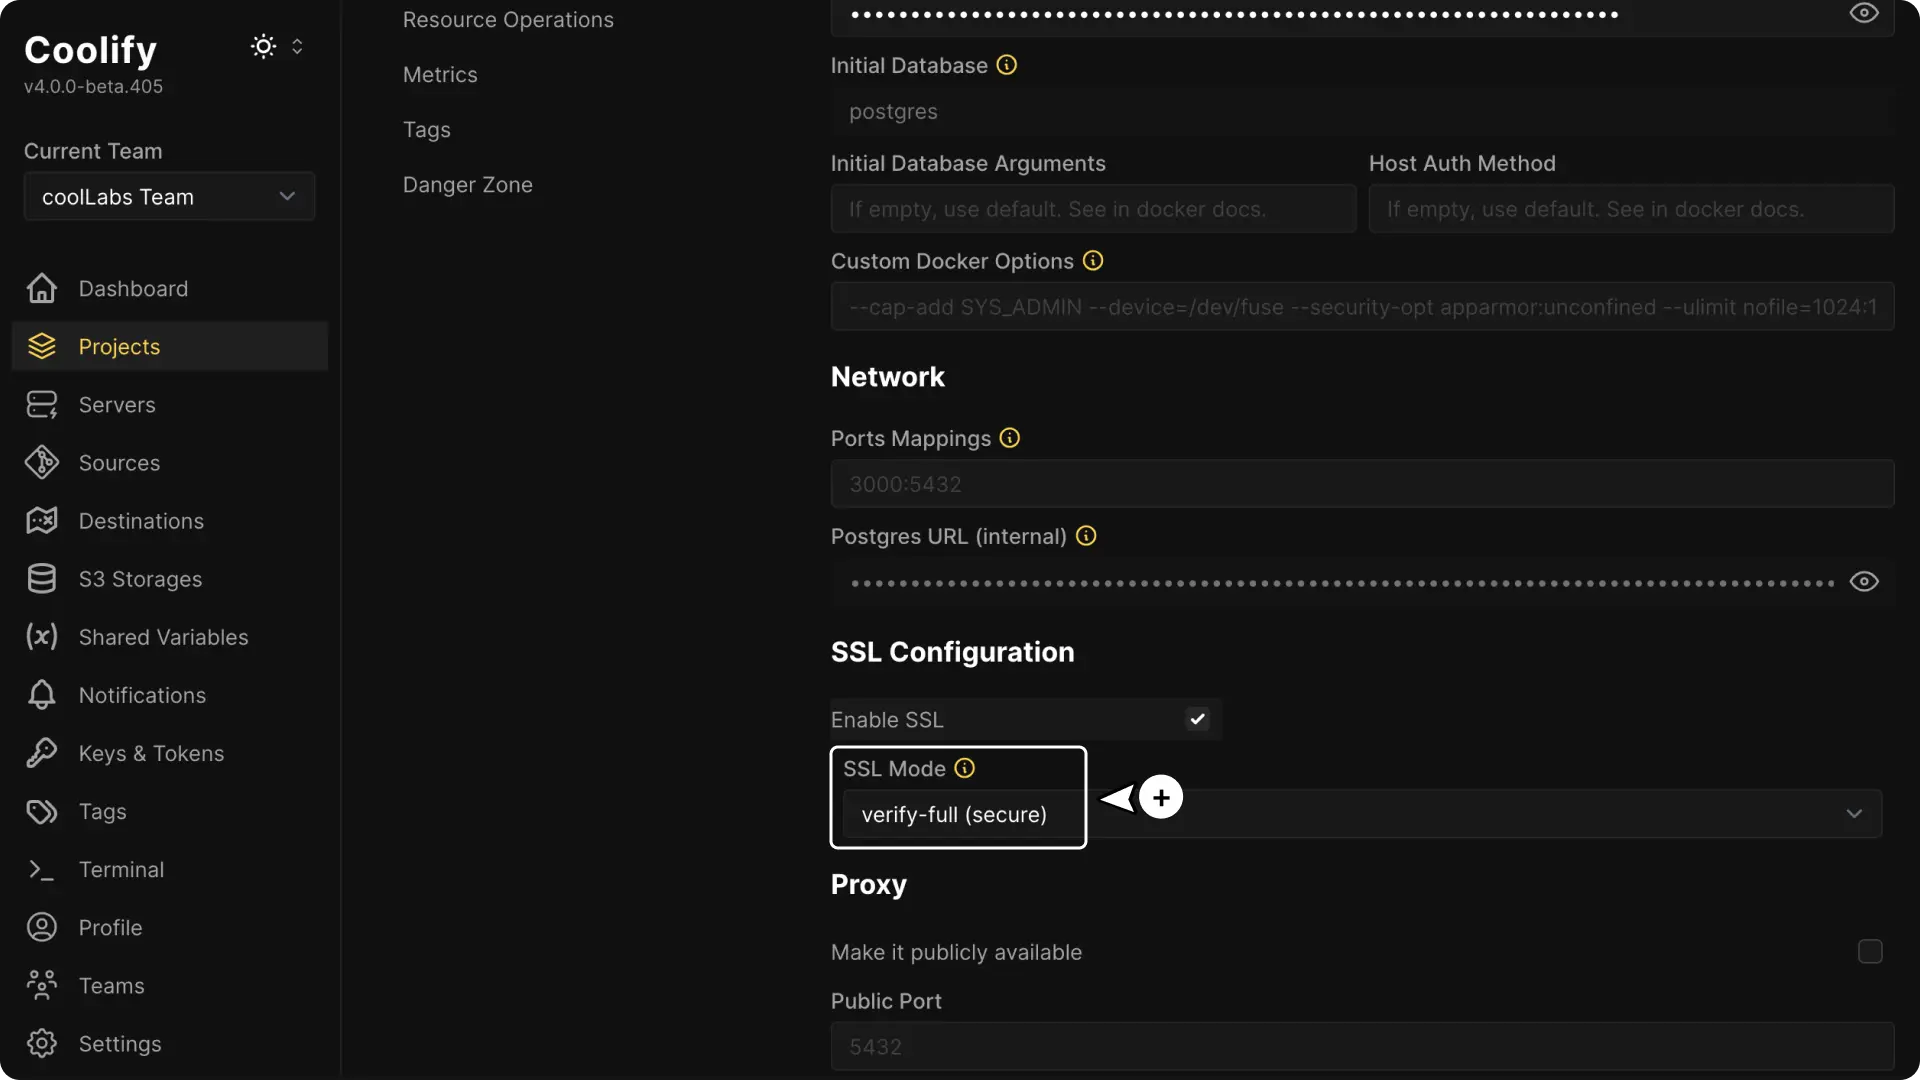
Note
To make use of SSL after enabling it, you need to use the new connection URL for your app, which includes the SSL configuration.
If you are not using the new URL, the database connection will not use SSL (in most cases).
Coolify automatically binds the generated certificates and keys to the required locations, so manual changes are only needed if you wish to use custom certificates.
2. SSL Modes Explained
Coolify supports several SSL modes, each providing a different level of security:
PostgreSQL
-
allow (insecure)
This mode permits both encrypted and unencrypted connections. It does not enforce SSL, so if SSL fails, the connection will fall back to an unencrypted state.This option is considered insecure because it allows unencrypted traffic.
-
prefer (secure)
With this mode, Coolify will attempt to use SSL first. If an SSL connection is available, it will be used, otherwise, it will fall back to an unencrypted connection.While this option prefers encryption, it doesn’t guarantee that every connection will be secured.
-
require (secure)
This mode mandates that the connection must be encrypted. However, it does not perform any checks on the server certificate.This means the connection is encrypted, but the identity of the server is not verified.
-
verify-ca (secure)
This option goes a step further by encrypting the connection and verifying that the server's certificate is signed by a trusted Certificate Authority (CA). It does not check if the hostname matches the certificate.This mode offers a balance between security and ease of setup.
-
verify-full (secure)
This is the most secure mode. It not only encrypts the connection and verifies the certificate authority but also confirms that the server’s hostname matches the certificate.This provides full assurance that you are connecting to the correct server, similar to the security level provided by Cloudflare Origin Certificate setups.
Other Databases
- MySQL & MongoDB:
Only the following modes are available: prefer, require, verify ca, verify full. - MariaDB, Redis, KeyDB, DragonFly DB:
No SSL modes are visible in the UI. - Clickhouse DB:
SSL is not supported, there is no checkbox to enable SSL nor dropdown options.
Developer Note
Modes lower than require are not 100% secure as they only encrypt the connection without full verification of the server’s identity.
For modes higher than require (i.e., verify-ca and verify-full), you must mount the Coolify CA certificate into the container that connects to the database for additional security.
Note that in most cases (for example, PostgreSQL), merely enabling SSL does nothing unless you use the new connection URL that enforces SSL.
However, for some databases, like the redis-based ones, enabling SSL in the UI does enforce the mode.
Tip
For maximum security, verify-full is recommended (when available).
3. CA SSL Certificate Management
Coolify manages the CA certificate automatically, ensuring that secure database connections are validated.
In the dashboard, under Servers > YOUR_SERVER_NAME > Proxy > Advanced, you can see the following options:
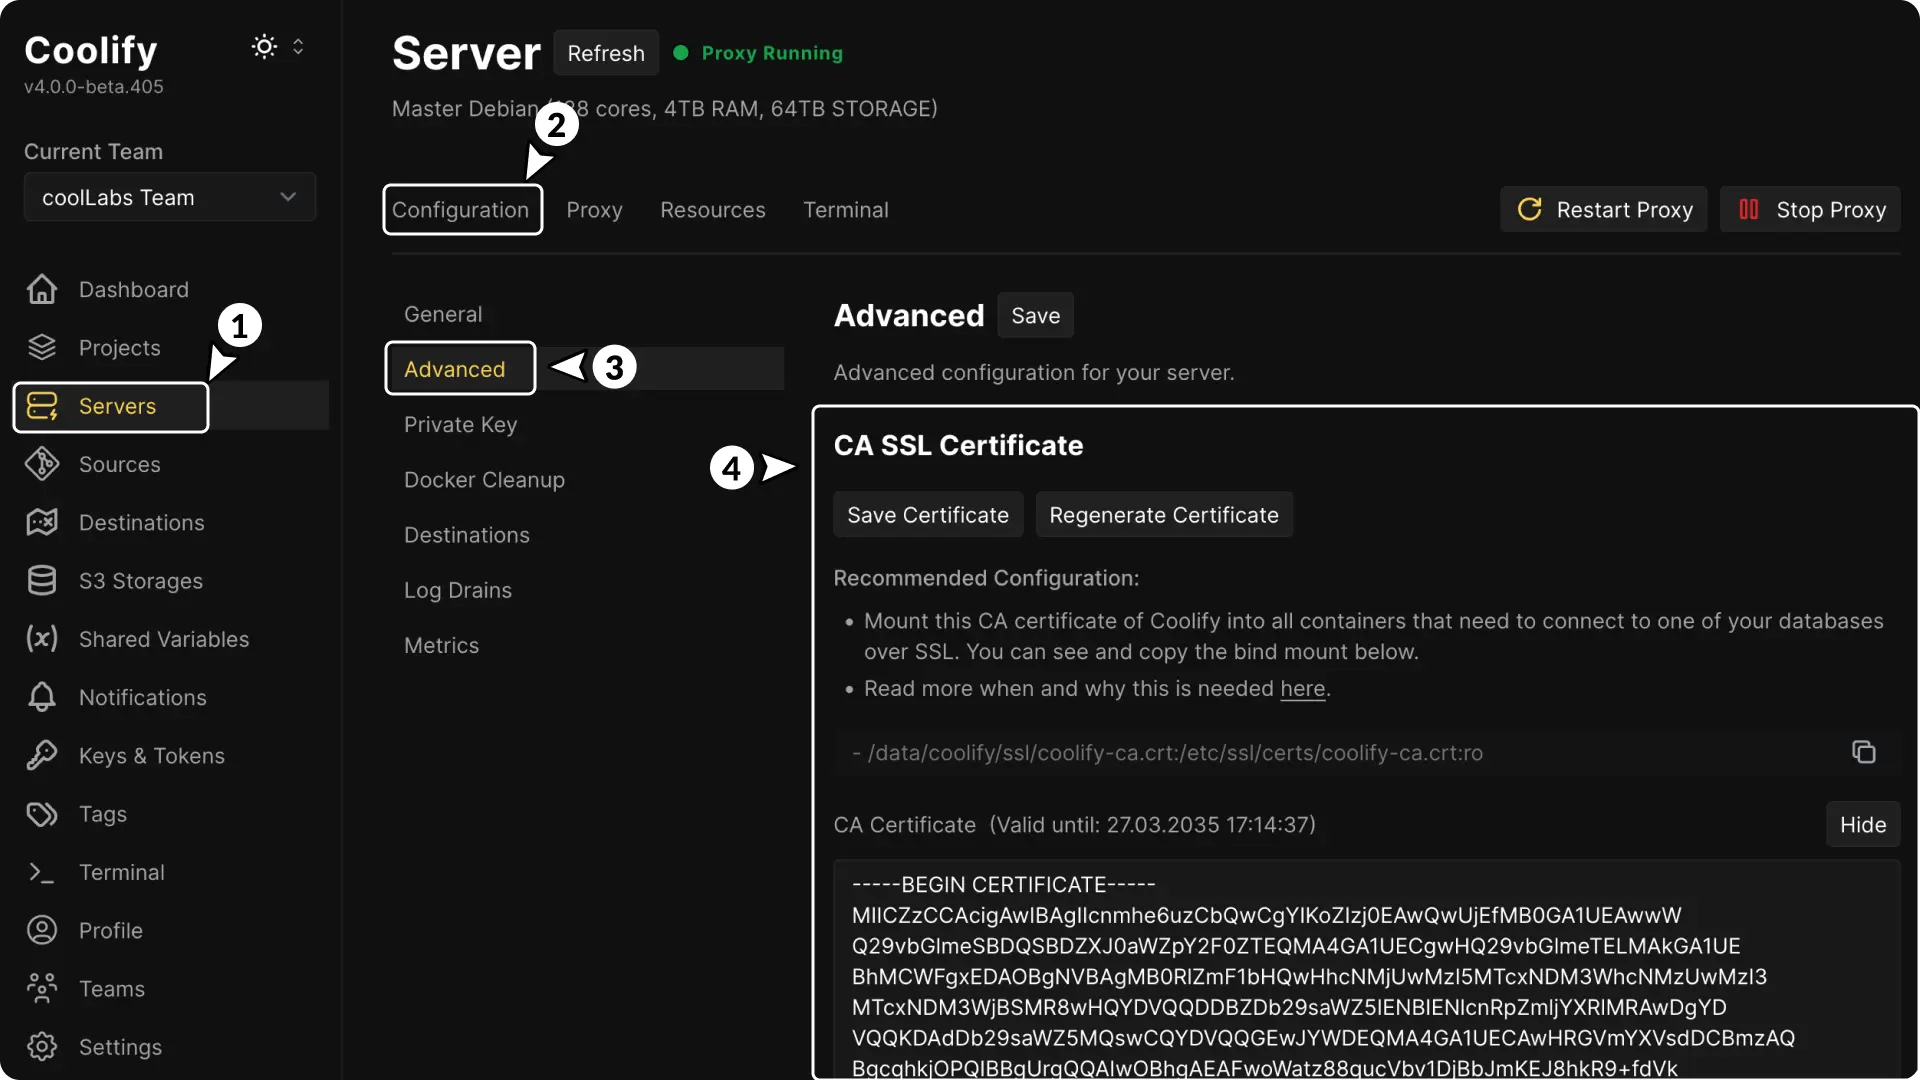
- CA SSL Certificate: Displays the current CA certificate used.
- Save Certificate: Allows you to save a local copy of the certificate.
- Regenerate Certificate: Lets you generate a new CA certificate if needed.
Recommended Configuration
For secure connections, mount the Coolify CA certificate into all containers that need to connect to your databases.
The recommended bind mount is:
/data/coolify/ssl/coolify-ca.crt:/etc/ssl/certs/coolify-ca.crt:ro4. Using a Custom CA Certificate
If you wish to use your own CA certificate instead of the one generated by Coolify:
-
Prepare Your CA Certificate
Make sure your certificate is in PEM format. -
Upload Your Certificate
Upload your custom CA certificate in the following location:/data/coolify/ssl/coolify-ca.crt -
Mount the Certificate
Make sure that the container that requires database access mounts the certificate at:/data/coolify/ssl/coolify-ca.crt:/etc/ssl/certs/coolify-ca.crt:ro