Backup and Restore Your Coolify Instance
This guide will show you how to back up your Coolify instance and restore it on a new server.
There are two methods to create backups:
- S3 Backup: Use S3-compatible storage to automatically save backups.
- Manual Backup: Trigger a backup manually from the Coolify dashboard.
If you use S3-compatible storage, simply download the backup file from your S3 provider and transfer it to your new server.
The rest of this guide will focus on the manual backup method, which is ideal for most users.
NOTE:
This only backs up and restores the Coolify instance itself — not your application data.
All settings from your Coolify dashboard will be restored, but application data (such as volume mounts) must be backed up and restored manually.
For details, refer to the Application Migration Guide.
1. Create a Manual Backup
-
Go to Backup Page on Dashboard:
In your Coolify dashboard, click on Settings and select the Backup tab to view your database and backup settings.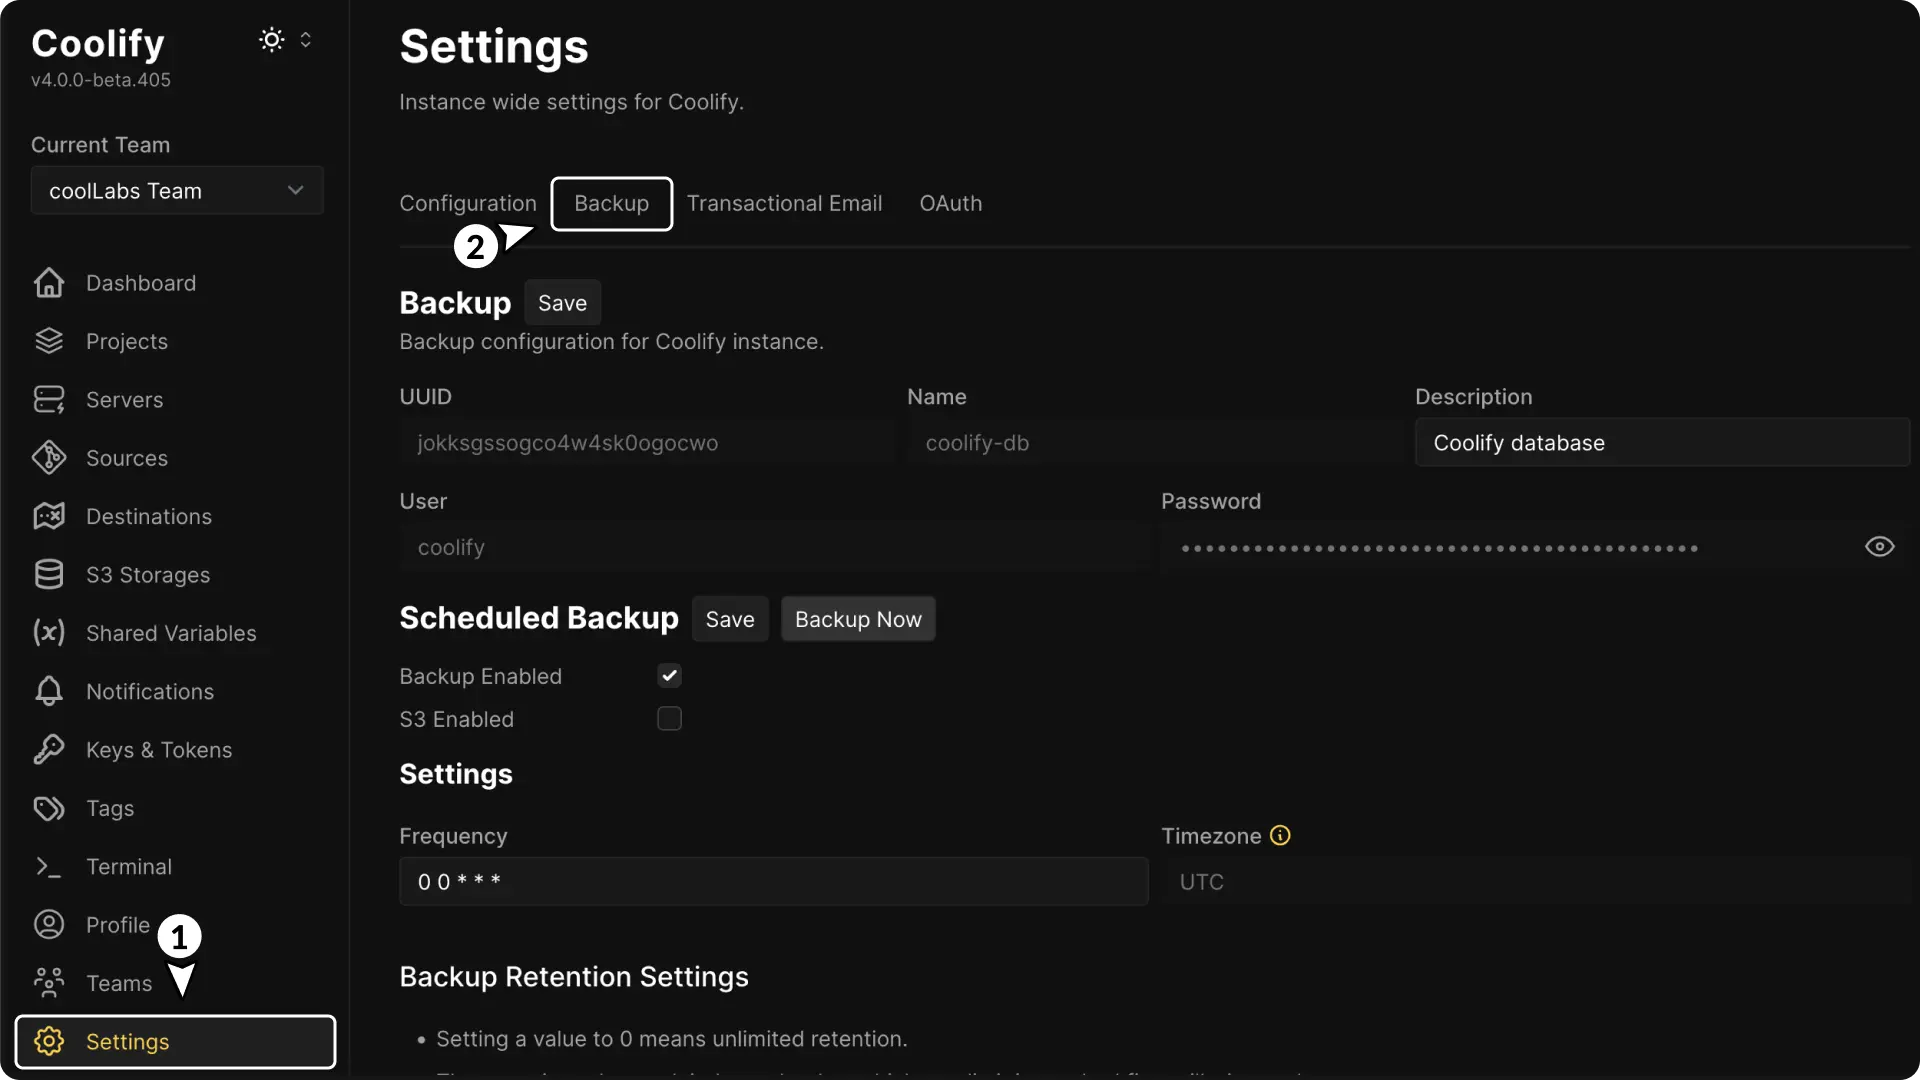
-
Trigger a Backup:
Click on the Backup Now button. This will start the backup process in the background.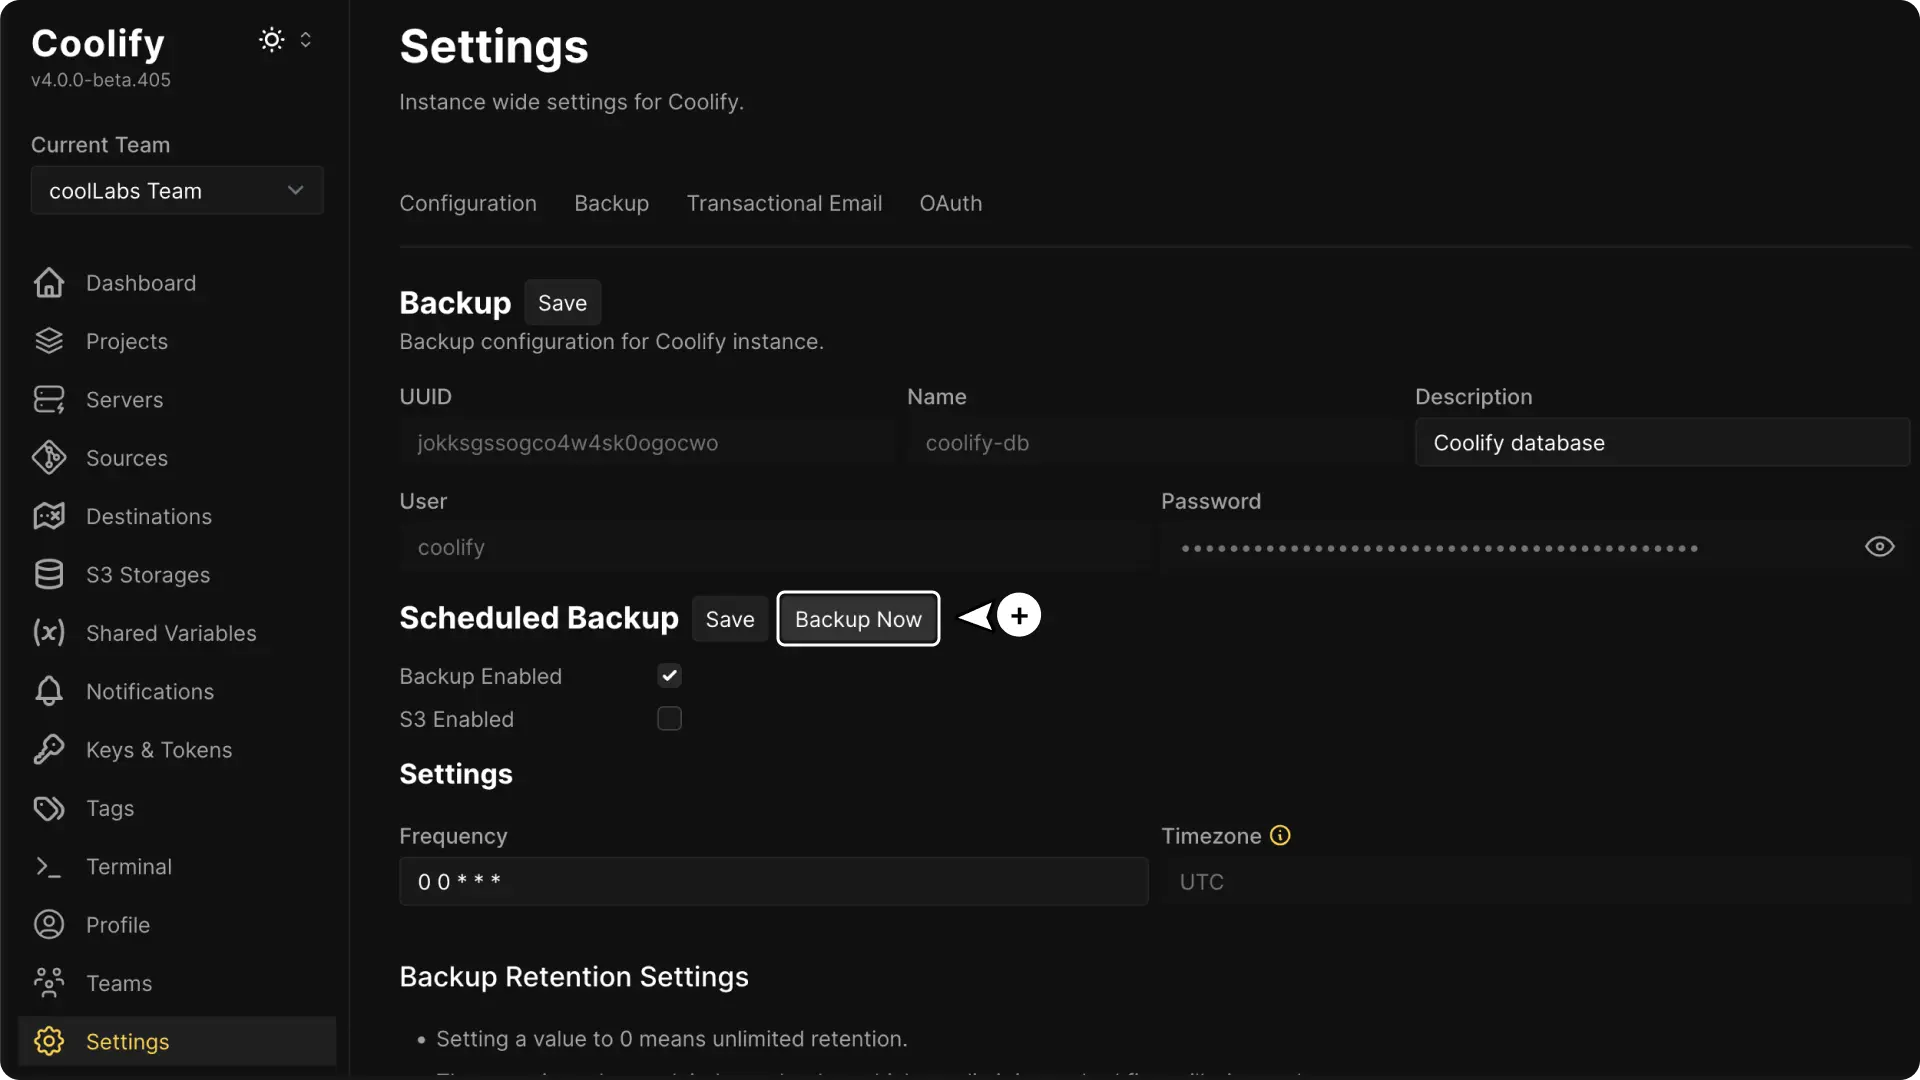
-
Download or Copy Backup Location:
Once the backup is complete, you will see a Download button and a location path in the UI.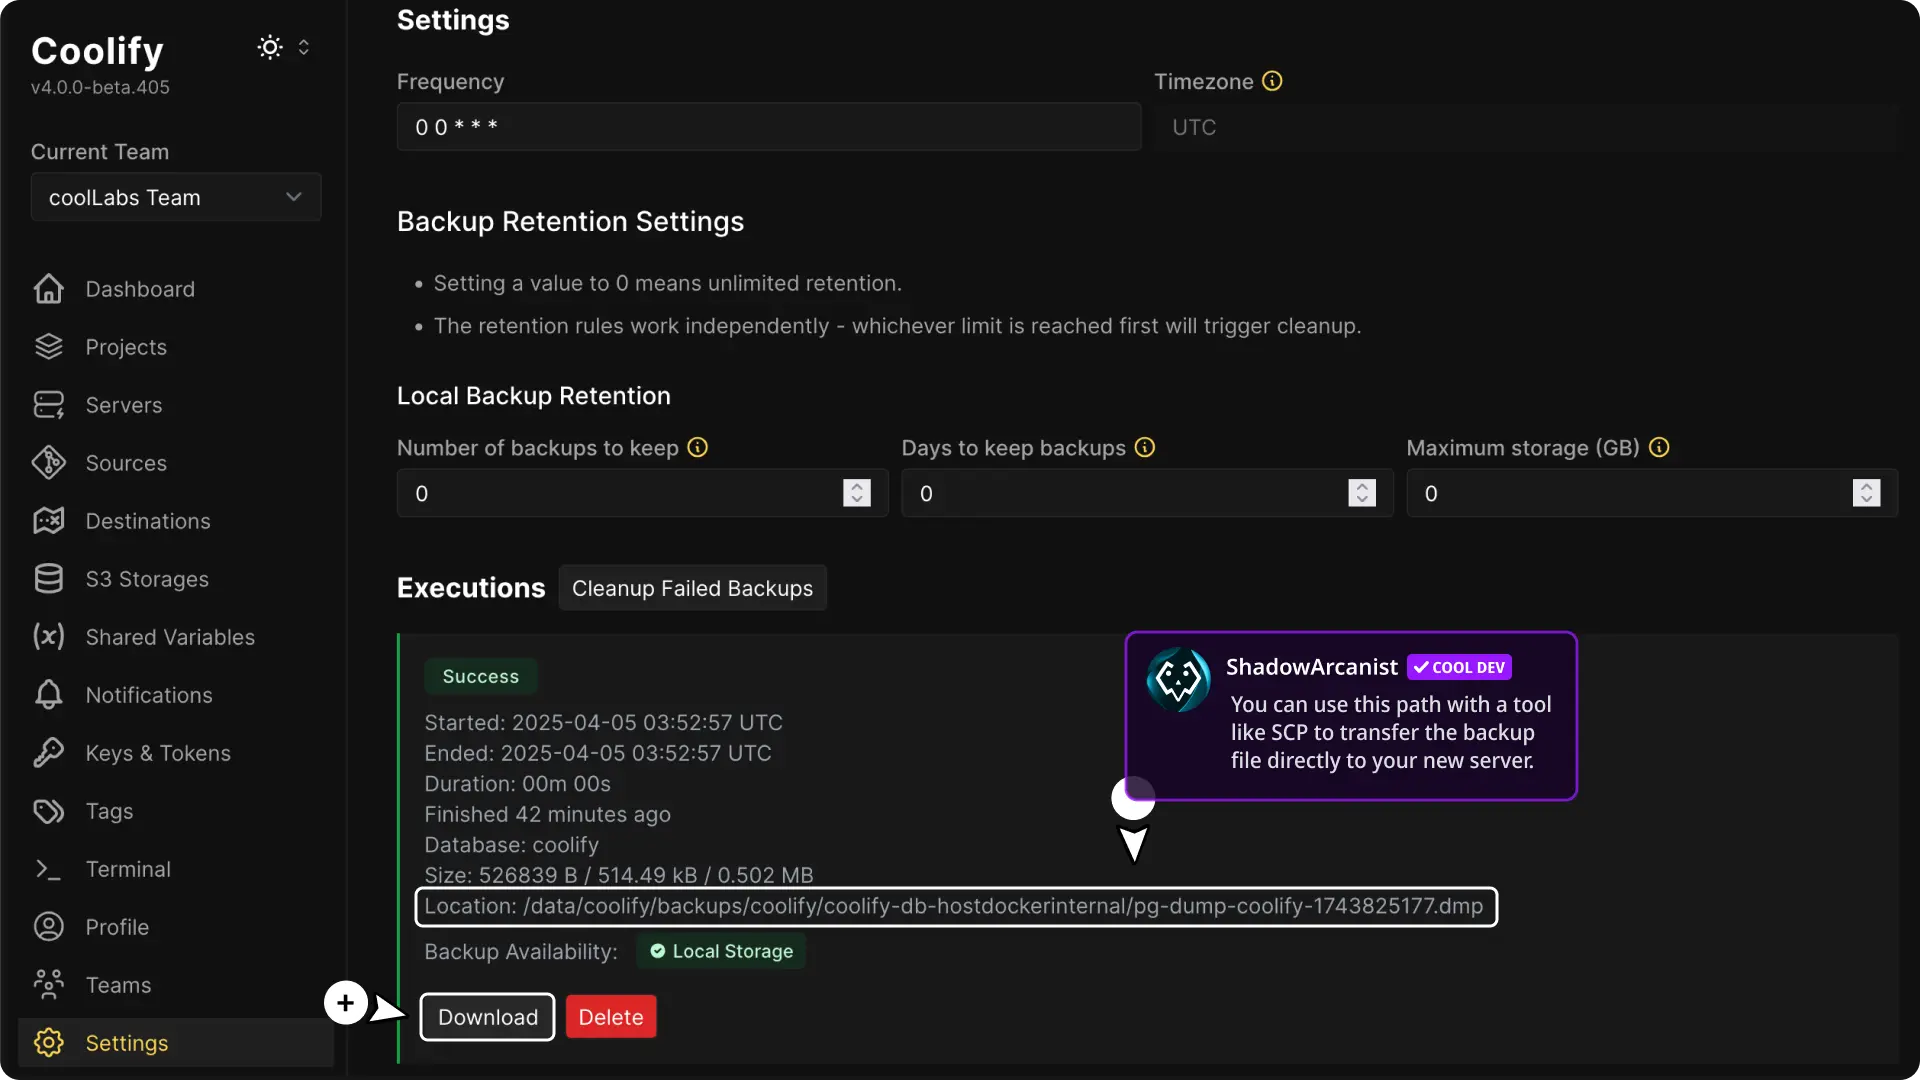
- Download: Saves the backup file to your local computer.
- Copy Path: You can use this path with a tool like SCP to transfer the backup file directly to your new server.
Note
If you are using S3-compatible storage for backups, download the backup file from your S3 provider instead
2. Retrieve Your APP_KEY
Before you restore the backup, you need to obtain the APP_KEY from your current Coolify instance. This key is used to decrypt your data during restoration.
-
Open the Terminal in Coolify:
Access the Terminal tab in the dashboard and connect to the server where Coolify is running. This server is named aslocalhostby default. -
View the Environment File
Run the following command to display the contents of the.envfile:cat /data/coolify/source/.envCopy the value of
APP_KEYand save it securely. This key is important for the restoration process.
IMPORTANT
Save this APP_KEY safely. Without it, you cannot restore your backup.
3. Back Up Your Coolify SSH Private and Public Key
Coolify generates one (or more) SSH key files under /data/coolify/ssh/keys. If you restore Coolify onto a new machine, you must bring those key files along so your managed servers remain reachable.
-
Locate the SSH Key on the Old Host:
ls -l /data/coolify/ssh/keysYou should see one or more files named like:
ssh_key@<random_id1>
ssh_key@<random_id2>
ssh_key@<random_id3>
Each
ssh_key@…entry represents an ED25519 key that Coolify uses to SSH into your servers. -
Copy all these SSH key files to your new host server and store them in a secure location (we will need this later on this guide).
-
Retrieve public keys:
Retrieve the public keys from your old server's
~/.ssh/authorized_keysfile and append them to the new server's~/.ssh/authorized_keysfile (do not replace existing entries).
4. Prepare Your New Server
Set up your new server where you will restore your Coolify instance.
-
Install a Fresh Coolify Instance:
Follow the installation instructions to install Coolify on your new server.Be sure to include the correct version number (example:
-s 4.0.0-beta.400) at the end of the installation script to ensure you're installing the same Coolify version as before.For example, to install version
4.0.0-beta.400, use this command:curl -fsSL https://cdn.coollabs.io/coolify/install.sh | bash -s 4.0.0-beta.400Remember to replace
4.0.0-beta.400with the desired version number. -
Verify the Installation:
Access your new Coolify instance on your browser. A fresh installation will show the registration page, indicating that no data exists yet.
5. Transfer and Restore the Backup
-
Transfer the Backup File:
Copy the backup file and SSH keys to the new server. You can do this via SCP, FTP, or any other secure file transfer method. -
Stop Coolify:
docker stop coolify coolify-redis coolify-realtime coolify-proxy -
Run the Restore Command:
Use the PostgreSQL restore tool to import your backup into the database container.cat /path/to/your_backup_file \ | docker exec -i coolify-db \ pg_restore --verbose --clean --no-acl --no-owner -U coolify -d coolifyYou have to replace
/path/to/your_backup_filewith the path of your backup file on the server.
Note:
Some warnings about existing foreign keys or sequences might appear, these can usually be ignored if the base structure remains intact.
6. Replace the Auto-Generated SSH Key
Replace the key files under /data/coolify/ssh/keys.
- Remove any auto-generated keys:
rm -f /data/coolify/ssh/keys/*-
Move your old key files into
/data/coolify/ssh/keys/These are the files you copied to the new host server on step 3
7. Update Environment Settings for Restoration
After restoring the backup, update your environment configuration to allow the new instance to use the old data.
-
Edit the Environment File:
Open the.envfile with your preferred text editor:nano /data/coolify/source/.env -
Add the Previous APP Key: Add a new environment variable called
APP_PREVIOUS_KEYSand paste the value ofAPP_KEYyou saved earlier. If you have migrated multiple times, you can list multiple keys separated by a comma (ensure there are no spaces between them):# Single key example: APP_PREVIOUS_KEYS=your_previous_app_key_here# Multiple keys example APP_PREVIOUS_KEYS=app_key_1,app_key_2,app_key_3Save and exit the editor.
8. Restart Coolify
To apply the restored backup and updated environment settings, restart your Coolify instance using the install script.
-
Run the Installation Script:
Re-run the Coolify installation command:curl -fsSL https://cdn.coollabs.io/coolify/install.sh | bash -s 4.0.0-beta.400Remember to replace
4.0.0-beta.400with the desired version number. -
Verify the Restoration:
Visit your Coolify dashboard URL and log in with the same credentials from your previous instance. Your projects, deployments, and settings should now be restored.
Troubleshooting
-
500 Error on Login or Project Access:
Double-check that theAPP_PREVIOUS_KEYSvariable is correctly set in your.envfile. -
Permission Denied Errors:
If you encounter permission issues while accessing directories, change the ownership of the/data/coolifydirectory. Since Coolify uses the root user account, ensure that the ownership is set to root:sudo chown -R root:root /data/coolify -
Server is not reachable (Permission denied): If Coolify cannot SSH into your servers because it doesn’t have the same key files.
Make sure you copied all of
/data/coolify/ssh/keys/from the old host, and then placed them under/data/coolify/ssh/keys/on the new host. If those files do not exactly match what was on the old server, you will see this error.Also, ensure that the corresponding public key from the old host's
authorized_keysfile is added to the new host's~/.ssh/authorized_keys.
Migrate Applications
Step-by-step guide to migrate applications, databases, and Docker volumes from one Coolify server to another with backup and restore scripts
Load Balancing on Hetzner
Deploy scalable load-balanced applications on Hetzner Cloud with Coolify including TLS termination, health checks, database setup, and firewall configuration.