Coolify offers automated backups of your instance to an AWS S3 bucket, giving you a hands‑off, reliable way to safeguard your configuration and data.
Why use AWS S3 with Coolify?
-
Enterprise‑grade durability & availability: S3 is designed for 99.999999999% durability and automatic replication across multiple facilities, so your backups are always safe and accessible.
-
Cost‑effective, pay as you go pricing: Only pay for the storage and requests you actually use, with built‑in lifecycle rules (e.g., transition to Glacier) to optimize long‑term costs.
-
Seamless integration – Coolify’s backup scheduler hooks directly into S3’s API, eliminating the need for custom scripts or third‑party tools and ensuring backups run on a schedule.
When to avoid using AWS S3 with Coolify?
-
Strict data residency or on‑prem requirements: If your regulations mandate keeping backups entirely within a private data center, S3’s public cloud model may not comply.
-
No external network access: In environments where outbound internet is blocked, Coolify cannot push snapshots to an S3 endpoint.
Example Data
The following data is used as an example in this guide. Please replace it with your actual data when following the steps:
- S3 Bucket Name: envix-coolify-backups-s3
- IAM Policy Name: EnvixCoolifyBackupS3Access
- IAM Username: EnvixCoolifyBackupS3User
- Endpoint: https://s3.ap-northeast-2.amazonaws.com
1. Create a S3 Bucket
To create your S3 Bucket, follow these steps:
Visit https://console.aws.amazon.com/s3 and Click on Create Bucket button
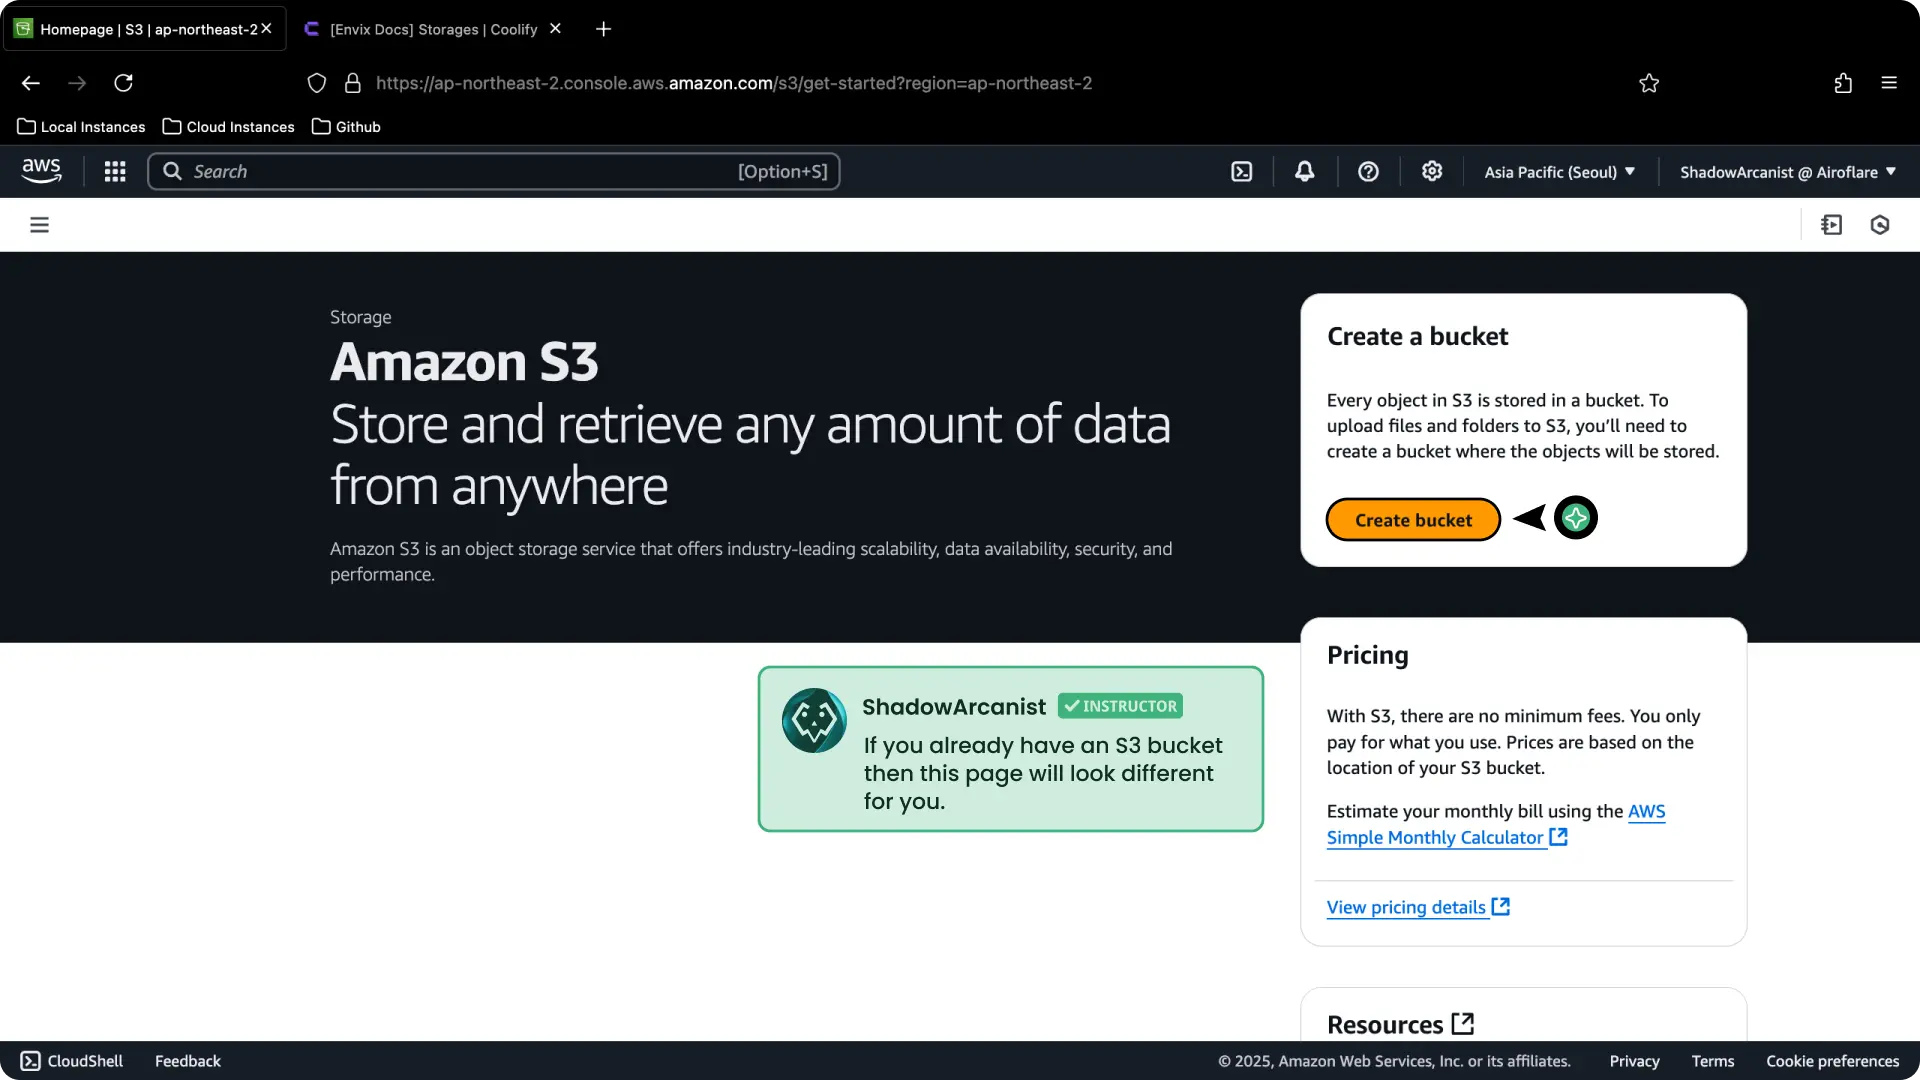
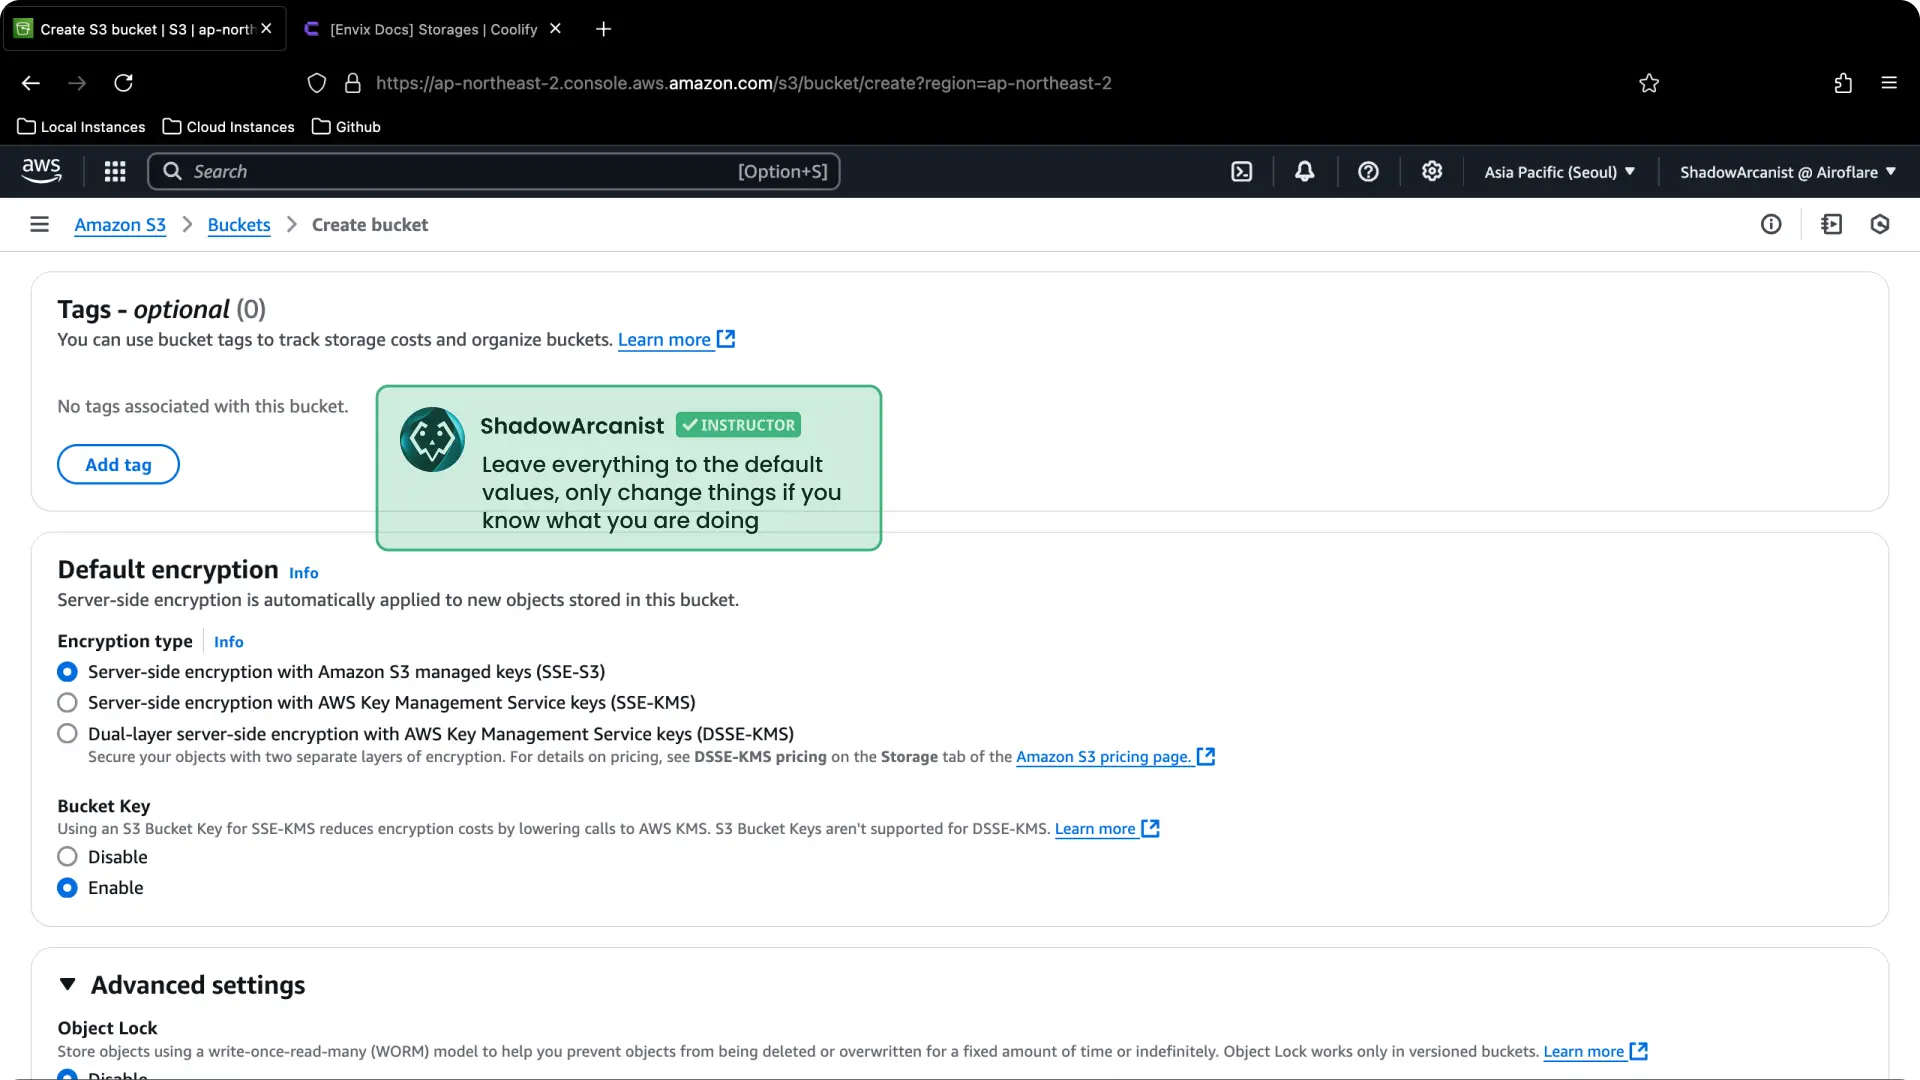
You’ll be asked to choose a name, object ownership, and so on.
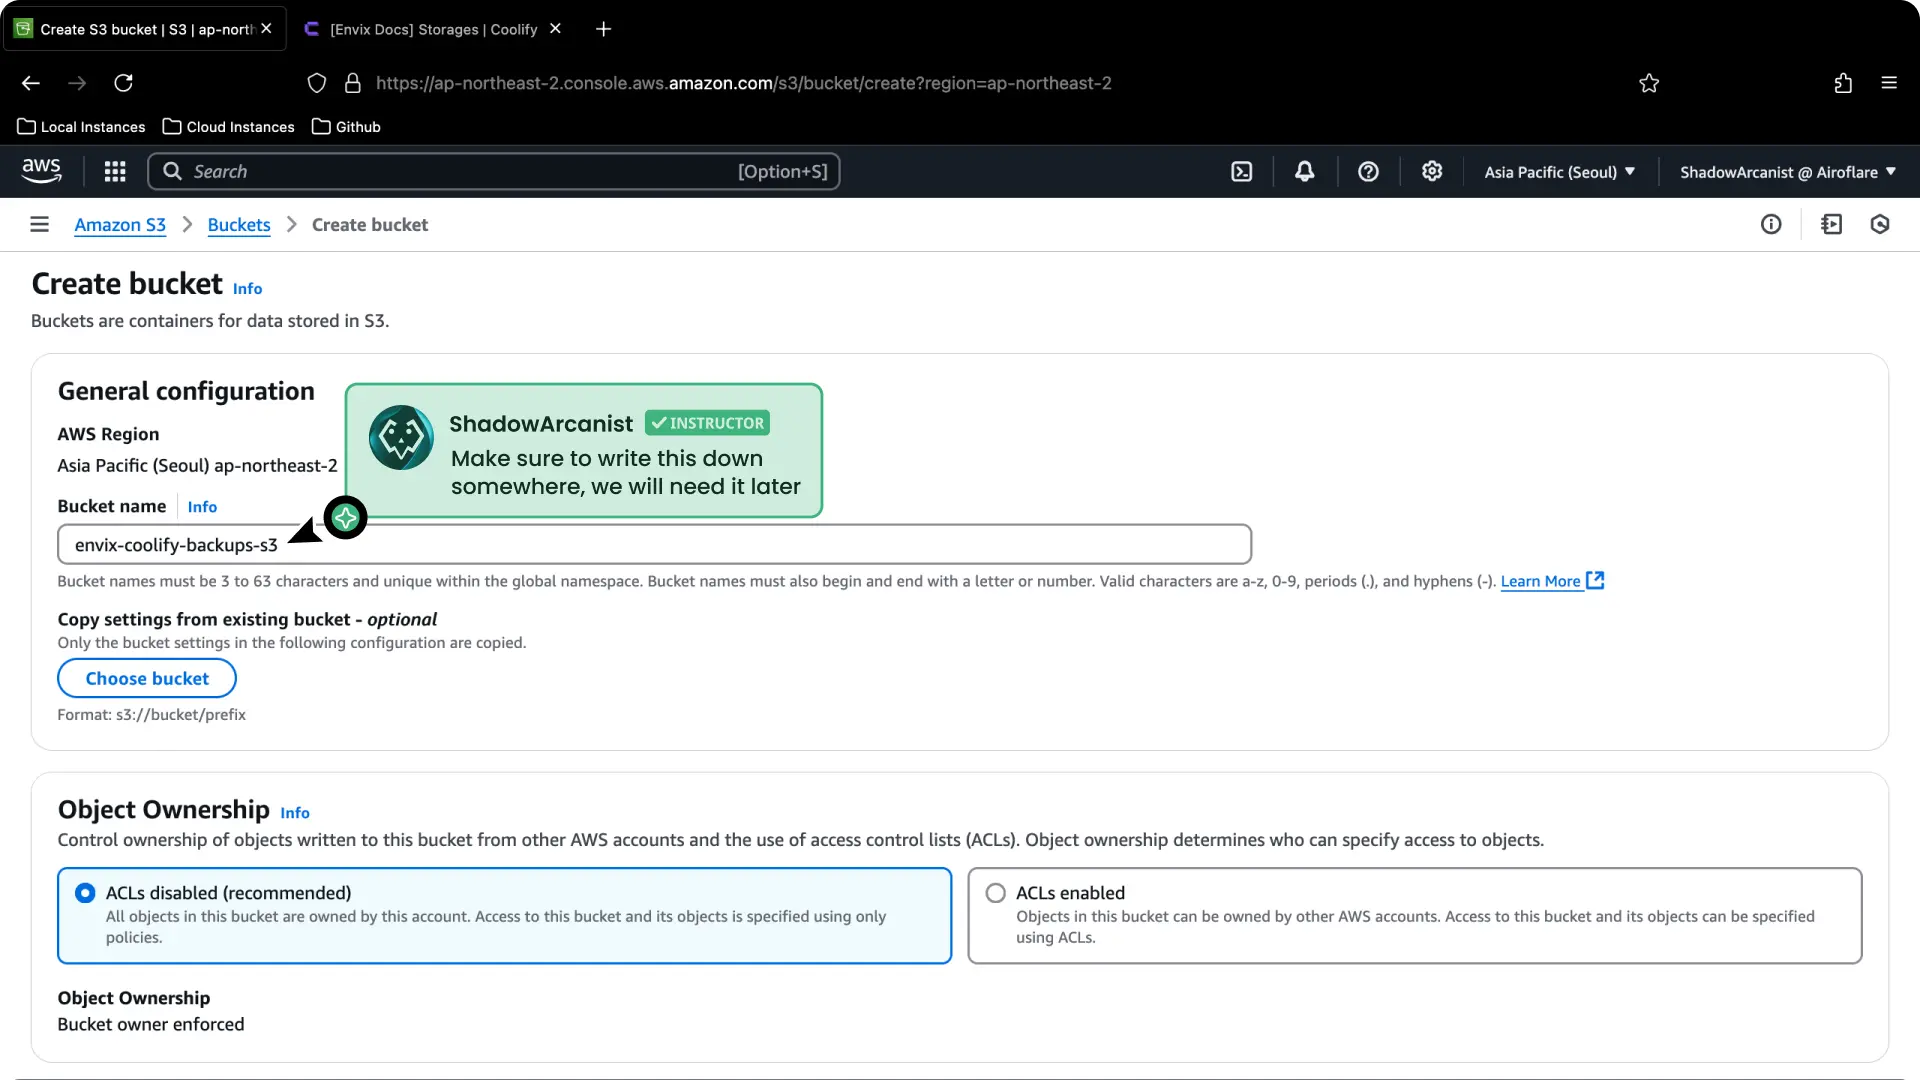
Note
Leave everything else to default values, only change things if you know what you are doing.
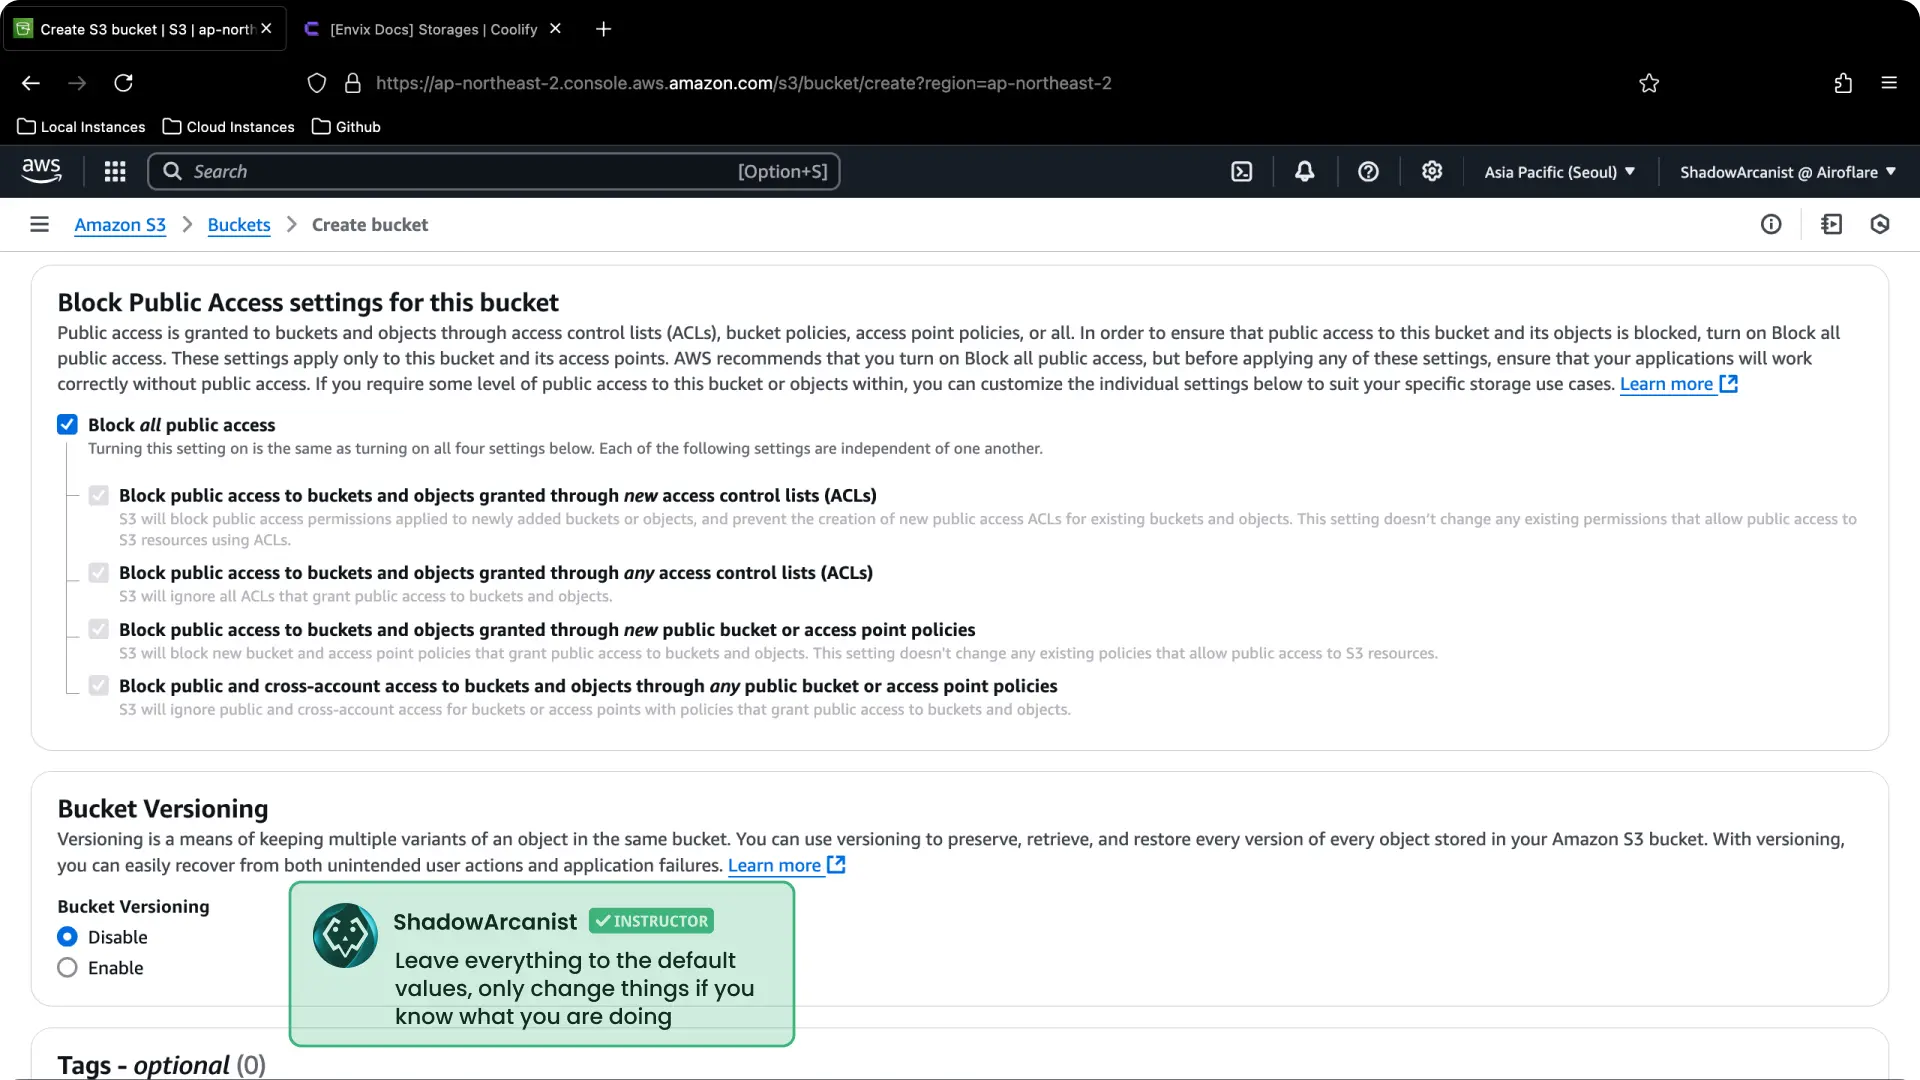
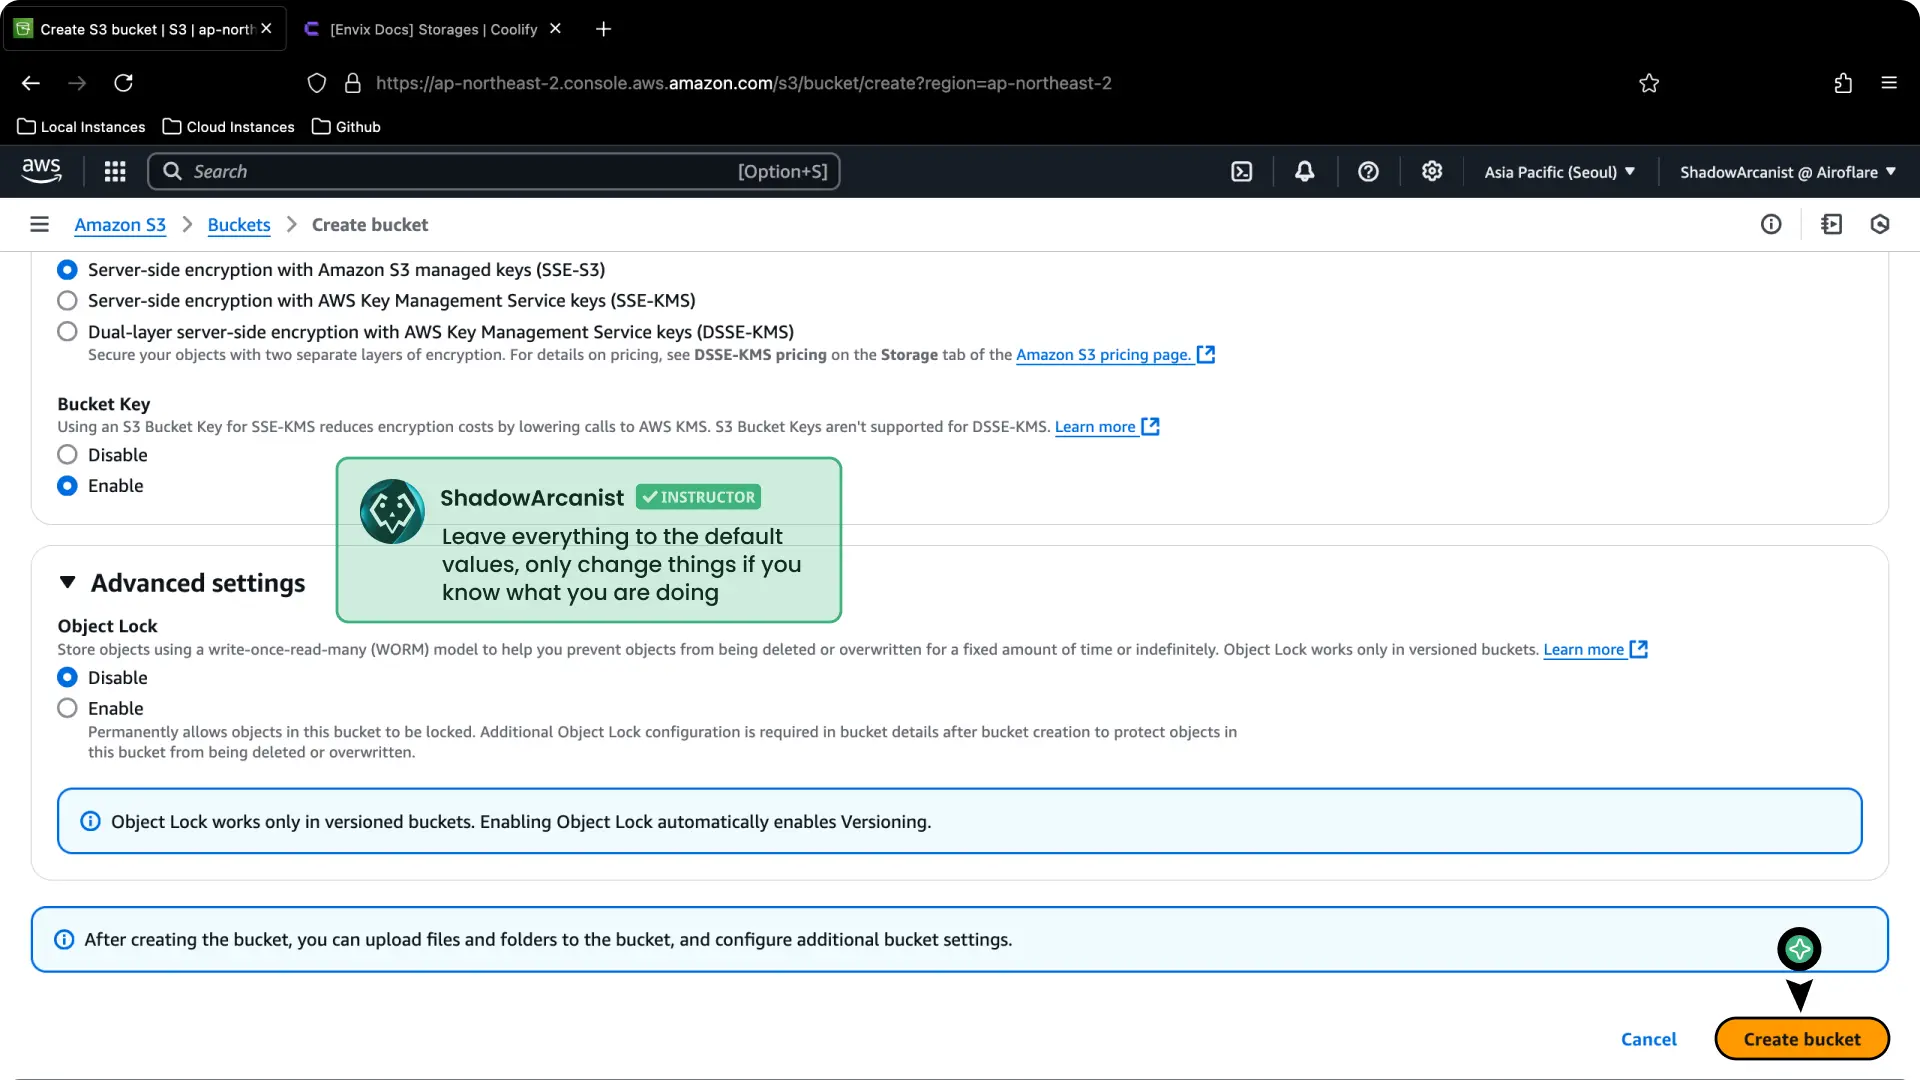
Click on Create Bucket button
Once the bucket is created you will be redirected to this page:

2. Create IAM Policy
To create your IAM Policy, follow these steps:
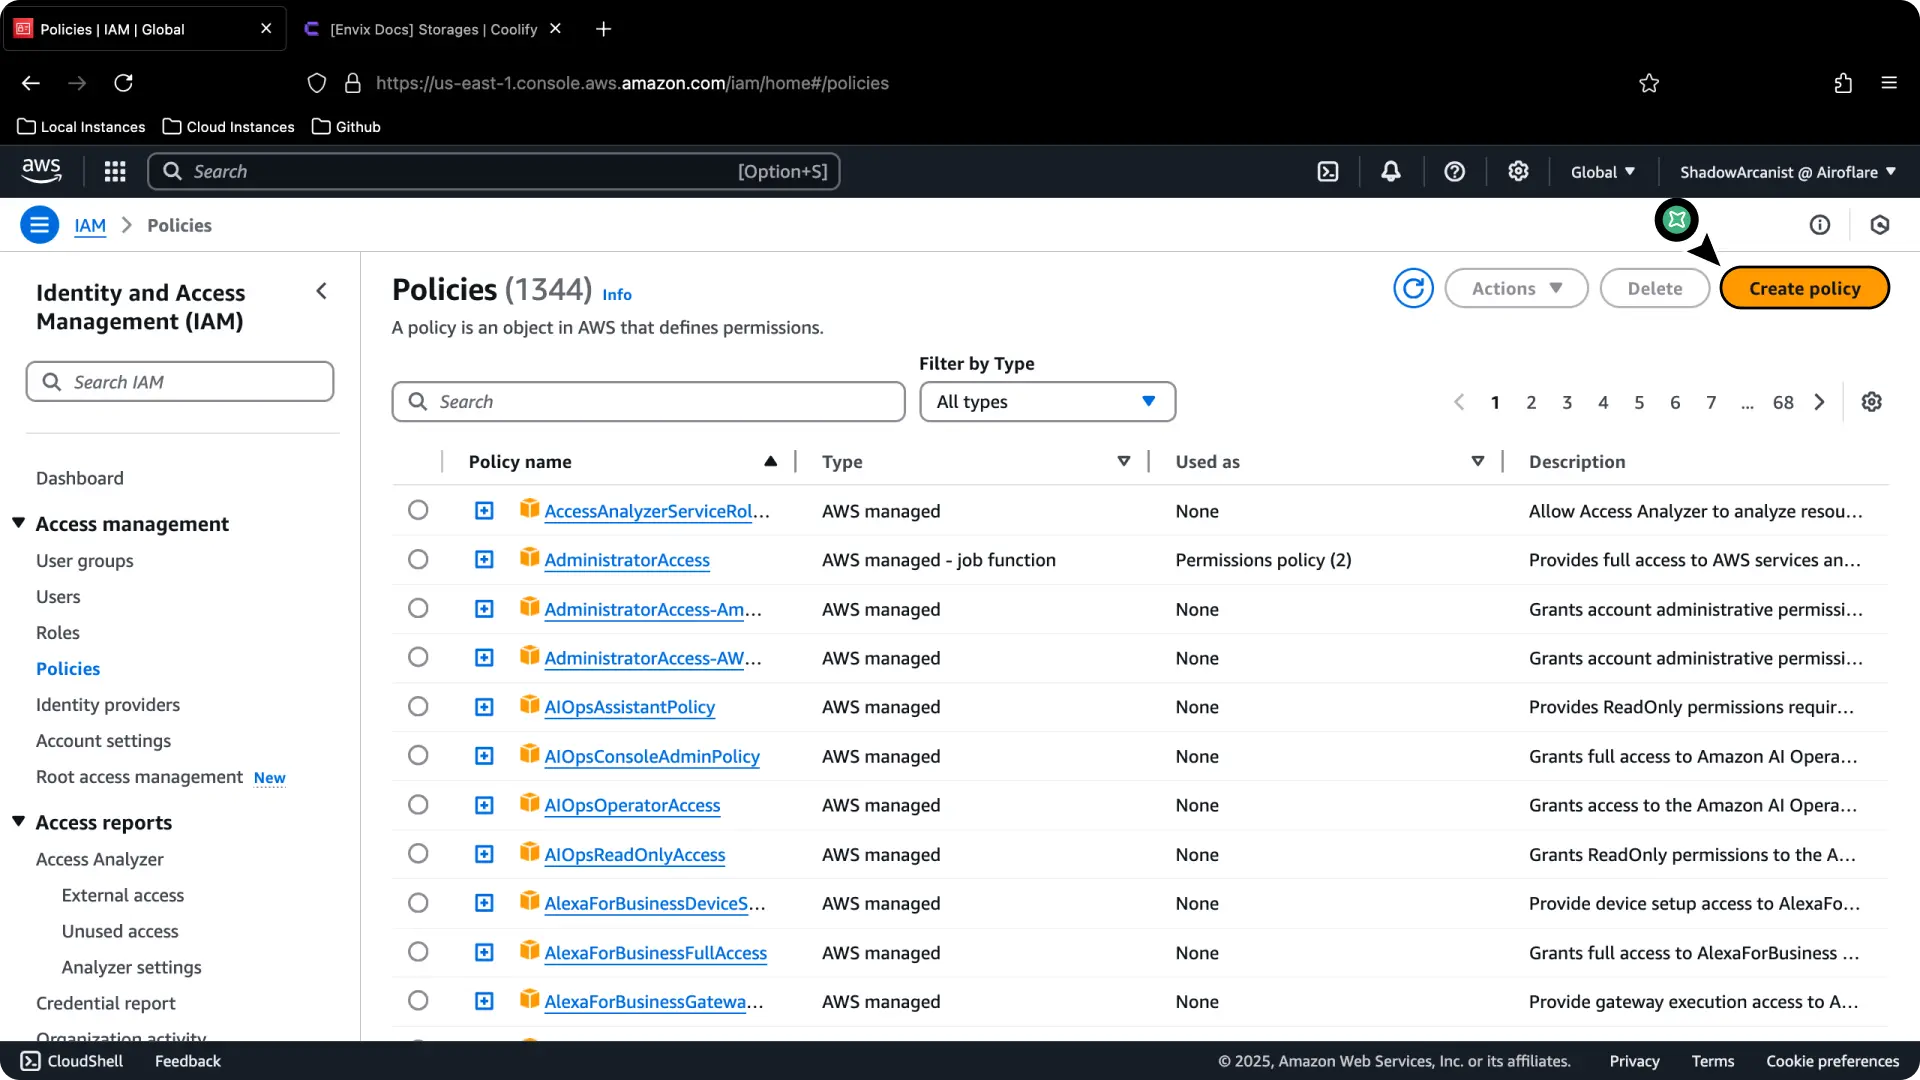
Visit https://console.aws.amazon.com/iam/home#/policies and Click on Create Policy button
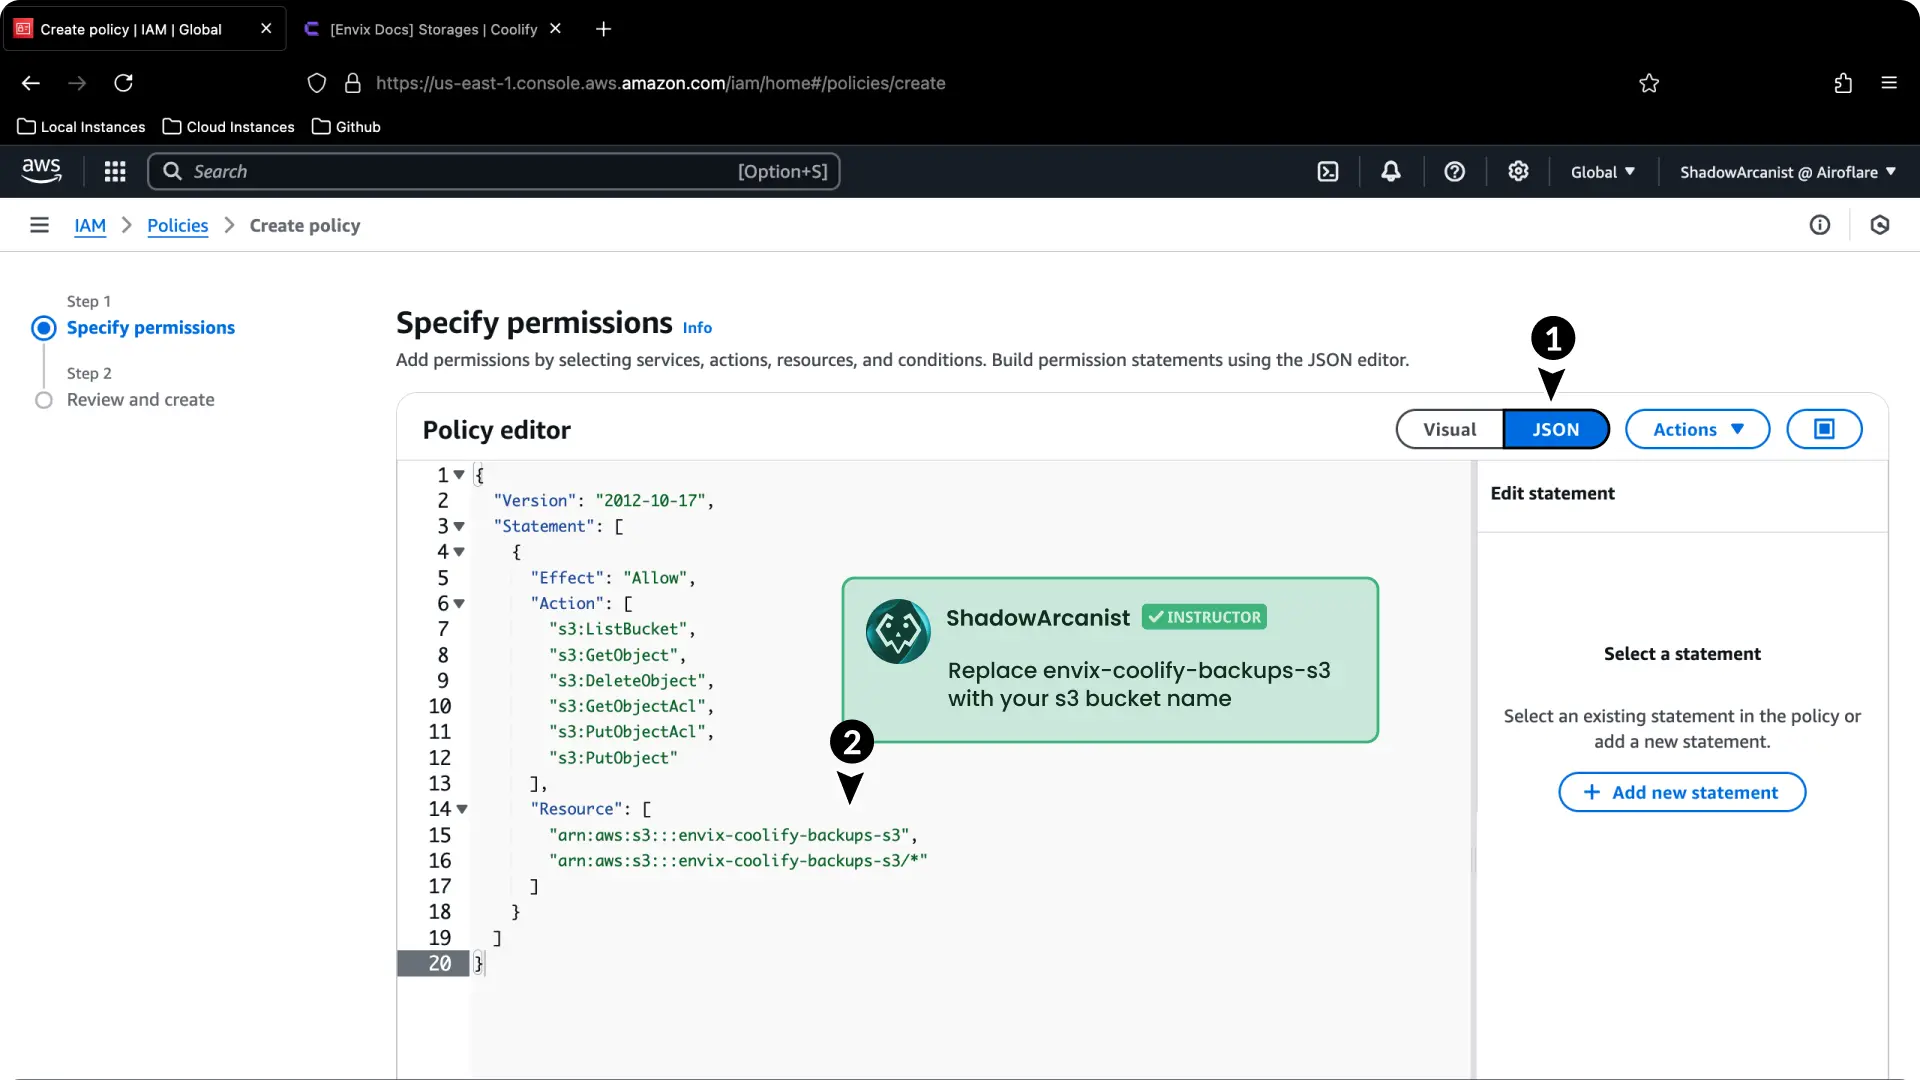
- Click on JSON option and copy paste the following code on the policy editor
{
  "Version": "2012-10-17",
  "Statement": [
    {
      "Effect": "Allow",
      "Action": [
        "s3:ListBucket",
        "s3:GetObject",
        "s3:DeleteObject",
        "s3:GetObjectAcl",
        "s3:PutObjectAcl",
        "s3:PutObject"
      ],
      "Resource": [
        // replace envix-coolify-backups-s3 with your bucket name on below two lines
        "arn:aws:s3:::envix-coolify-backups-s3",
        "arn:aws:s3:::envix-coolify-backups-s3/*"
      ]
    }
  ]
}
Scroll down till the bottom of the page and click on the Continue button.
Then you’ll be asked to choose a name for the policy:
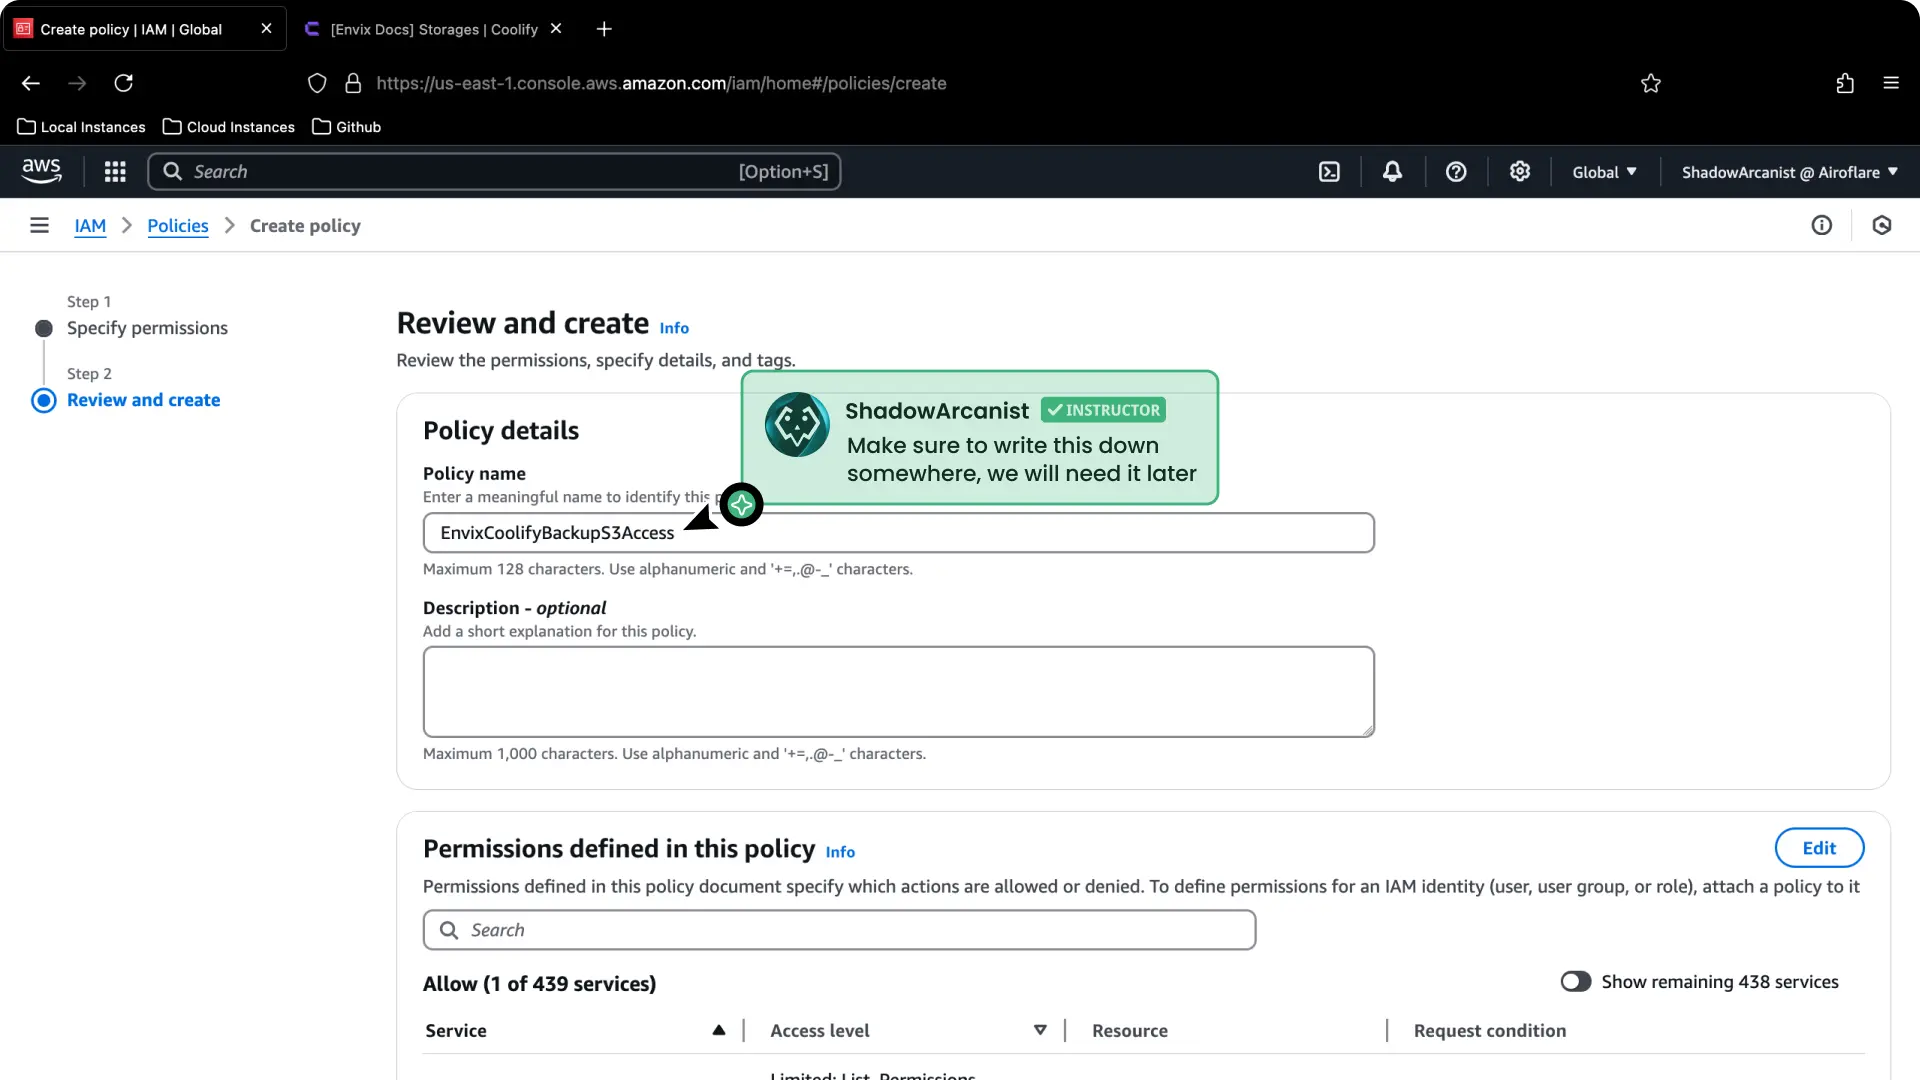
Once you have entered the name, scroll down till the bottom of the page and click on the Continue button.
Once the Policy is created you will be redirected to this page:

Tip
You won't see the policy you just created, you have to search for its name on the search box.
3. Create a IAM User
To create your IAM User, follow these steps:
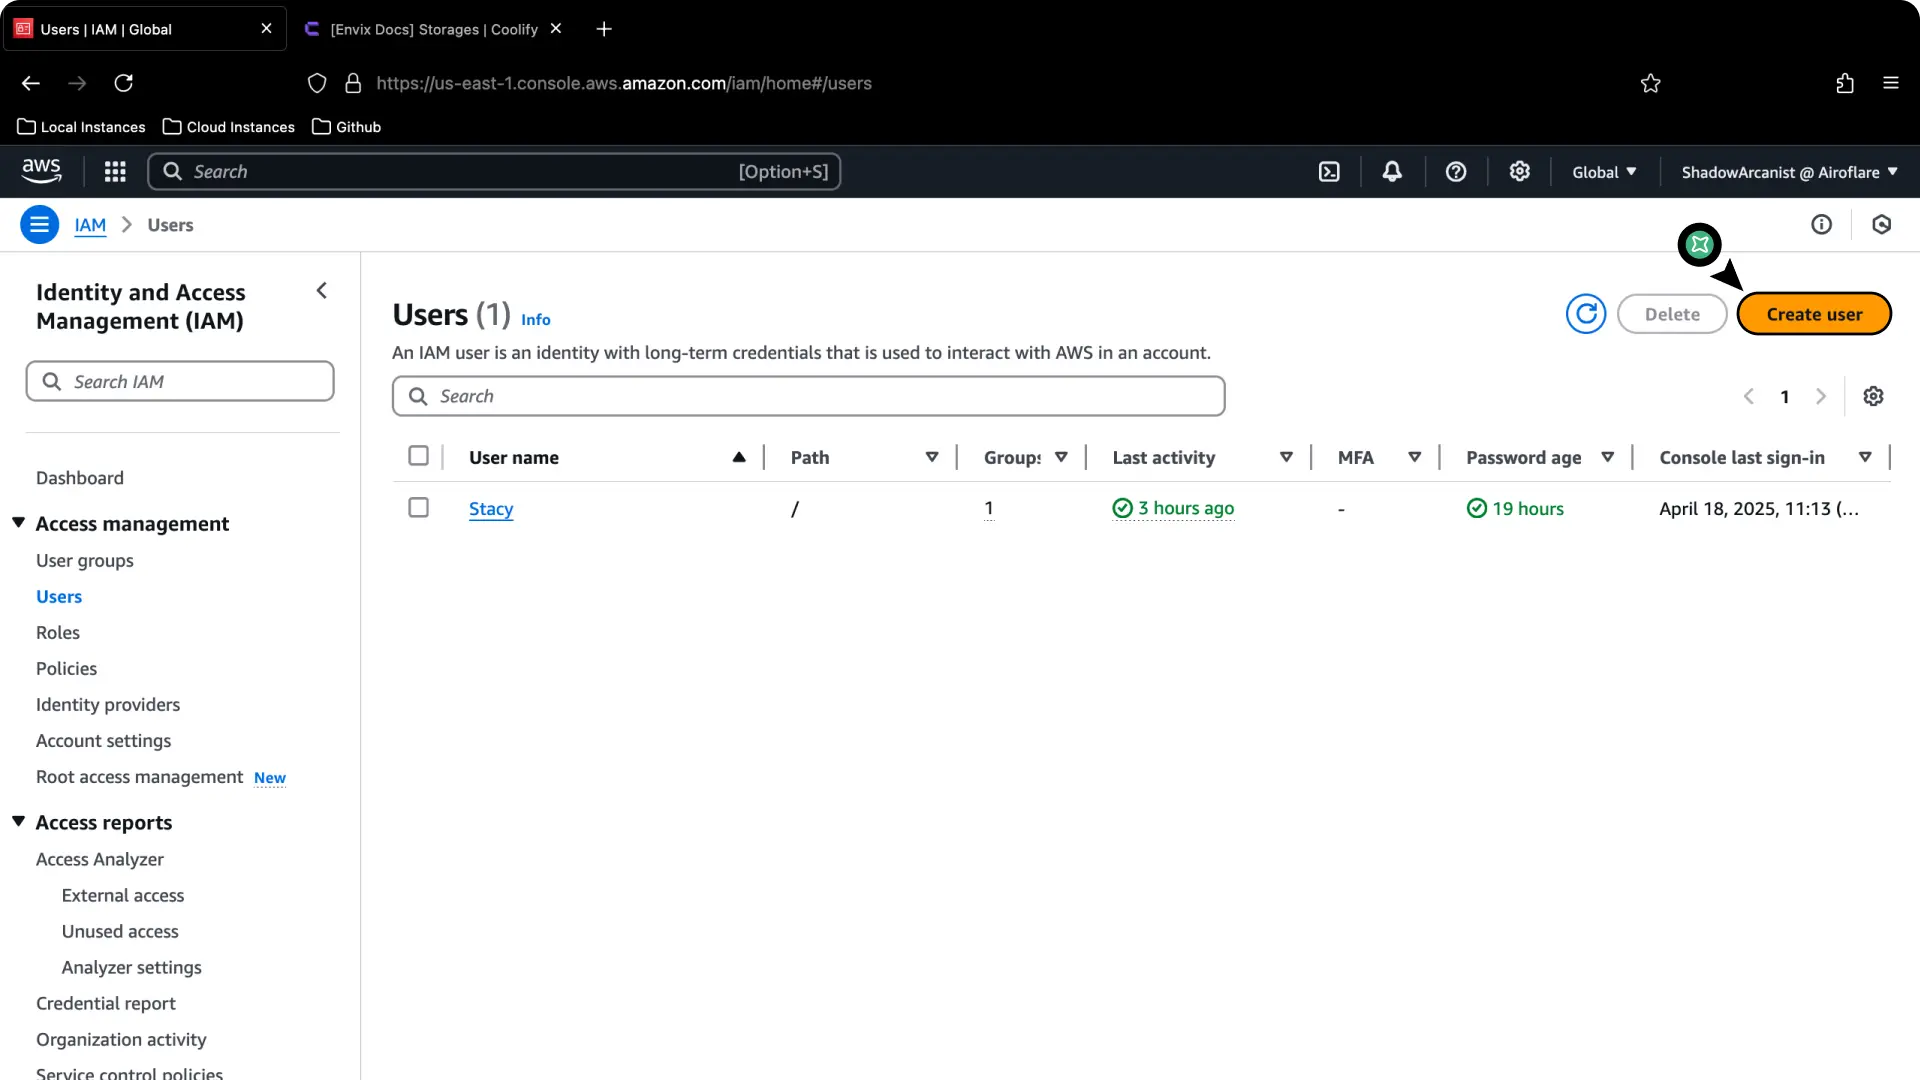
Visit https://console.aws.amazon.com/iam/home#/users and Click on Create user button
You’ll be asked to choose a name for the user:
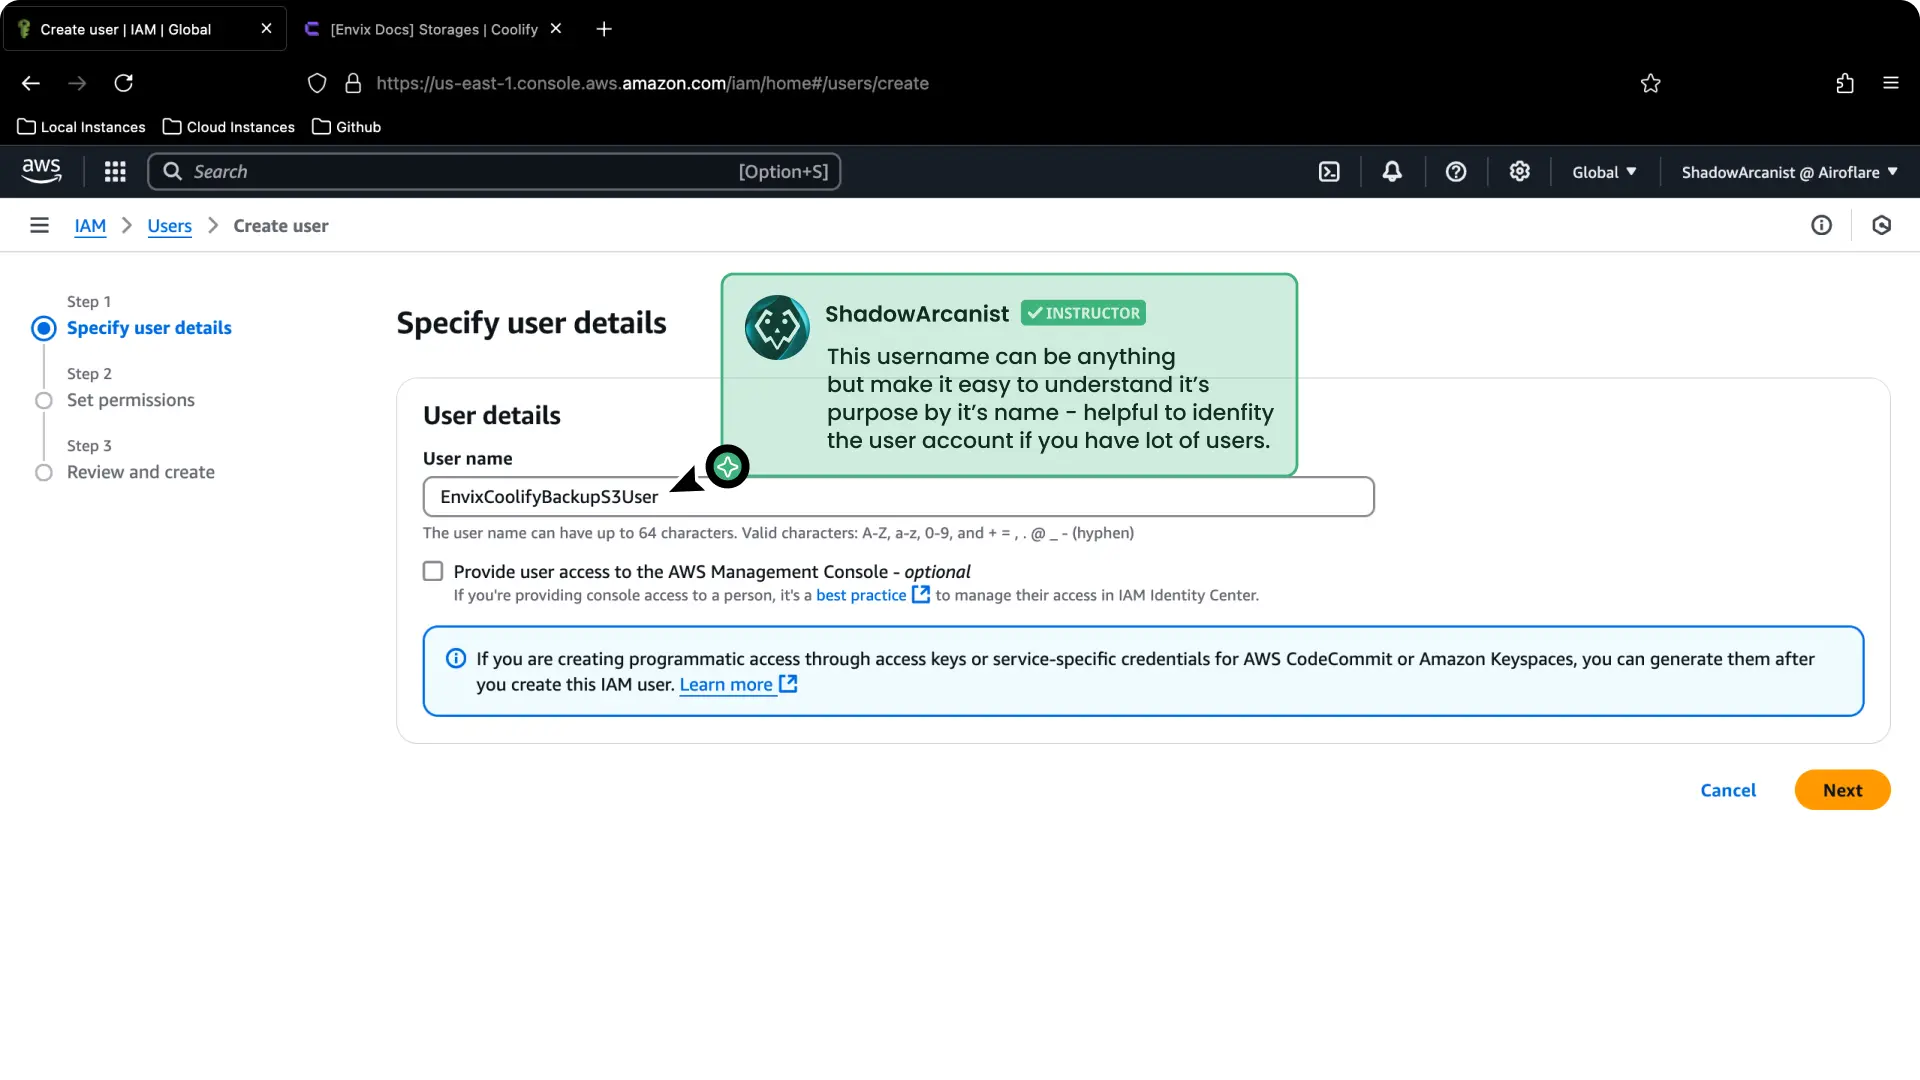
- Click on Next button after you have entered a name for the user.
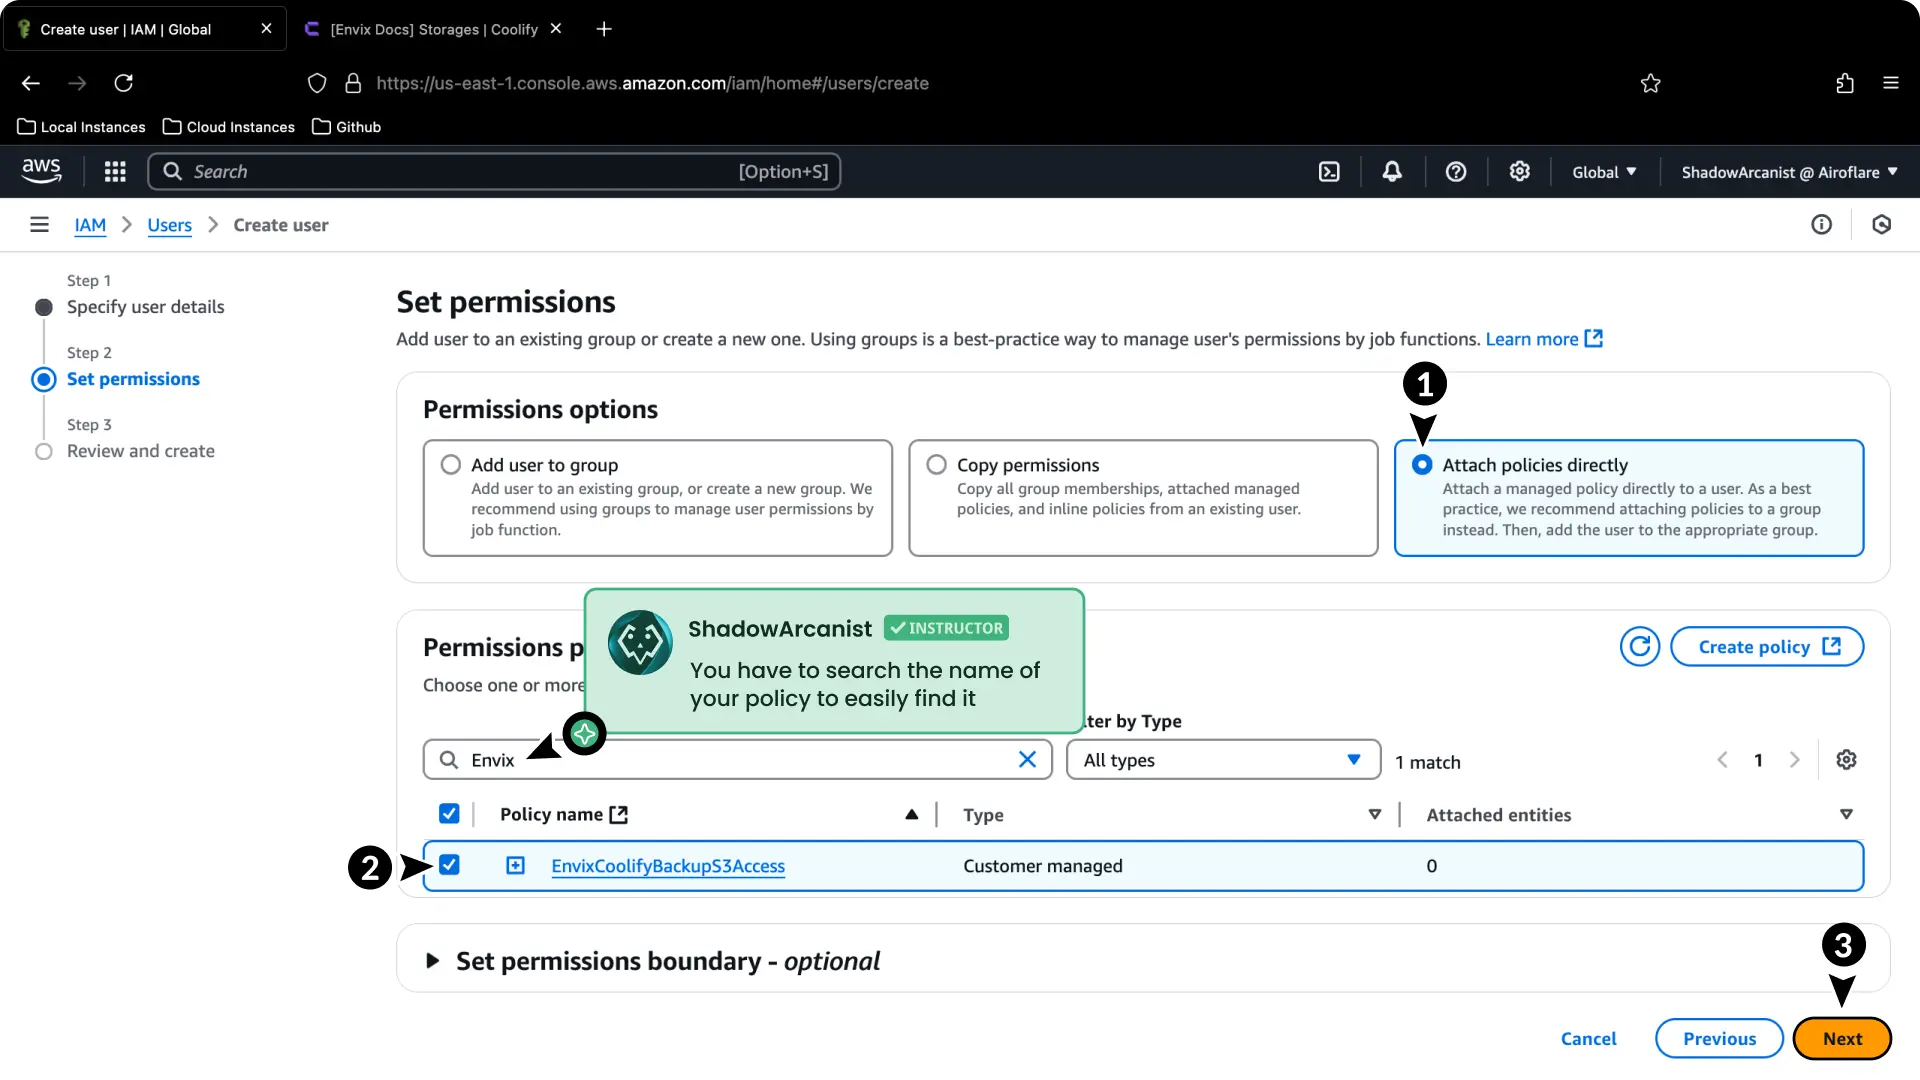
- Select Attach policies directly option
- Select the policy we created on the previous step
- Click on Next button

- Click on Create user button (you don't have to change anything on this page)
Once the Policy is created you will be redirected to this page:
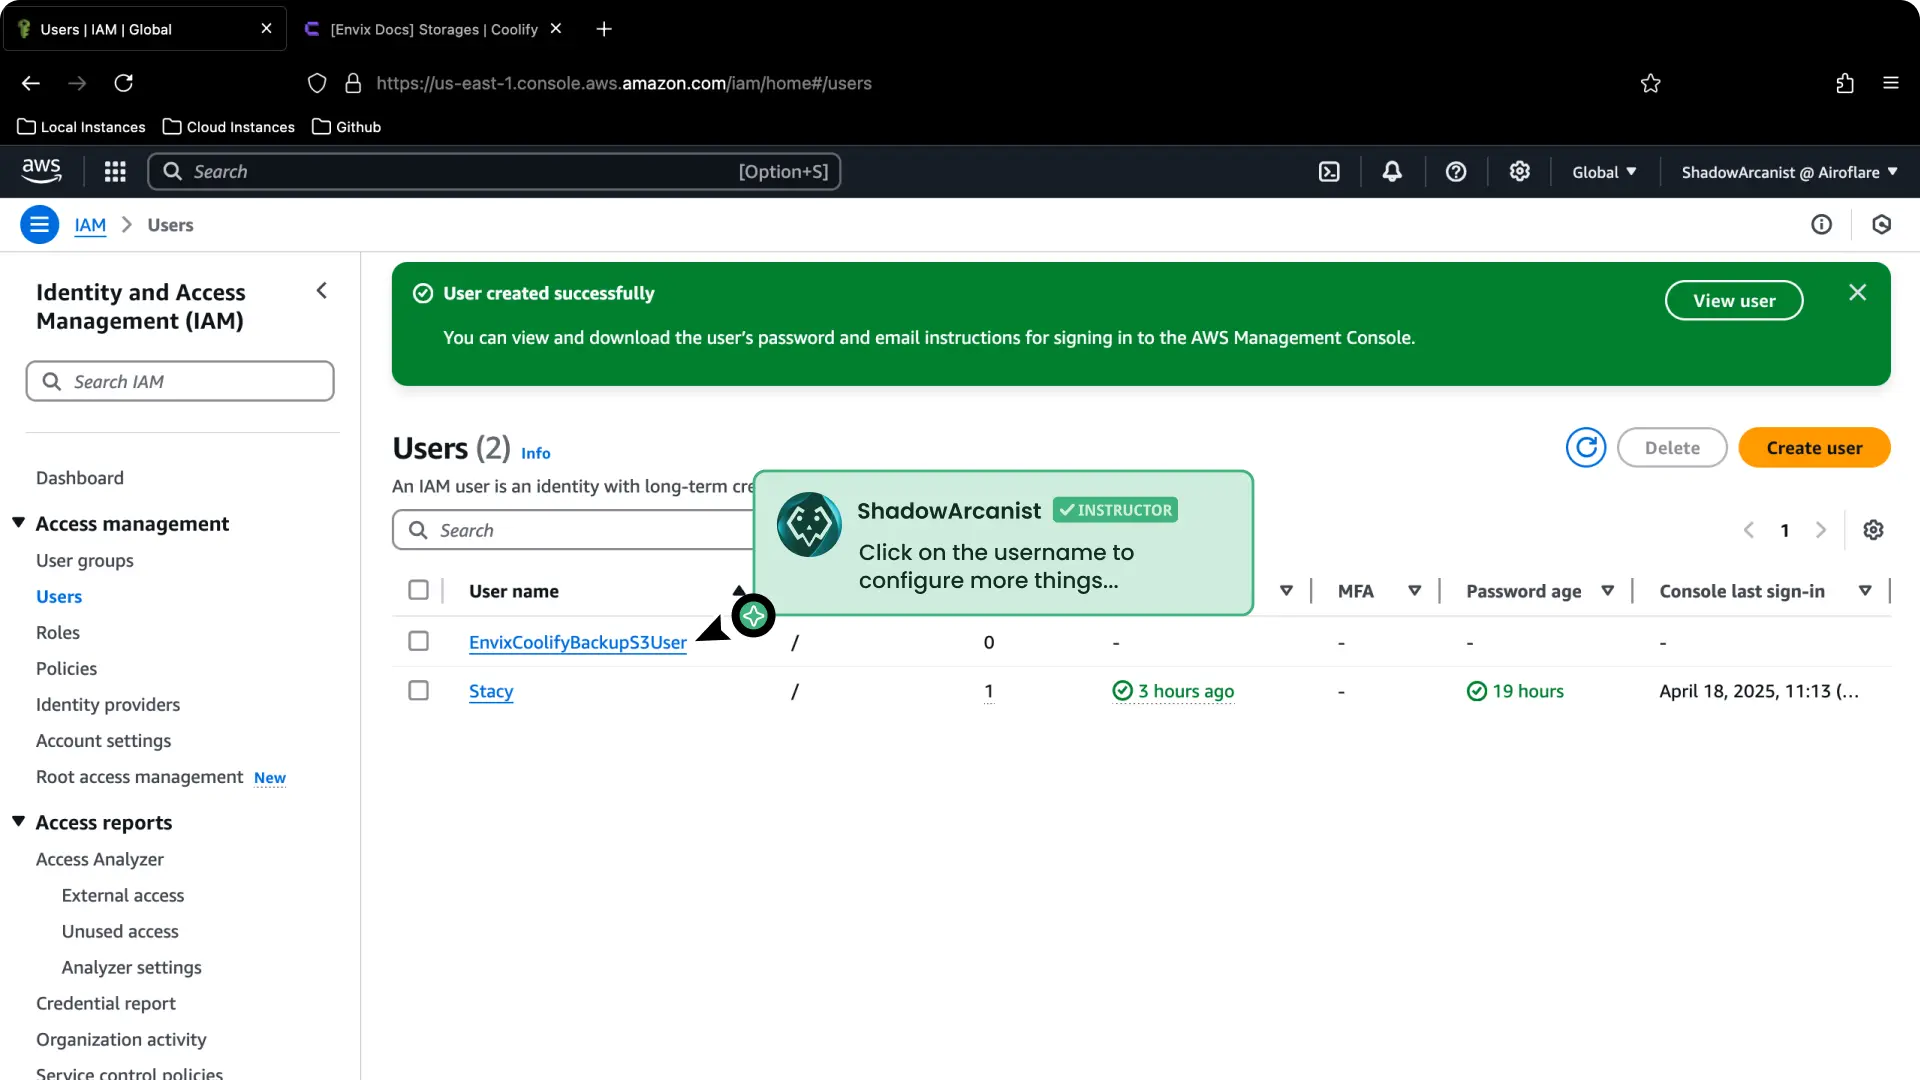
- Click on the username to create an access key.
4. Create an Access Key
After you have clicked on the username on previous step, you will be redirected to this page:
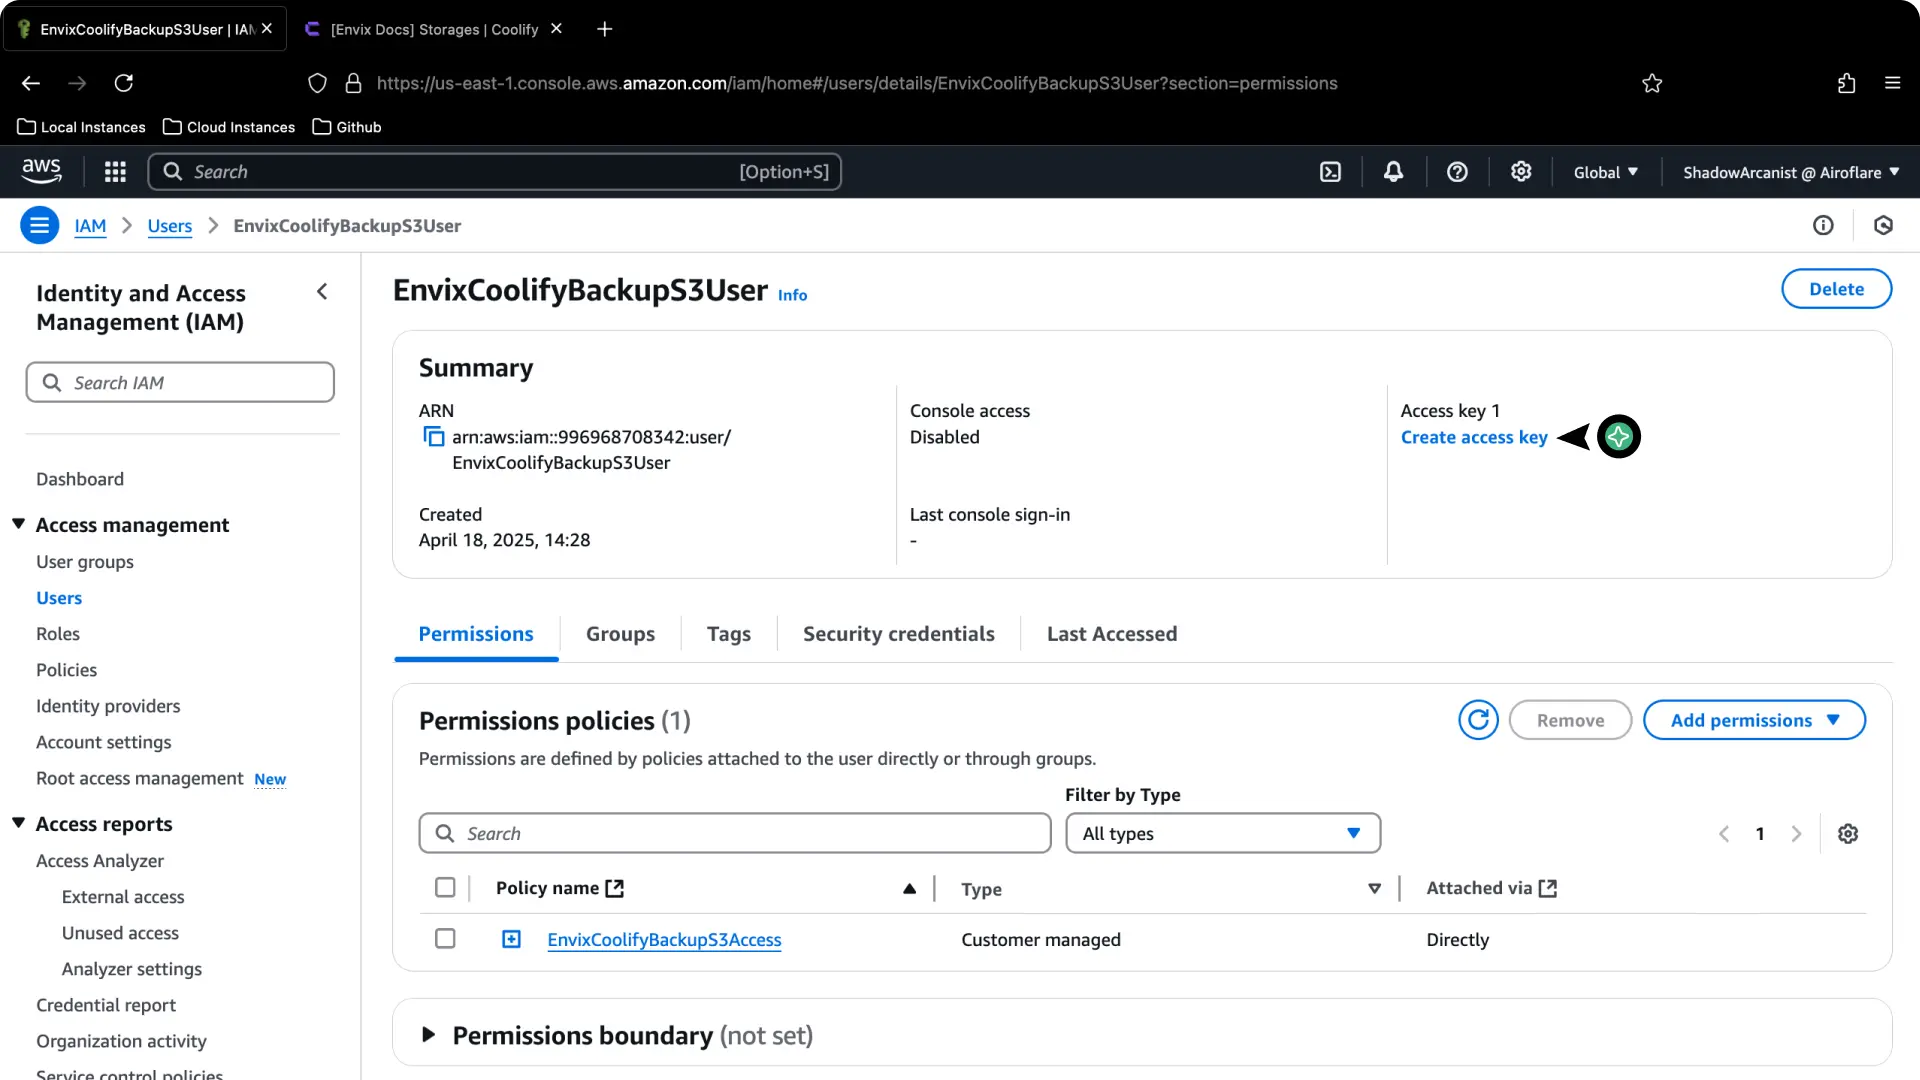
- Click on Create access key option to setup a new access key.
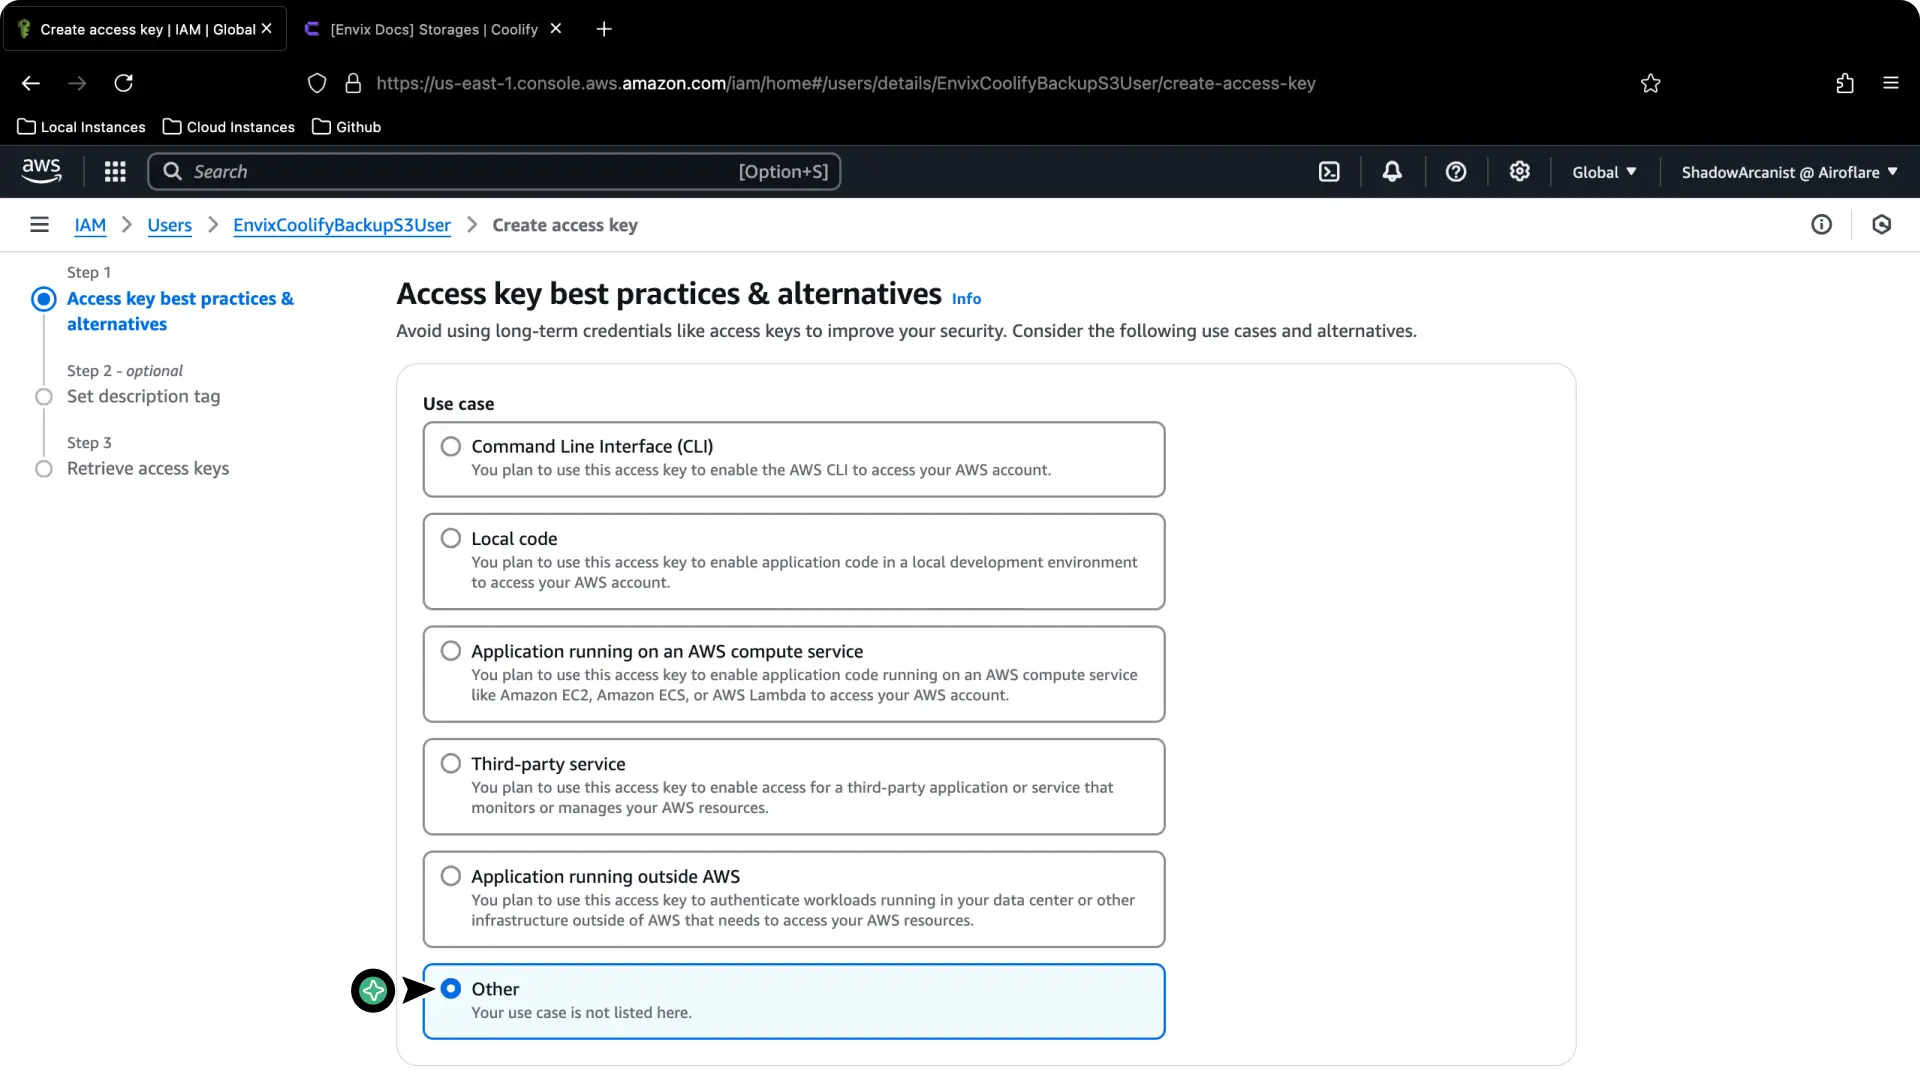
- Choose the Other option and click on Continue button
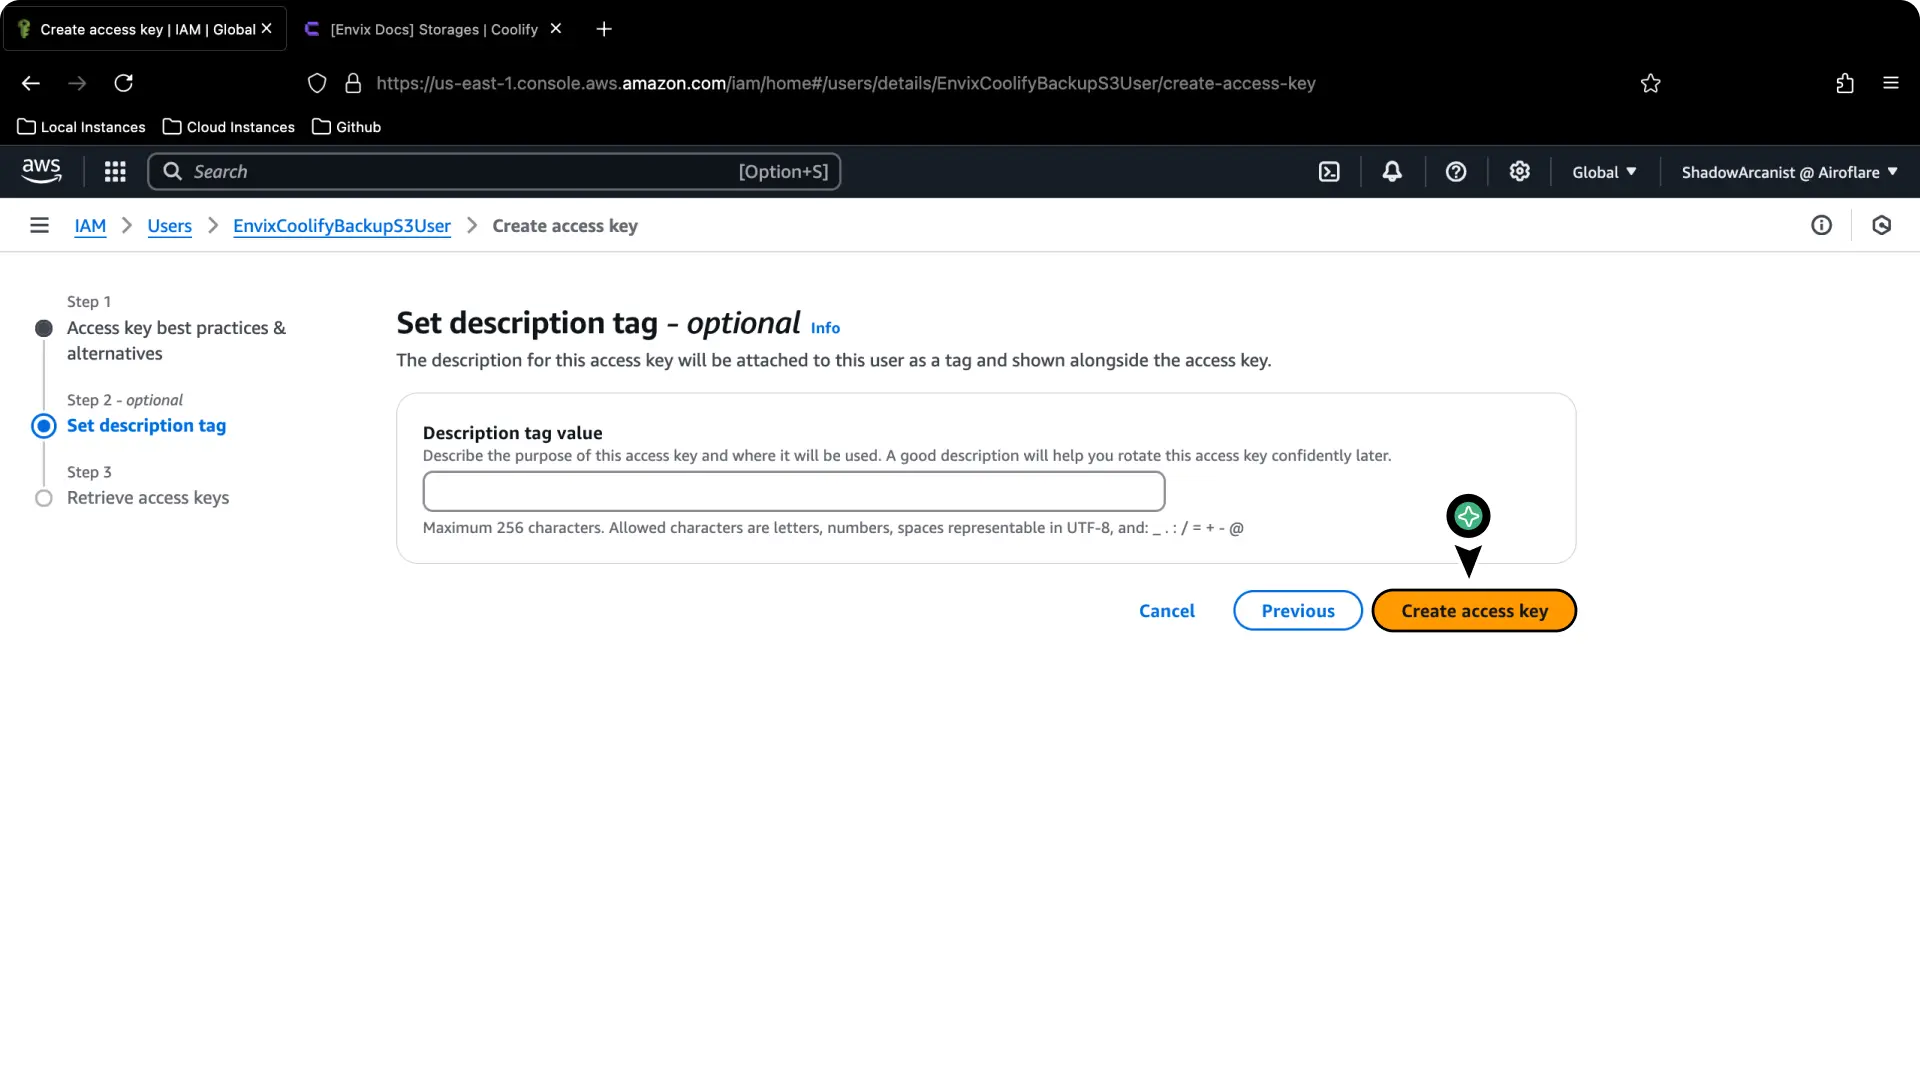
- Click on Create access key button.
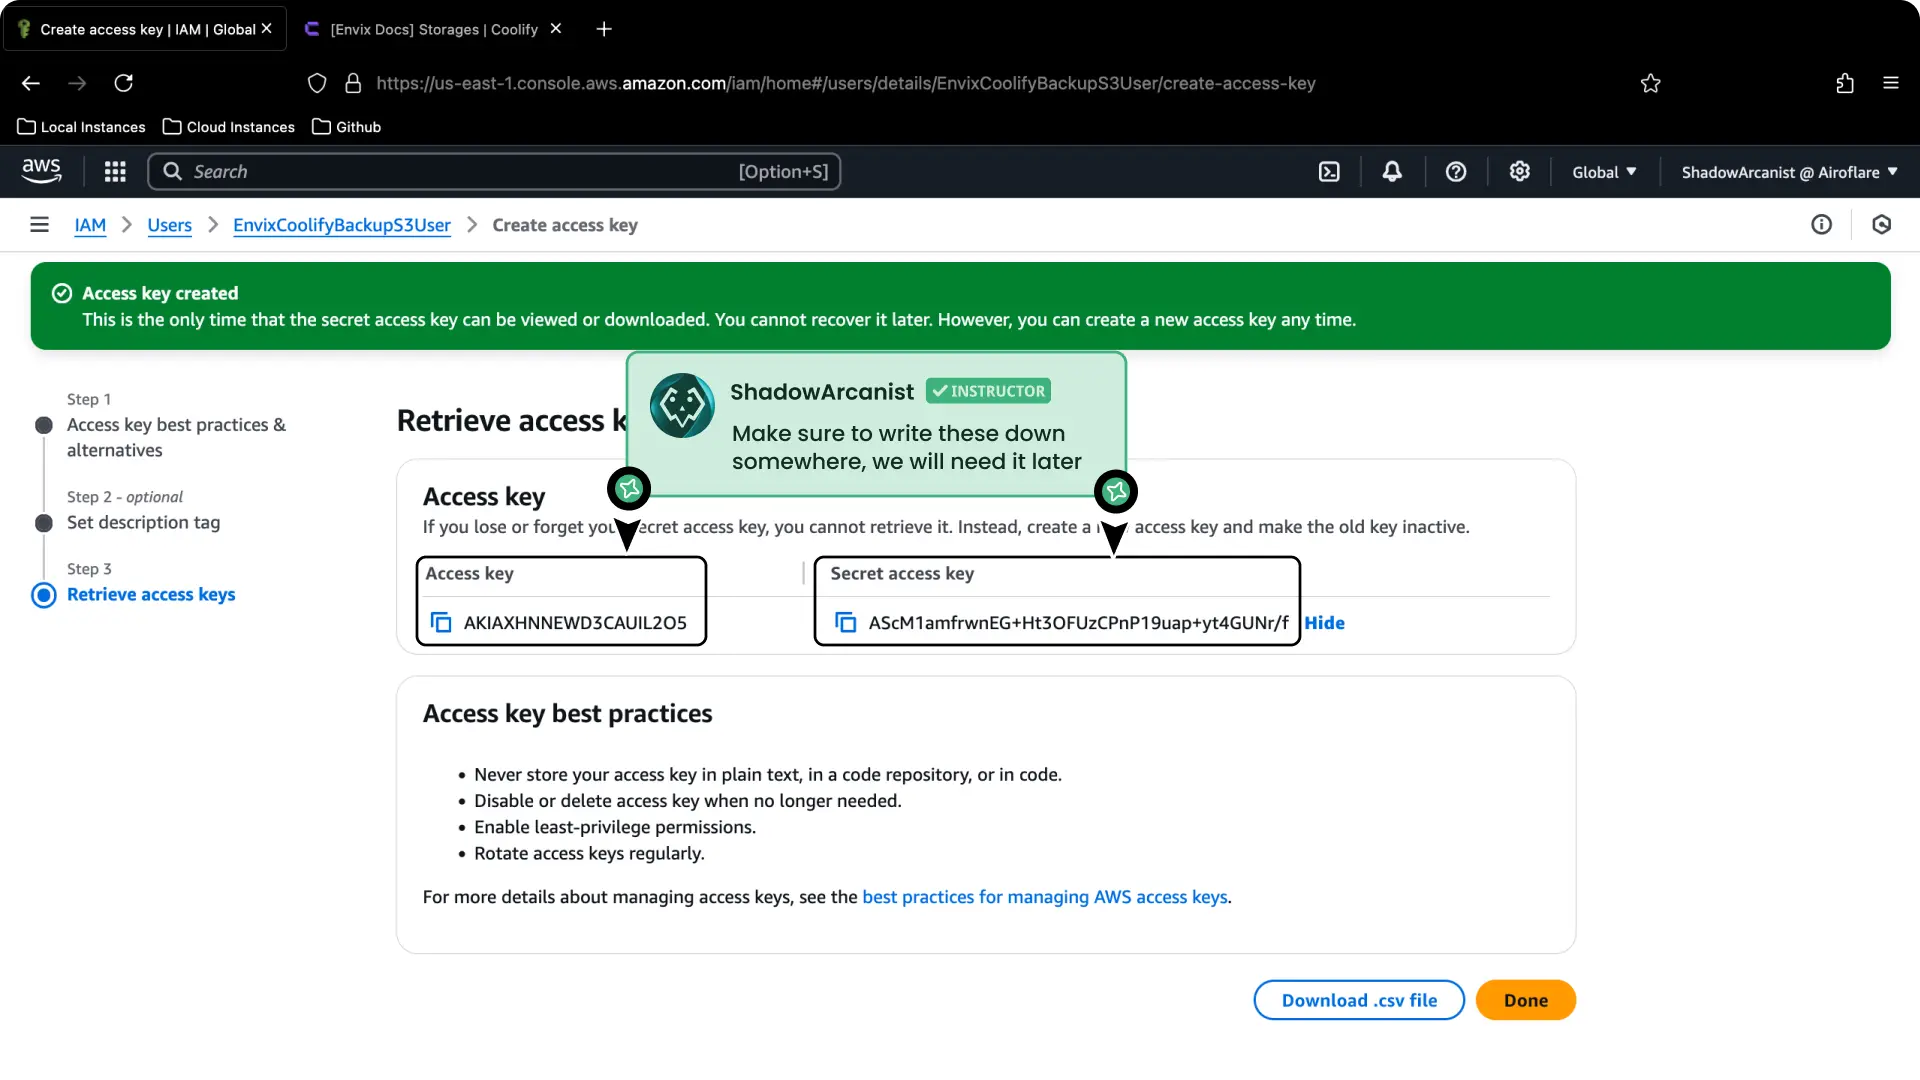
- Save the Access Key and Secret Access Key somewhere safe and click on Done button
Note
You won't able able to see the access key after you click the Done button, so make sure to save the keys somewhere safe.
5. Setup S3 in Coolify
To create your setup S3 in Coolify, follow these steps:
In your Coolify dashboard:
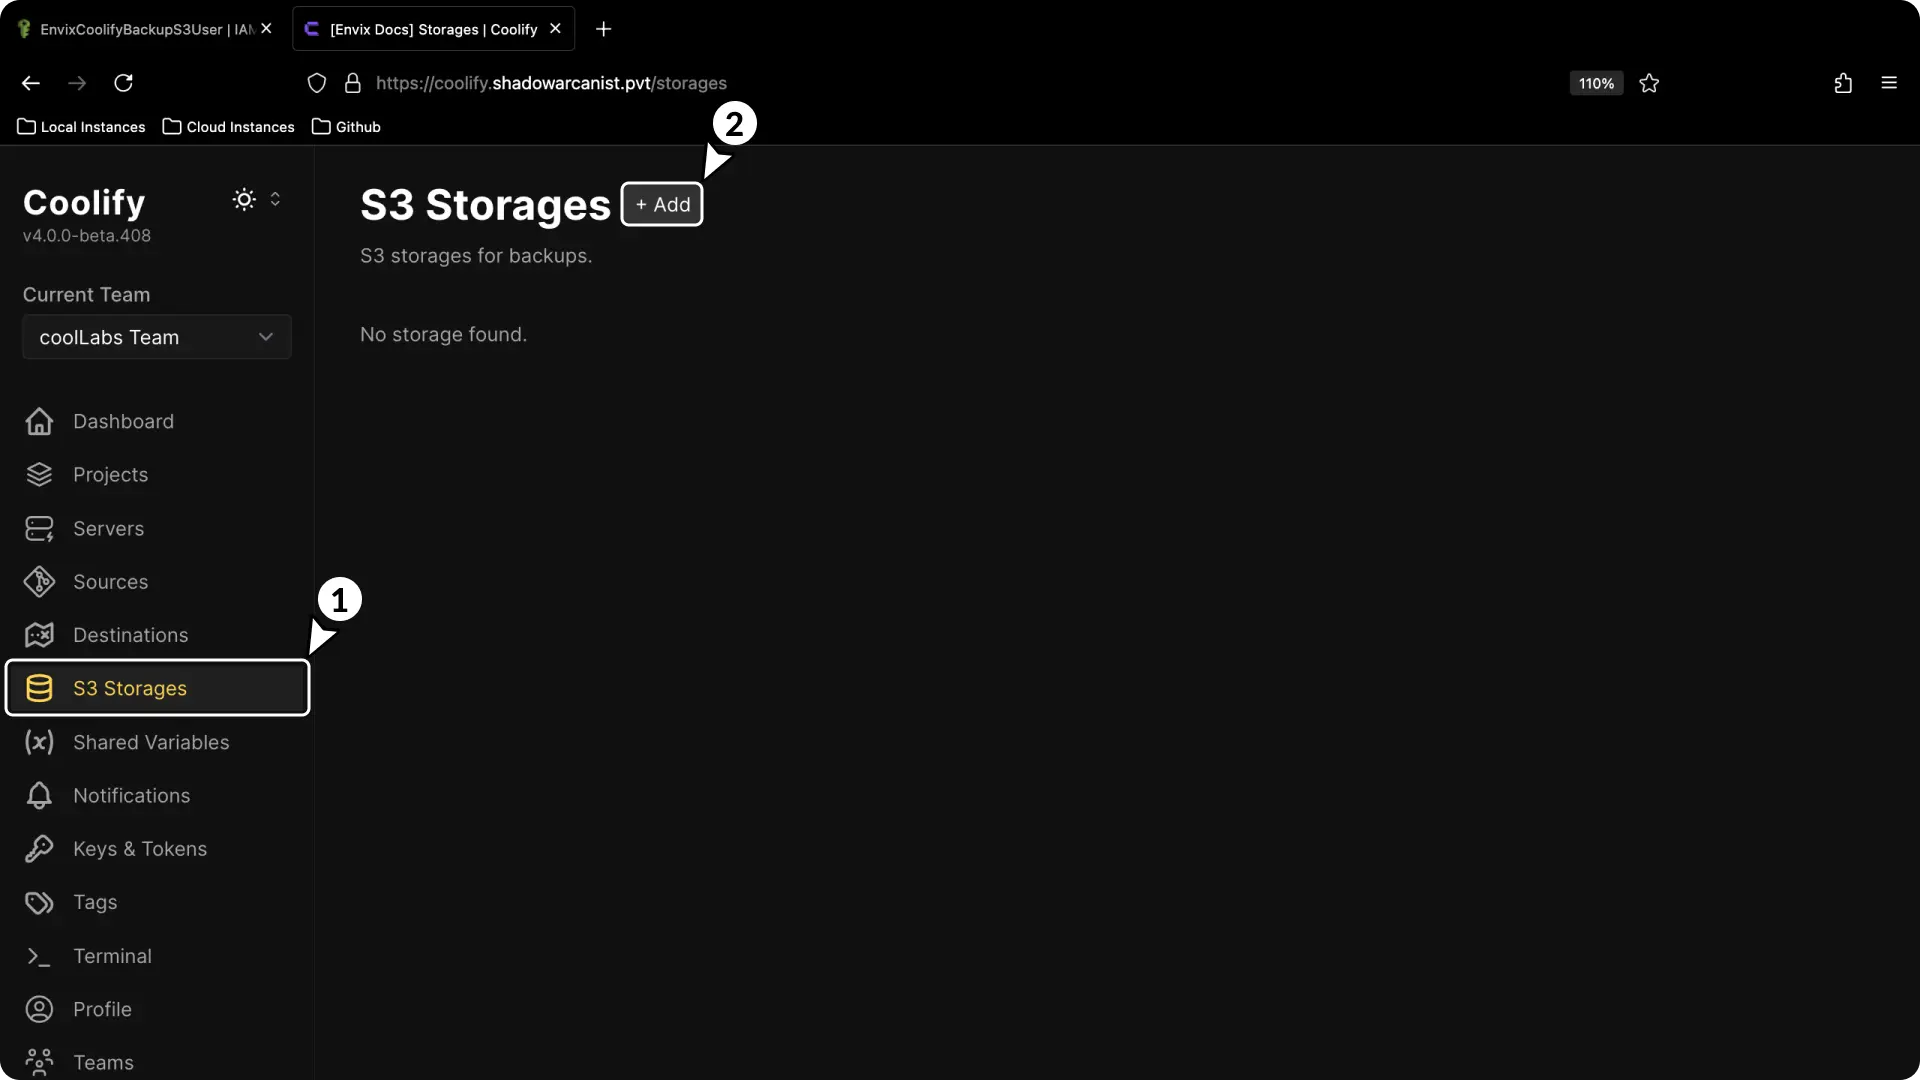
- Go to the Storage section in the sidebar.
- Click Add button
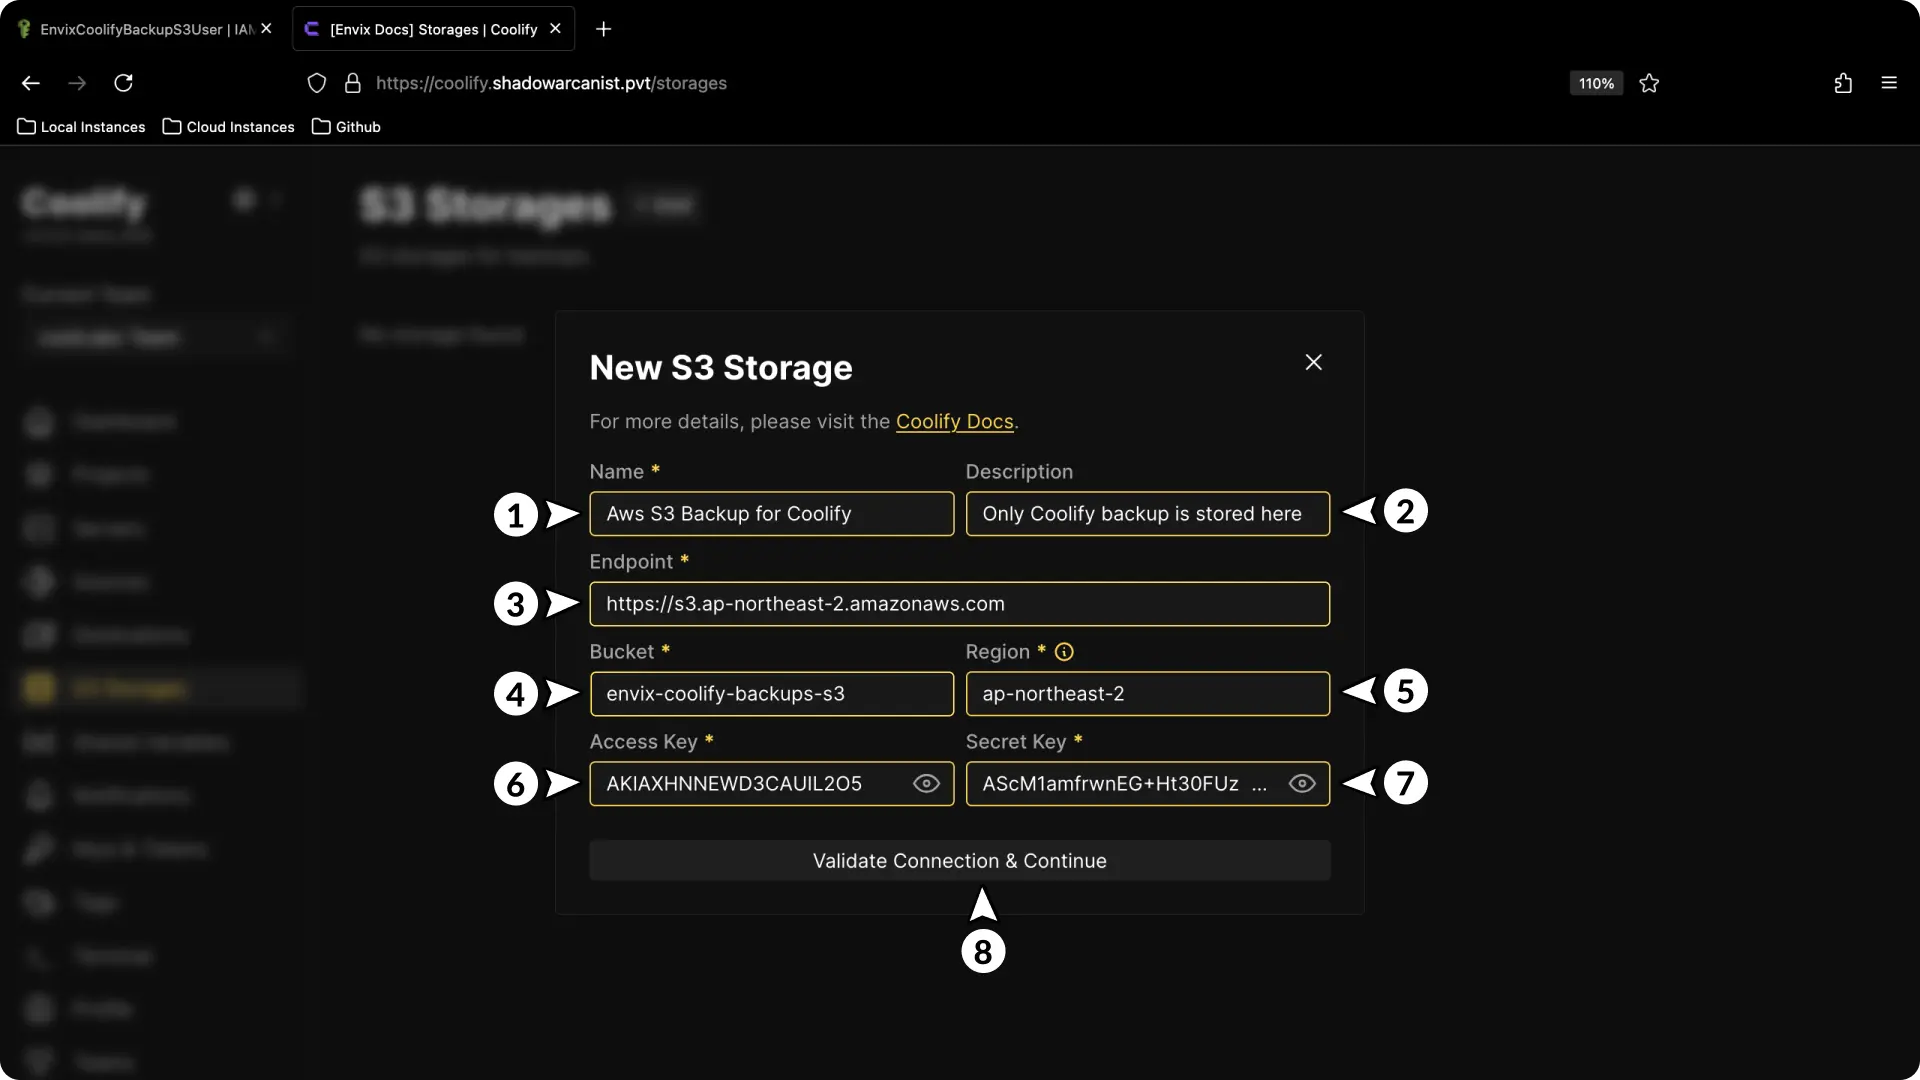
- Give a name for the S3 storage (this can be any name)
- Give a short description for the storage (optional)
- Enter the endpoint without your bucket name:
https://s3.YOUR_REGION_NAME.amazonaws.com - Enter the name of the S3 bucket you created.
- Enter your S3 bucket's region
- Enter your Access Key
- Enter your Secret Access Key
- Click on Validate Connection & Continue button
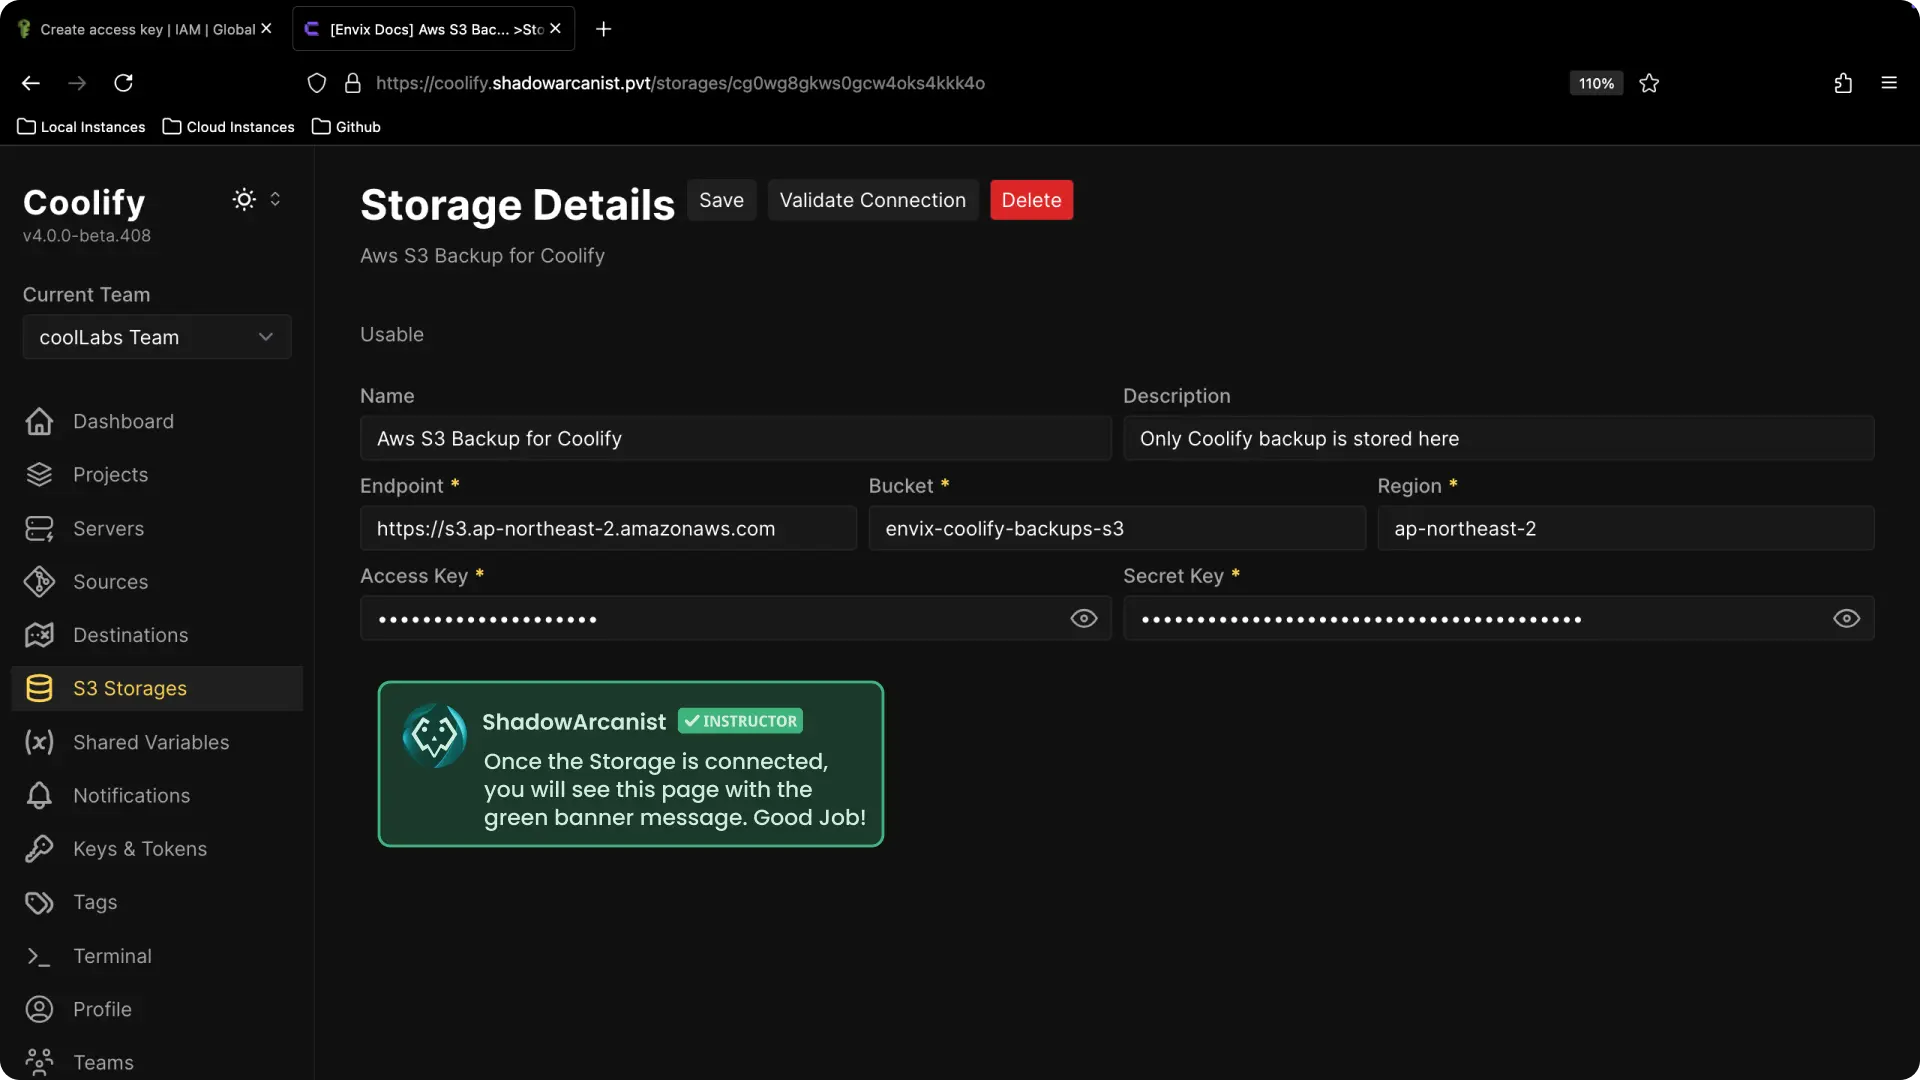
Once the Bucket is validated you will be redirected to this page:
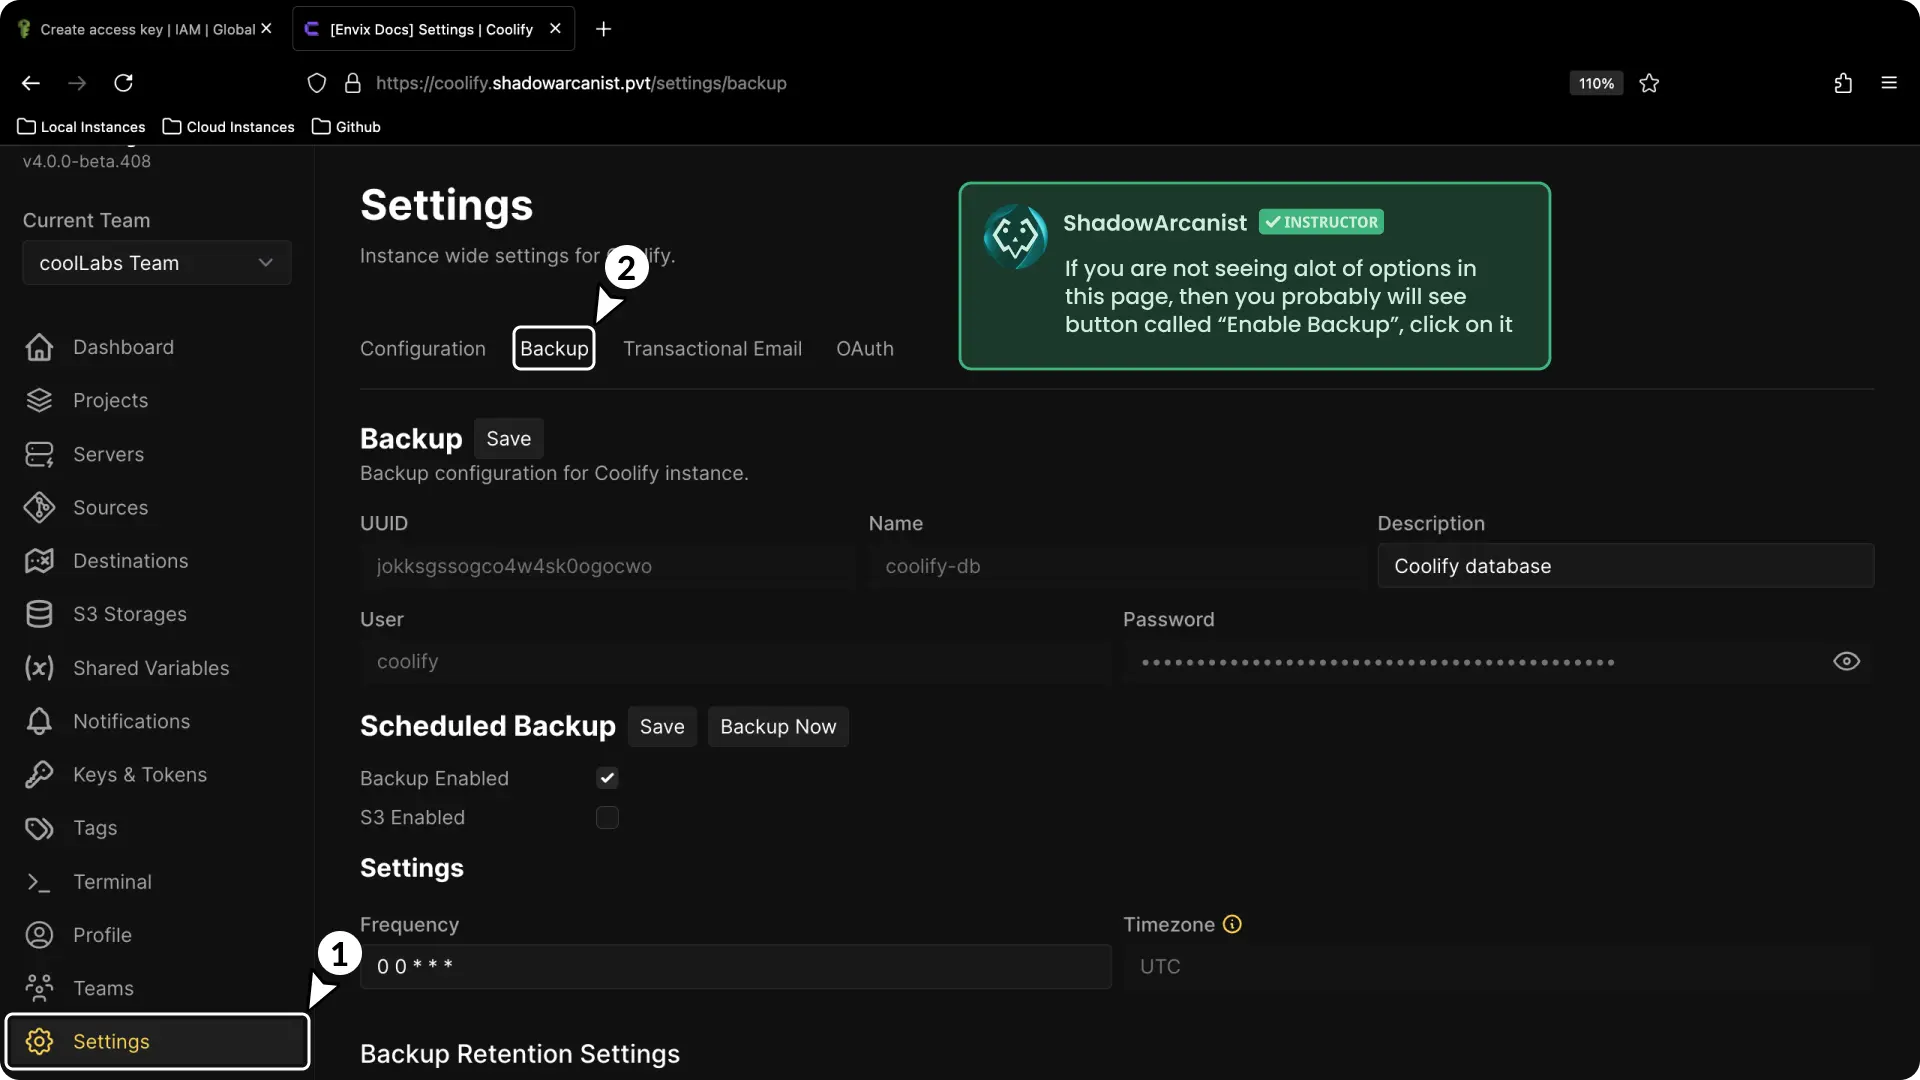
Then go to settings page and click on Backup
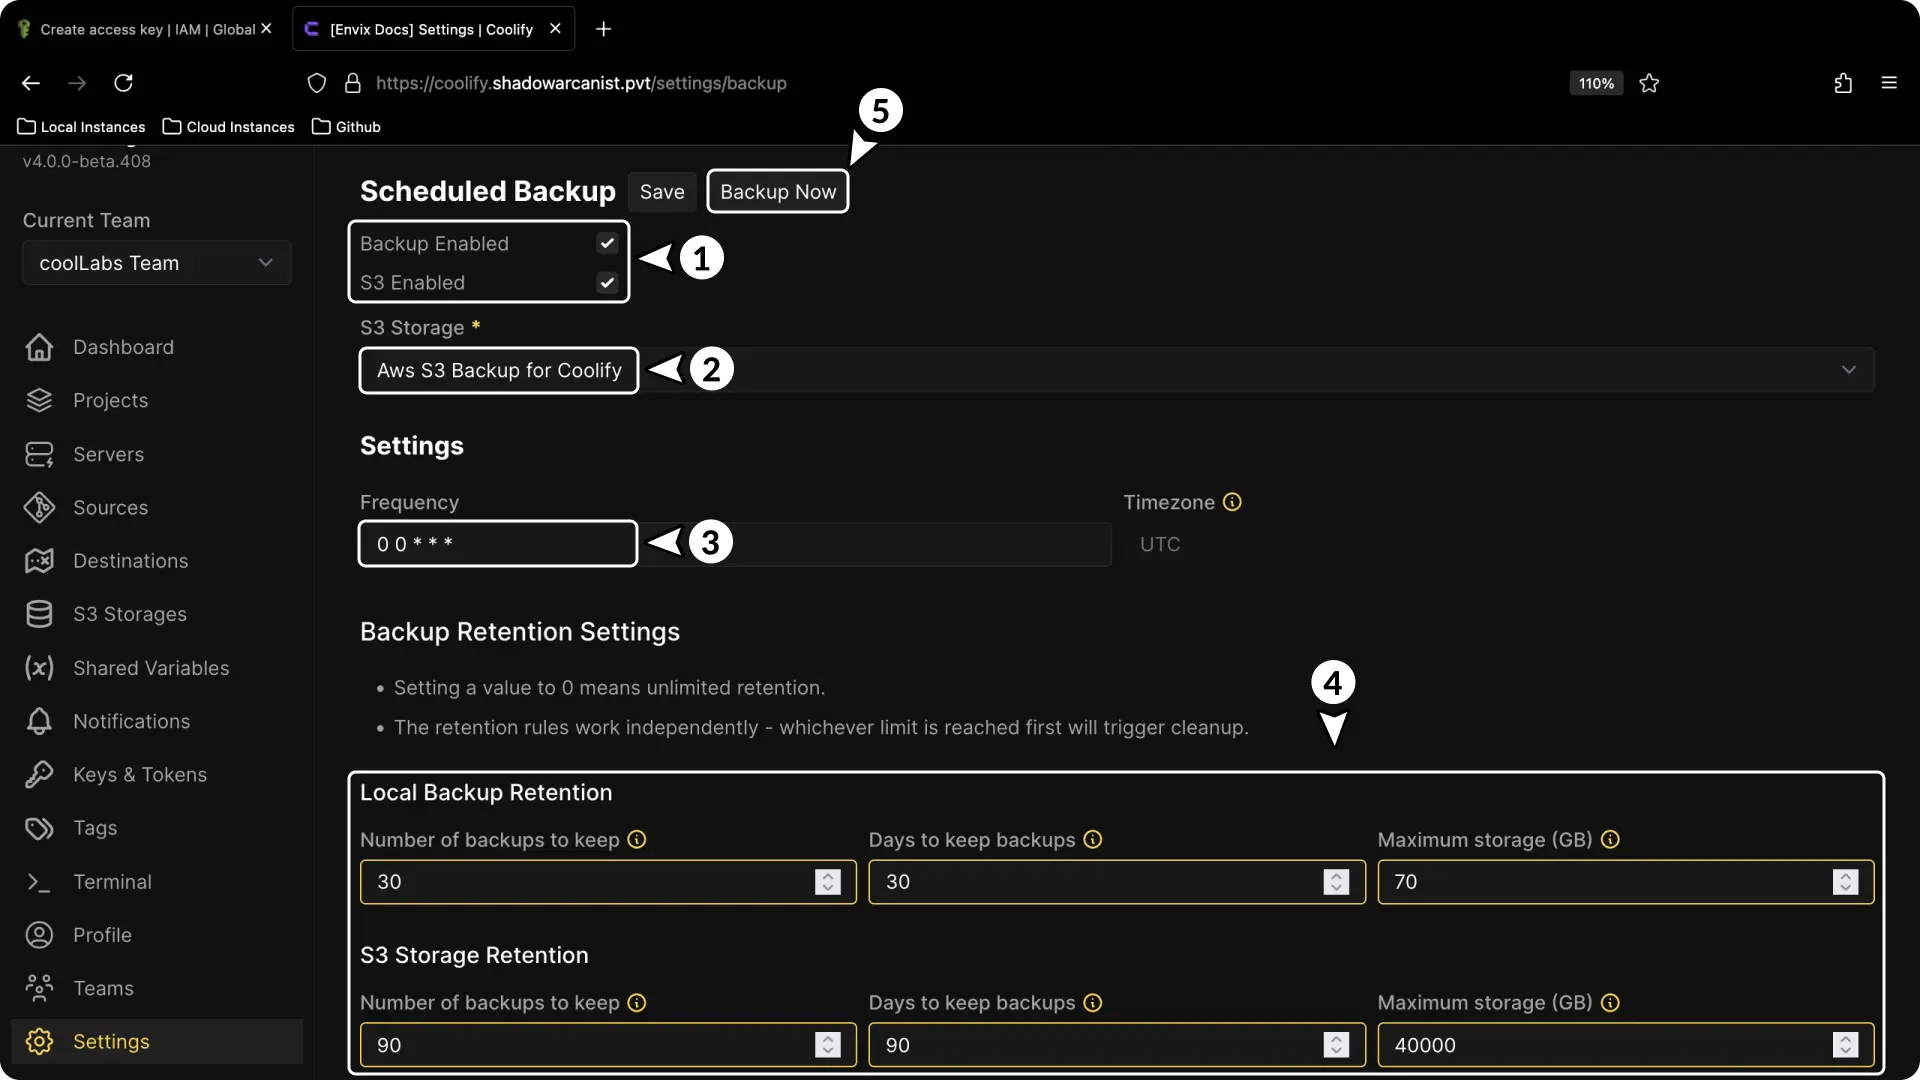
- Enable S3
- Select your S3 storage
- Select the frequency of the backup (you can use this website if you are new to cron)
- Setup Backup Retentions
- Click on Backup Now button (just to check if everything works)
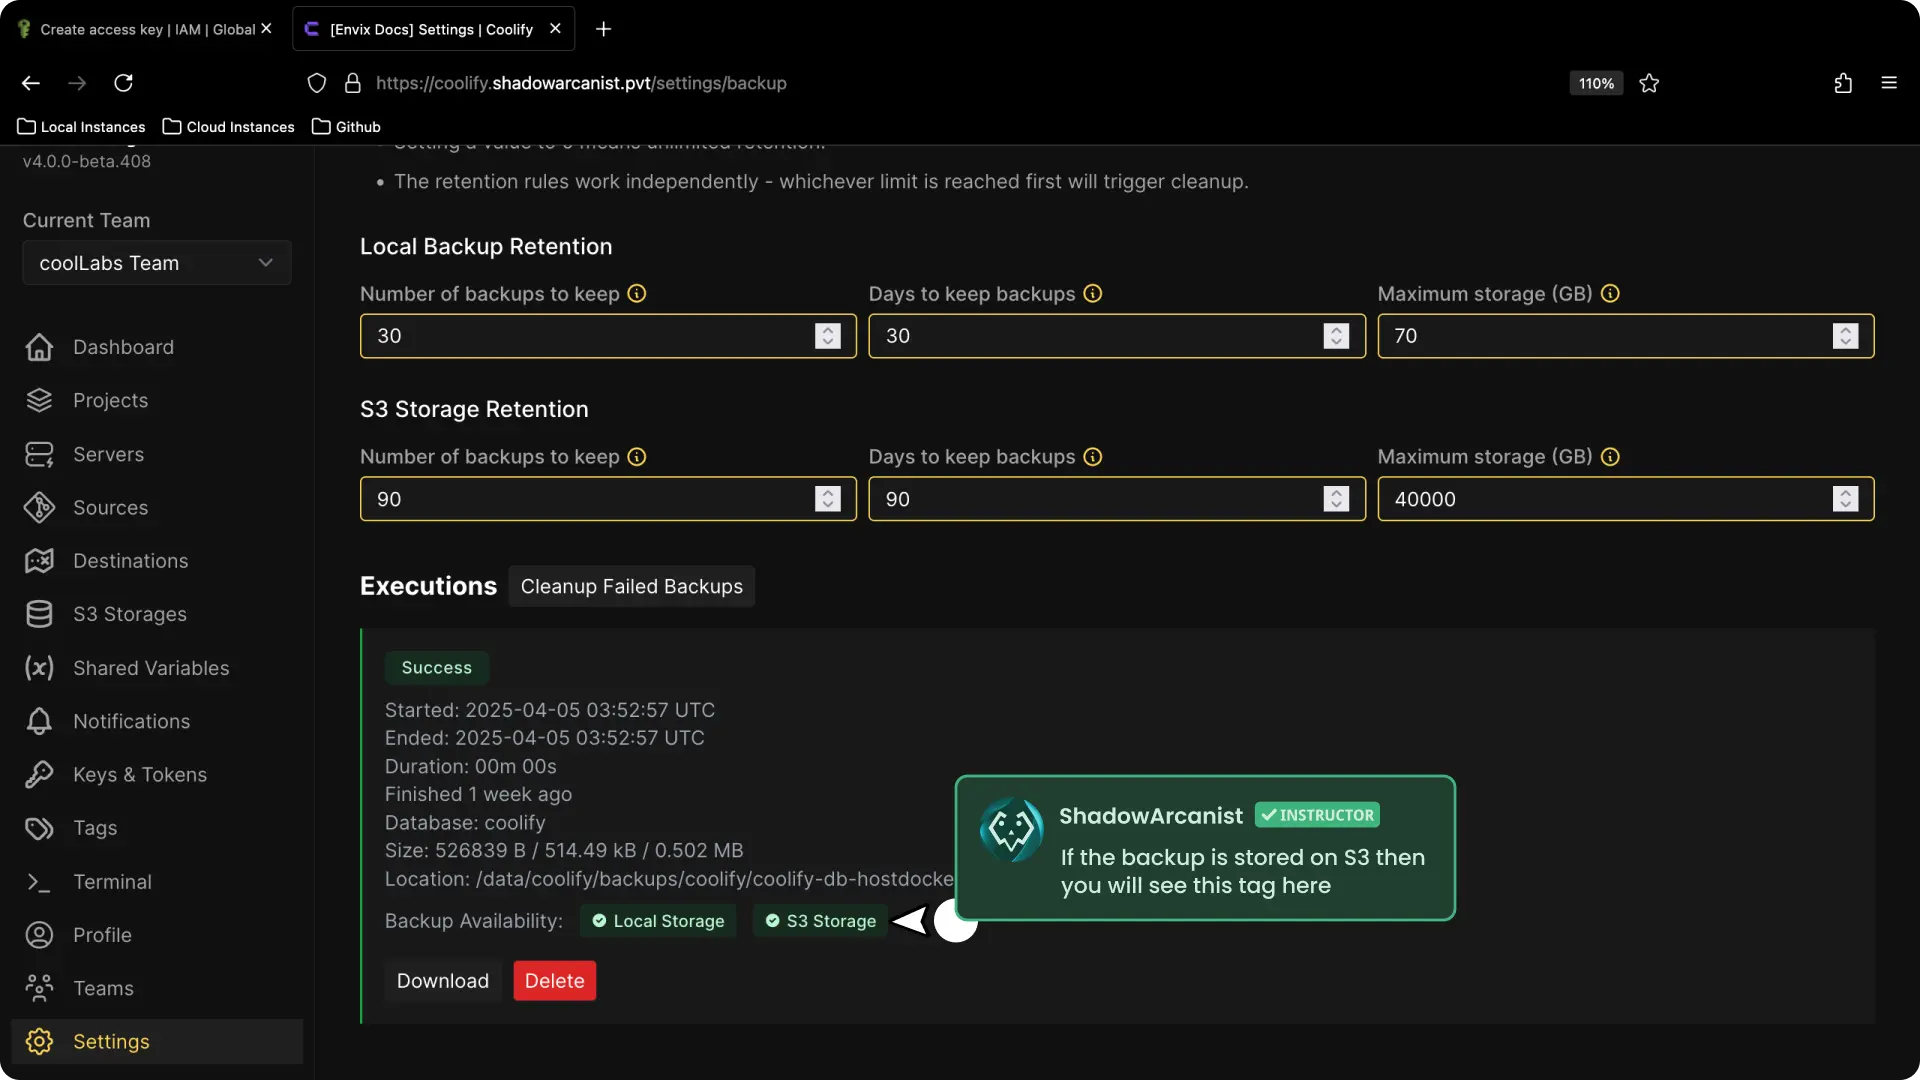
You can see the backups stored on your S3 from the execution logs:
Now you’re done! Your Coolify instance is set up to automatically backup and store them on your Aws S3 bucket safely.
Introduction
Configure S3-compatible storage for Coolify backups including AWS, DigitalOcean Spaces, MinIO, Cloudflare R2, Supabase Storage, Backblaze B2, and Scaleway Object Storage.
Cloudflare R2
Configure Cloudflare R2 S3-compatible storage for Coolify backups with bucket creation, API token setup, and access credentials configuration.