Docker Compose
If you are using Docker Compose based deployments, you need to understand how Docker Compose works with Coolify.
In all cases the Docker Compose (docker-compose.y[a]ml) file is the single source of truth.
This means various settings you would normally configure in the Coolify UI (like environment variables, storage, etc.) need to be defined in the compose file itself.
Making services available to the outside world
When Coolify deploys a Docker Compose, it creates a network for the services in the deployment. In addition, it adds the proxy service so that it can make services available from within the new network.
That means that there are a few ways to make your services available:
Domains
Once Coolify loads your compose file, it finds a list of services and allows you to assign a domain. If your services listen on port 80, assigning a domain is enough for the proxy to find and route traffic to them. If they're listening on other ports, add that port to the domain.
For example, if your app is listening on (container) port 80, and you want to run it on example.com, enter http://example.com (or https://) for the domain.
If your app is listening on (container) port 3000, however, you'll enter http://example.com:3000 in the relevant service. The port here only tells Coolify where to send traffic within the container; the proxy will make this service available on the normal port (http://example.com port 80, in this case.)
If you want to customize this domain-based routing further, see Coolify's magic environment variables below.
Service Port Mapping
If you want to make your service accessible via it's port on the host, add the ports attribute in your compose file. For example, to map container port 3000 directly to the host machine:
services:
  backend:
    image: your-backend:latest
    ports:
      - "3000:3000"
Be aware that if you do this, your service will be available on your server at port 3000, outside the control of any proxy configuration. This may not be what you want! If you use the same Docker Compose file for development and deployment, this may expose the ports of private services that you did not intend.
Optionally, you can pass an IP address to bind the port to a specific interface on the host machine:
services:
  backend:
    image: your-backend:latest
    ports:
      - "127.0.0.1:3000:3000"
This will make your service only available on localhost:3000 of your server.
Private or Internal Services
If you don't map a service port or assign a domain, Coolify will not expose your service outside the private network. At that point, you can refer to it as normal for Docker Compose.
For example, if you have two services with these names:
services:
  backend:
    image: your-backend:latest
  auth:
    image: your-auth:latest
Then you can connect from backend to auth by referring to it as http://auth:1234 (or whatever port.) Likewise, auth can connect to backend by referring to http://backend:3000 (or whatever port.)
For further details, please refer to the Docker Networking in Compose docs.
Defining Environment Variables
Coolify automatically detects environment variables mentioned in your compose file and displays them in the UI. For example:
services:
  myservice:
    environment:
      - SOME_HARDCODED_VALUE=hello # Gets passed to the container but will not be visible in Coolify's UI
      - SOME_VARIABLE=${SOME_VARIABLE_IN_COOLIFY_UI} # Creates an uninitialized environment variable editable in Coolify's UI
      - SOME_DEFAULT_VARIABLE=${OTHER_NAME_IN_COOLIFY:-hello} # Creates an environment variable of value "hello" editable in Coolify's UI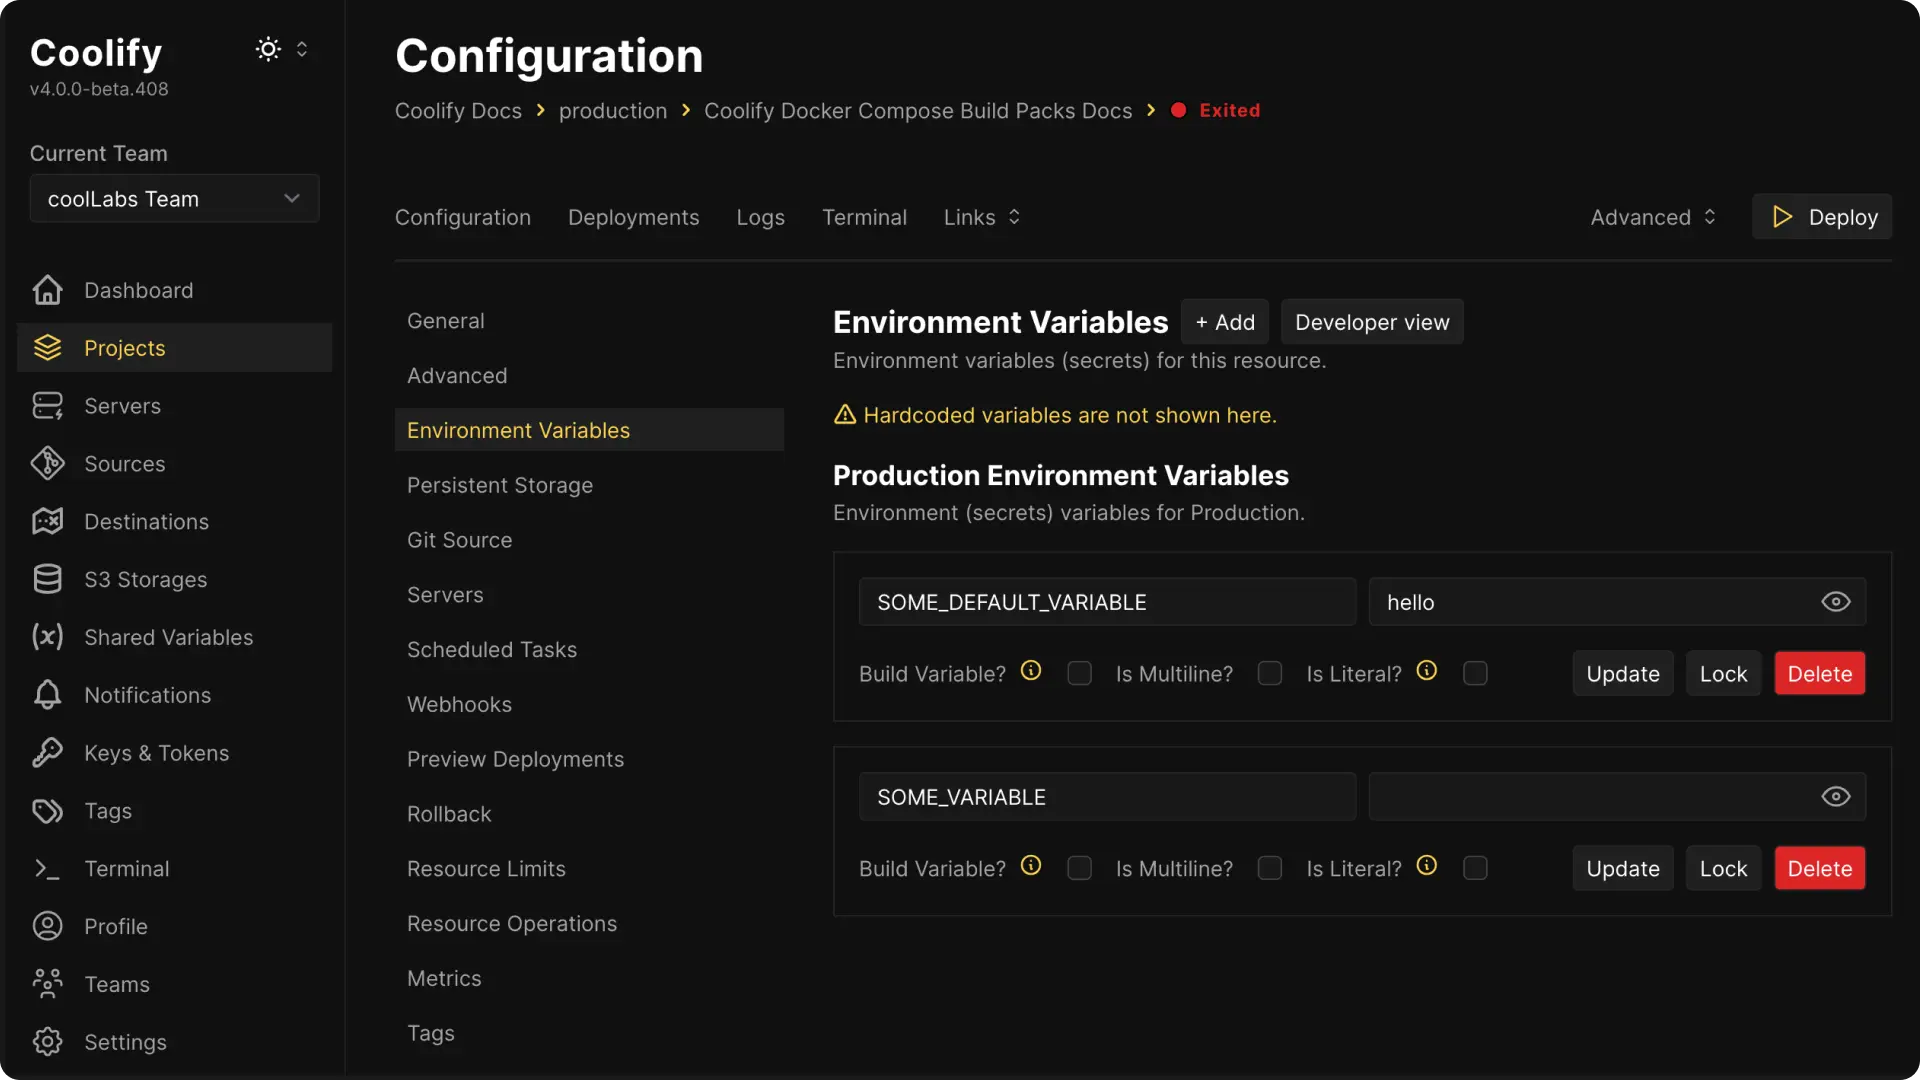
Required Environment Variables
Coolify supports marking environment variables as required using Docker Compose's built-in syntax. This feature improves the deployment experience by validating critical configuration before starting services.
You can mark environment variables as required using the :? syntax. Required variables must be set before deployment and will be highlighted in Coolify's UI with a red border if empty.
services:
  myapp:
    environment:
      # Required variables - deployment will fail if not set
      - DATABASE_URL=${DATABASE_URL:?}
      - API_KEY=${API_KEY:?}

      # Required variables with default values - prefilled in UI but can be changed
      - PORT=${PORT:?3000}
      - LOG_LEVEL=${LOG_LEVEL:?info}

      # Optional variables - standard behavior
      - DEBUG=${DEBUG:-false}
      - CACHE_TTL=${CACHE_TTL:-3600}
Key behaviors:
- Required variables (
{VAR:?}) appear first in the environment variables list and show a red border when empty - Required with defaults (
{VAR:?default}) are prefilled with the default value but remain editable - Optional variables (
{VAR:-default}) use standard Docker Compose behavior
If a required variable is not set during deployment:
- Coolify will highlight the missing variable in the UI
- The deployment will be prevented until all required variables are provided
- Clear error messages guide users to fix the configuration
This validation happens before container creation, preventing partial deployments and runtime failures.
Shared Environment Variables
Coolify doesn't directly detect shared environment variables in the compose file, but are able to be referenced using with an additional step.
-
Create your shared variable following the shared variables documentation.
-
Define your variables in your Docker Compose file, for example;
services:
  myservice:
    environment:
      - HARD_CODED=dev # Passed to the container, but not visible in Coolify's UI.
      - SOME_OPTIONAL_VARIABLE=${SOME_VARIABLE_IN_COOLIFY_UI} # Creates an editable, uninitialized variable in the UI.
    volumes:
      - data-persist:/var/data
  volumes:
    data-persist:
device: /mnt/serverstorage/${SOME_VARIABLE_IN_COOLIFY_UI} # Re-uses the variable- Define the variable explicitly in the applications Environment Variables referencing your shared variable created in step 1;
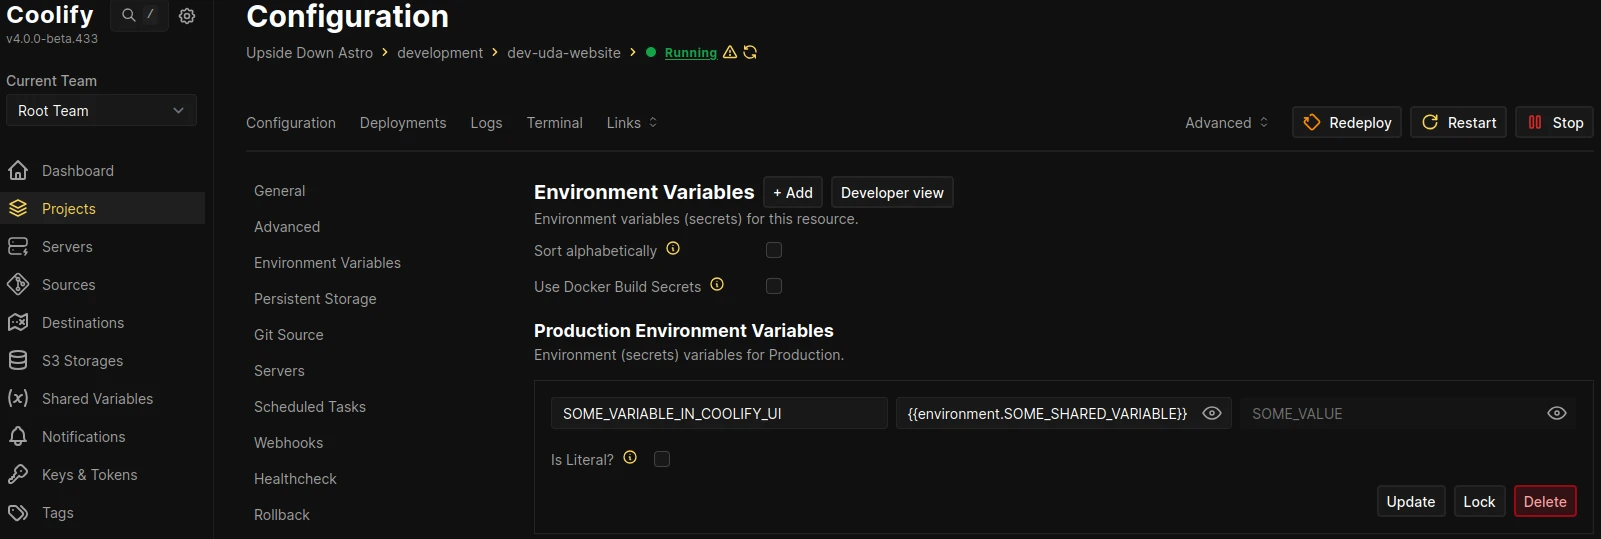
If in developer view, you can enter it like so;
SOME_VARIABLE_IN_COOLIFY_UI={{environment.SOME_SHARED_VARIABLE}}Or in the normal view, the Name is what's referenced in the Docker Compose file SOME_VARIABLE_IN_COOLIFY_UI with the Value being the referenced environment variable {{environment.SOME_SHARED_VARIABLE}} as seen below. Once saved if correct, you'll see there's a third text box, if you reveal this, you should be able to see the true value, in this case SOME_VALUE.
Coolify's Magic Environment Variables
Coolify can generate dynamic environment variables for you using the following syntax: SERVICE_<TYPE>_<IDENTIFIER>. The type may be one of:
| Type | Generated value |
|---|---|
URL | URL based on your wildcard domain. The example below shows how you can add paths and ports. |
FQDN | FQDN based on the generated URL. The example below shows how you can add paths and ports. |
USER | Random string, 16 characters. |
PASSWORD | Random password without symbols. |
PASSWORD_64 | Random password without symbols, 64 characters. |
PASSWORDWITHSYMBOLS | Random password with symbols. |
PASSWORDWITHSYMBOLS_64 | Random password with symbols, 64 characters. |
BASE64 or BASE64_32 | Random string, not Base64-encoded, 32 characters. |
BASE64_64 | Random string, not Base64-encoded, 64 characters. |
BASE64_128 | Random string, not Base64-encoded, 128 characters. |
REALBASE64 or REALBASE64_32 | Base64-encoded random string, 32 characters. |
REALBASE64_64 | Base64-encoded random string, 64 characters. |
REALBASE64_128 | Base64-encoded random string, 128 characters. |
HEX_32 | Hexadecimal random string, 32 characters. |
HEX_64 | Hexadecimal random string, 64 characters. |
HEX_128 | Hexadecimal random string, 128 characters. |
Identifier Naming
Identifier with underscores (_) cannot use ports in environment variables. Use hyphens (-) instead to avoid this limitation.
SERVICE_URL_APPWRITE_SERVICE_3000 ❌
SERVICE_URL_APPWRITE-SERVICE_3000 ✅
Every generated variable can be reused and will always have the same value for every service. All generated variables are displayed in Coolify's UI for environment variables and can be edited there (except FQDN and URL).
As an example, imagine an application with UUID vgsco4o (generated by Coolify on creation).
It uses a compose file deploying Appwrite on the wildcard domain http://example.com .
This will do the following:
services:
  appwrite:
    environment:
      # http://appwrite-vgsco4o.example.com
      - SERVICE_URL_APPWRITE
      # http://appwrite-vgsco4o.example.com/v1/realtime
      - SERVICE_URL_APPWRITE=/v1/realtime
      # _APP_URL will have the FQDN because SERVICE_URL_APPWRITE is just a simple environment variable
      - _APP_URL=$SERVICE_URL_APPWRITE
      # http://appwrite-vgsco4o.example.com/ will be proxied to port 3000
      - SERVICE_URL_APPWRITE_3000
      # DOMAIN_URL will have the FQDN (appwrite-vgsco4o.example.com) because SERVICE_FQDN_APPWRITE generates the full FQDN. No need to add 3000 at the end of the variable
      - DOMAIN_NAME=${SERVICE_FQDN_APPWRITE}
      # http://api-vgsco4o.example.com/api will be proxied to port 2000
      - SERVICE_URL_API_2000=/api
      # Coolify generates password and injects it as SERVICE_SPECIFIC_PASSWORD into the container
      - SERVICE_SPECIFIC_PASSWORD=${SERVICE_PASSWORD_APPWRITE}
      # Coolify generates a 64-character password without symbols
      - LONG_PASSWORD=${SERVICE_PASSWORD_64_APPWRITE}
      # Coolify generates a 64-character password with symbols
      - SYMBOL_PASSWORD=${SERVICE_PASSWORDWITHSYMBOLS_64_APPWRITE}
      # Coolify generates a 64-character Base64-encoded random string
      - ENCRYPTION_KEY=${SERVICE_REALBASE64_64_APPWRITE}
      # Coolify generates a 64-character hexadecimal random string
      - HEX_SECRET=${SERVICE_HEX_64_APPWRITE}
  not-appwrite:
    environment:
      # Reuses the password from the Appwrite service.
      - APPWRITE_PASSWORD=${SERVICE_PASSWORD_APPWRITE}
      # As SERVICE_URL_API is not the same as SERVICE_URL_APPWRITE
      # Coolify will generate a new URL
      # http://not-appwrite-vgsco4o.example.com/api
      - SERVICE_URL_API=/api
Support for Magic Environment Variables in Compose files based on Git sources requires Coolify v4.0.0-beta.411 and above.
Storage
You can predefine storage normally in your compose file, but there are a few extra options that you can set to tell Coolify what to do with the storage.
Create an empty directory
# Predefine directories with host binding
services:
  filebrowser:
    image: filebrowser/filebrowser:latest
    volumes:
      - type: bind
        source: ./srv
        target: /srv
        is_directory: true # This will tell Coolify to create the directory (this is not available in a normal docker-compose)
Create a file with content
Here you can see how to add a file with content and a dynamic value that is coming from an environment variable.
services:
  filebrowser:
    image: filebrowser/firebrowser:latest
    environment:
      - POSTGRES_PASSWORD=password
    volumes:
      - type: bind
        source: ./srv/99-roles.sql
        target: /docker-entrypoint-initdb.d/init-scripts/99-roles.sql
        content: |  # This will tell Coolify to create the file (this is not available in a normal docker-compose)
          -- NOTE: change to your own passwords for production environments
           \set pgpass `echo "$POSTGRES_PASSWORD"`

           ALTER USER authenticator WITH PASSWORD :'pgpass';
           ALTER USER pgbouncer WITH PASSWORD :'pgpass';
Alternatively config files can be created using the configs top level element in Docker Compose.
services:
  filebrowser:
    image: filebrowser/filebrowser:latest
    environment:
      - POSTGRES_PASSWORD=password
    configs:
      - source: roles
        target: /docker-entrypoint-initdb.d/init-scripts/99-roles.sql

configs:
  roles:
    content: |
      -- NOTE: change to your own passwords for production environments
        \set pgpass `echo "$POSTGRES_PASSWORD"`

        ALTER USER authenticator WITH PASSWORD :'pgpass';
        ALTER USER pgbouncer WITH PASSWORD :'pgpass';
Exclude from healthchecks
If you have a service that you do not want to be part of your overall healthchecks, you can exclude it from the healthchecks by setting the exclude_from_hc option to true.
Tip
This is useful for example if you have a migration service that runs only once and then the container stops.
services:
  some-service:
    exclude_from_hc: true
    ...
Connect to Predefined Networks
By default, each compose stack is deployed to a separate network, with the name of your resource uuid. This will allow to each service in your stack to communicate with each other.
But in some cases, you would like to communicate with other resources in your account. For example, you would like to connect your application to a database, which is deployed in another stack.
To do this you need to enable Connect to Predefined Network option on your Service Stack page, but this will make the internal Docker DNS not work as expected.
Here is an example. You have a stack with a postgres database and a laravel application. Coolify will rename your postgres stack to postgres-<uuid> and your laravel stack to laravel-<uuid> to prevent name collisions.
If you set Connect to Predefined Network option on your laravel stack, your laravel application will be able to connect to your postgres database, but you need to use the postgres-<uuid> as your database host.
Raw Docker Compose Deployment
You can set up your project to use docker compose build pack to deploy your compose file directly without most of Coolify's magic. It is called Raw Compose Deployment.
Caution
This is for advanced users. If you are not familiar with Docker Compose, we do not recommend this method.
Labels
Coolify will still add the following labels (if they are not set) to your application:
labels:
  - coolify.managed=true
  - coolify.applicationId=5
  - coolify.type=application
To use Coolify's Proxy (Traefik), you need to set the following labels to your application:
labels:
  - traefik.enable=true
  - "traefik.http.routers.<unique_router_name>.rule=Host(`coolify.io`) && PathPrefix(`/`)"
  - traefik.http.routers.<unique_router_name>.entryPoints=http
Supabase Storage
Configure Supabase Storage as an S3-compatible backup destination for Coolify using your project endpoint, bucket, region, and access keys.
Custom Commands
Add custom Docker run options to Coolify deployments including custom entrypoints, GPU support, security options, system controls, devices, and resource limits.