Deploy Webstudio Projects using Coolify
Coolify makes deploying your Webstudio projects to Hetzner as simple as it is powerful.
In this guide, you’ll learn how to set up your project, deploy it on a Hetzner server, and keep your infrastructure fully under your control, all with a few straightforward steps.
HEADS UP!
In this guide, we are using servers from Hetzner.
However, if you're using a different hosting provider, you can still follow this guide with their servers as well.
If you prefer watching a video instead of reading, you can check out our tutorial video ↗
What You’ll Need
Before you start, make sure you have:
- A GitHub account ↗ to host your code.
- A Hetzner account ↗ to provision your server (or an account with any other hosting provider).
- The Webstudio CLI ↗ installed locally to manage your project exports.
1. Create Your GitHub Repository
Start by creating a new repository on GitHub where you’ll store your Webstudio project code.
Once the repository is created, clone the repository to your local machine to start developing locally.
2. Export Your Webstudio Project
Using the Webstudio CLI ↗, export your project and select the "Docker" option.
This prepares your project for deployment via Coolify without the need for additional dependency installations.
3. Push Your Code to GitHub
With your project exported locally, push your code to the GitHub repository you created. This makes your project accessible for deployment.
4. Set Up Your Hetzner Server
Follow these steps to prepare your Hetzner server:
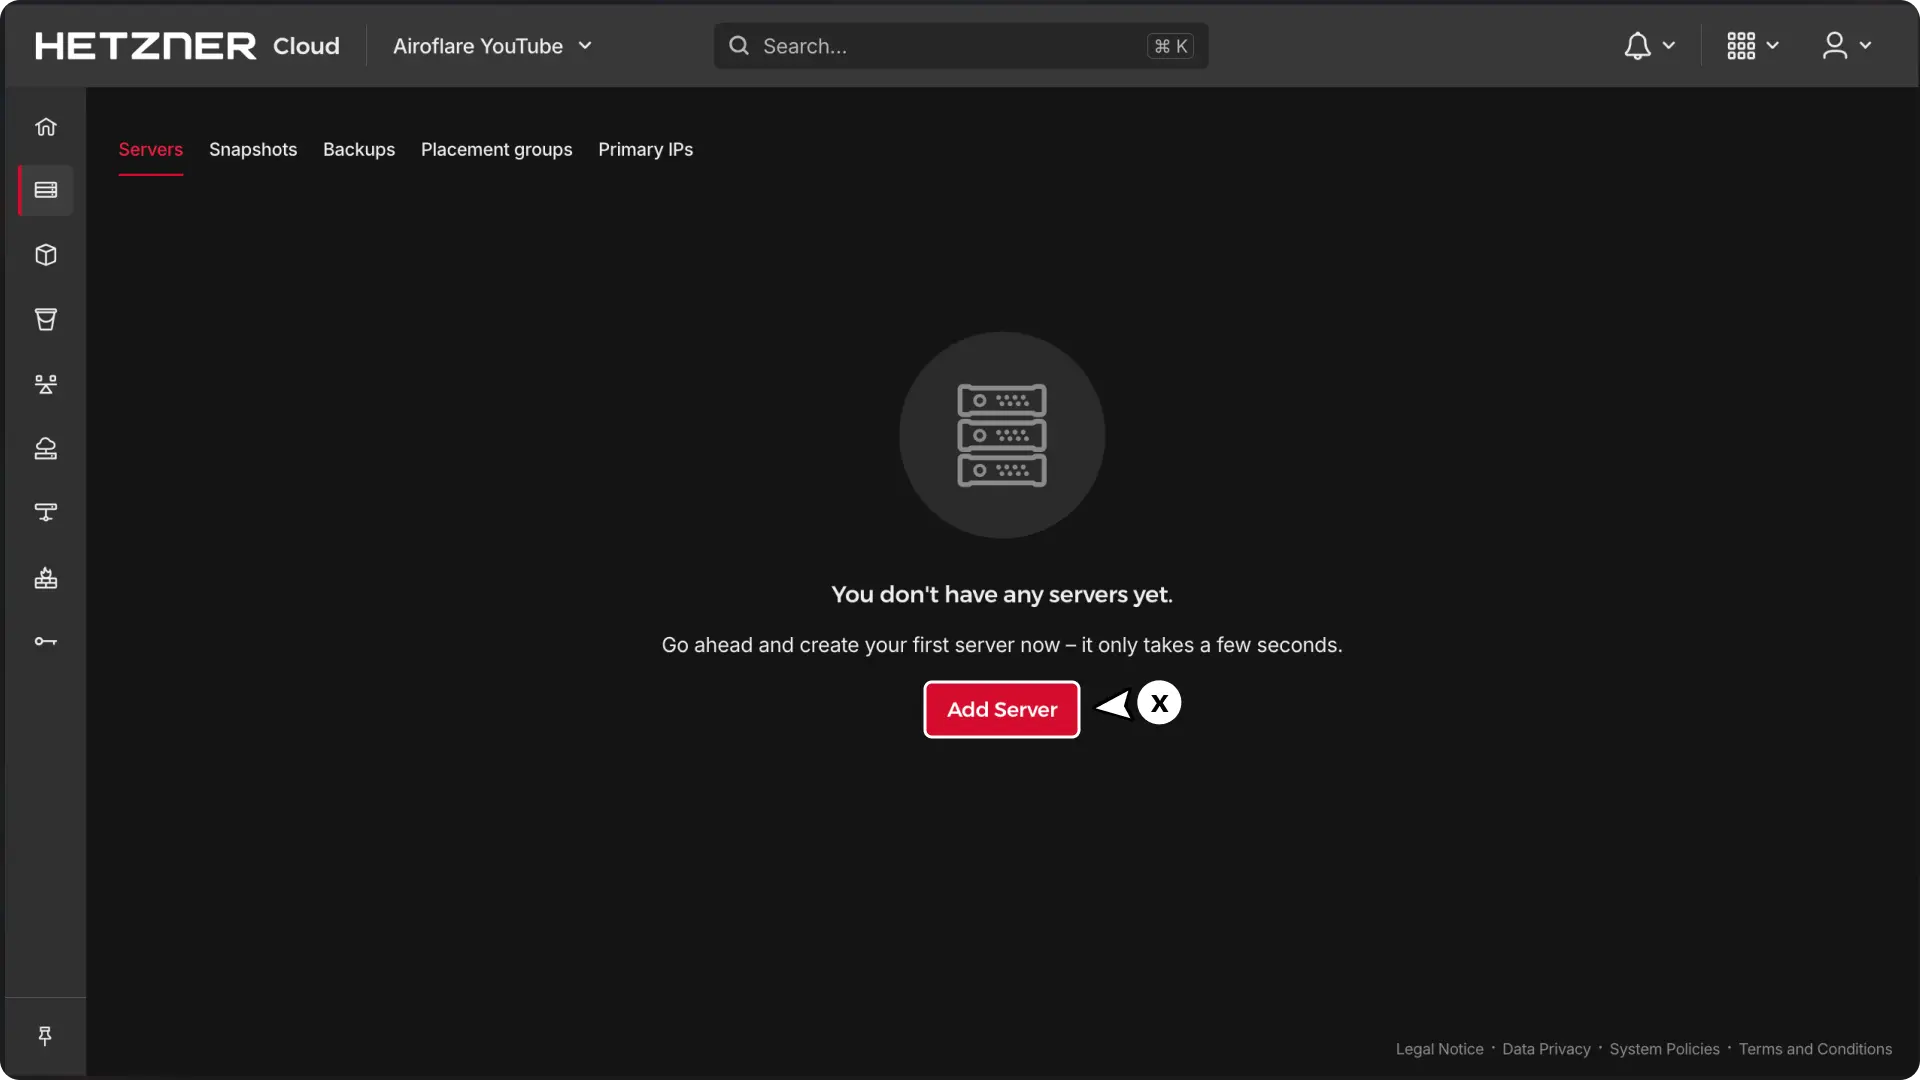
- Create a New Server: Log into Hetzner Cloud Dashboard ↗ and create a new server.
- Choose Your Region: Select the region that best suits your needs.
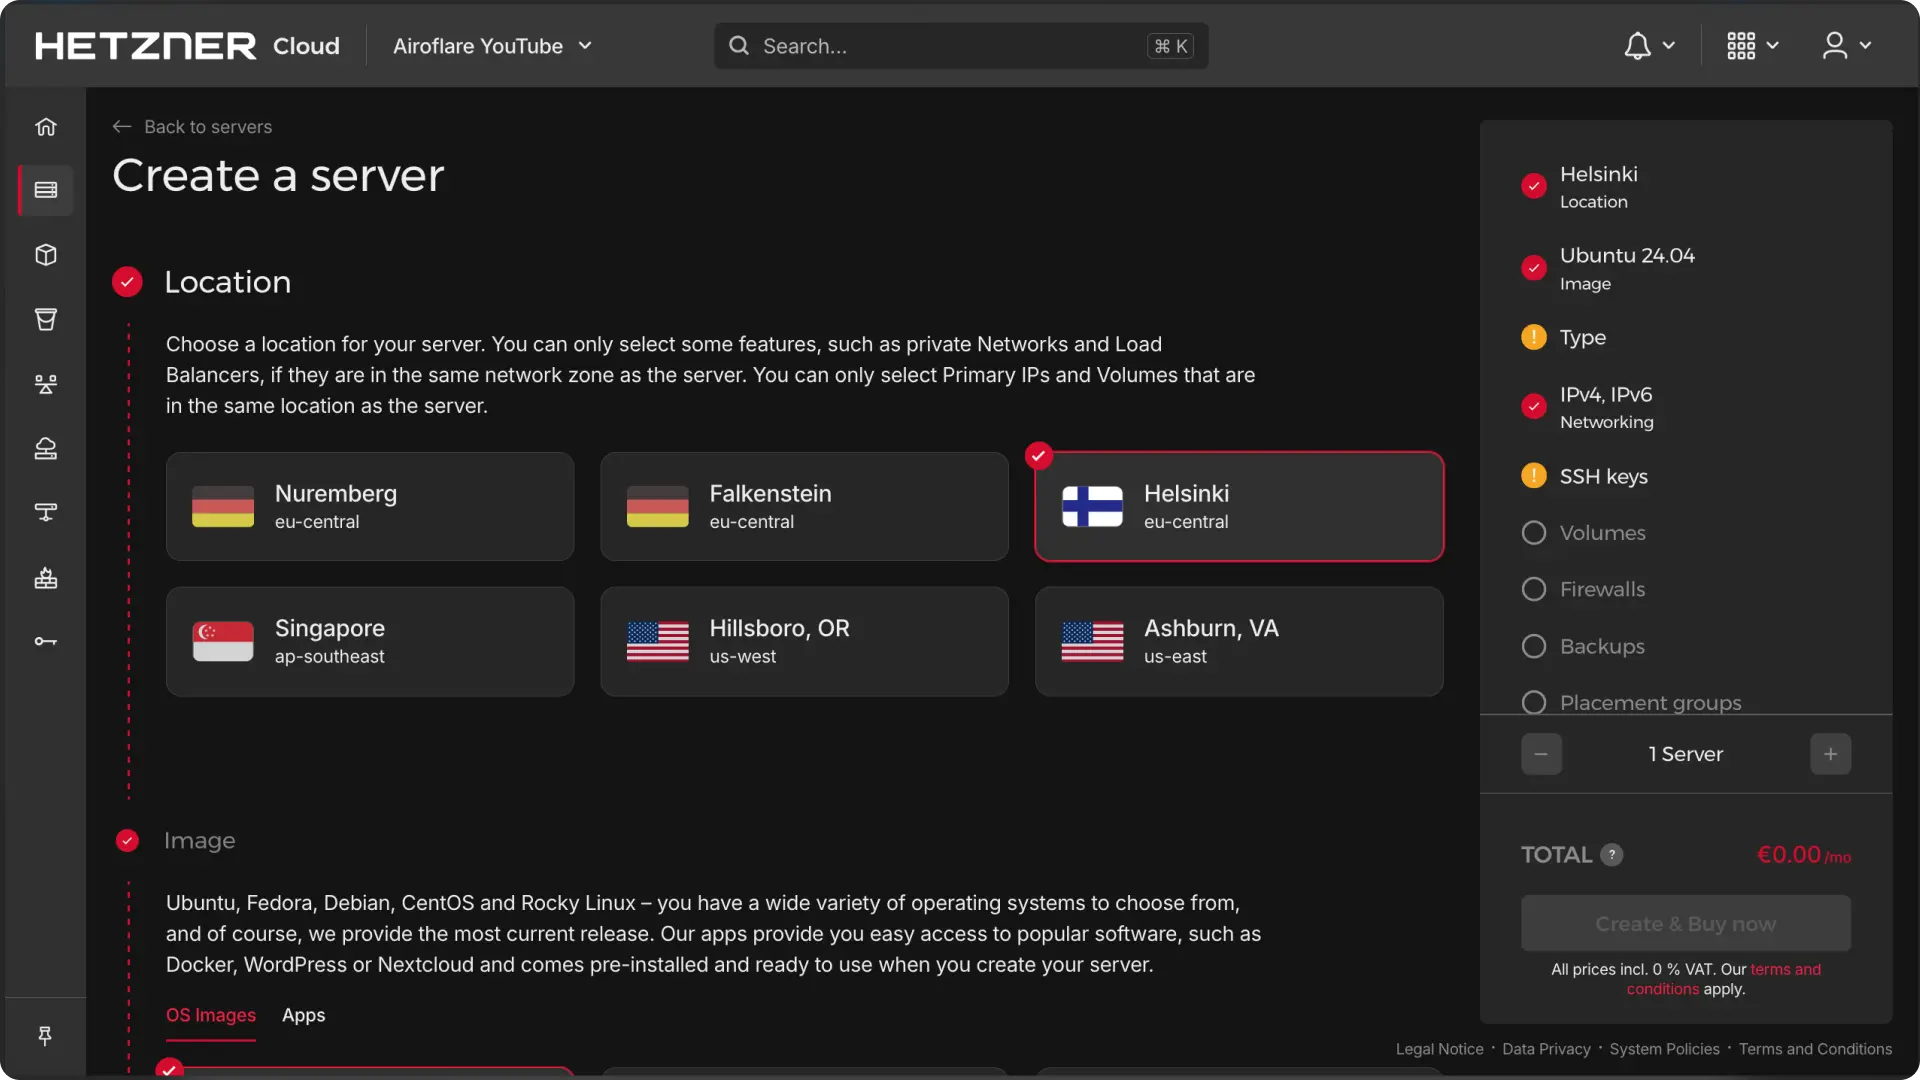
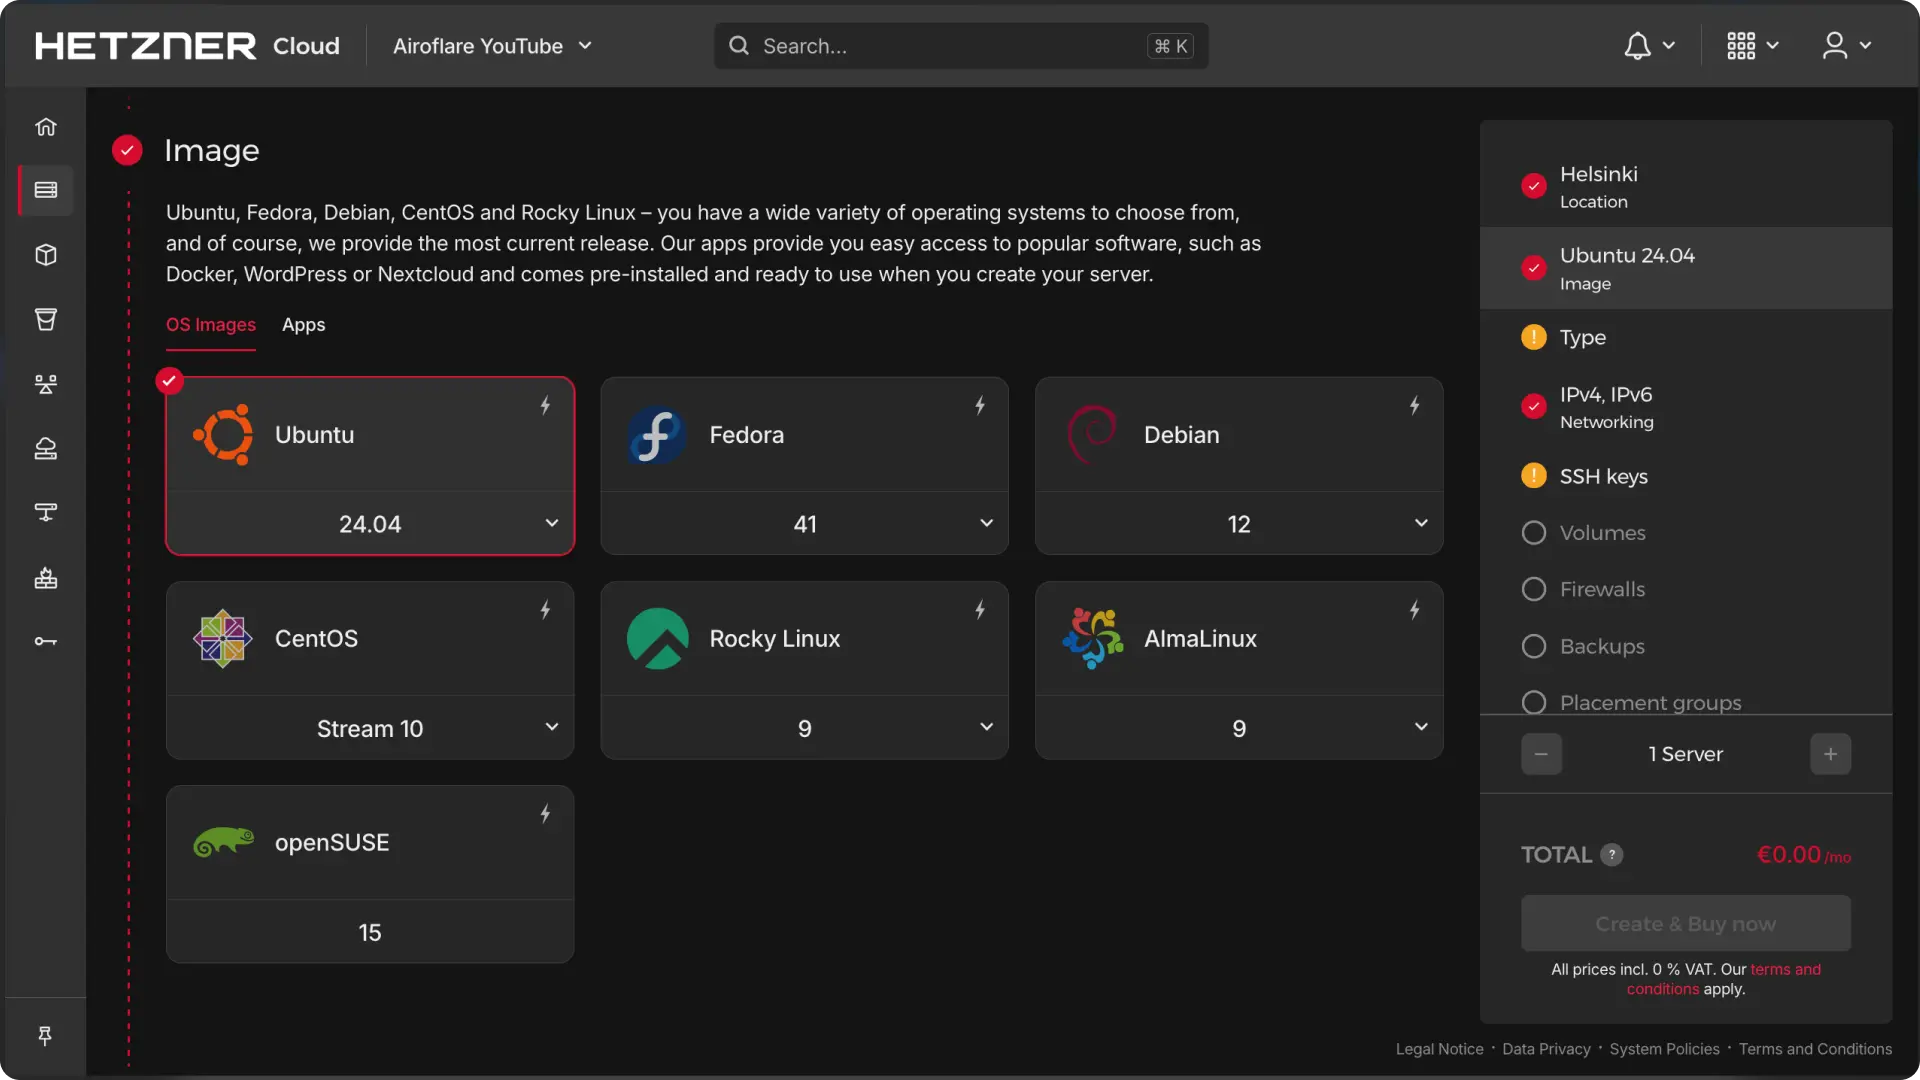
- Select Ubuntu: Pick an Ubuntu image (make sure it’s a Docker-supported version, check the Docker Ubuntu requirements).
- Configure Resources: A shared CPU with at least 2 GB RAM is recommended.
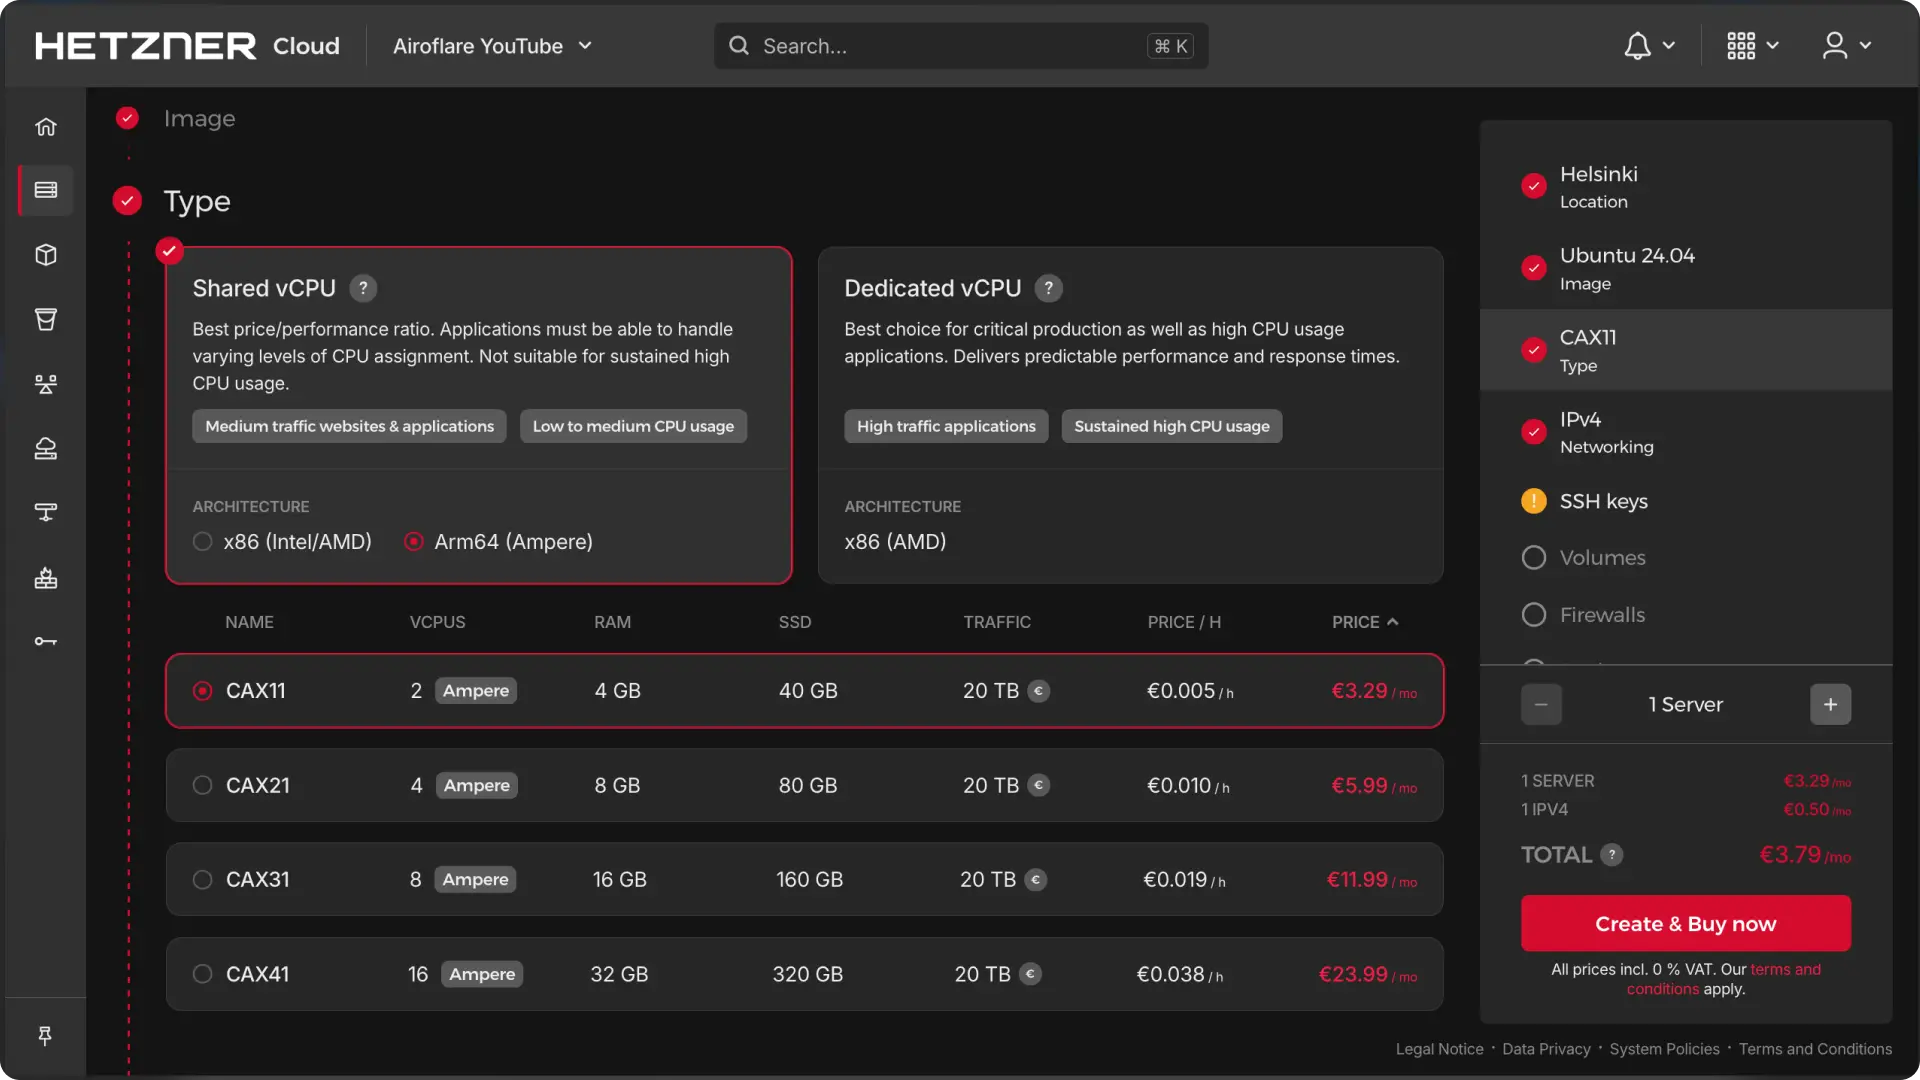
- Allocate an IPv4 Address: Make sure your server has a dedicated IPv4 address.
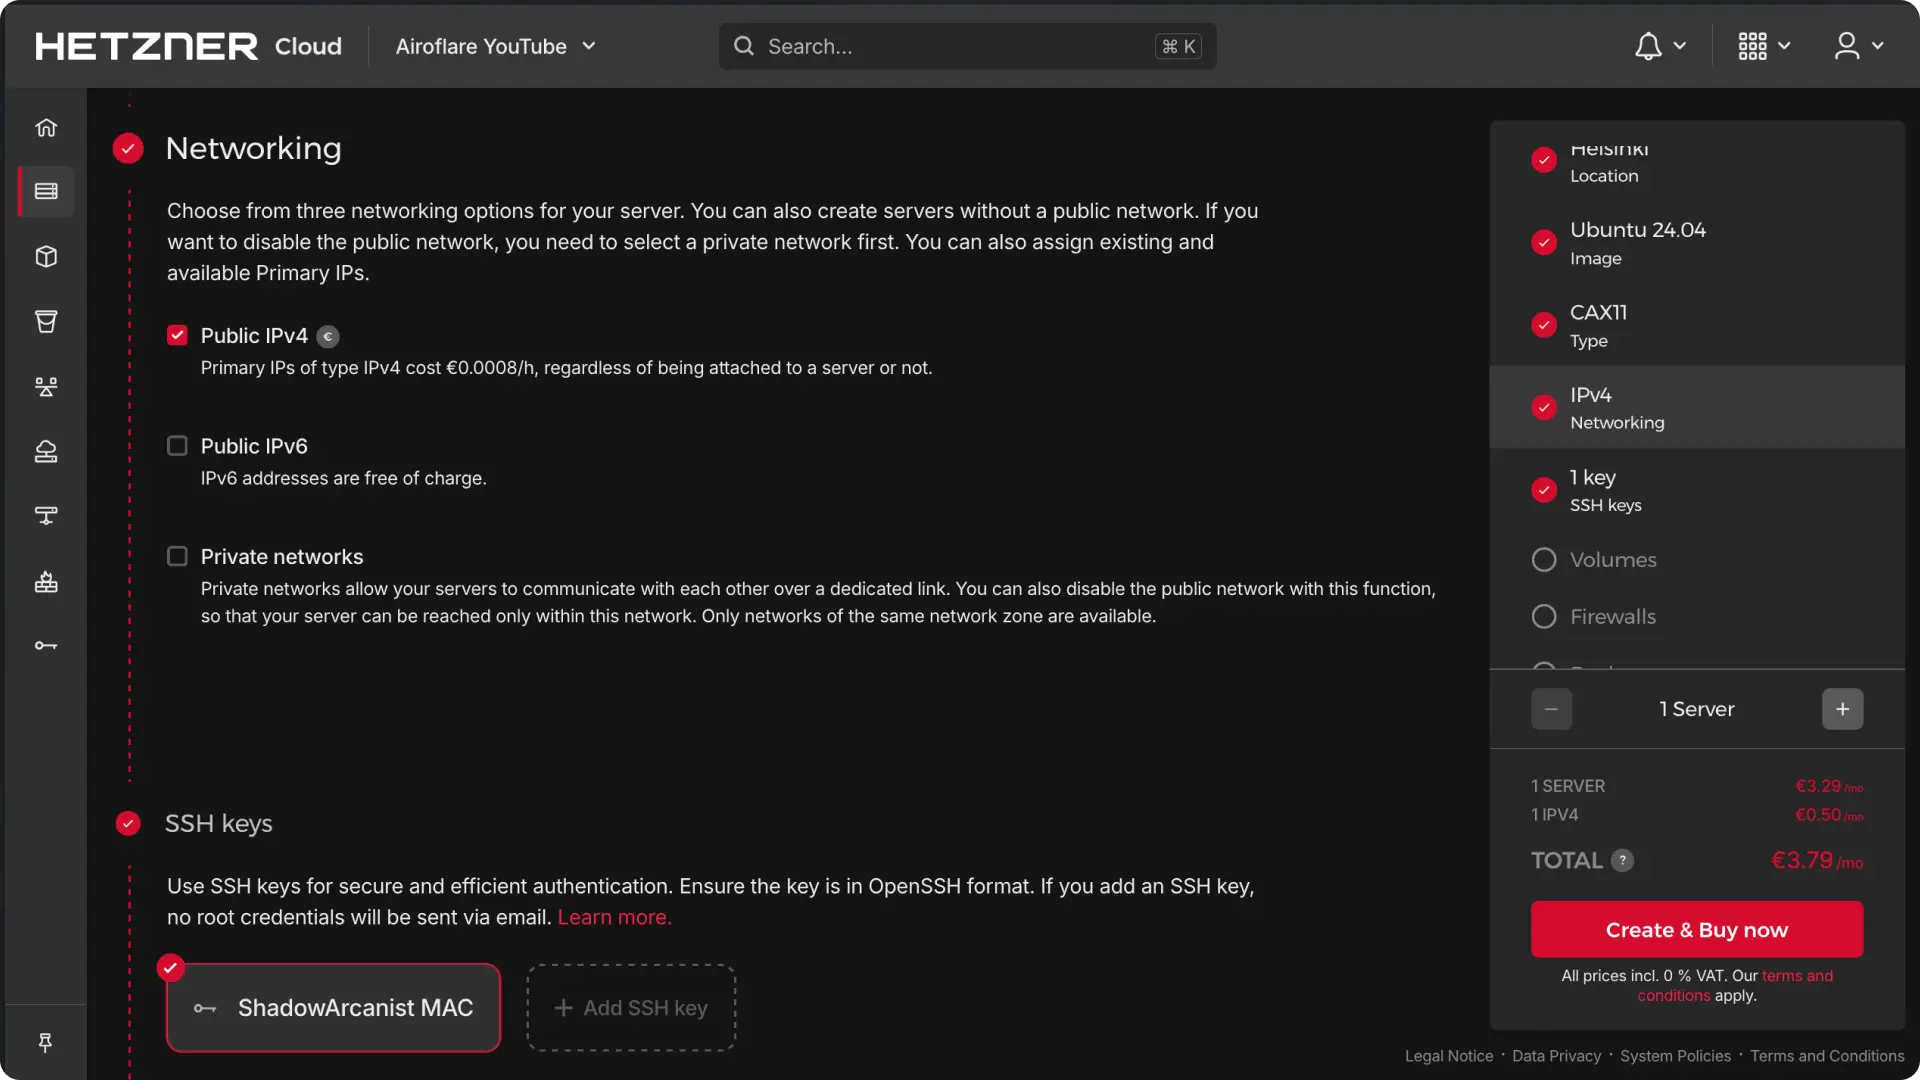
Finalize Setup: Click Create and Buy Now and wait until your server is provisioned.
Save the IP: Copy your server’s IPv4 address, it will be needed shortly.
5. Connect Coolify to Your Server
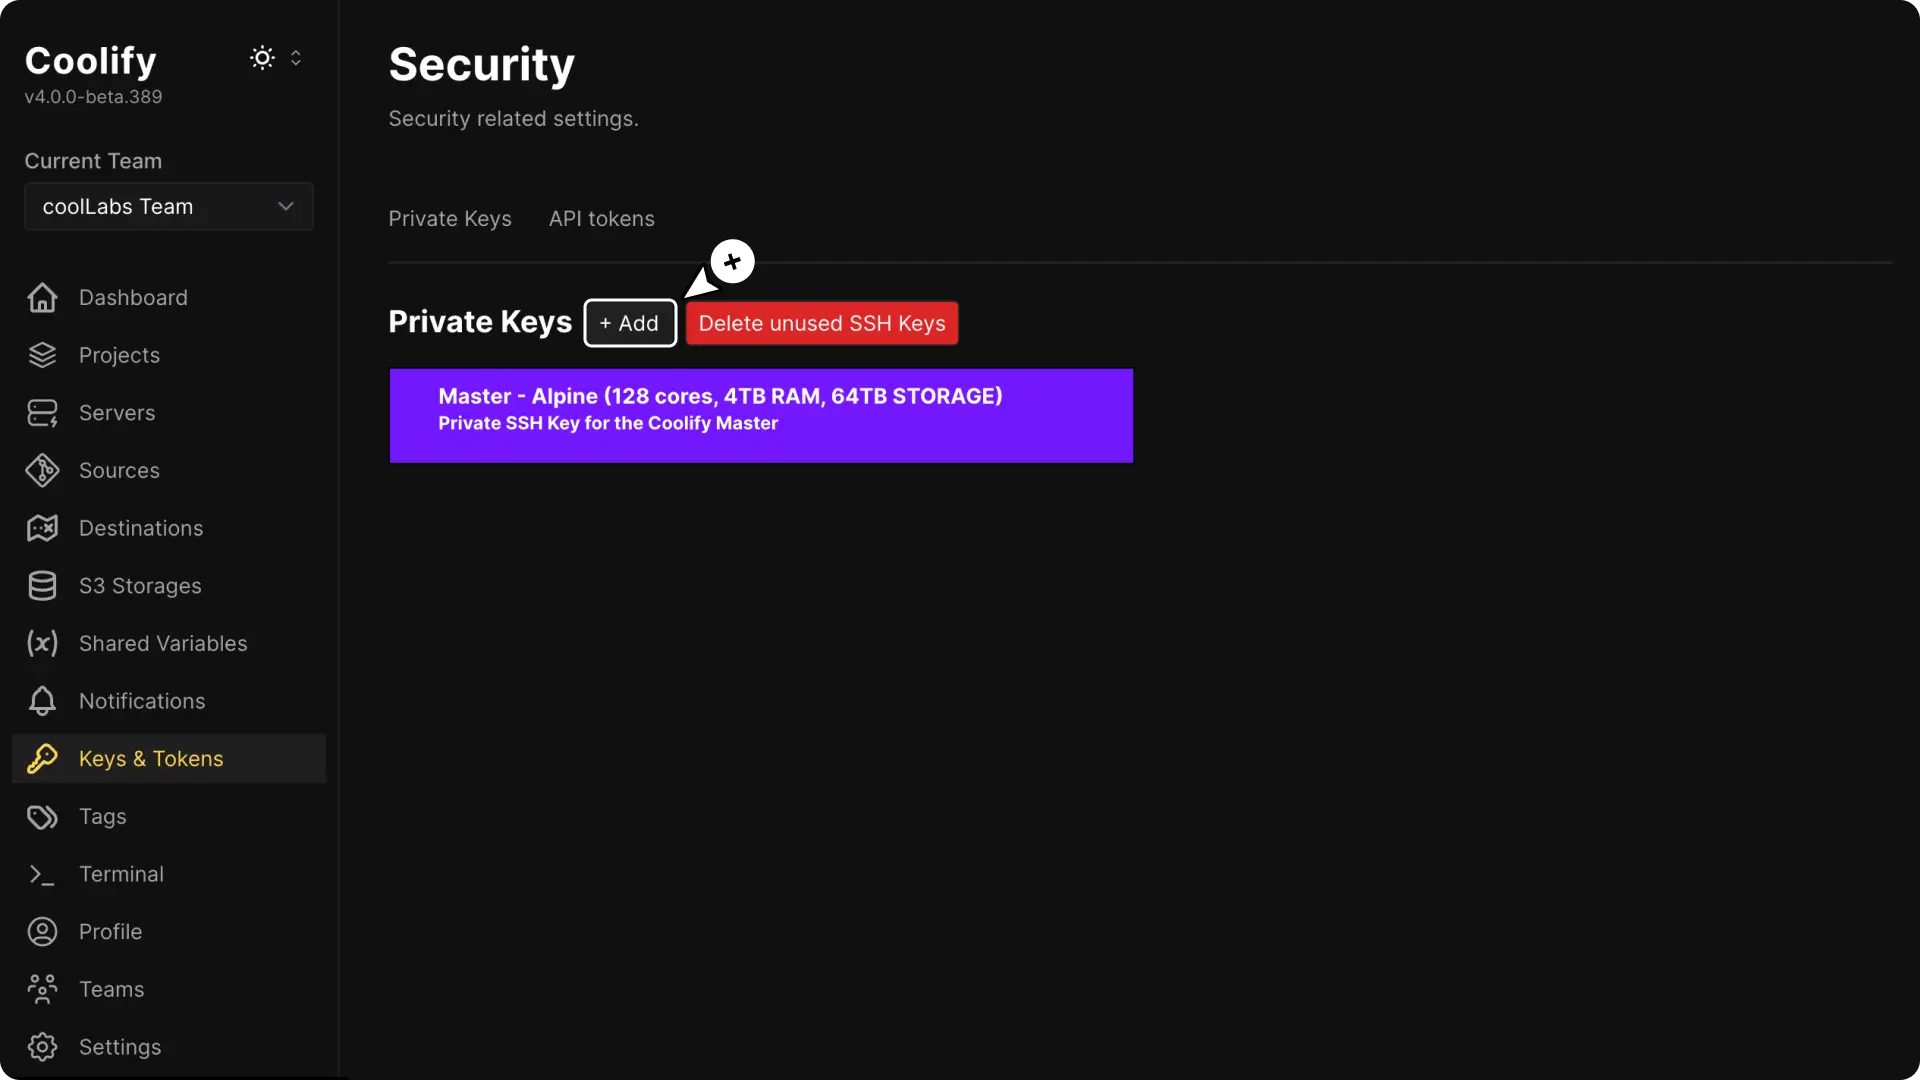
- Add Private Key: Login to your Coolify account (or create one if you’re new) and Add a new private key

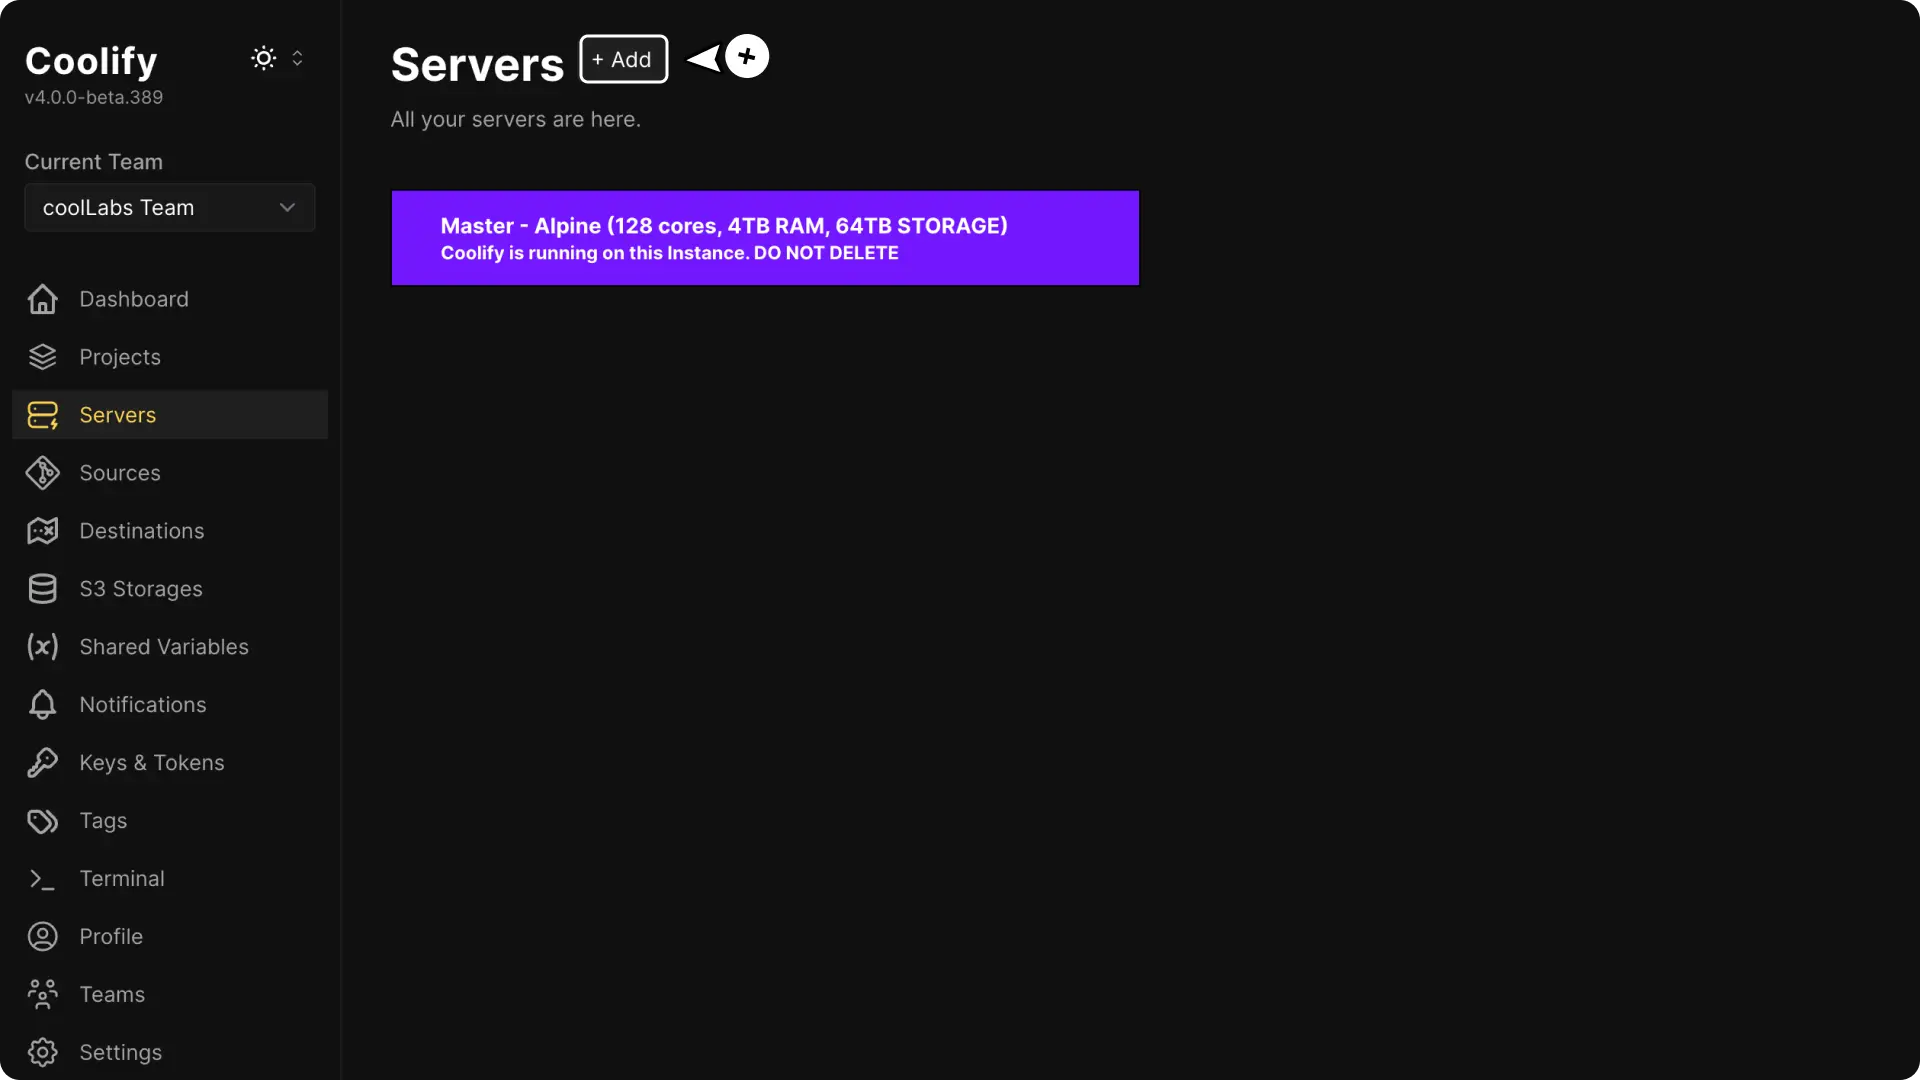
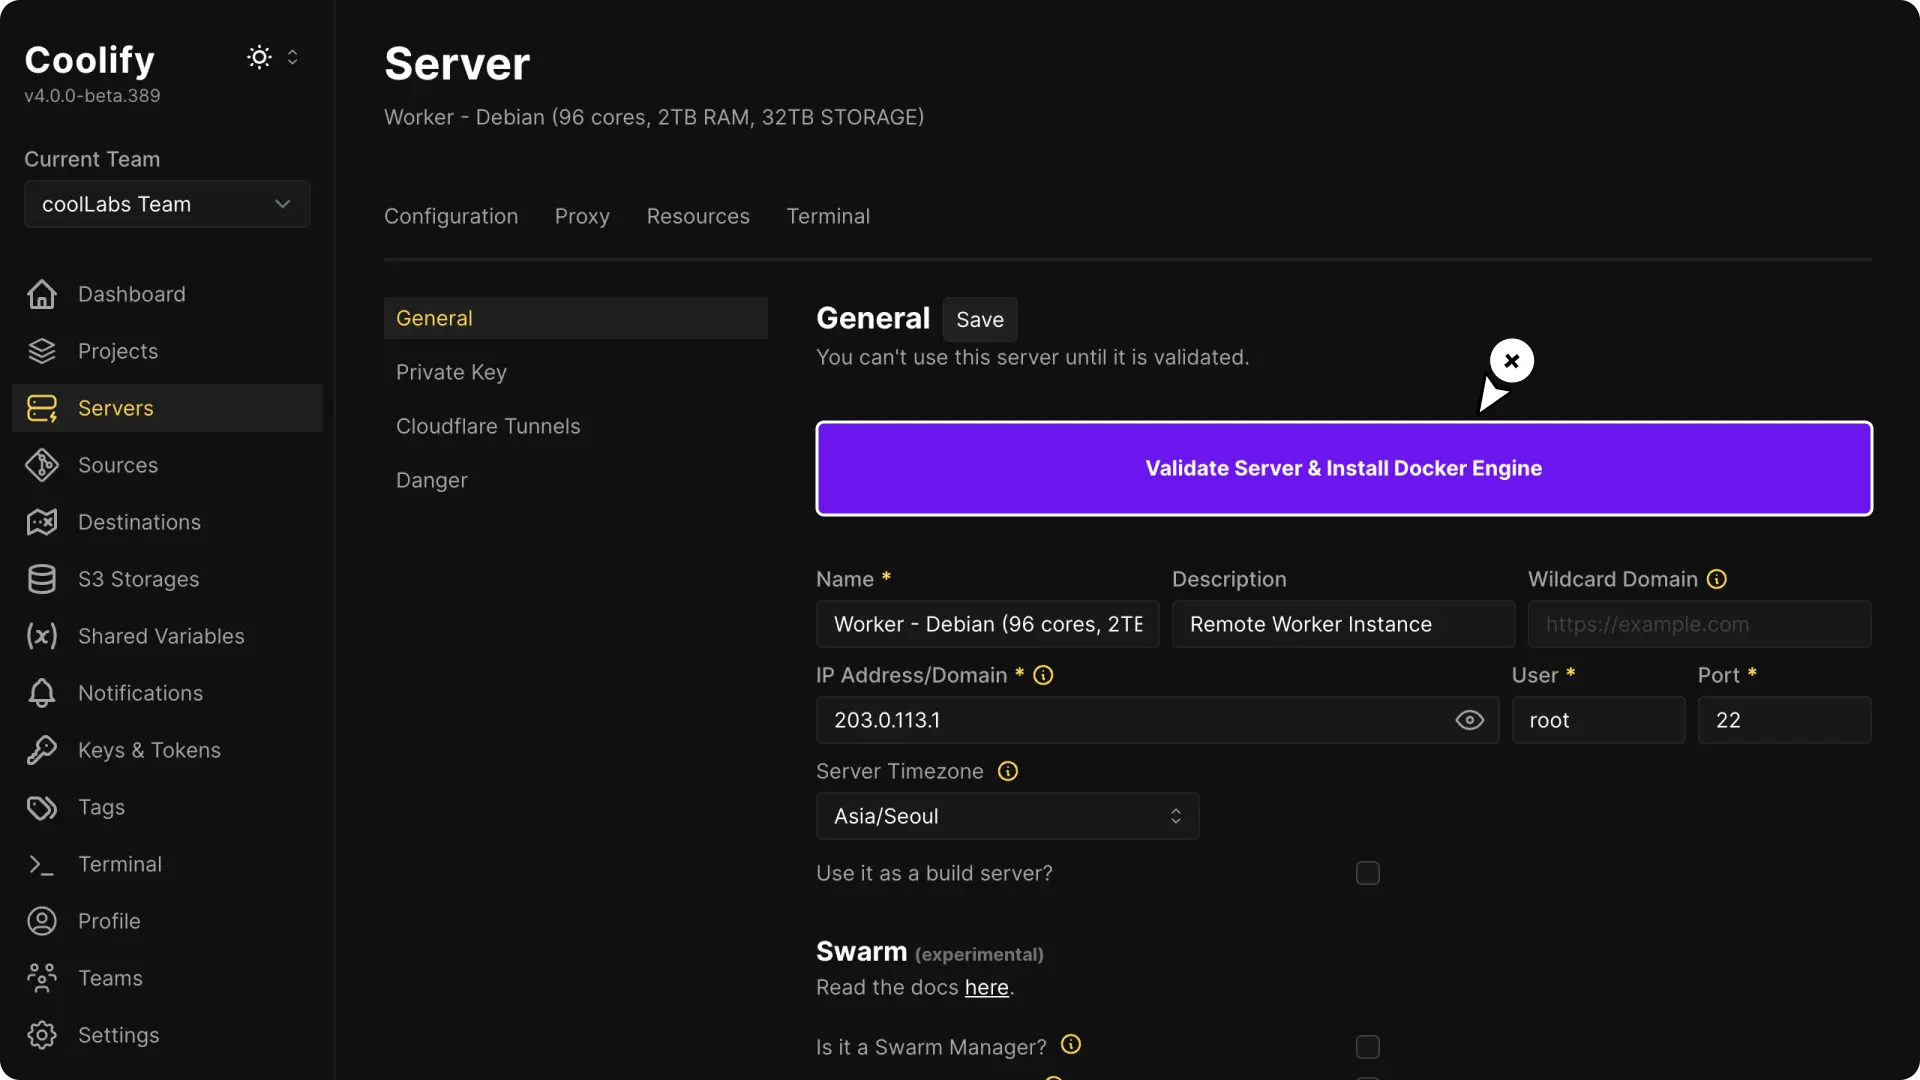
- Add a Server: Navigate to the Servers tab and add a new server by entering your Hetzner server’s IPv4 address.
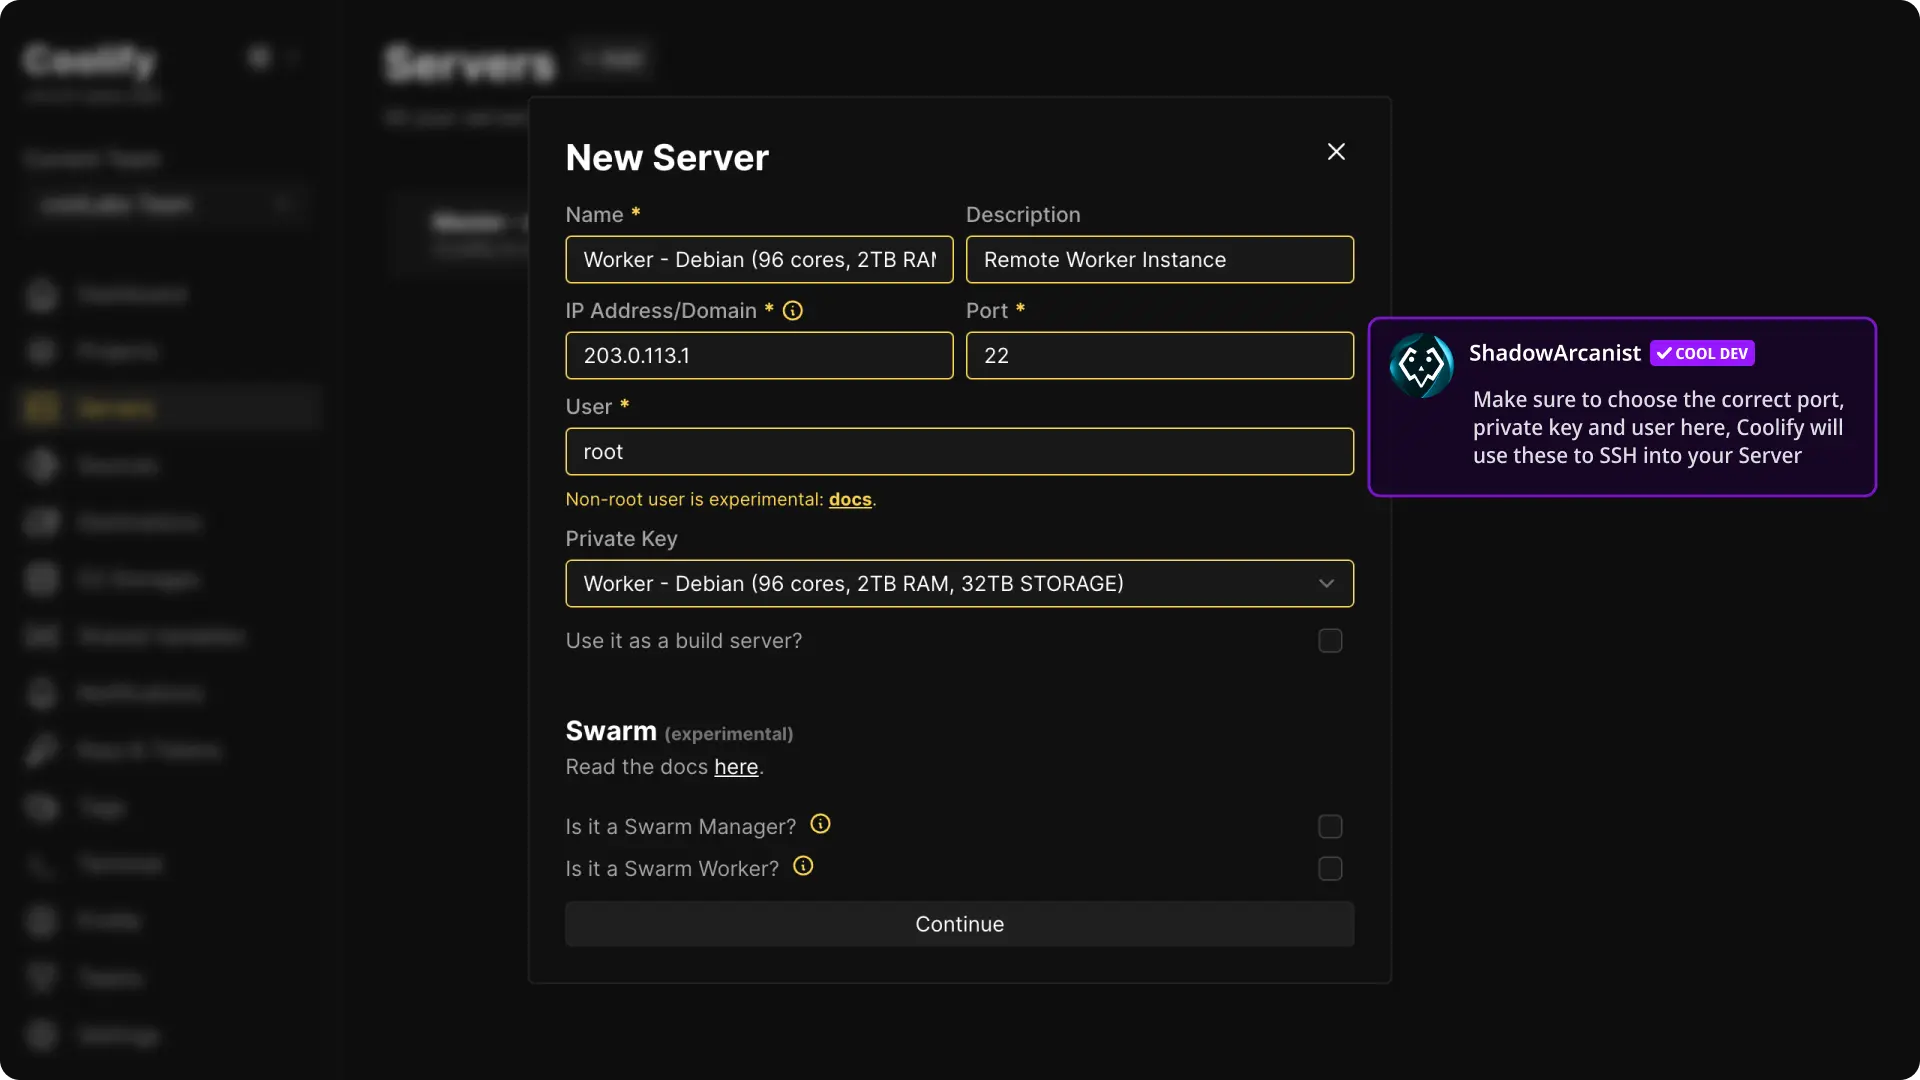
- Validate Server: Click Validate Server & Install Docker Engine. Coolify will automatically install all necessary components on your server.
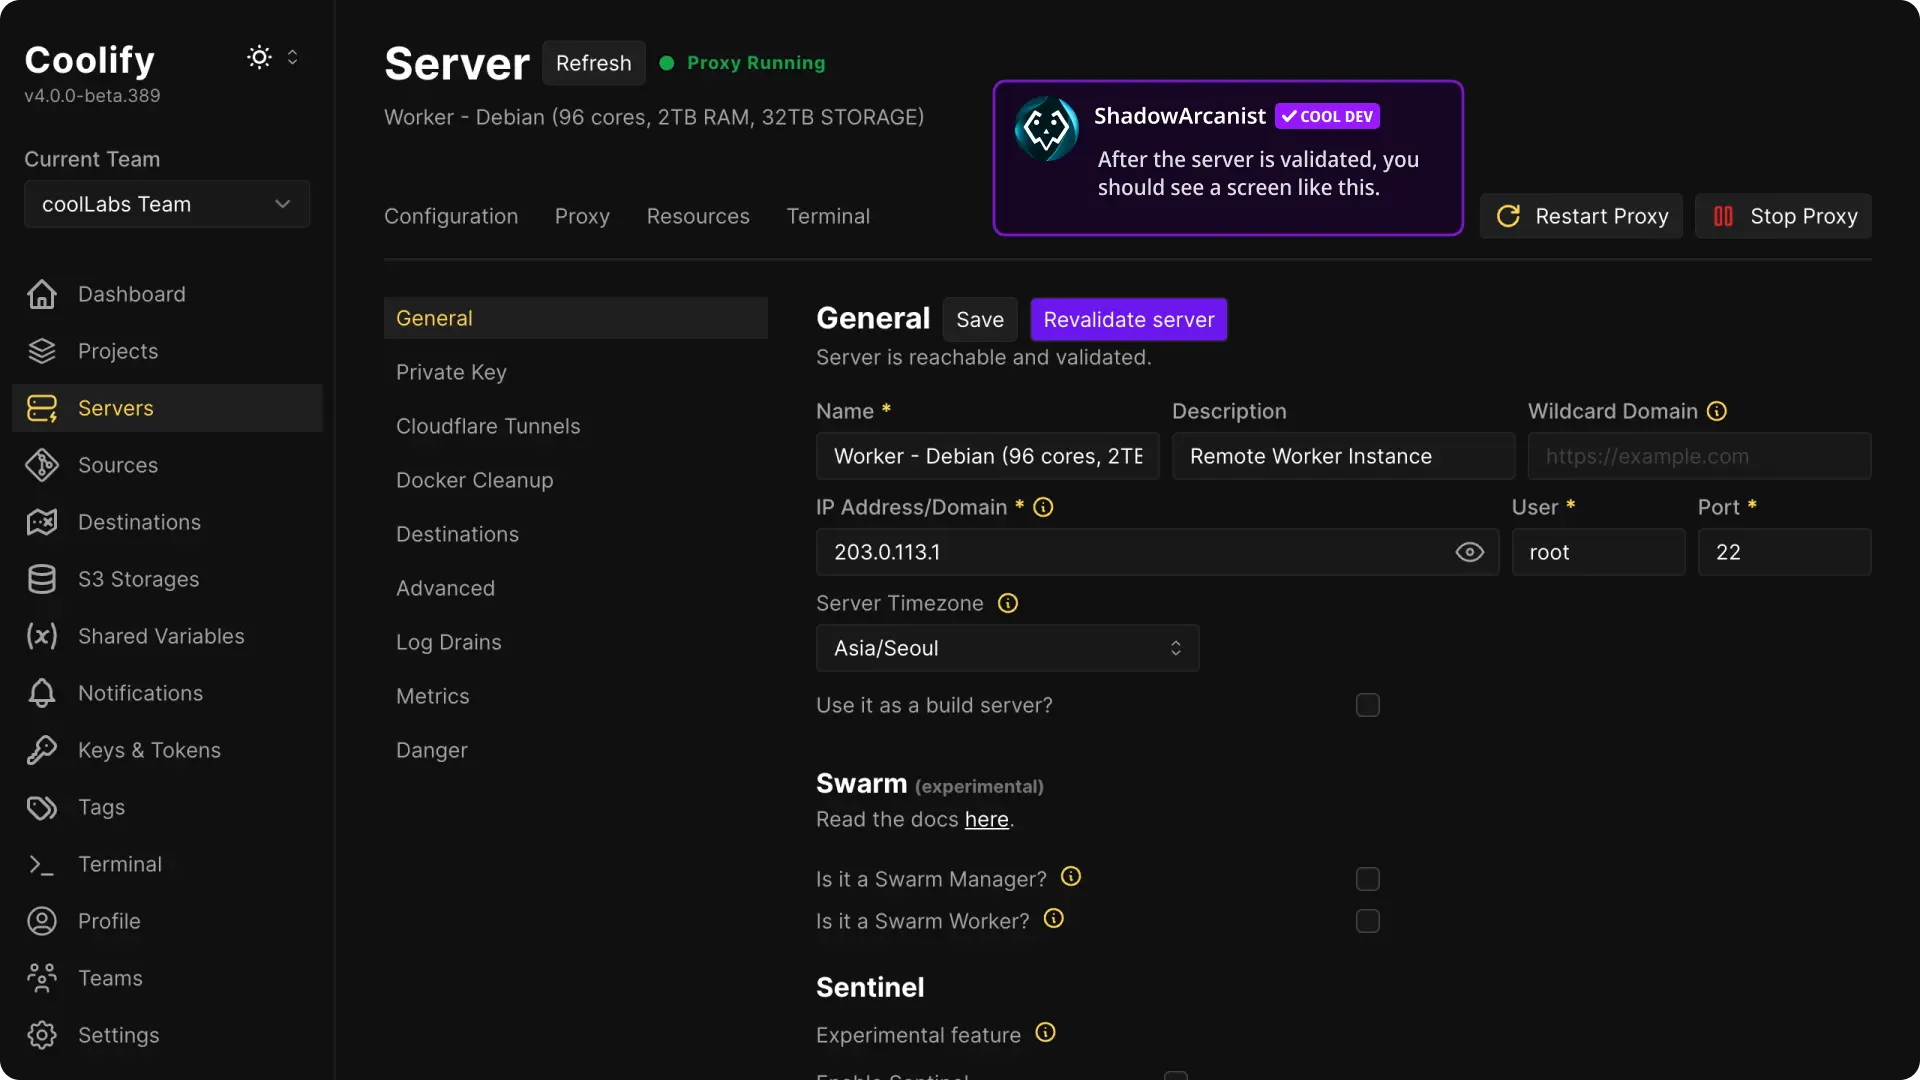
- Check Status: Once finished, you should see a green Proxy Running status indicating everything is set up.
6. Configure Your Project on Coolify
Create a New Project: Head to the Projects section and create a new project.
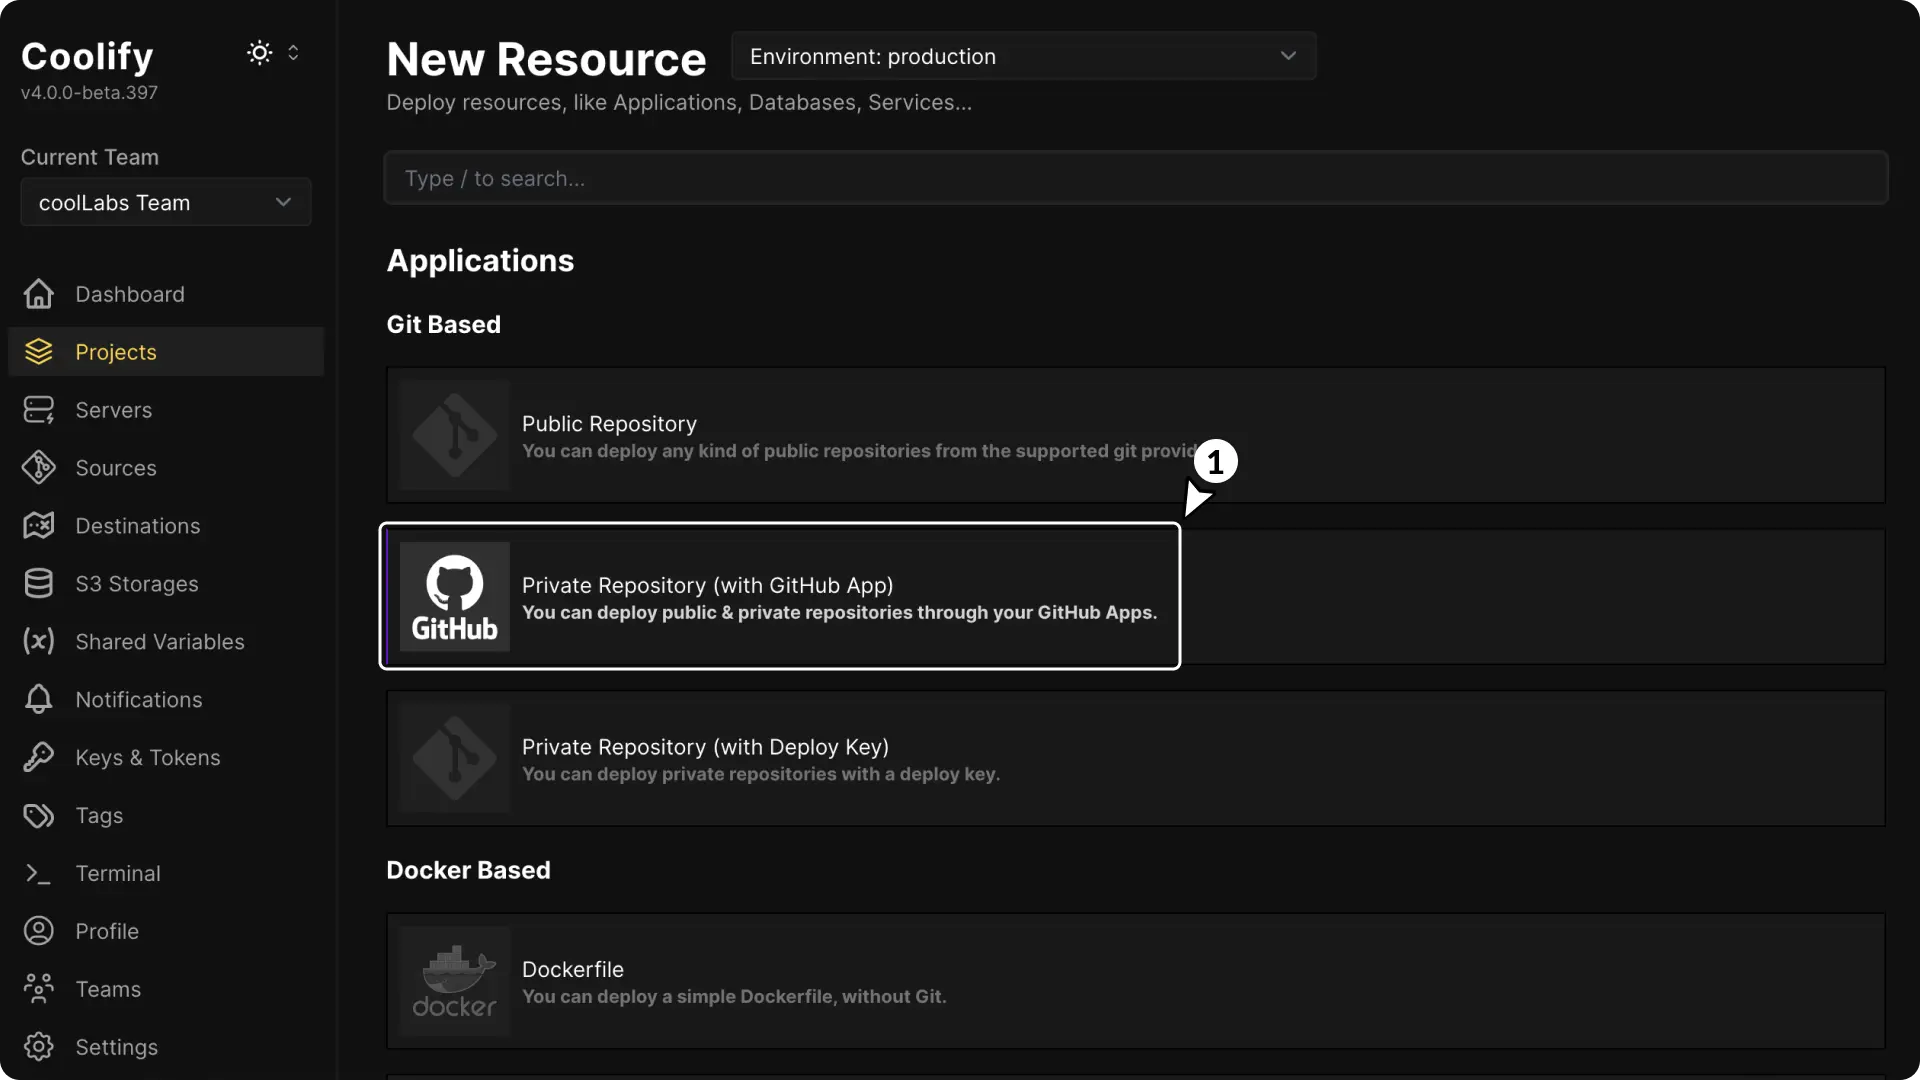
Add a Resource: Add a new resource, selecting your GitHub repository as the source.
Connect Your Repository: Use the GitHub app integration to grant access to your repository.
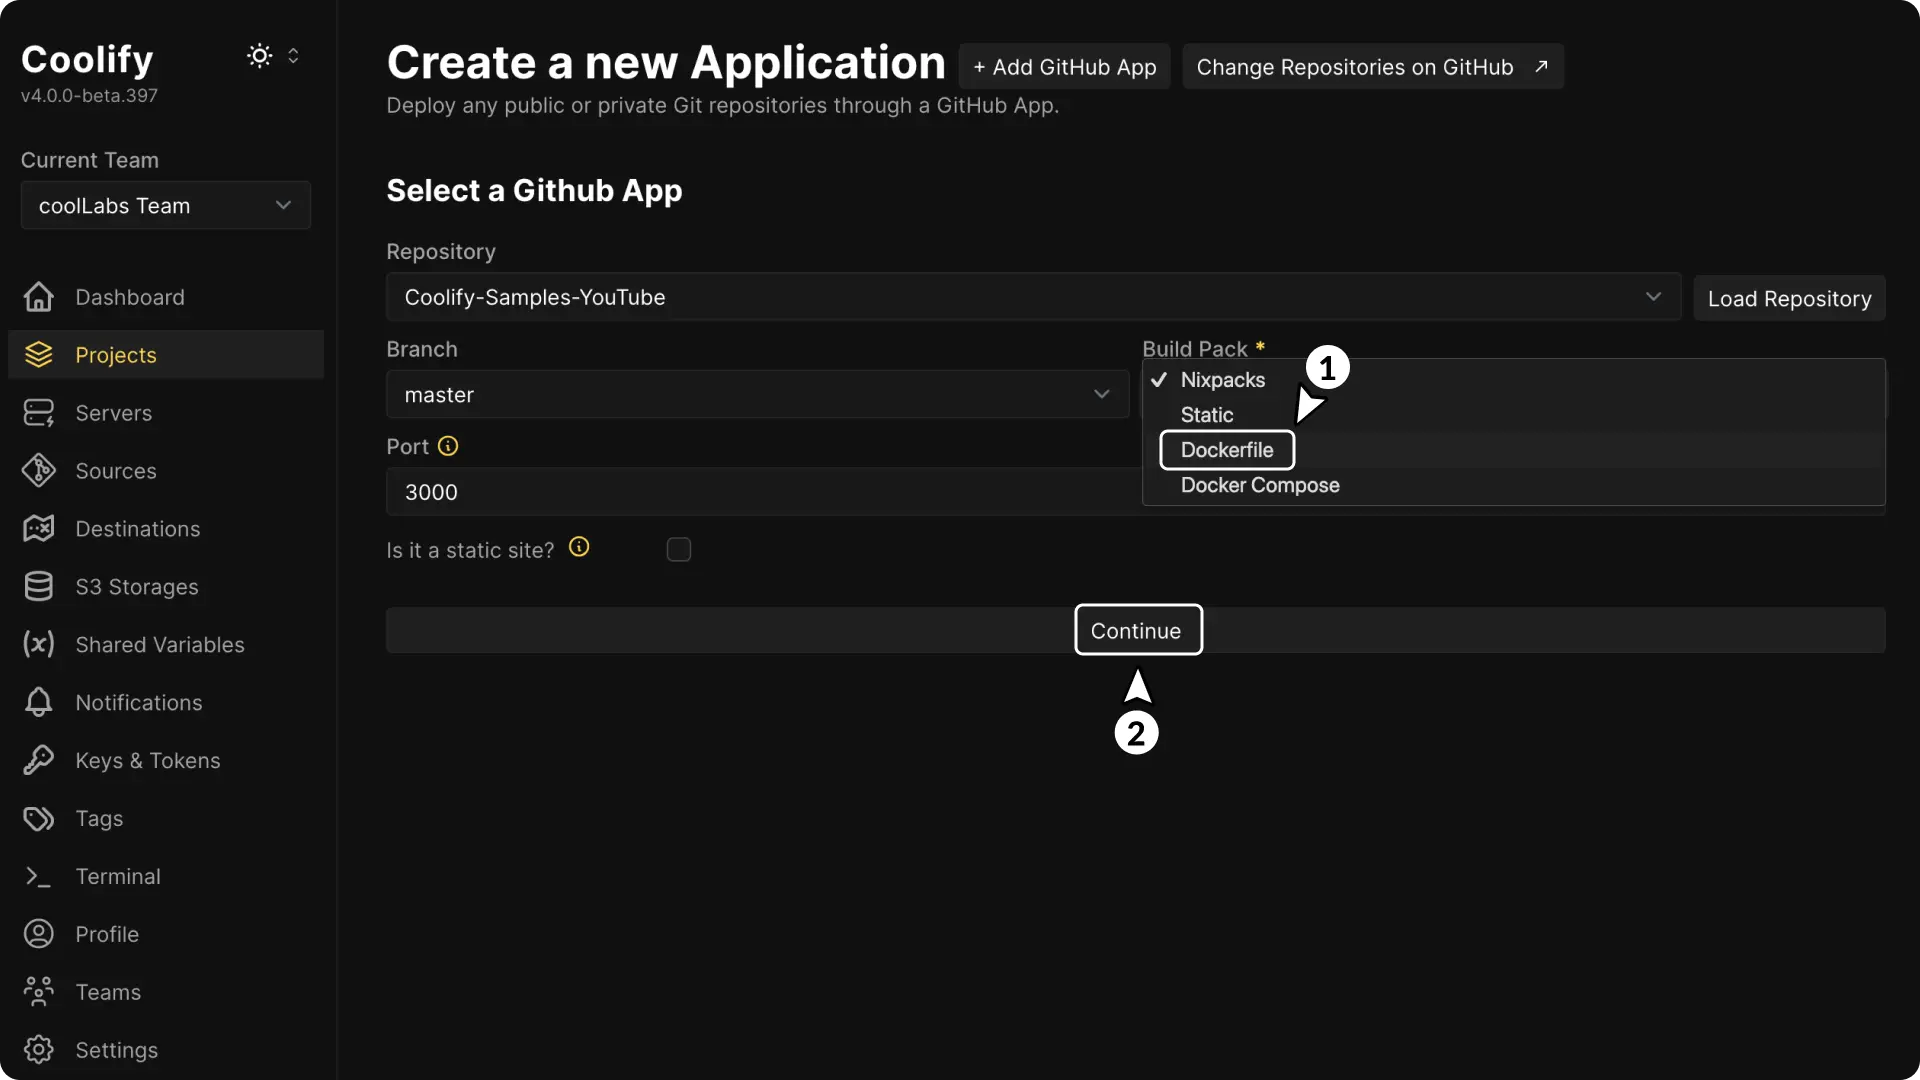
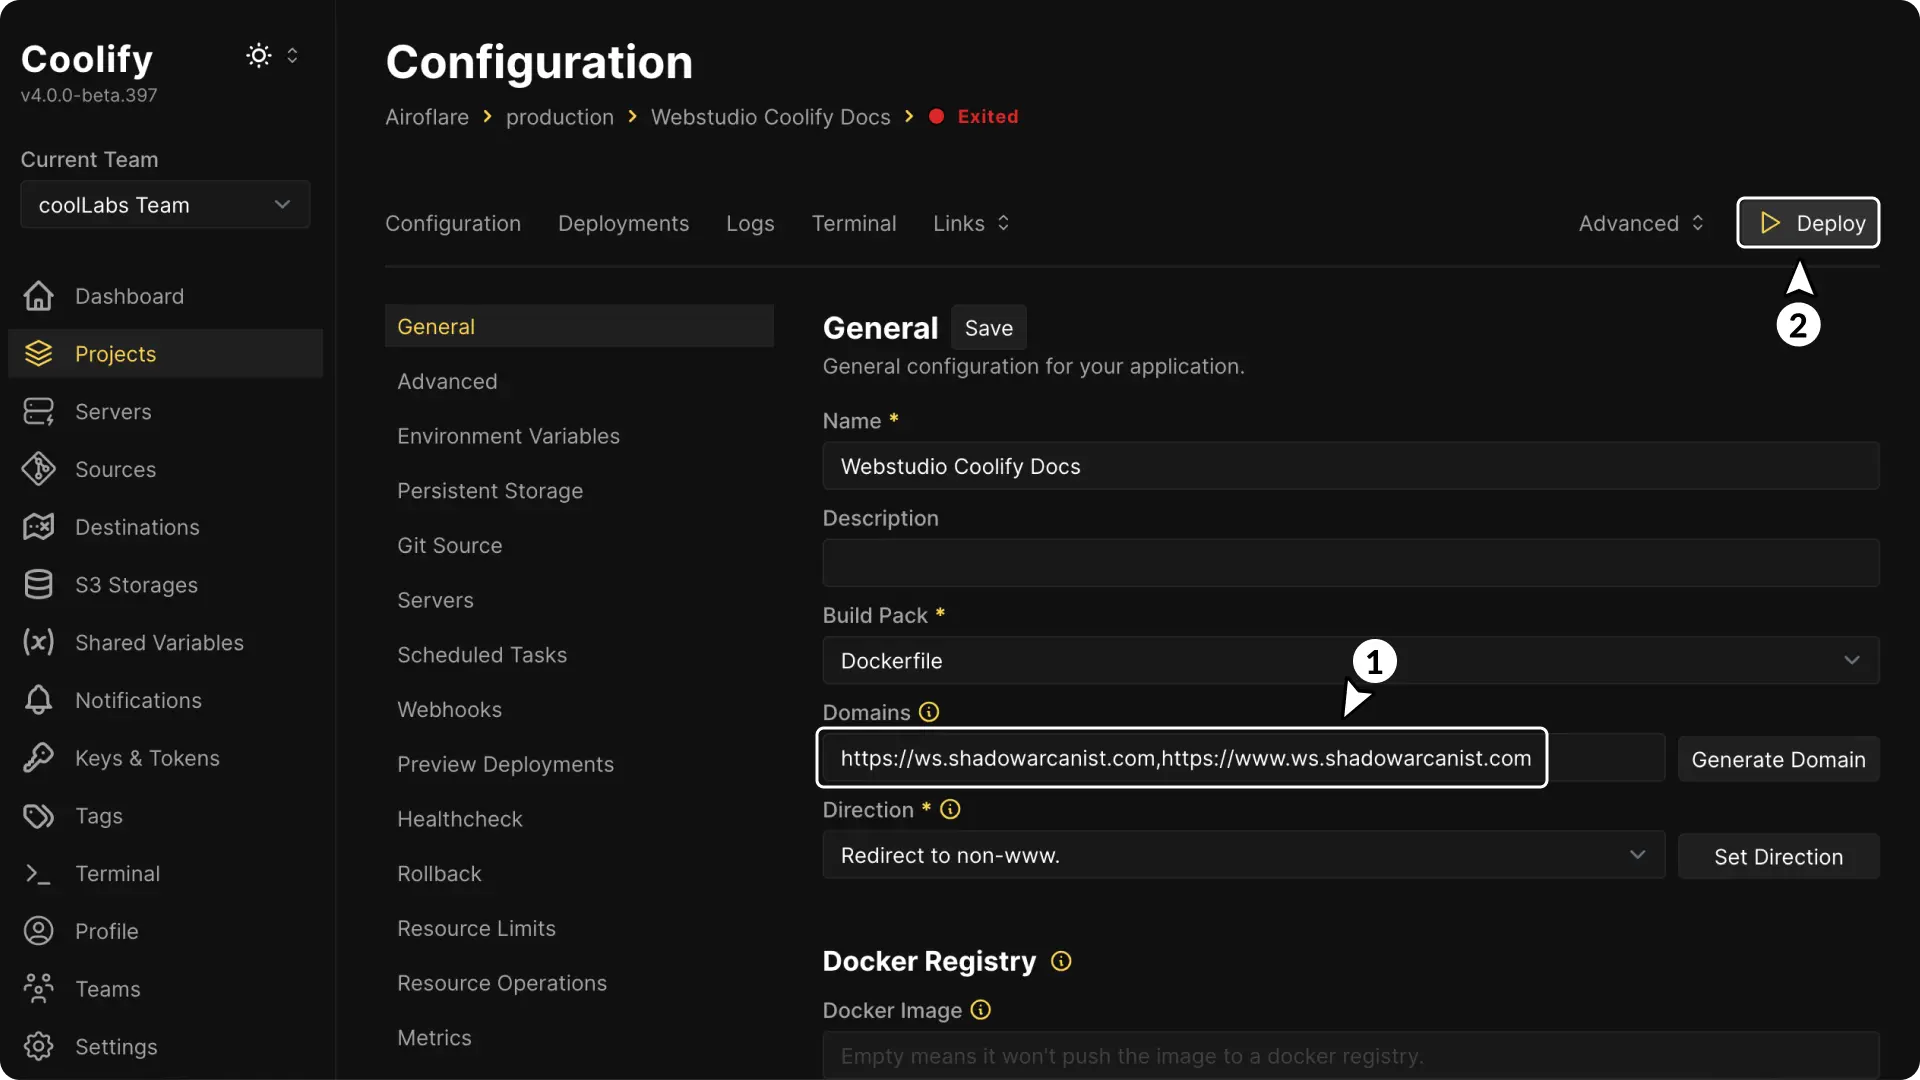
- Select Build Pack: Change the Build Pack to Dockerfile and click on continue button.
- Configure Domains & Deploy: Enter your domain in the domains field and Click Deploy and wait as Coolify builds and deploys your project.
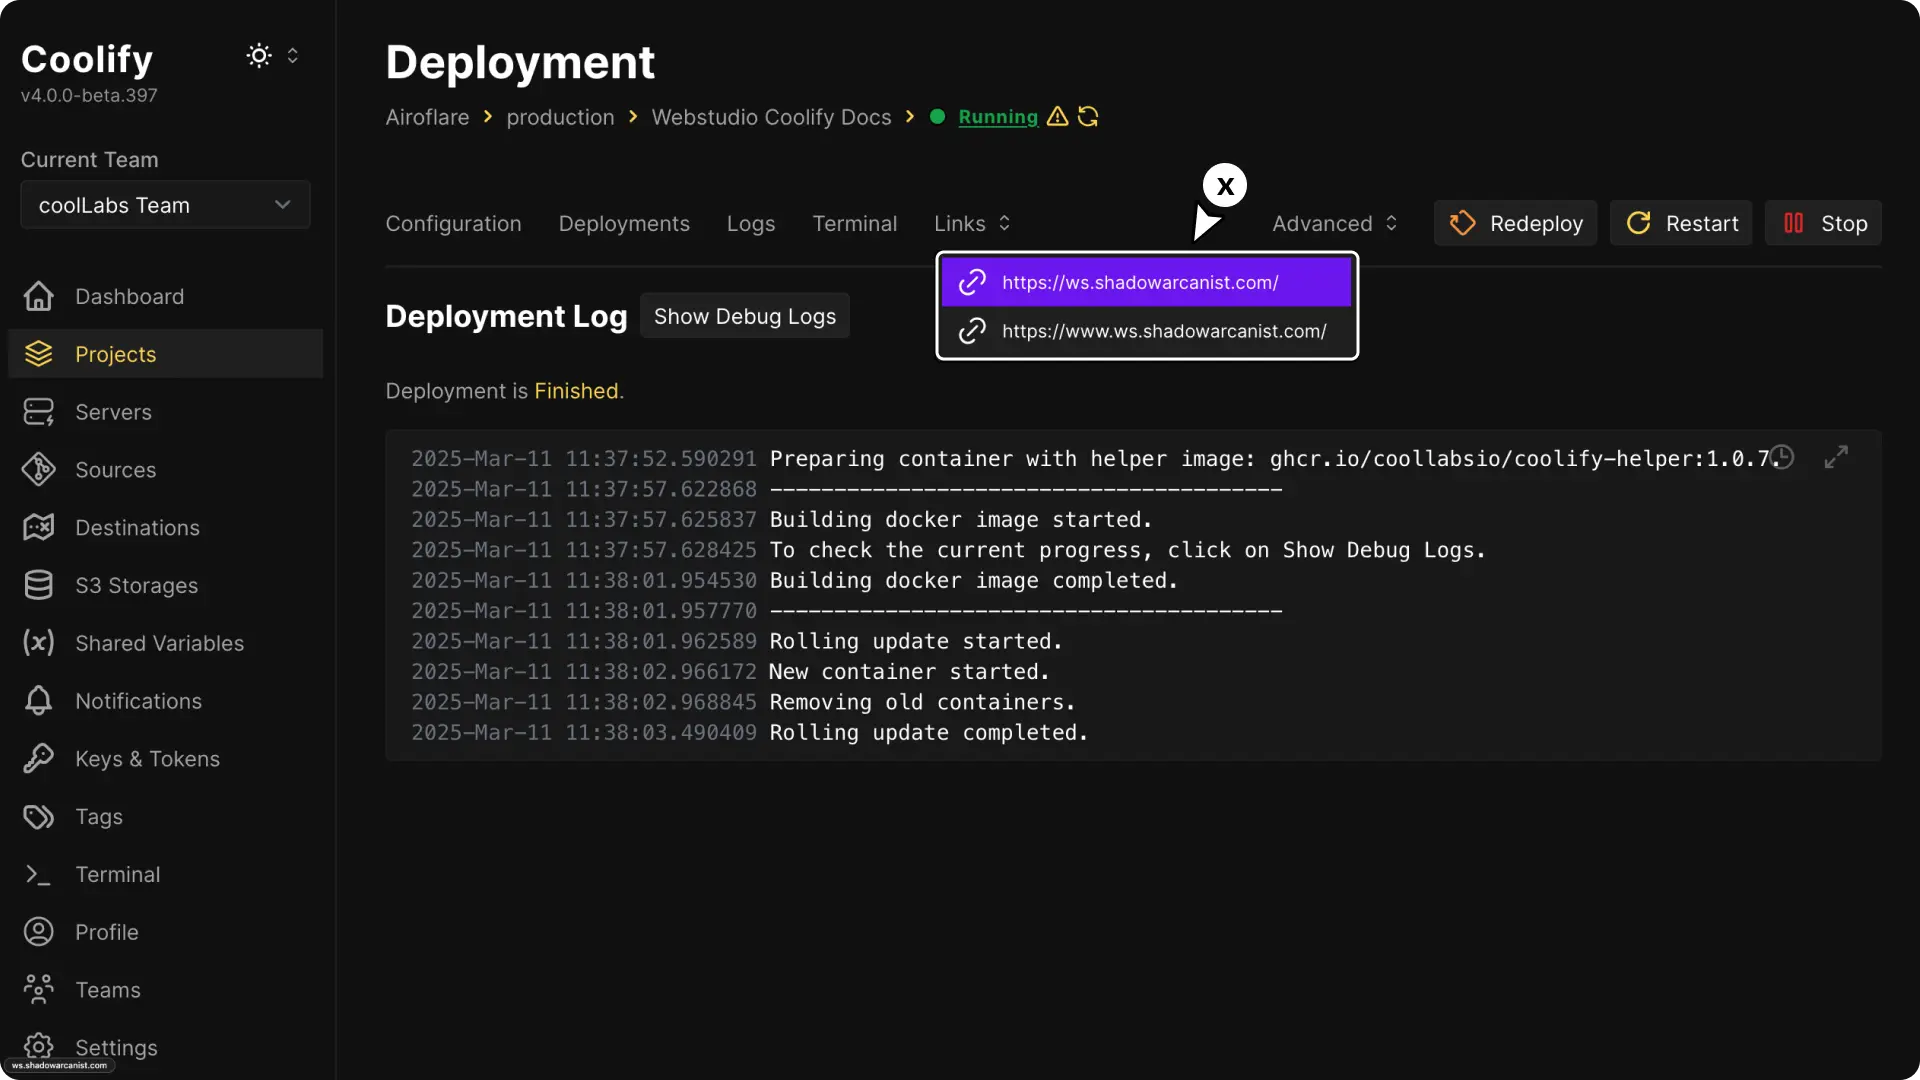
Successful Deployment: When deployment is complete, you’ll see a “Deployment is Finished” message.
Access Your Site: Use the links button at the top of the project dashboard to visit your live site.
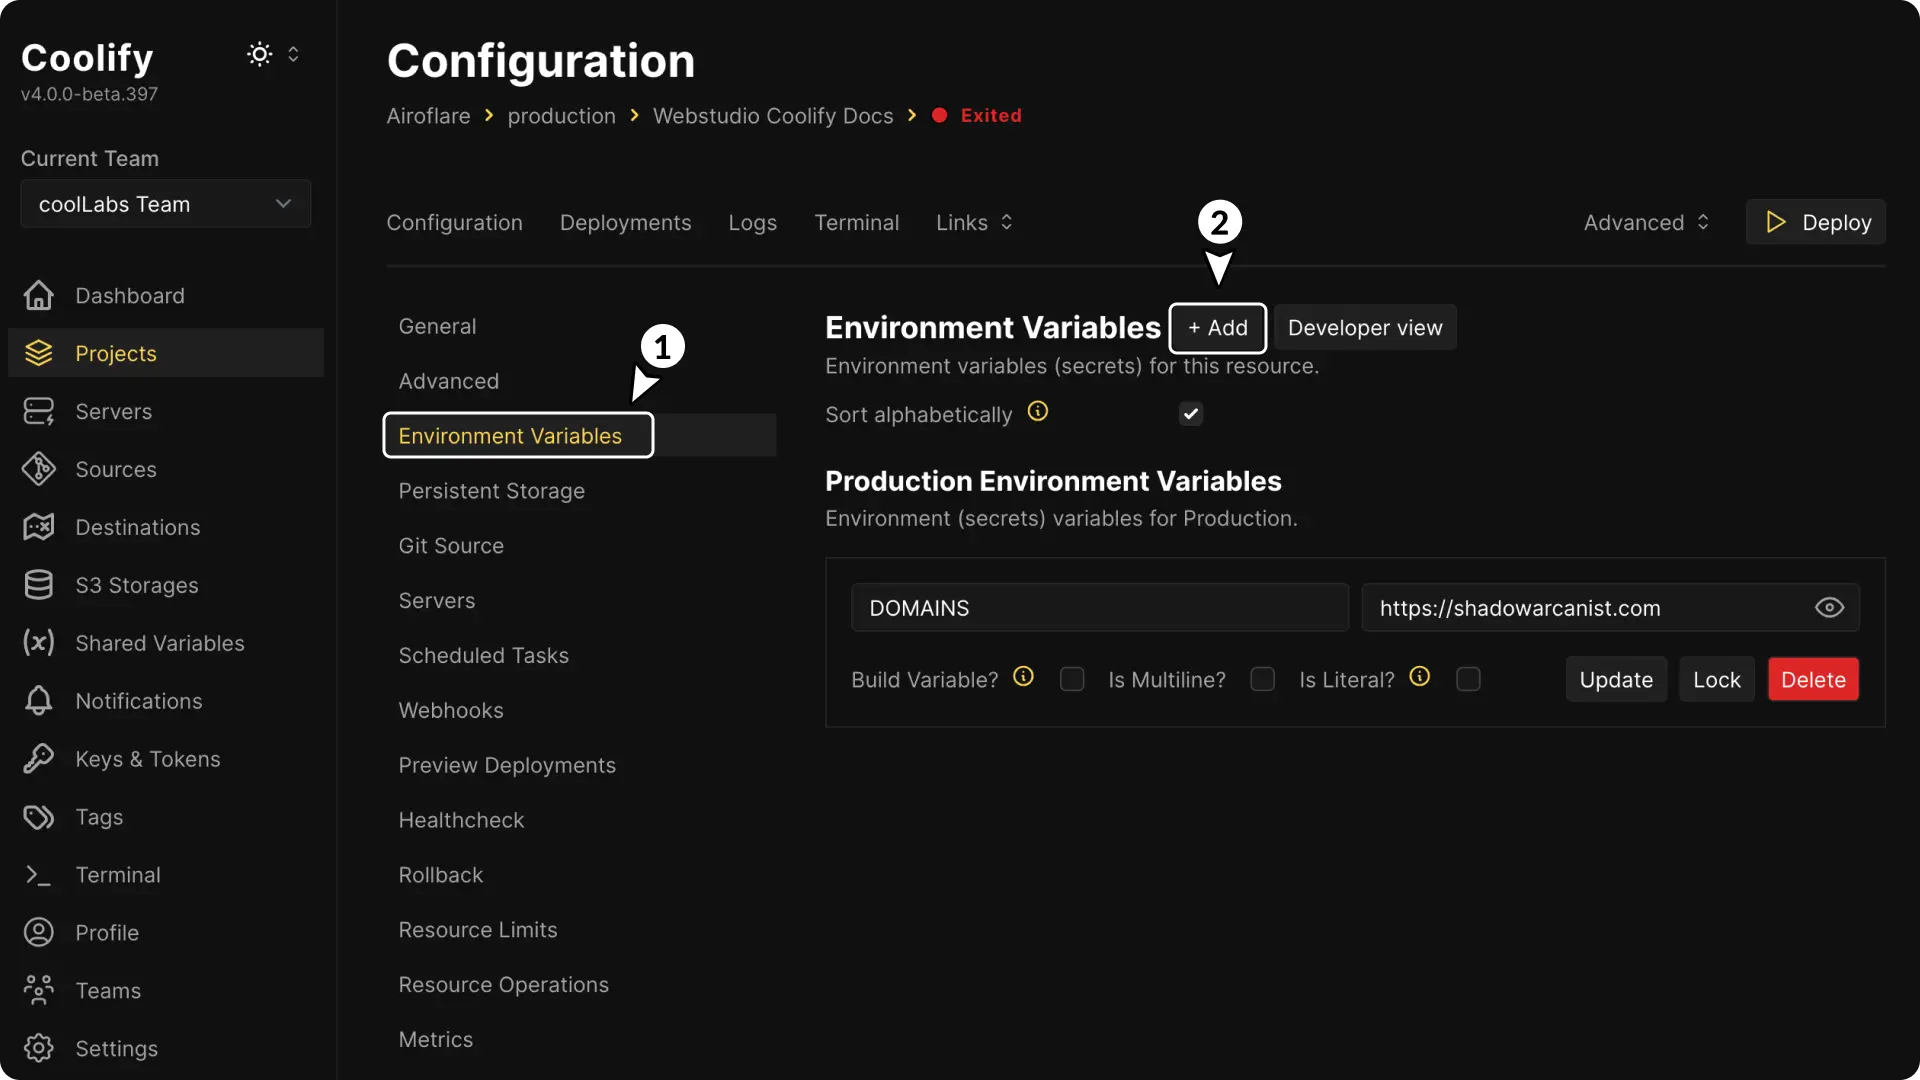
- Optional – Third-Party Domains: If your project loads images from external sources, add those domains as a comma-separated list under the environment variable
DOMAINS. (make sure to restart the application after adding the variable)
7. Update Your Webstudio Site
To publish updates and keep your site up to date, follow these steps:
- Publish Changes: In the Webstudio builder, click Publish to generate the latest build data.
- Sync and Build: Run the following commands in your terminal:bash
webstudio sync webstudio build --template docker - Push Updates: Commit and push your changes to GitHub. Coolify will detect the update and automatically trigger a new deployment.
Now you’re all set!