Nixpacks is a open source build pack created by Railway and the source is available on Github. Coolify uses Nixpacks as one of the build pack.
Nixpacks checks your git repository (also called as "source directory" in nixpacks) and generates a Dockerfile, then it will build a docker image based on the Dockerfile it generated.
Nixpacks can deploy both fully static websites and non-static applications. Once your repository is set up, you can use Coolify to deploy your project with ease.
How to use Nixpacks?
On Coolify you can only use Nixpacks on git-based deployments.
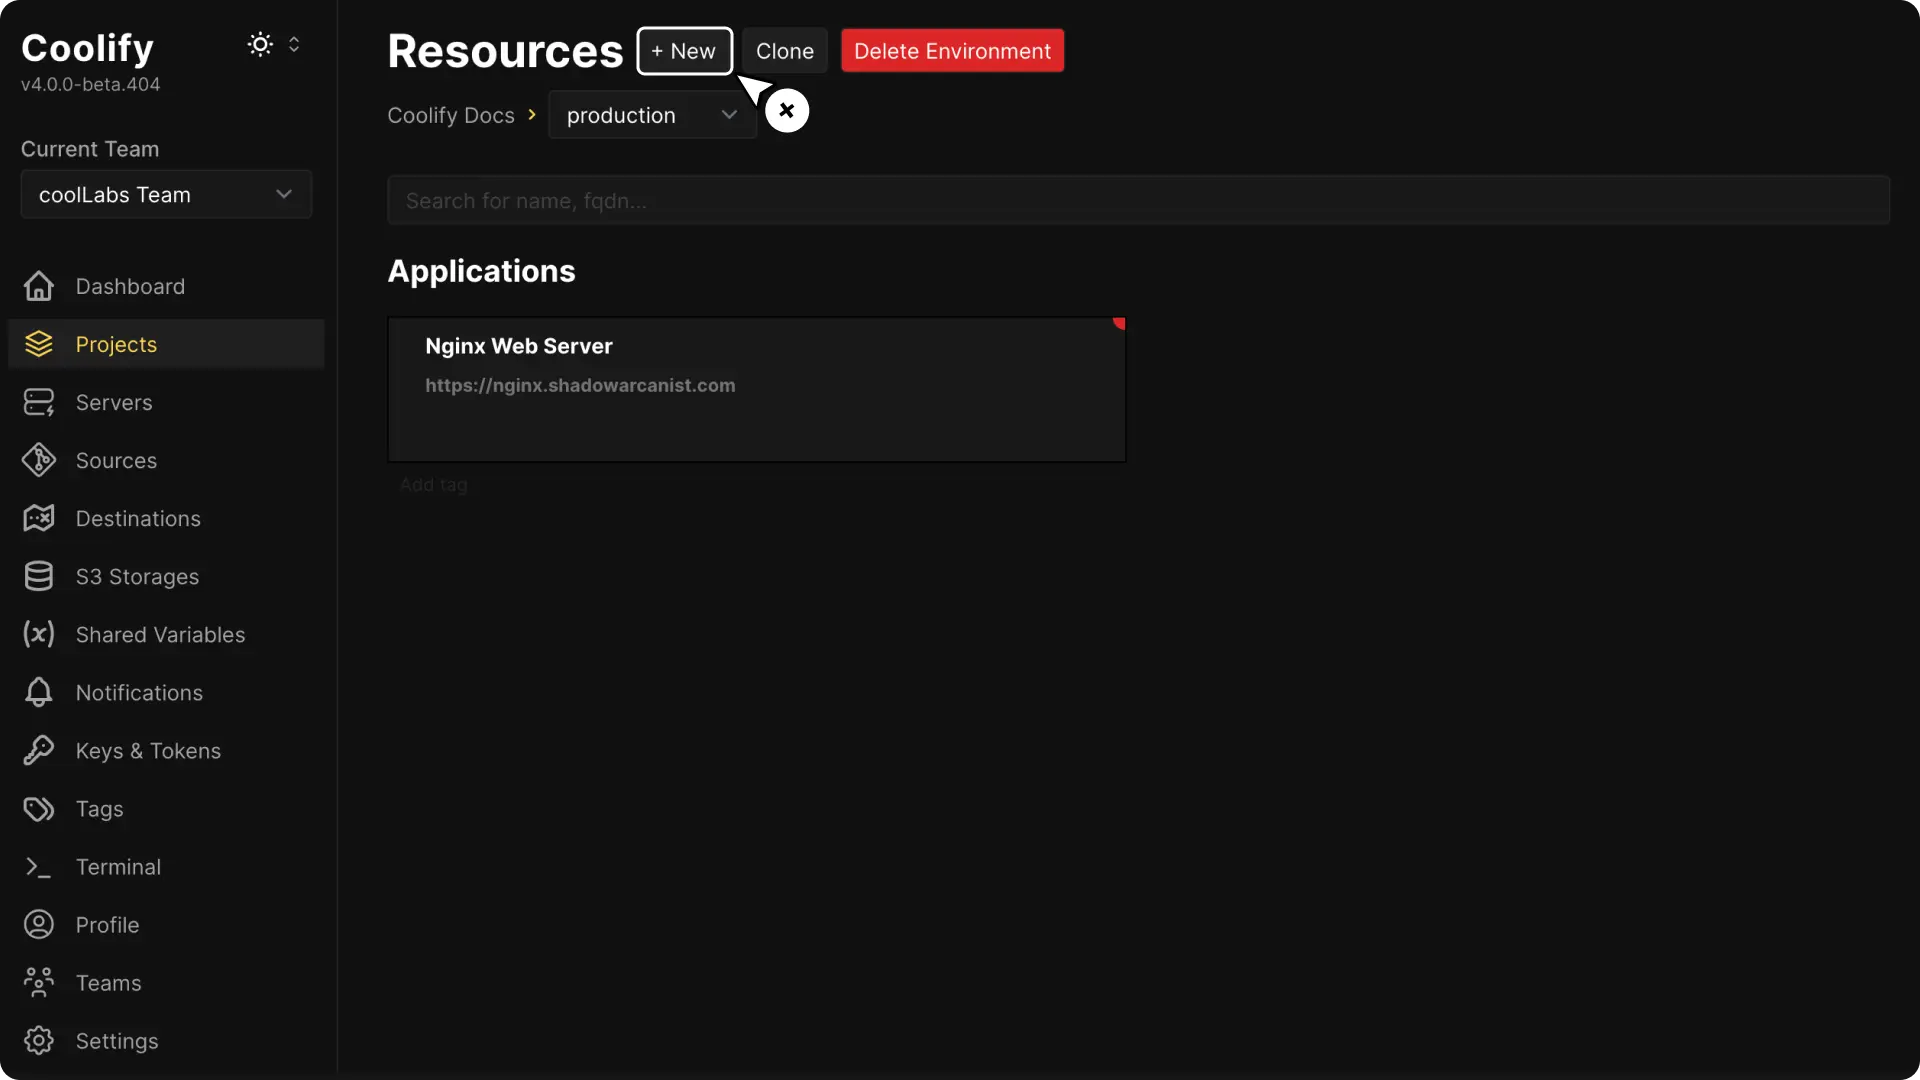
1. Create a New Resource in Coolify
On Coolify dashboard open your project and click the Create New Resource button.
2. Choose Your Deployment Option
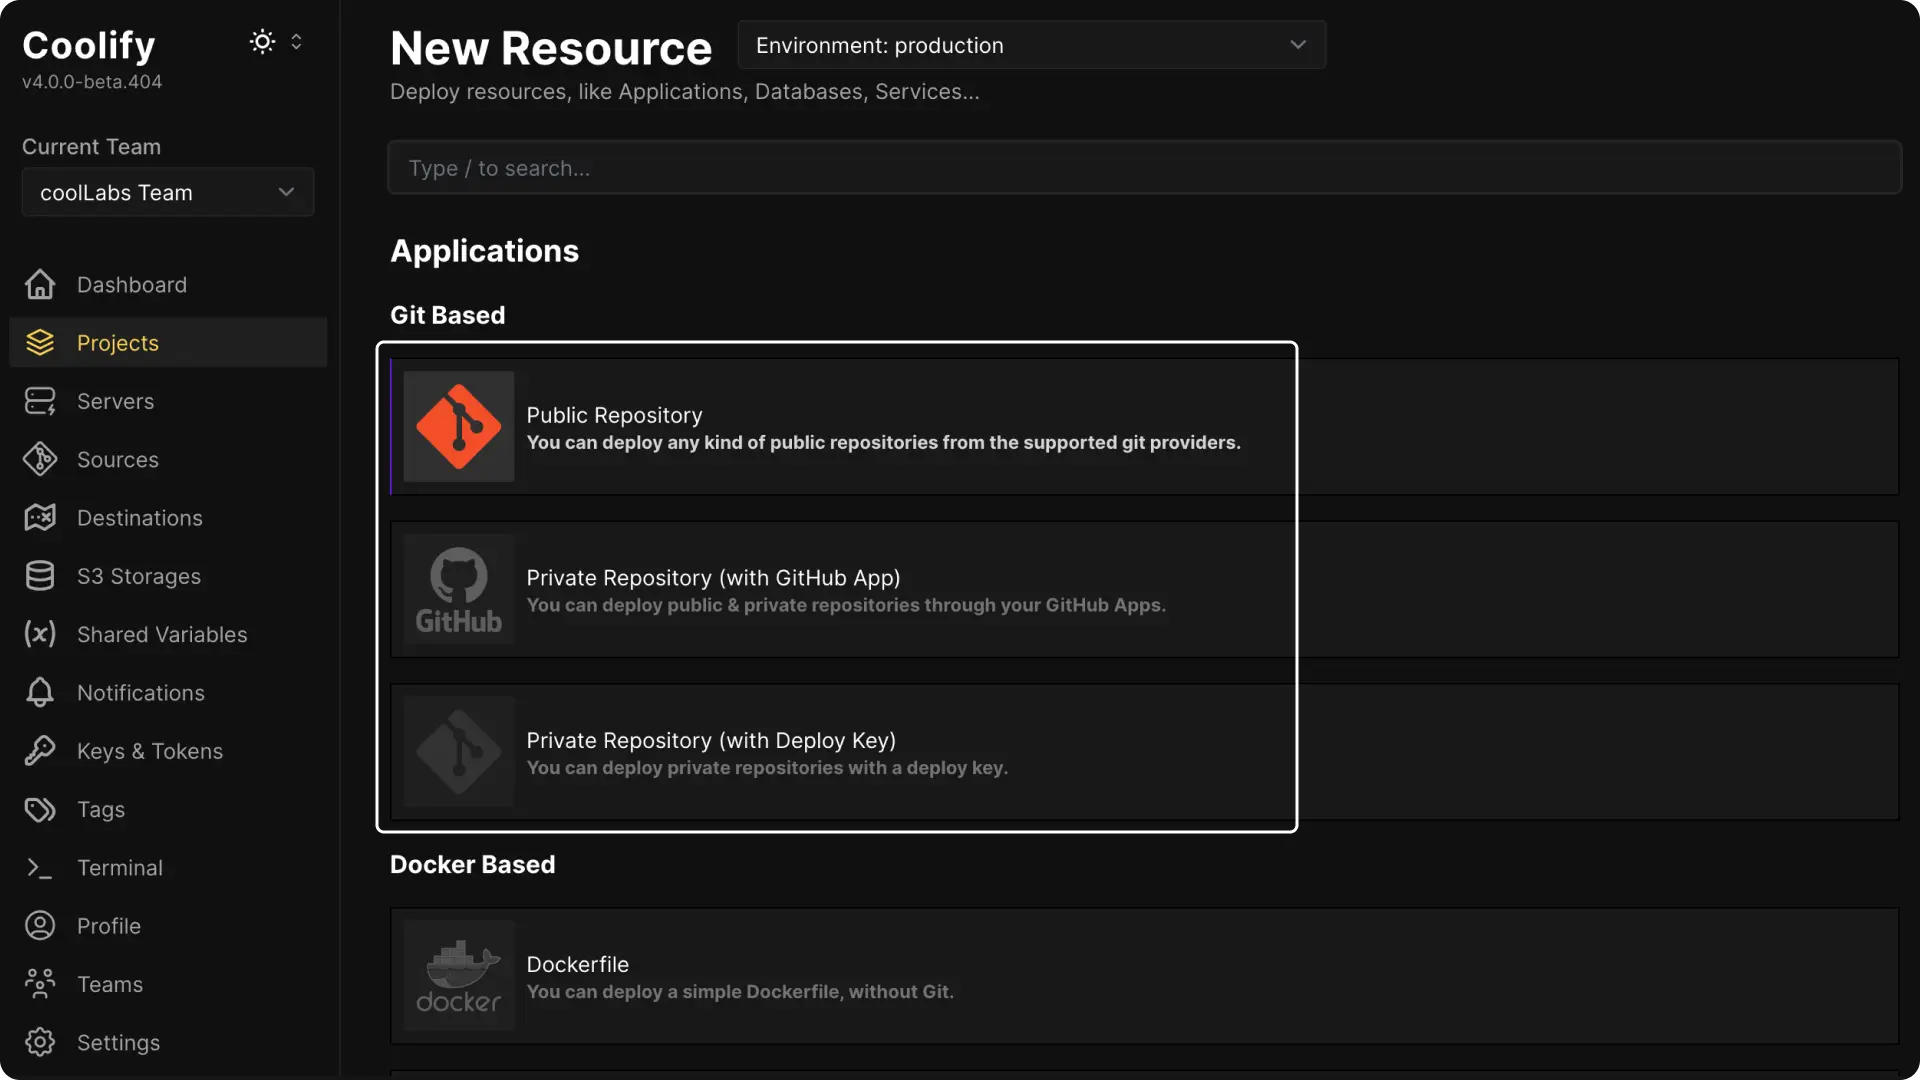
A. If your Git repository is public, choose the Public Repository option.
B. If your repository is private, you can select Github App or Deploy Key. (These methods require extra configuration. You can check the guides on setting up a Github App or Deploy Key if needed.)
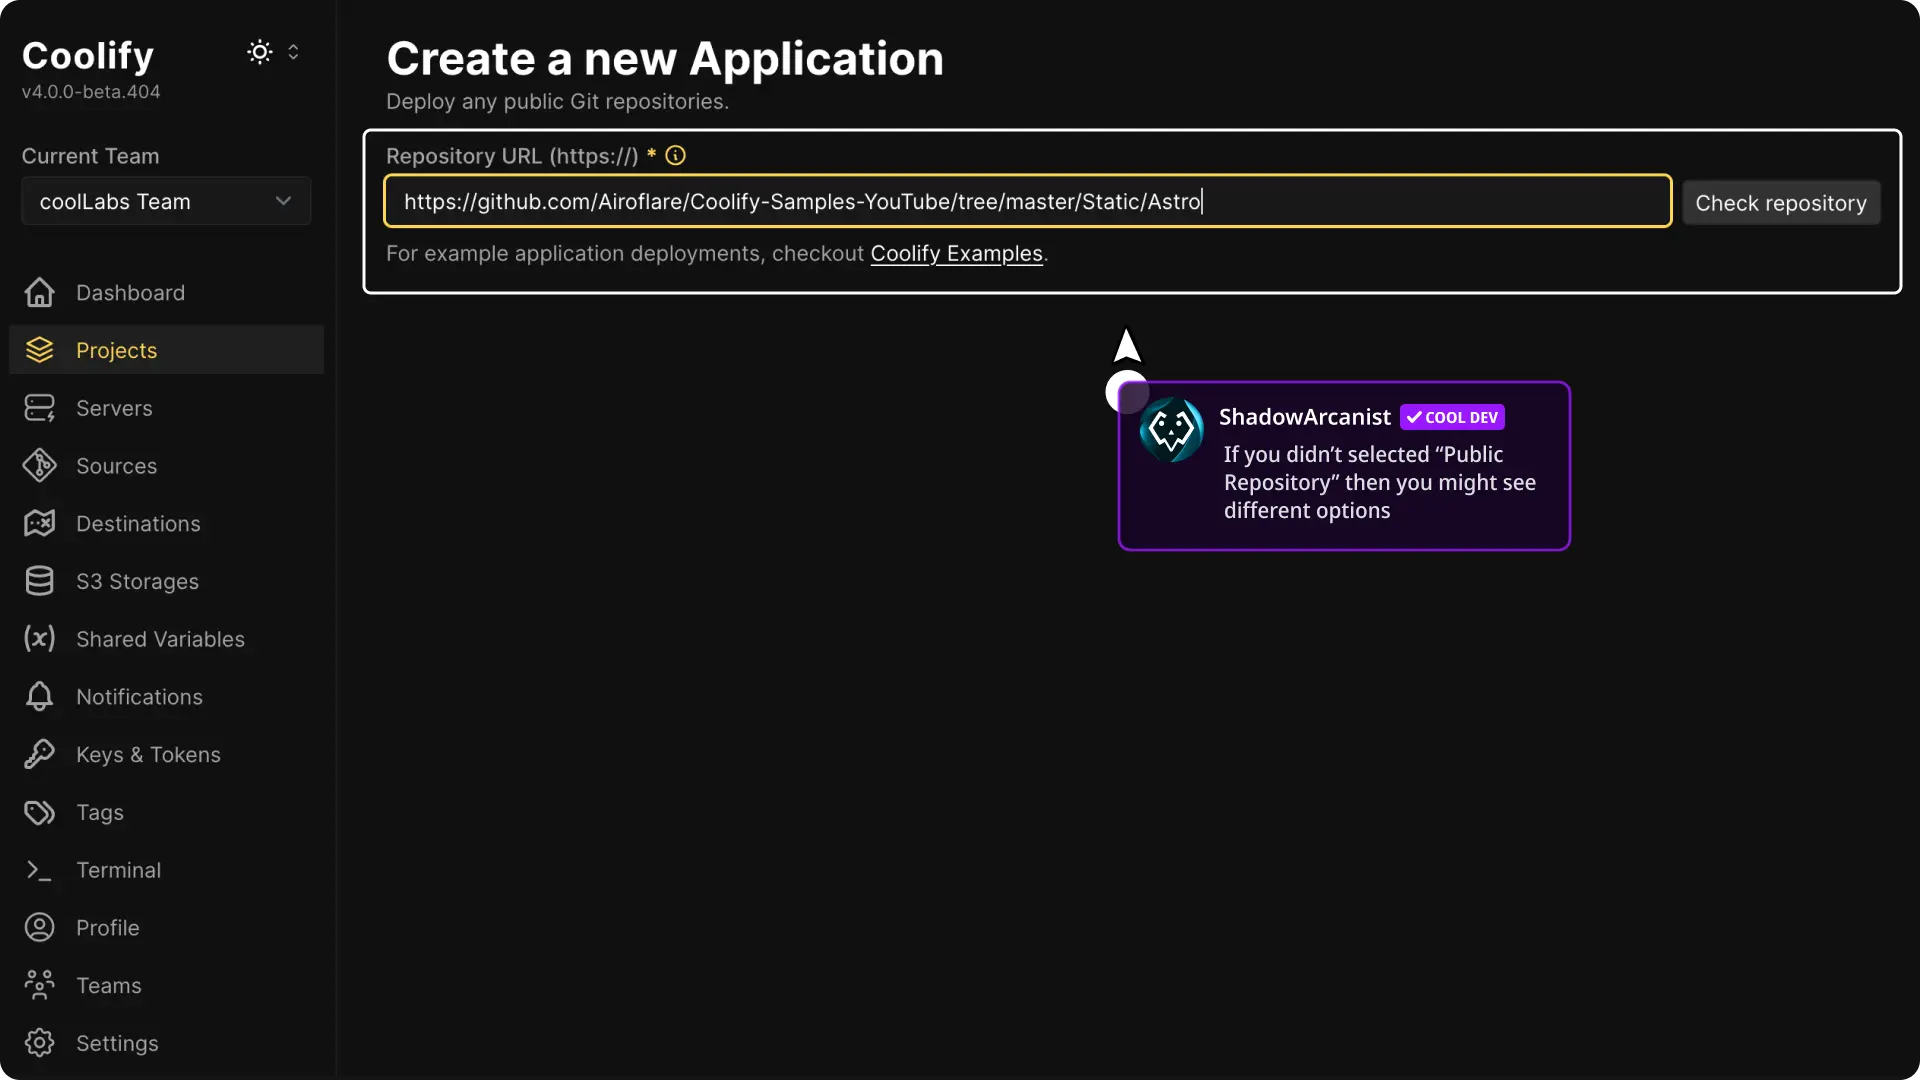
3. Select Your Git Repository
If you are using a public repository, paste the URL of your GitHub repository when prompted. The steps are very similar for all other options.
4. Choose the Build Pack
Coolify will default to using Nixpacks. If it doesn’t, click to select Nixpacks as your build pack.

5. Configure Build Pack
We have different options like Base Directory, Publish Directory, and Ports that slightly change based on the application you deploy (static websites/applications). So, below we have two sections for the deployments possible with Nixpacks.
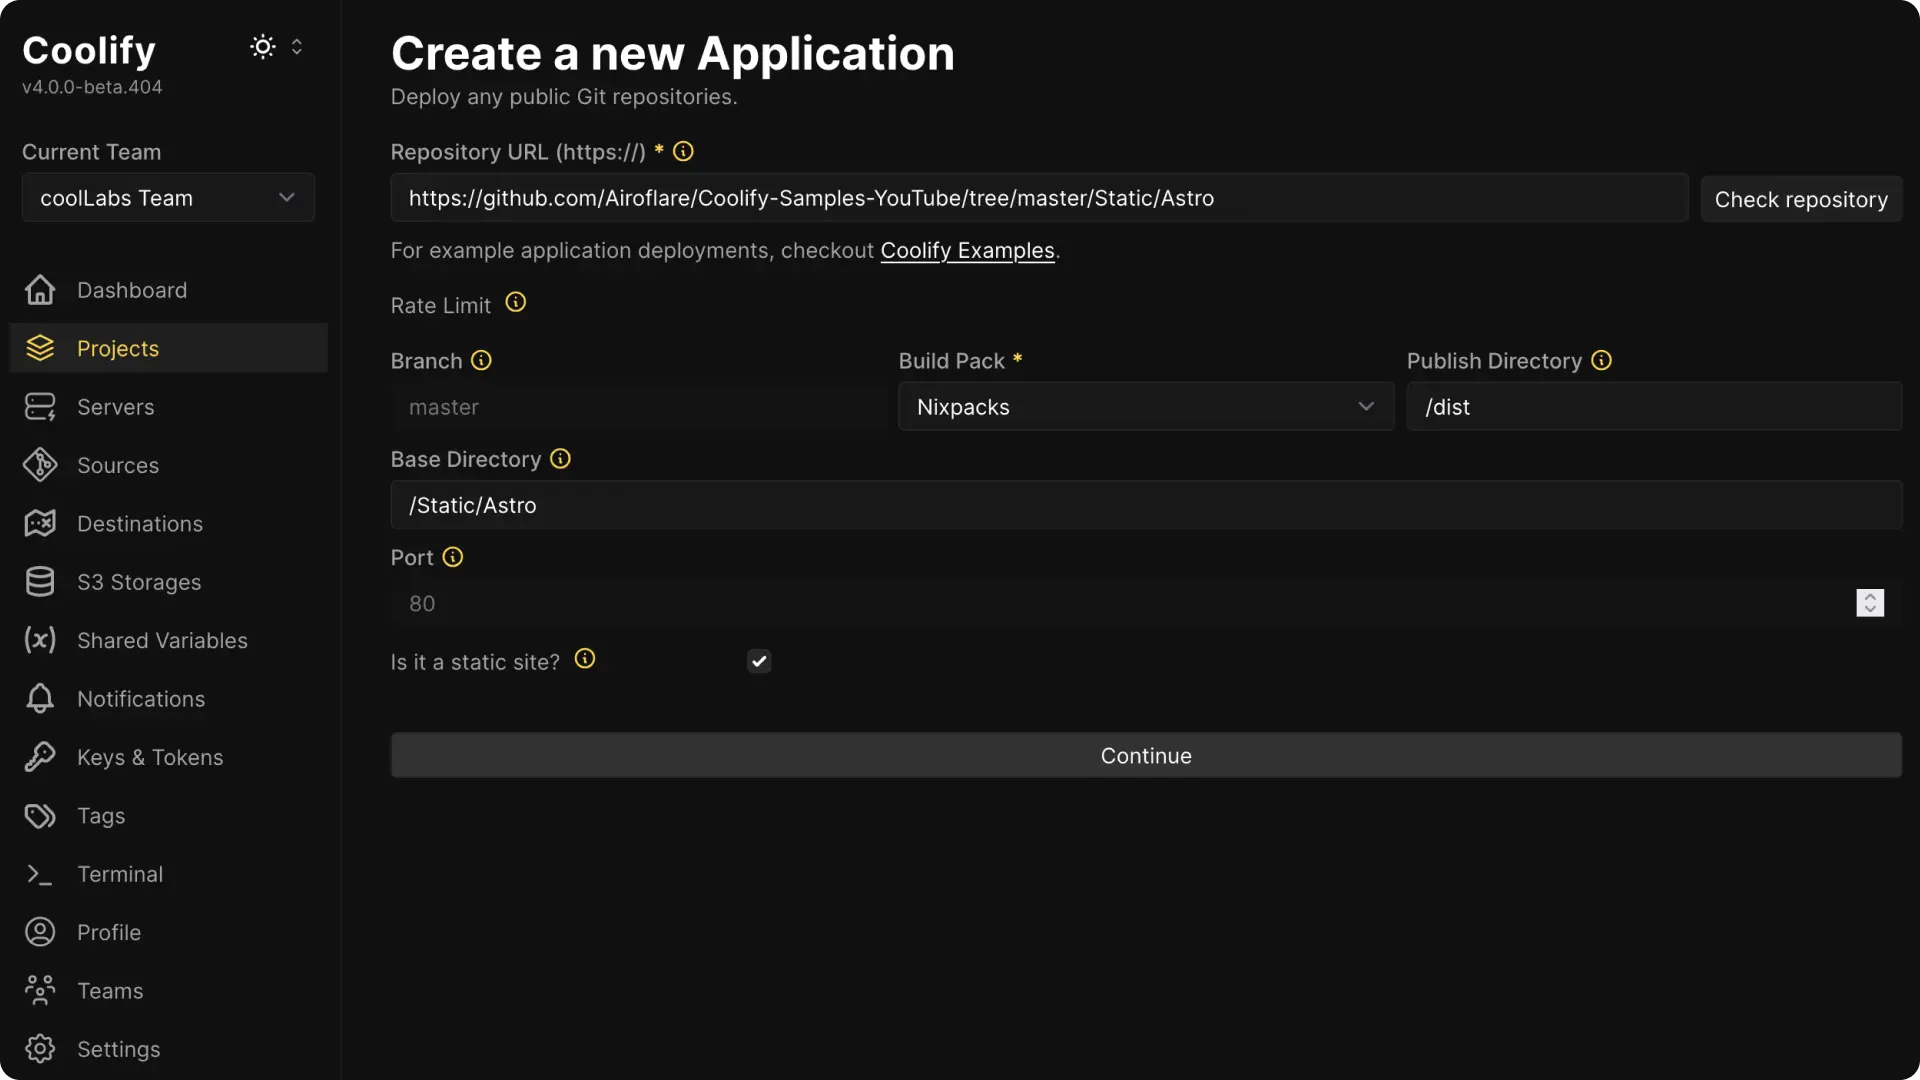
How to deploy Fully Static Website?
First, follow the previous section in this documentation: How to use Nixpacks. After that, proceed with the steps below.
-
Branch: Coolify will automatically detect the branch from your Repository.
-
Base Directory: Enter the directory Nixpacks should use as the root (for example,
/if your files are at the root, or a subfolder if applicable).- If you have a monorepo then you can enter the path of the directory you want to use as base directory (
/backendfor example)
- If you have a monorepo then you can enter the path of the directory you want to use as base directory (
-
Is it a static Site?: Click on this option to enable static mode.
-
Port: Once you enabled
Is it a static Sitethe port will be automatically set to80and cannot be changed. (This is intentional) -
Publish Directory: Once you enabled
Is it a static Sitethis publish directory option will visible on the UI. You have to enter the output directory where your static files are generated (commonly/dist). -
Click on Continue button once you have set all the above settings to correct details.
-
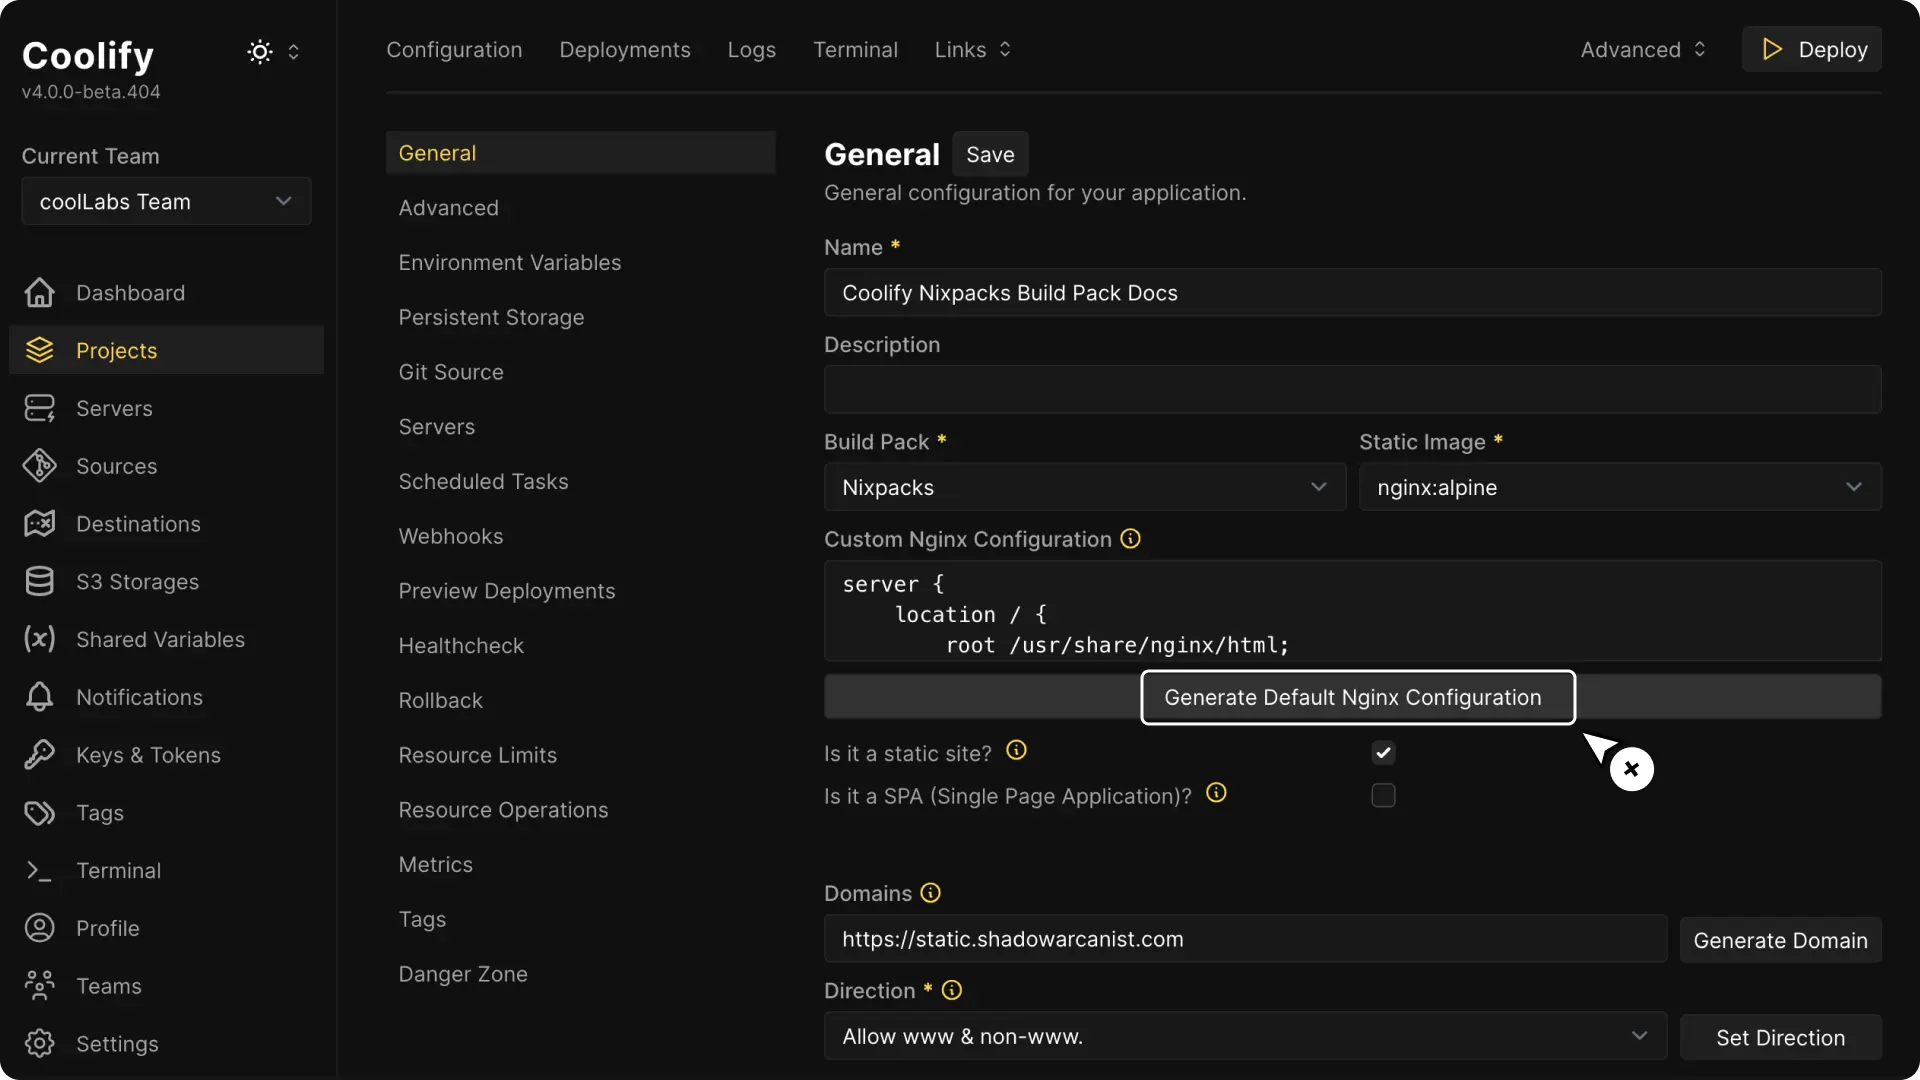
Choose a web server for your static website
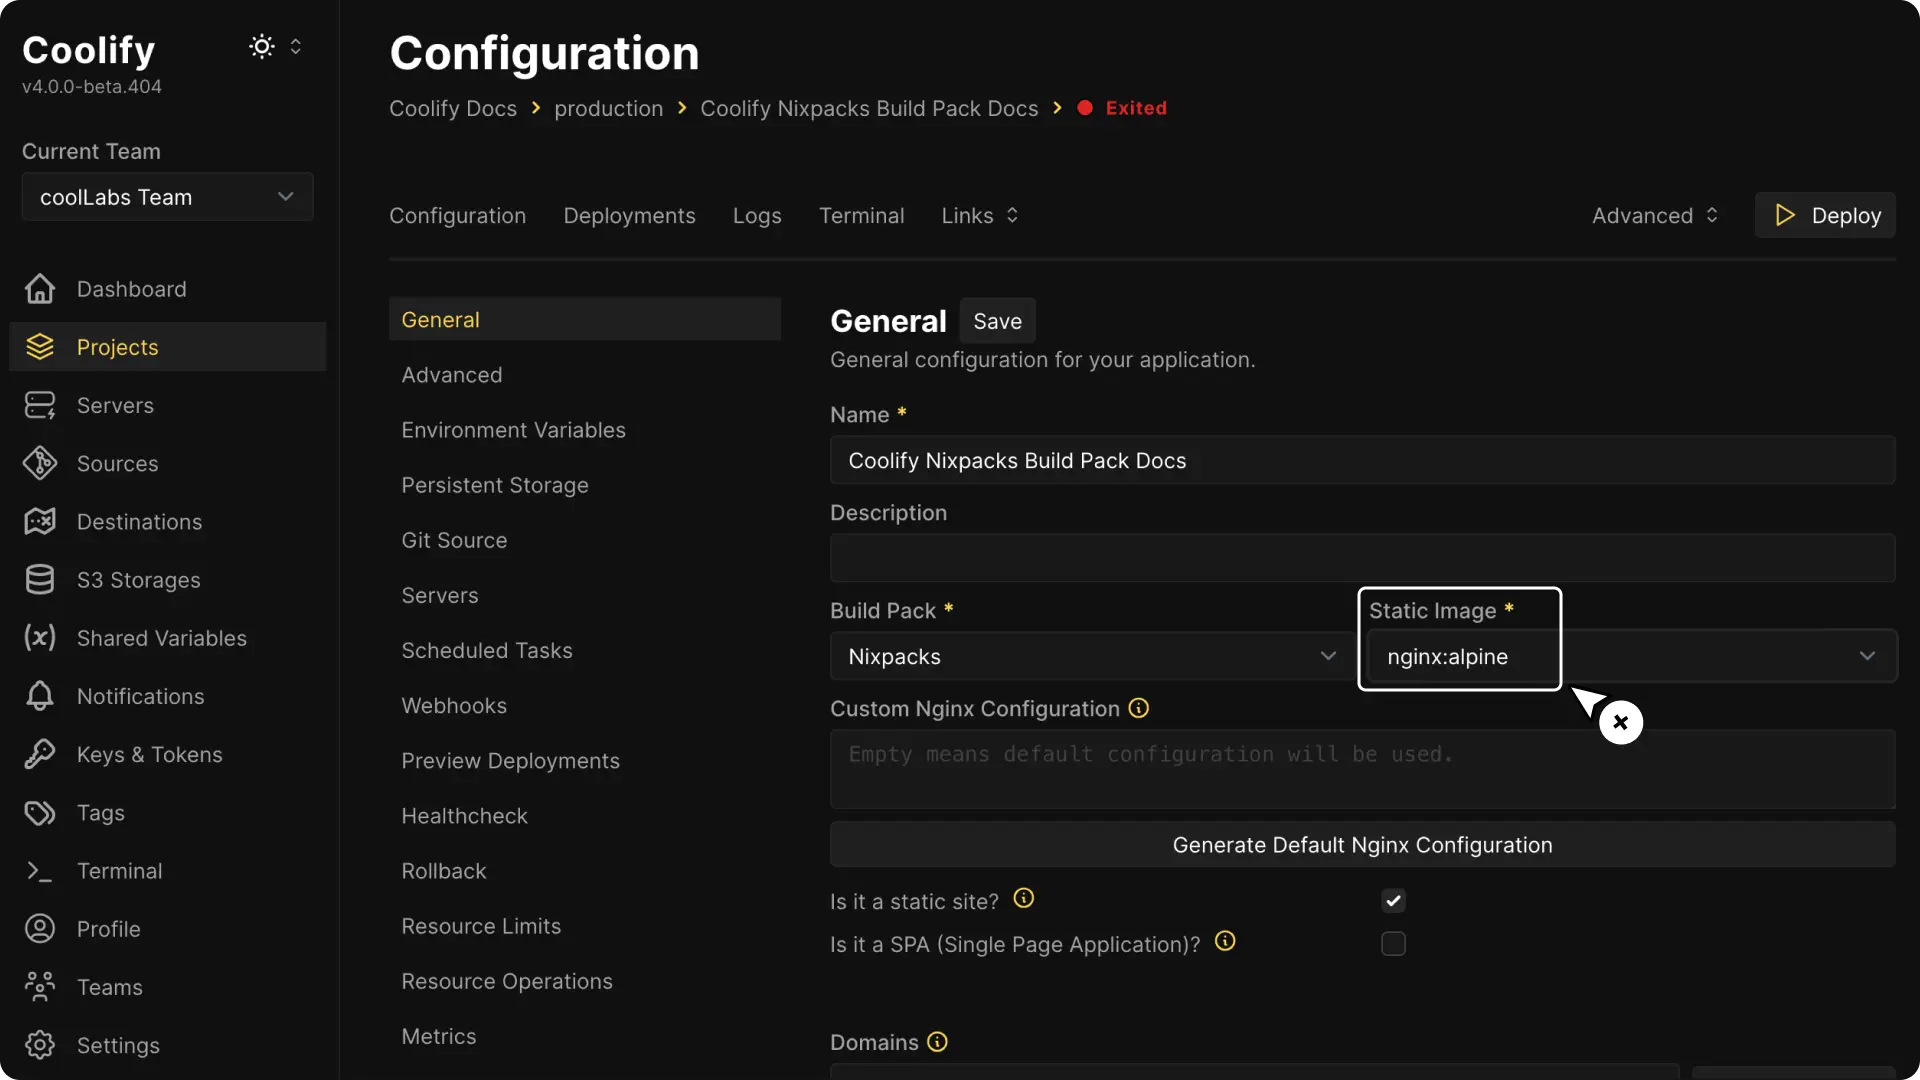
- As of Coolify v4.0.0-beta.404, the only web server option available is Nginx. So Nginx will be selected by default.
-
Click the Deploy button. The deployment process is usually quick (often less than a minute, depending on your server).
-
Customize Your Web Server Configuration
Optional
-
Coolify provides a default web server configuration that works for most cases.
-
If you want to change it then click the Generate button to load the default settings and make any changes you need.
HEADS UP!
You have to click on the Restart button for the new configuration to take effect.
How this works?
Nixpacks will build the website using your codebase and create a Docker image with a web server to serve them. This means your final Docker image has a web server ready to serve your HTML, CSS, and JavaScript files.
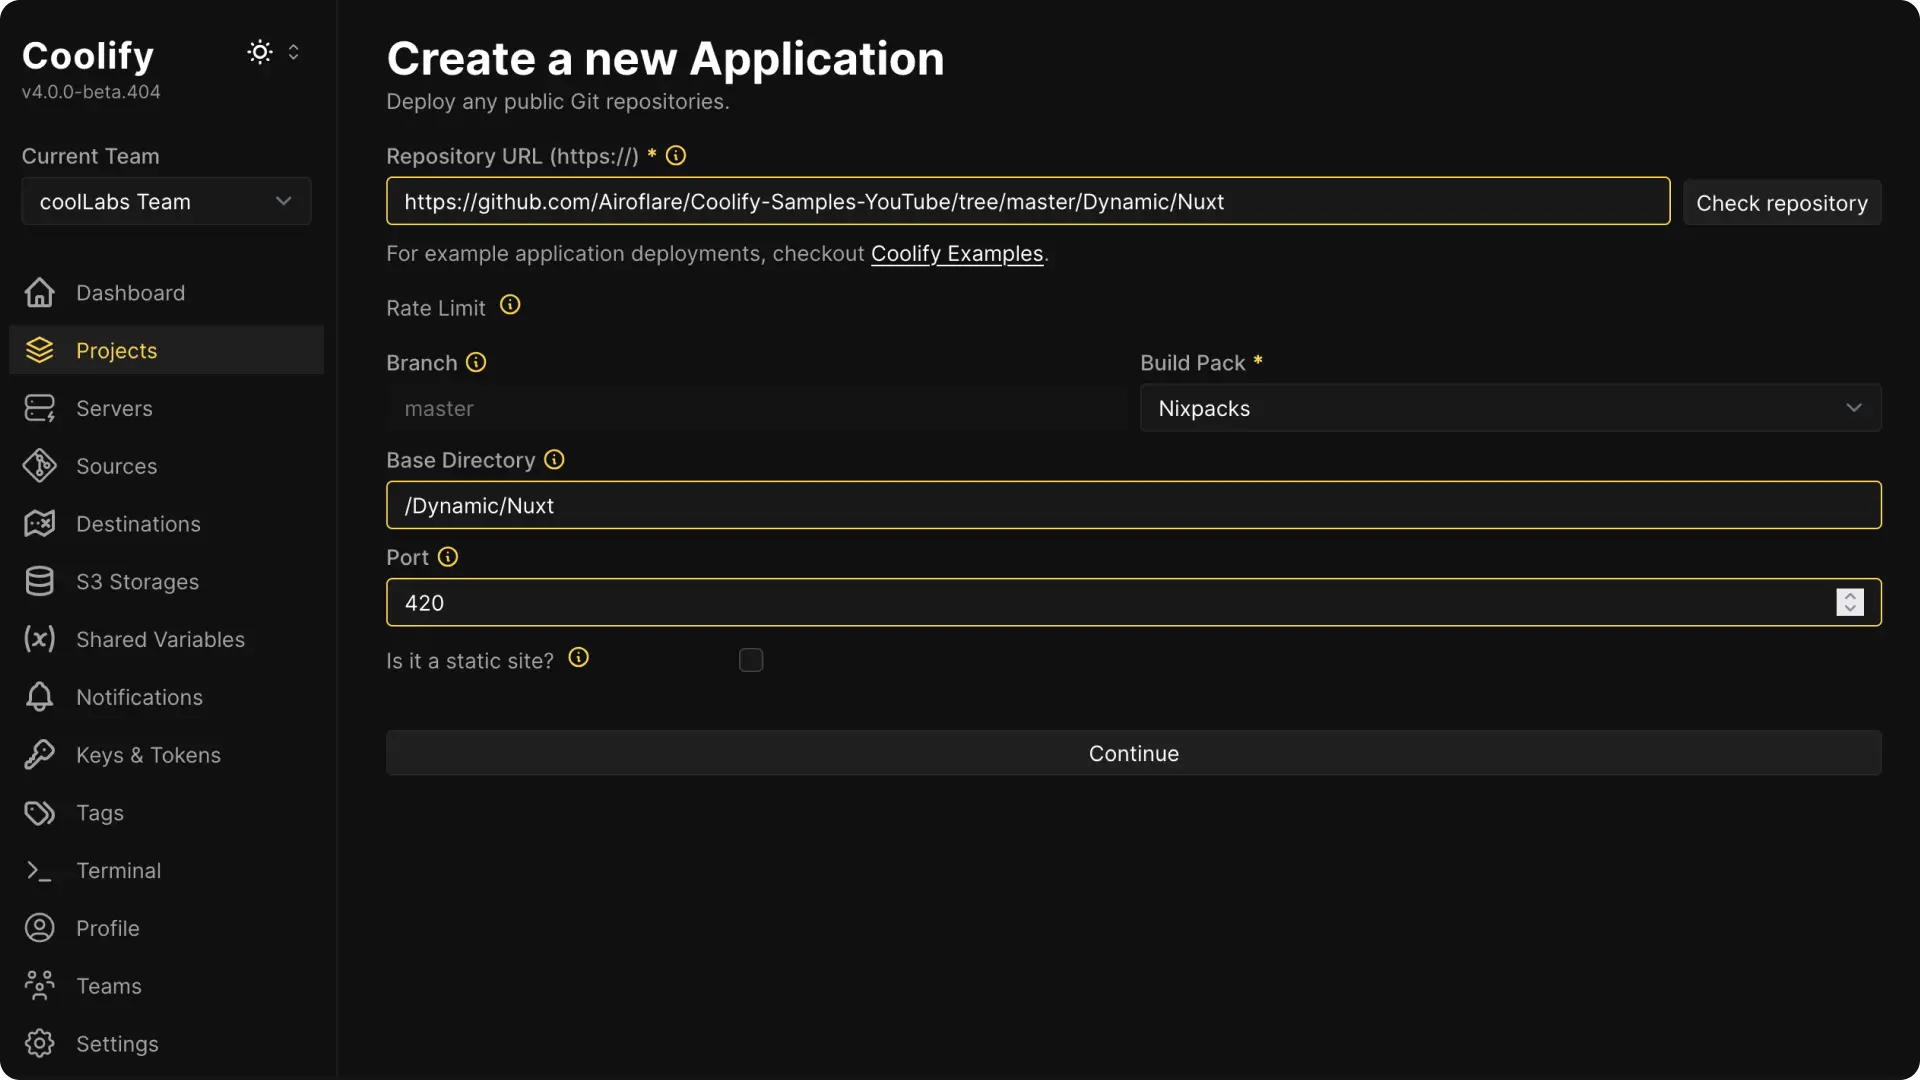
How to deploy Non-Static Website/Applications?
First, follow the previous section in this documentation: How to use Nixpacks. After that, proceed with the steps below.
-
Branch: Coolify will automatically detect the branch from your Repository.
-
Base Directory: Enter the directory Nixpacks should use as the root (for example,
/if your files are at the root, or a subfolder if applicable).- If you have a monorepo then you can enter the path of the directory you want to use as base directory (
/backendfor example)
- If you have a monorepo then you can enter the path of the directory you want to use as base directory (
-
Port: Enter the port where your application listens for incoming requests.
-
Is it a static Site?: Leave this unchecked since you’re deploying a non-static application.
-
Click on Continue button once you have configured all the above options.
-
After clicking the Continue button, you can adjust settings like your domain and environment variables, then click the Deploy button to launch your application.
How this works?
Nixpacks analyzes your codebase, builds a Docker image, and then starts a container using that image.
Advanced Configuration
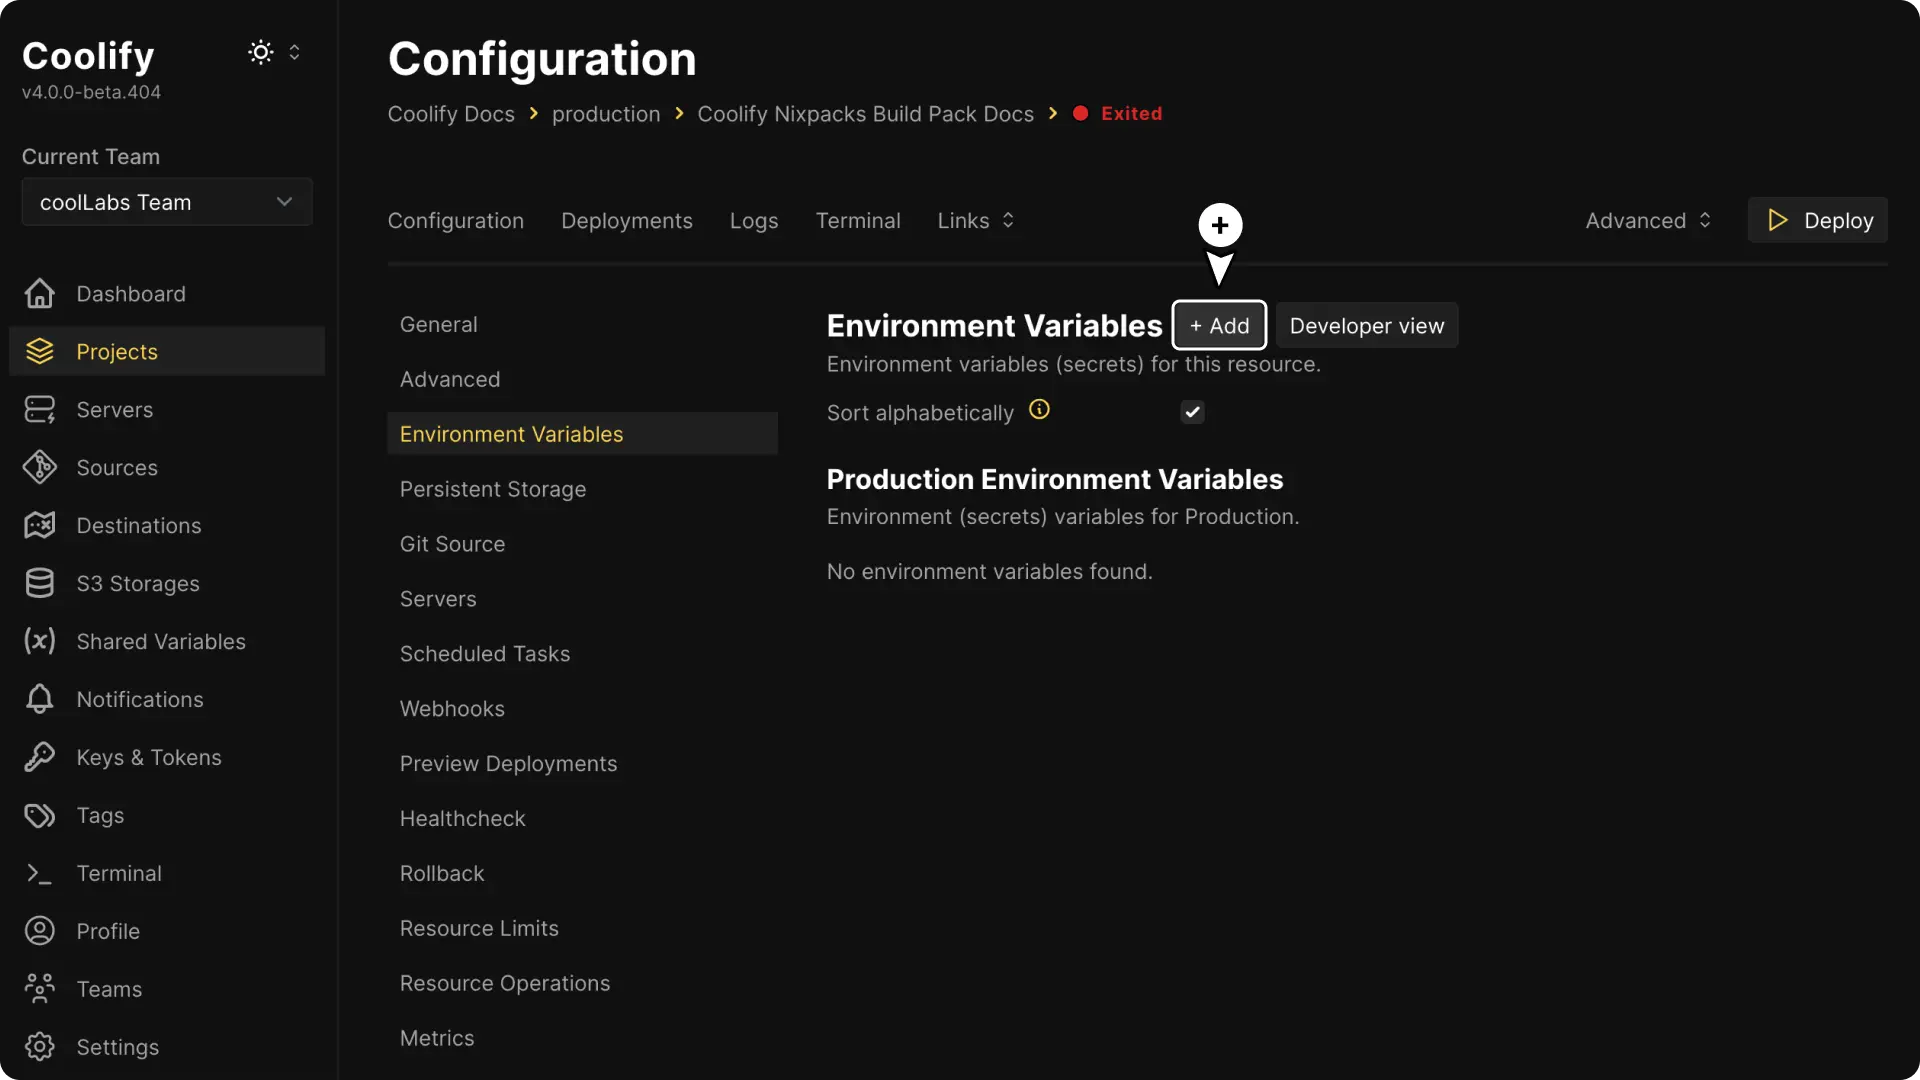
Environment Variables
You can customize Nixpacks' behavior using environment variables. There are many variables available for different application frameworks, and you can find detailed information in their documentation: Nixpacks Environment Variables.
To add or modify environment variables in Coolify, simply click on the Environment Variables tab, where you can manage them easily.
Commands
If needed, you can override the default install, build, and start commands. Simply scroll down to the build section on Coolify and input your custom commands.
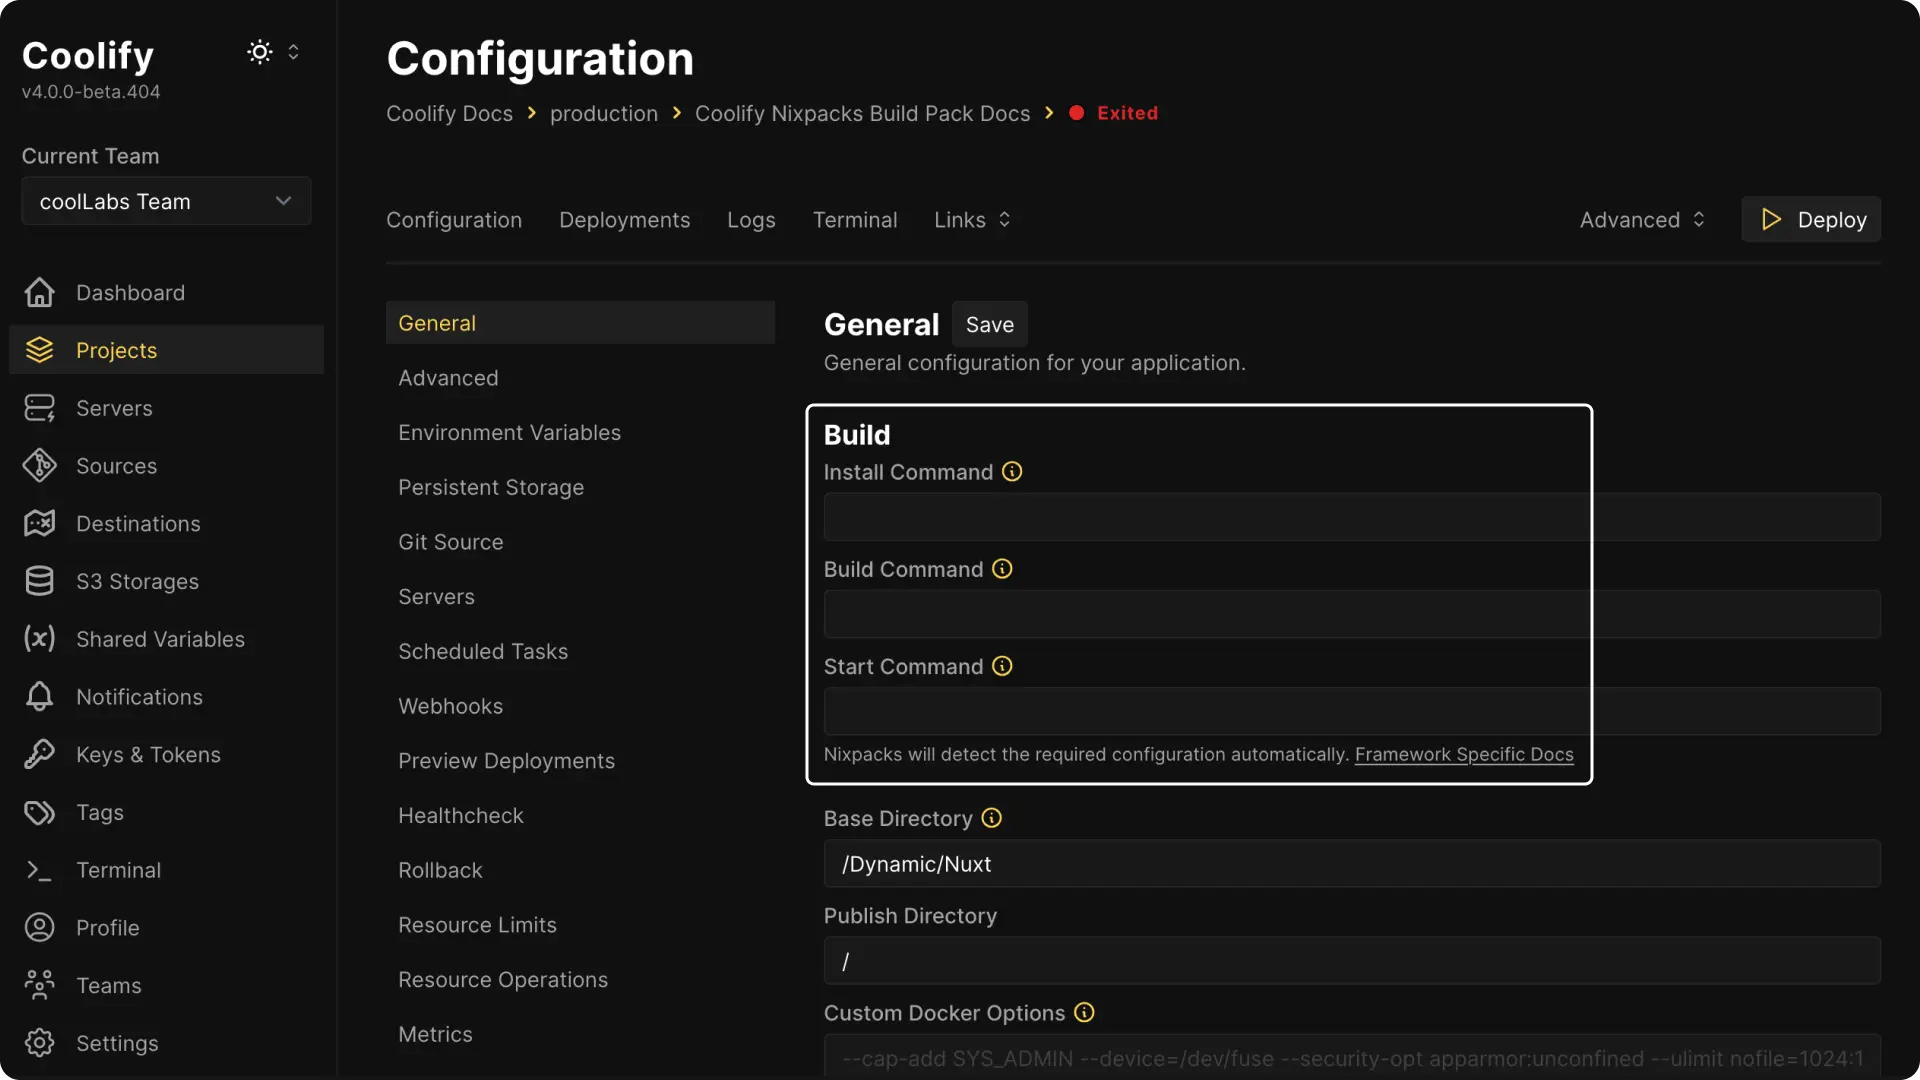
Note:
You may need to include a nixpacks.toml file in your repository for these changes to take effect.
Configuration file
Nixpacks supports specifying build configurations in a nixpacks.toml or nixpacks.json file. If one of these files is present in the root of your repository, it will be automatically used. For more details, refer to the Nixpacks documentation.
Node.js Multi-Core Scaling
A plain Node.js process only uses one CPU core. To make a Node.js (or Bun) app use every core on the host from a single Nixpacks build, see the Node.js Multi-Core Scaling guide.
Known Issues
Outdated Packages/Dependencies
Sometimes, Nixpacks may use older package versions than you need. This is especially common with Node.js, where you might need a specific minor or patch version.
For Node.js version pinning, see the dedicated Node.js Versioning guide.
For other packages, you can update the nixpkgs archive version in your nixpacks.toml file. Learn more in the Nixpacks docs on nixpkgs archive.